
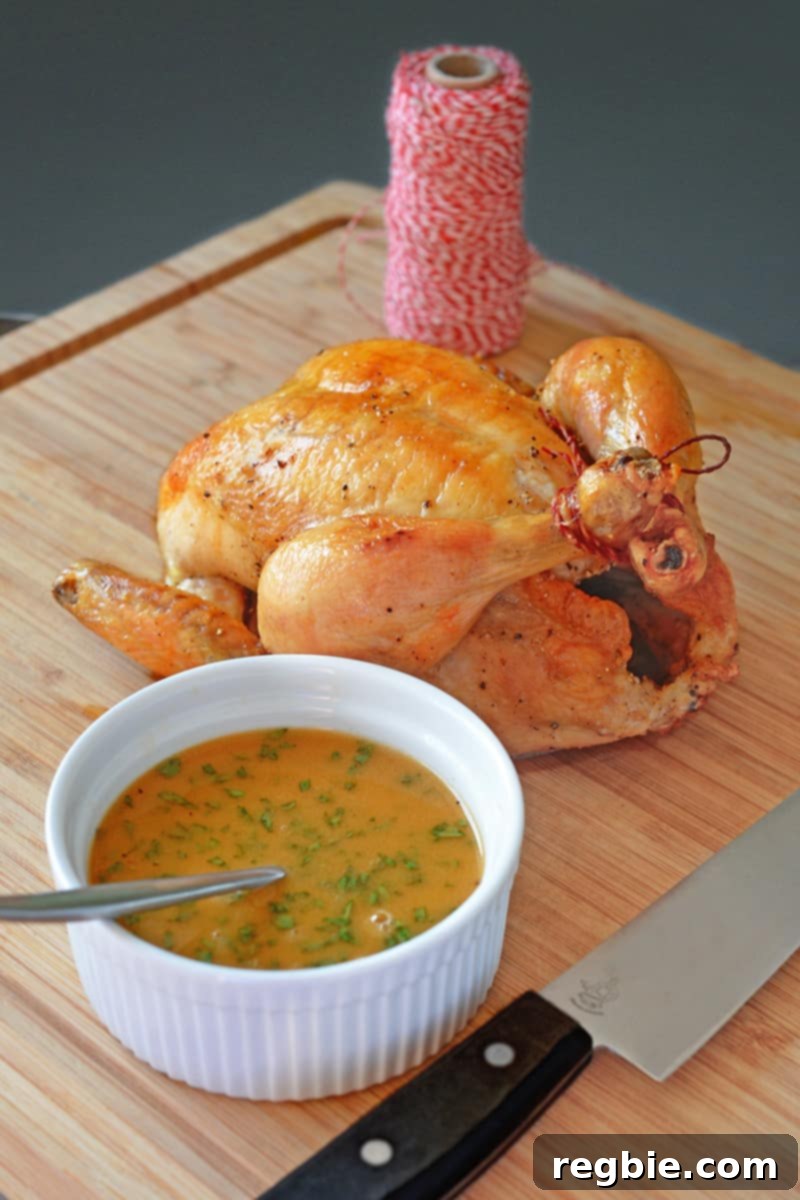
Transform your weeknights with this simple, foolproof oven-roasted whole chicken recipe, guaranteed to deliver succulent meat and crispy skin every time!
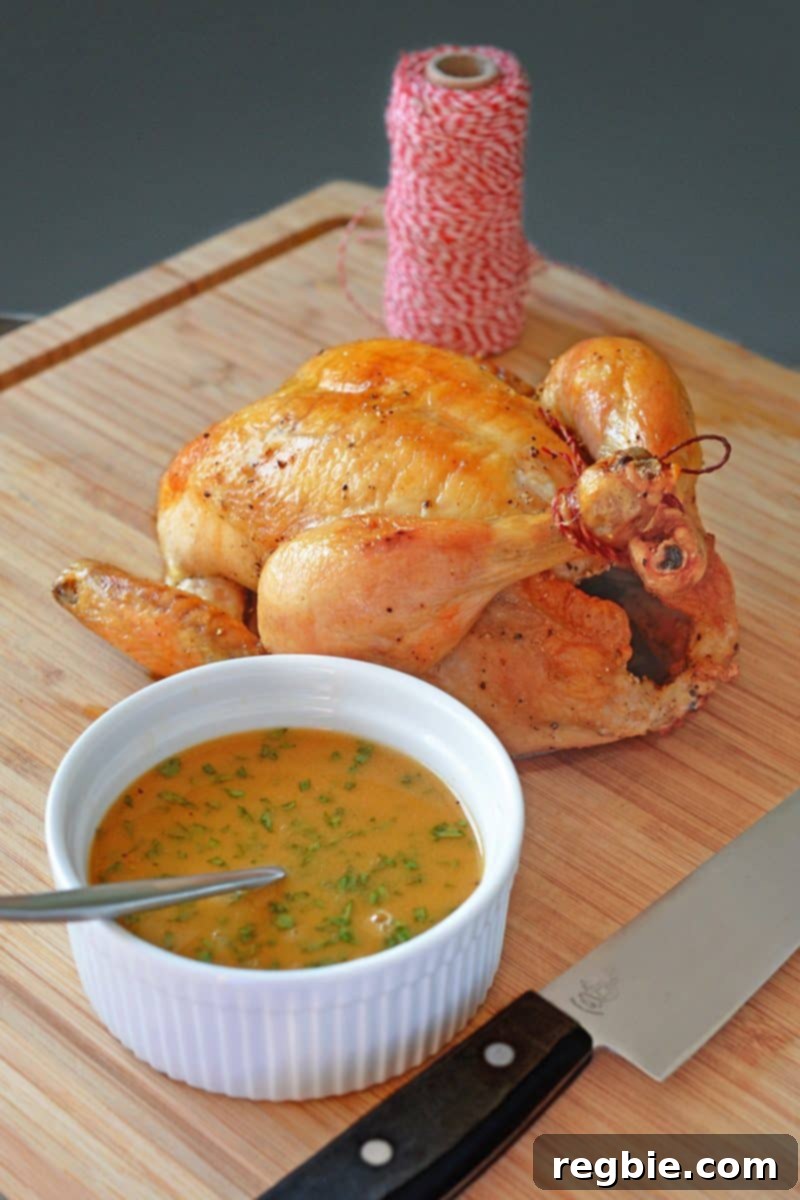
Table of Contents
- Effortless Oven Roasted Whole Chicken for Any Night!
- The ATK Advantage: Perfect Chicken, Every Time!
- Key Ingredients for Your Perfect Roast Chicken
- Main Ingredients for the Chicken
- Optional Tarragon-Lemon Pan Sauce Ingredients
- Step-by-Step Guide to Roasting a Whole Chicken
- Complementary Sides: What to Serve with Roast Chicken
- Storing and Repurposing Leftovers
- More Quick and Tasty Chicken Recipes
- Weeknight Roast Chicken Recipe Card
Effortless Oven Roasted Whole Chicken for Any Night!
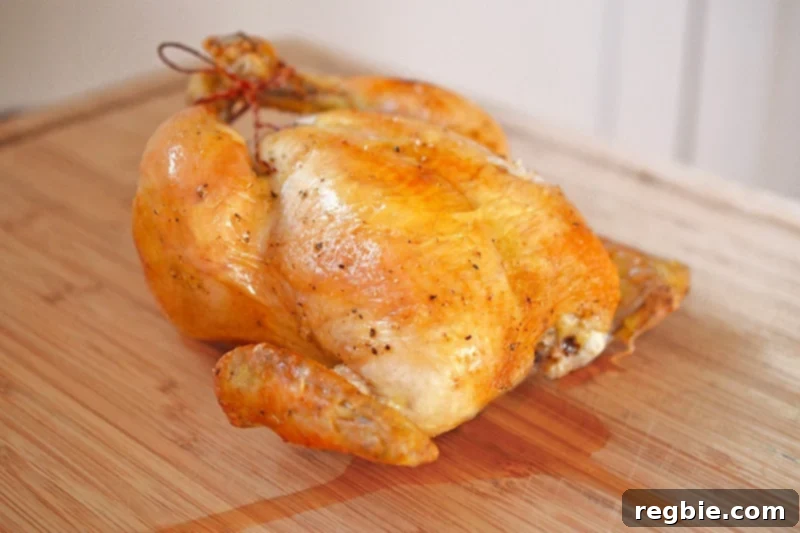
For too long, roasting a whole chicken has been relegated to elaborate Sunday dinners or special occasions. But what if we told you that a perfectly tender, incredibly flavorful, and beautifully crisp-skinned roast chicken could be a reality even on a busy weeknight? This isn’t just a dream; it’s a proven method brought to you by the culinary geniuses at America’s Test Kitchen, and detailed in their authoritative guide, The Cook’s Illustrated Meat Book: The Game-Changing Guide that Teaches You How to Cook Meat and Poultry with 425 Bulletproof Recipes.
As a devoted home cook and someone who appreciates culinary precision, I’ve accumulated over 30 of America’s Test Kitchen’s esteemed cookbooks. My passion isn’t hoarding, but rather a profound appreciation for recipes that are meticulously tested, refined, and ultimately bulletproof. The dedicated team at ATK conducts extensive trials, experimenting with countless variations, so that we, the everyday cooks, can follow their instructions with absolute confidence. This unwavering commitment to perfection means that even those of us who might feel intimidated by a whole chicken can achieve spectacular results without a hitch.
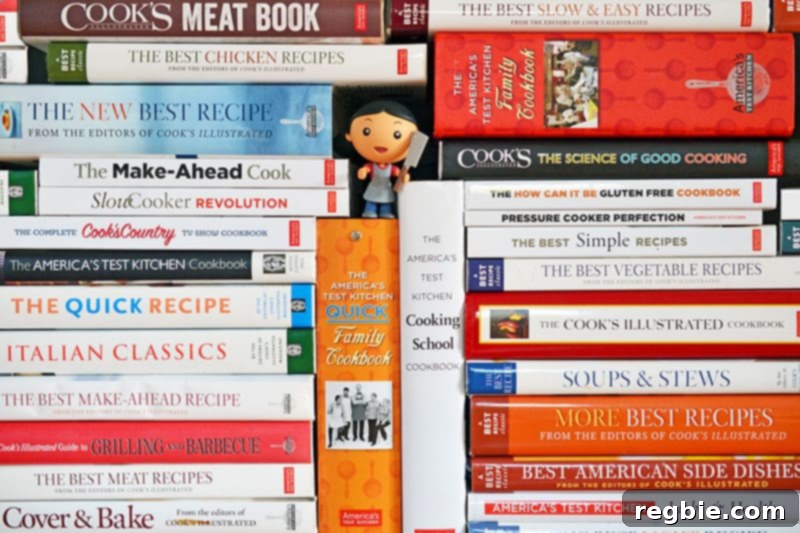
The ATK Advantage: Perfect Chicken, Every Time!
While America’s Test Kitchen consistently delivers reliable and delicious recipes, their method for Weeknight Roast Chicken truly stands out as a game-changer. Forget complicated techniques or obscure ingredients; this recipe champions simplicity and smart cooking. All you need is a fresh whole chicken, essential seasonings like salt and pepper, a good fat (like ghee), a bit of kitchen twine, and, most importantly, a dependable meat thermometer. With these in hand, you can have your chicken prepped and ready for the oven in under five minutes.
The true genius of this recipe, as revealed in The Meat Book, lies in an unconventional yet brilliant cooking strategy: turning off the oven midway through the roasting process. This counter-intuitive step is the secret to achieving unbelievably moist chicken while still developing that coveted, shatteringly crisp skin. By initially roasting at a high temperature and then allowing the chicken to finish cooking in the residual heat of the turned-off oven, the meat cooks gently and evenly without drying out. It’s a method that works flawlessly, producing consistently superior results.
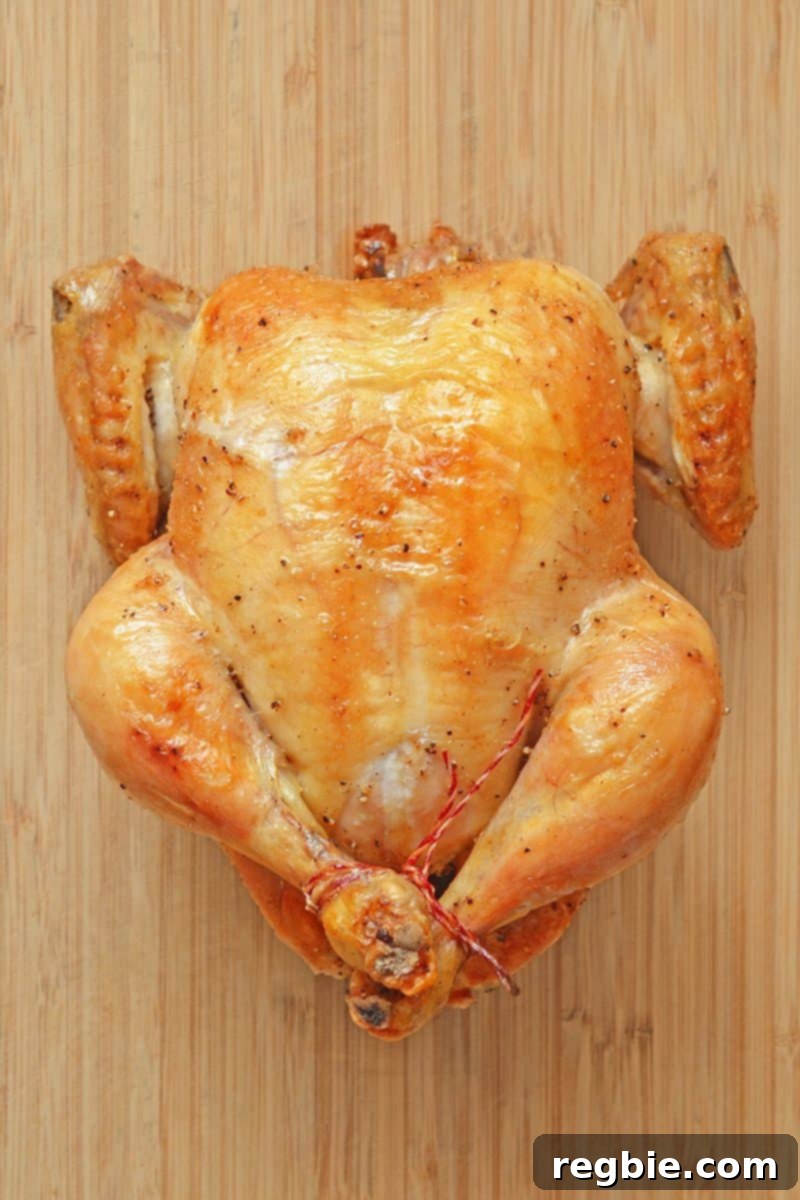
I’ve personally tried and tested this method countless times, and the results are consistently phenomenal. The chicken emerges from the oven with a beautifully golden, crispy skin and incredibly juicy, tender meat. It’s truly a testament to ATK’s innovative approach and commitment to culinary excellence. This technique is not just effective; it’s pure genius, making a perfect roast chicken accessible to anyone, any night of the week.
Key Ingredients for Your Perfect Roast Chicken
Crafting a truly exceptional roast chicken requires high-quality ingredients and a thoughtful approach to flavor. Here’s what you’ll need to achieve that perfect balance of crispy skin and juicy meat, along with options for a delightful accompanying pan sauce.
Main Ingredients for the Chicken
- 1 (3½- to 4-pound) whole chicken, giblets discarded: Opt for a fresh, good quality chicken for the best flavor and texture. Ensure you remove any giblets from the cavity before beginning.
- Diamond Crystal brand kosher salt: This specific brand is often recommended by chefs for its flakier texture and predictable salinity, which helps in seasoning evenly. If using another brand of kosher salt or table salt, adjust the quantity accordingly.
- Freshly ground black pepper: Freshly ground pepper offers a more vibrant and aromatic kick than pre-ground varieties, enhancing the overall flavor profile of your roast.
- Melted ghee (or fat of choice, like olive oil or avocado oil): Ghee provides a rich, buttery flavor and contributes to a wonderfully crispy skin. If you prefer, or if following specific dietary guidelines, high-smoke-point oils like olive oil or avocado oil are excellent alternatives.
Optional Tarragon-Lemon Pan Sauce Ingredients
Elevate your roast chicken with this quick and flavorful pan sauce, utilizing the delicious drippings from your skillet.
- Shallot: A minced shallot offers a delicate, sweet onion flavor that forms a fantastic base for the sauce. Should you not have shallots on hand, a small amount of finely minced onion or the white part of a leek can be a suitable substitute.
- Chicken broth or bone broth: Use a good quality broth to deglaze the pan and create a savory depth. Bone broth will also add extra nutritional benefits.
- Dijon mustard: Just a touch of Dijon mustard adds a subtle tang and helps emulsify the sauce, giving it a velvety texture and an extra layer of flavor.
- Unsalted butter (or cold ghee for folks doing a Whole30): Finishing the sauce with cold butter or ghee provides richness and gloss. For Whole30 compliance, ensure you use cold ghee.
- Minced fresh tarragon: Tarragon’s unique anise-like flavor pairs beautifully with chicken and lemon. If tarragon isn’t available or to your taste, fresh herbs like thyme, rosemary, or parsley would also make delightful additions.
- Freshly lemon juice: A squeeze of fresh lemon juice at the end brightens the sauce, cutting through the richness and adding a delightful zesty finish.
- Freshly ground black pepper: A final seasoning with fresh black pepper rounds out the flavors of the sauce.
Step-by-Step Guide to Roasting a Whole Chicken
Achieving a perfectly roasted whole chicken doesn’t have to be complicated. Follow these detailed steps to ensure a tender, juicy interior and a wonderfully crisp, golden-brown exterior, ideal for any weeknight meal.
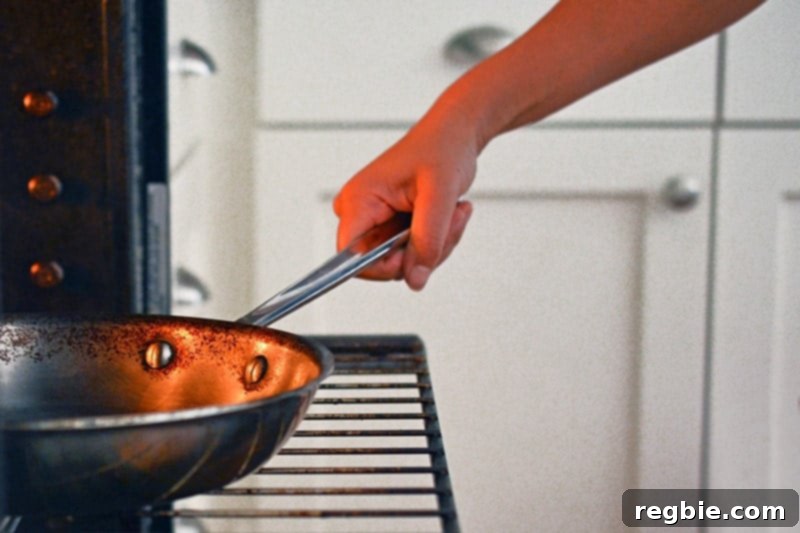
First, prepare your oven. Position an oven rack in the middle of your oven. Place a 12-inch oven-safe skillet (cast iron works beautifully for this) directly on the rack. Close the oven door and preheat your oven to a high 450°F (230°C). Preheating the skillet is crucial; it helps in achieving that coveted crispy skin by providing immediate high heat to the chicken as soon as it enters the oven.
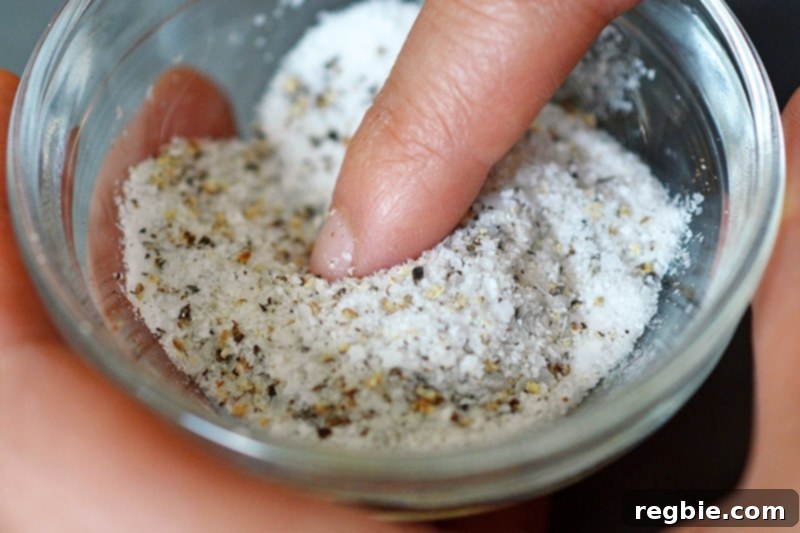
While the oven is heating, prepare your seasonings. In a small bowl, combine your Diamond Crystal kosher salt and freshly ground black pepper. Have your melted ghee (or preferred fat) ready beside it. This preparation ensures a smooth and efficient seasoning process.
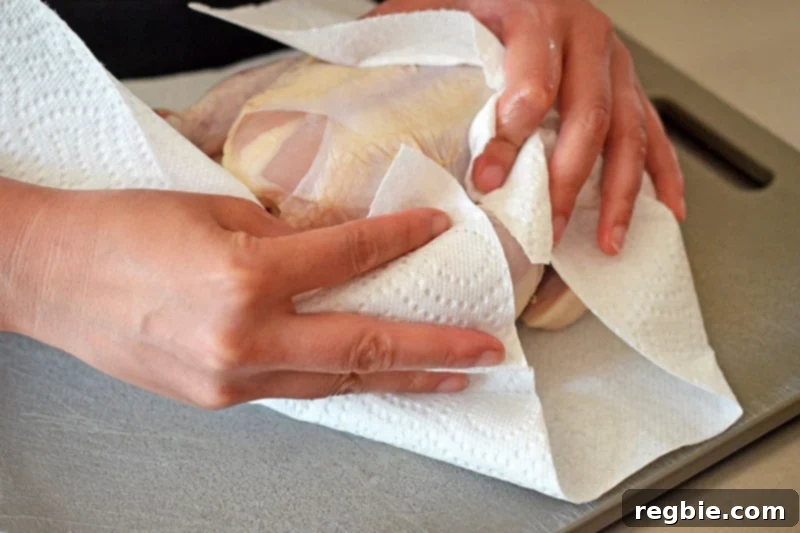
Next, focus on the chicken itself. Thoroughly pat the entire surface of the chicken dry with paper towels. This step is incredibly important and should not be skipped! Excess moisture on the skin will steam rather than crisp, preventing you from achieving that desirable crackling skin. A dry surface is the foundation for a perfectly browned and crispy finish.
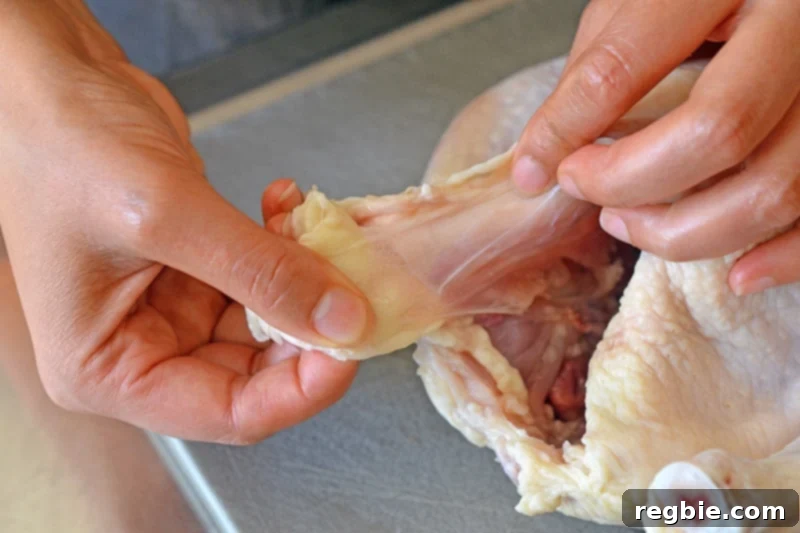
Once dry, inspect the chicken. Pull off any excess fat deposits around the open cavity and trim away any extraneous skin that might hang loose and burn. If you happen to notice any stray feathers, simply pluck them out. Don’t be squeamish; a little prep goes a long way towards a more enjoyable eating experience.
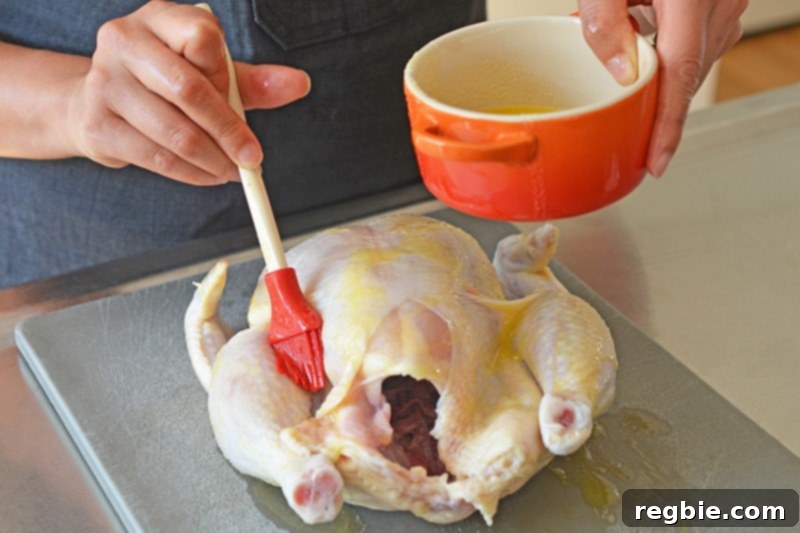
Now, generously brush the entire surface of the bird with the melted ghee. Don’t worry if the ghee solidifies slightly upon contact with the cold chicken; this is completely normal and won’t affect the final outcome. The fat is crucial for crisping the skin and enhancing flavor.
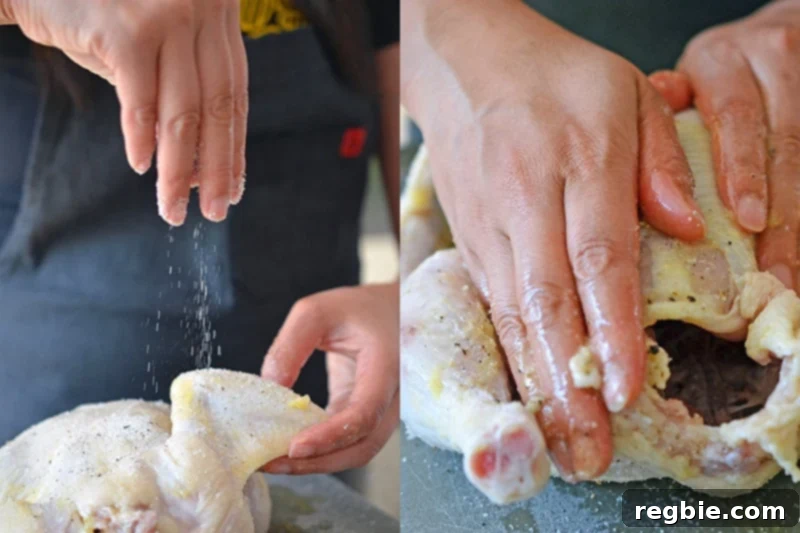
With the ghee applied, take your salt and pepper mixture and sprinkle it generously over the entire exterior and into the cavity of the bird. Then, using your hands, massage the seasoning into the chicken, ensuring it adheres well and flavors every part of the meat.
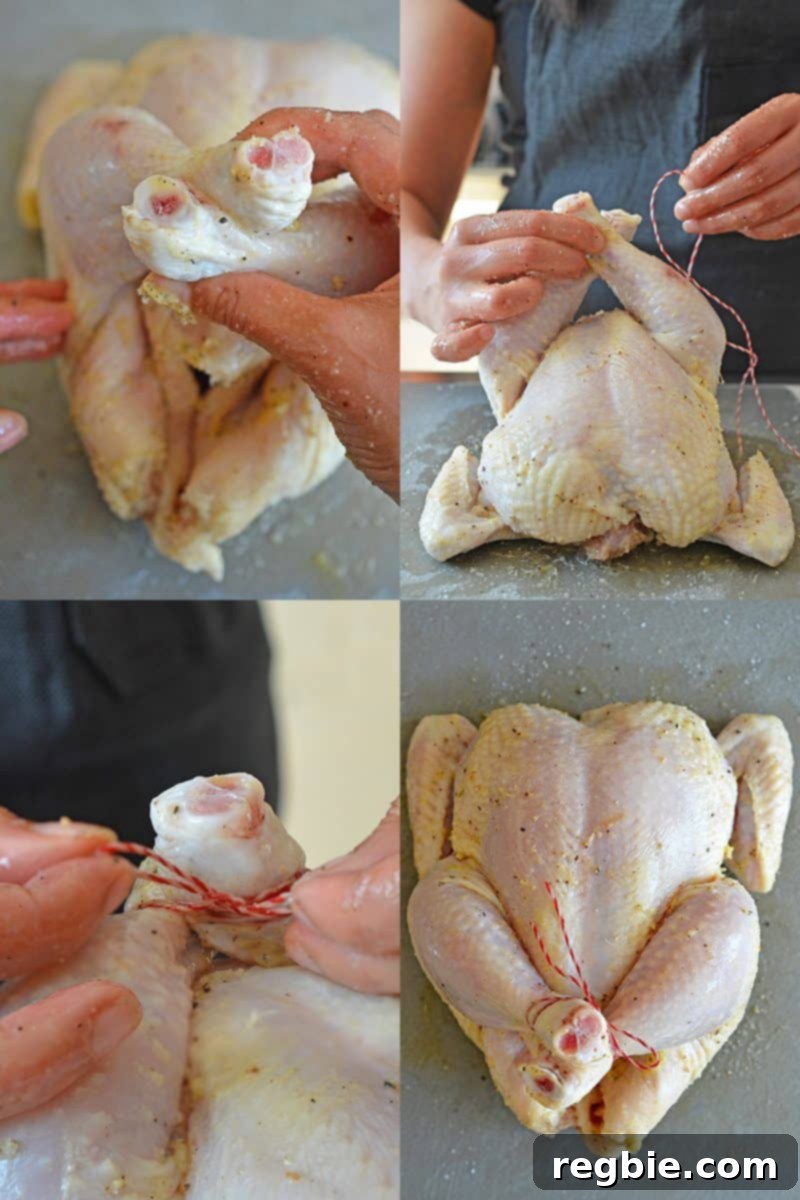
To prevent the delicate wing tips from burning in the hot oven, tuck them neatly behind the chicken’s back. This small step helps them cook evenly. Then, tie the legs together securely with a piece of kitchen twine. Trussing the chicken helps it cook more uniformly and creates a more compact, appealing presentation.
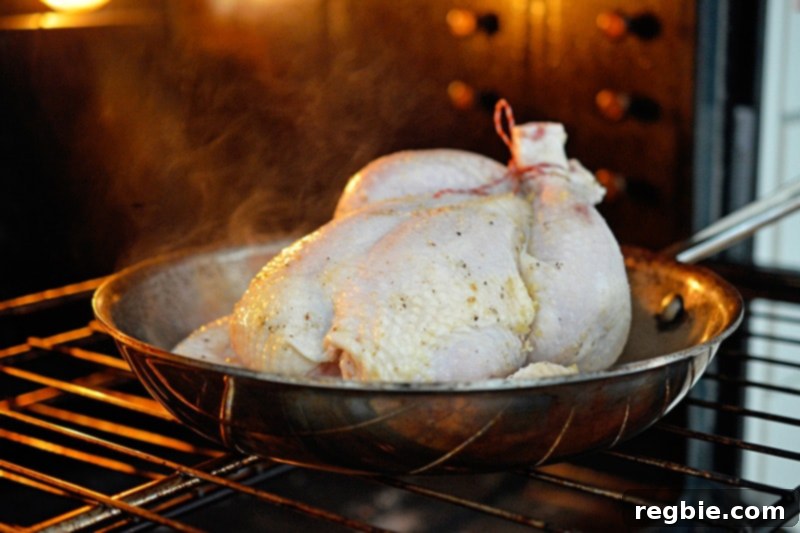
Your bird is now ready for the oven. Carefully remove the preheated skillet from the oven (remember, it’s very hot!) and place your seasoned chicken, breast-side up, directly into the hot skillet. Exercise extreme caution to avoid burns.
Roast the chicken in the 450°F (230°C) oven until the internal temperature of the breast registers 120°F (49°C) and the thighs reach 135°F (57°C). This usually takes about 25 to 35 minutes. This is where your instant-read meat thermometer becomes your best friend. It’s an invaluable tool for ensuring perfectly cooked meat and avoiding dry chicken. Investing in one is a small price for guaranteed dinner success.
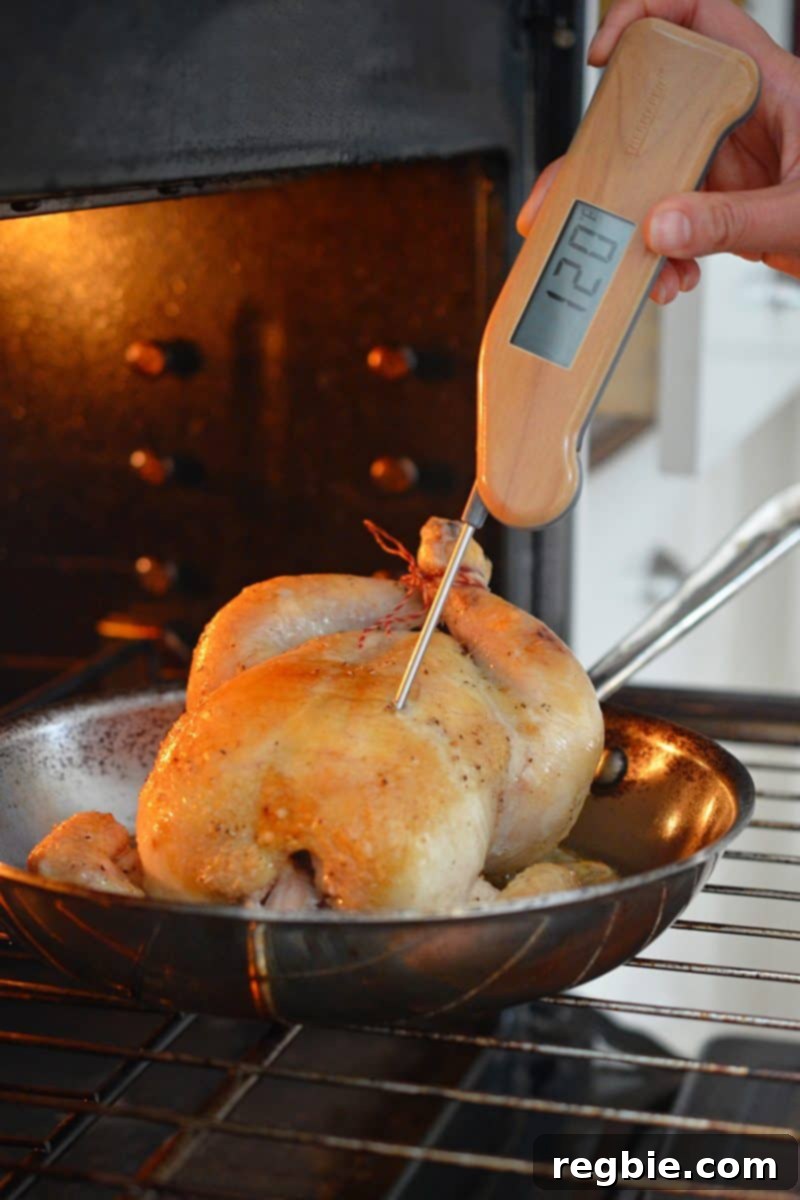
Once those temperatures are reached, immediately turn off your oven. Crucially, leave the chicken inside the warm oven to continue cooking with the residual heat. This gentle “carryover cooking” ensures the chicken finishes perfectly without drying out. Continue cooking until the breast reaches a final temperature of 160°F (71°C) and the thighs hit 175°F (79°C). This second stage will take an additional 25 to 35 minutes. Always rely on your meat thermometer to confirm doneness.
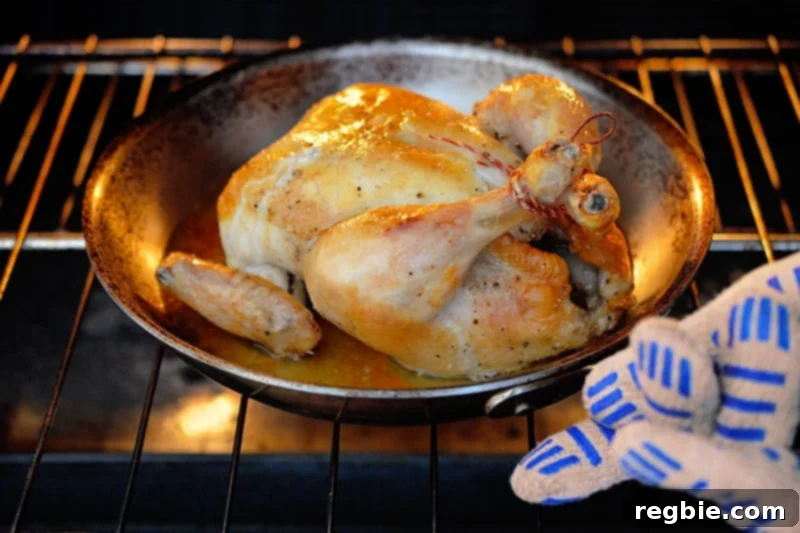
Once fully cooked, carefully remove the chicken from the pan and transfer it to a cutting board. It’s vital to allow the chicken to rest for a full 20 minutes. Resting allows the juices to redistribute throughout the meat, ensuring every bite is succulent and tender. Cutting into it too soon will result in dry chicken as the juices run out.
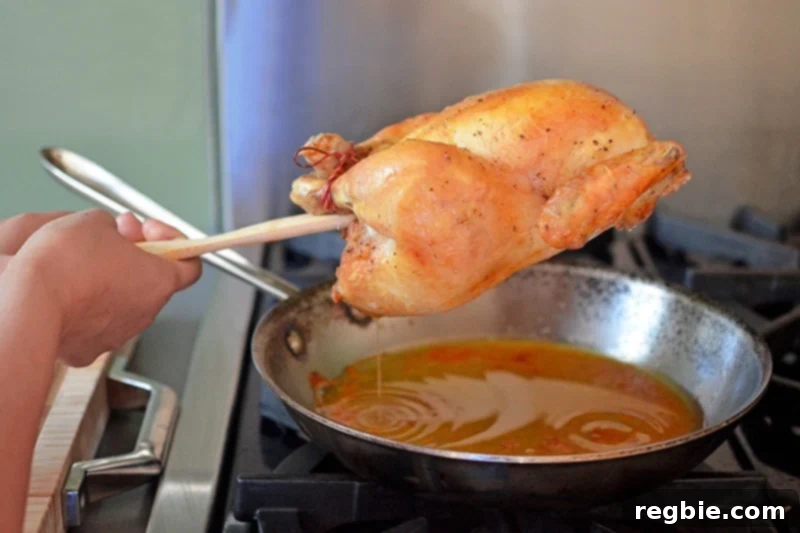
A clever trick for transferring the roast chicken: instead of tongs, which can tear the beautiful, crispy skin, insert the handle-end of a sturdy wooden spoon or spatula into the bird’s cavity. Use this to lift the chicken gently from the pan. This method also allows any excess juices inside the chicken to drain back into the skillet, enriching your pan drippings.
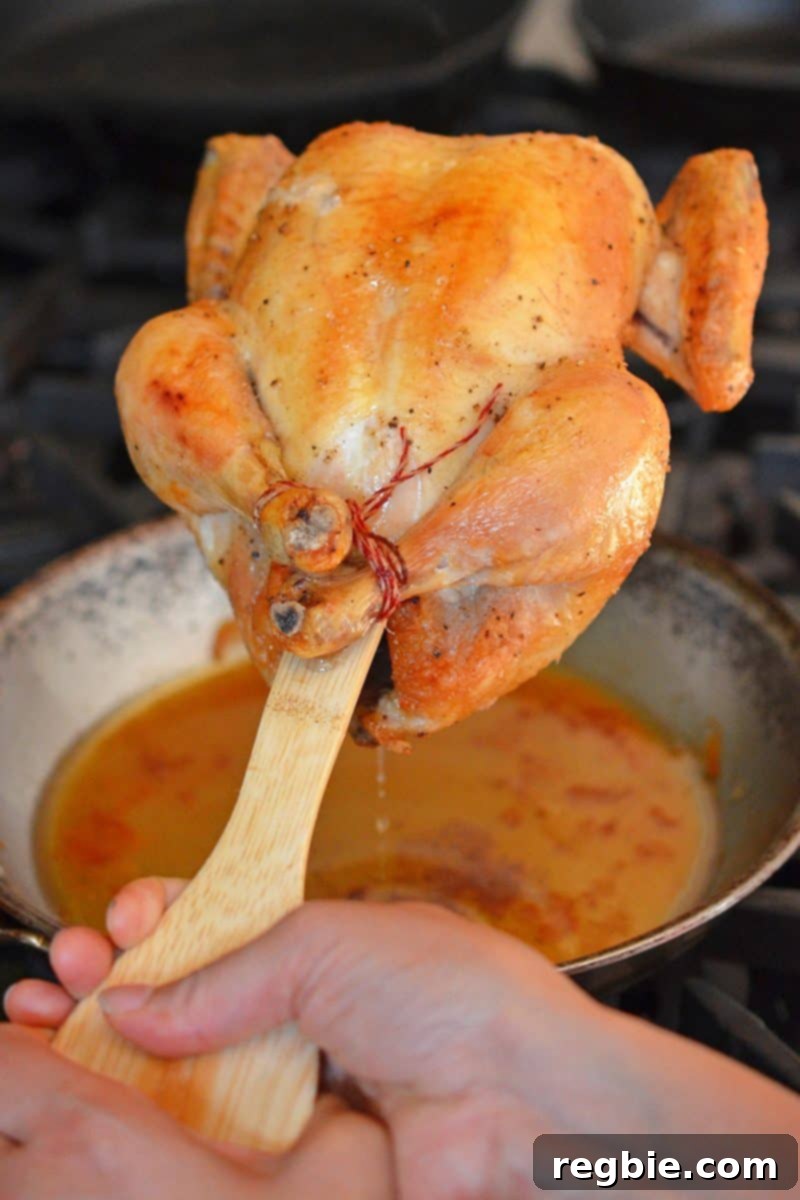
While your magnificent chicken is resting and its juices are settling, you have the perfect window to whip up a simple yet incredibly flavorful pan sauce. This sauce will elevate your meal, utilizing all the delicious brown bits and drippings left in the skillet.
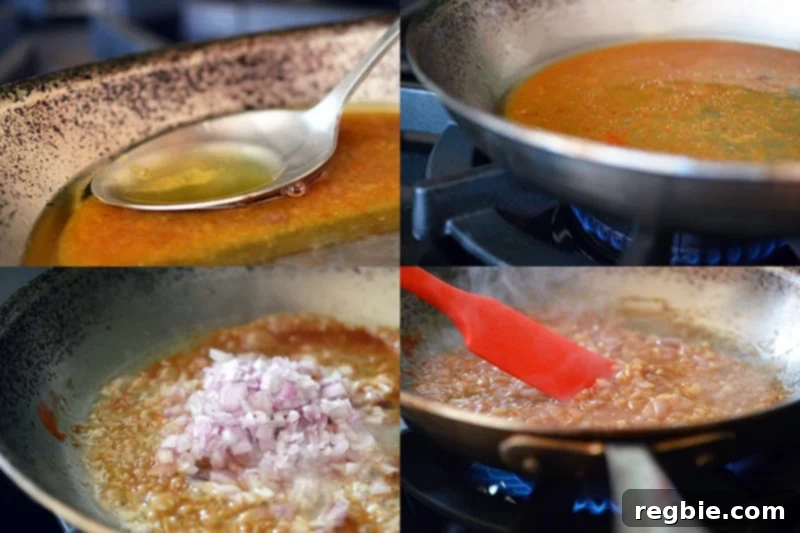
Start by removing all but 1 tablespoon of the fat from the skillet, making sure to leave all the flavorful jus and browned bits in the pan. Place the skillet over a medium-high burner. As the liquid begins to bubble and sizzle, add the minced shallots. Sauté the shallots, stirring frequently, until they soften and become translucent, typically for 2-3 minutes. This step builds a foundational layer of aromatic flavor.
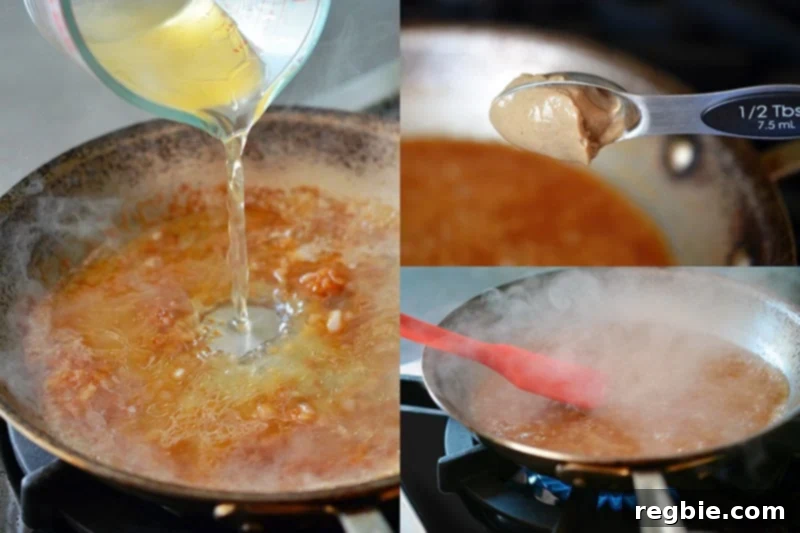
Next, pour in the chicken broth and Dijon mustard. Immediately scrape the bottom of the pan with a wooden spoon or spatula, dissolving all the caramelized, flavorful brown bits (known as the “fond”) into the liquid. This deglazing process is essential for extracting maximum flavor into your sauce. Bring the mixture to a simmer and let it reduce until it thickens slightly and measures about ¾ cup. This concentration intensifies the savory notes.
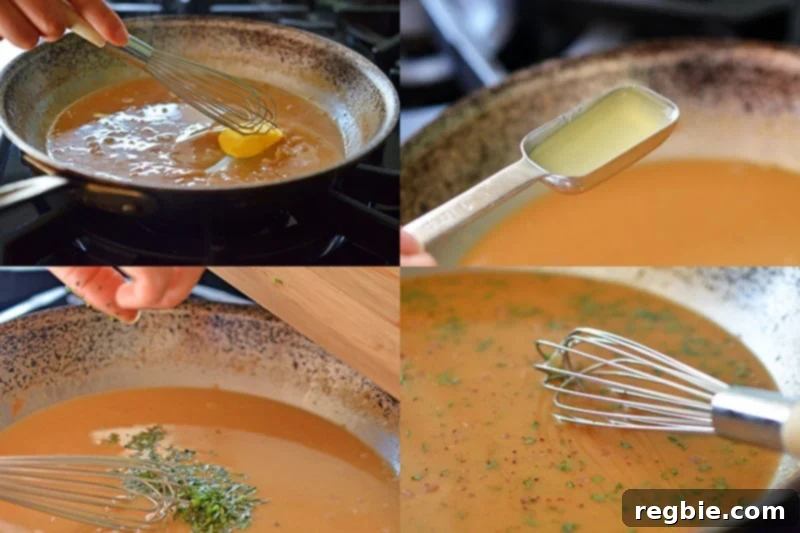
Once the sauce has reduced, remove the skillet from the heat. Gradually whisk in the cold unsalted butter (or cold ghee, if you’re keeping it Whole30-friendly) piece by piece. The cold fat will emulsify into the hot sauce, creating a smooth, rich, and glossy consistency. Stir in the fresh lemon juice and minced tarragon. Taste the sauce and adjust the seasoning with salt and freshly ground black pepper as needed. The brightness of the lemon and the herbaceous notes of tarragon perfectly complement the savory chicken drippings.
Carve your beautifully roasted chicken, plate it generously, and serve with a drizzle of this incredible homemade pan gravy. The combination of crispy skin, moist meat, and a flavorful sauce makes for an unforgettable meal!
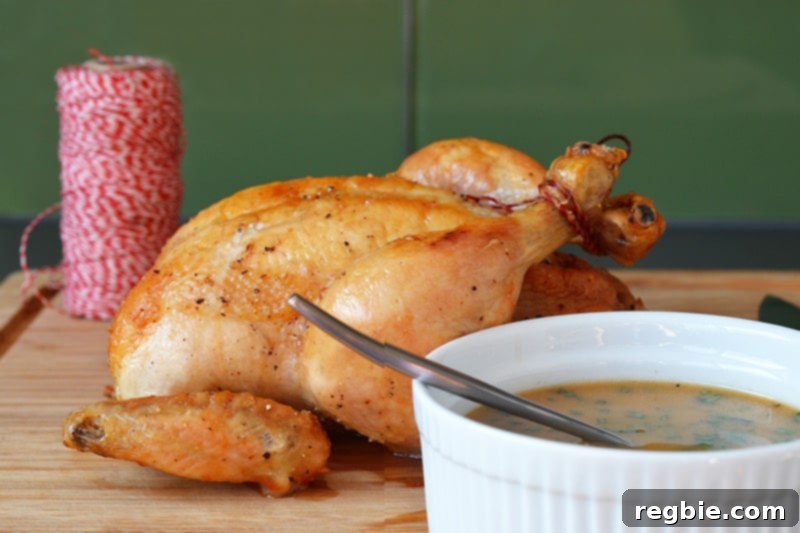
And there you have it: a truly perfect roast chicken, ready to impress on any weeknight. Enjoy!
Complementary Sides: What can you serve with the chicken?
A perfectly roasted whole chicken is a magnificent centerpiece, but a well-chosen side dish can elevate the meal from great to extraordinary. Here are some fantastic, often Whole30 and Paleo-friendly, options that pair beautifully with the rich flavors of your Weeknight Roast Chicken:
- Garlic Cauliflower Mashed Potatoes: A creamy, low-carb alternative to traditional mashed potatoes, infused with aromatic garlic.
- Asian Chopped Salad: A vibrant, refreshing salad with crisp vegetables and a zesty dressing, offering a delightful contrast to the richness of the chicken.
- Quick Asian Sugar Snap Peas: Lightly cooked and seasoned, these peas provide a sweet crunch and a touch of green to your plate.
- Instant Pot Crispy Potatoes: Achieving perfectly crispy potatoes with minimal effort, offering a satisfying texture and hearty accompaniment.
- Roasted Green Beans with Lemon and Garlic: Simple yet elegant, these green beans are brightened with lemon and savory garlic, making a healthy and delicious side.
- Roasted Brussels Sprouts and Bacon: The smoky, savory crunch of bacon perfectly complements the earthy sweetness of roasted Brussels sprouts.
- Asparagus Mimosa: A sophisticated dish featuring blanched asparagus topped with finely chopped hard-boiled eggs, offering a delicate texture and flavor.
- Roasted Broccoli and Bacon: A classic combination where tender-crisp roasted broccoli meets crispy bacon for an irresistible side.
Each of these options offers a balanced and delicious addition to your Weeknight Roast Chicken, making your meal complete and satisfying. Choose your favorite or mix and match for a diverse spread!
Storing and Repurposing Leftovers
Don’t let any of that delicious Weeknight Roast Chicken go to waste! Leftovers are often just as good, if not better, and can be easily repurposed into new meals. To store, allow the chicken to cool completely, then carve any remaining meat from the bones. Place the chicken meat in an airtight container. It will keep beautifully in the refrigerator for up to 4 days, ready for quick lunches or dinners. For longer storage, you can freeze the cooked chicken for up to 3 months. Thaw overnight in the refrigerator before reheating.
Leftover roast chicken is incredibly versatile. Shred it for chicken salads, sandwiches, or tacos. Dice it into hearty soups, stews, or casseroles. Toss it with roasted vegetables for a quick stir-fry, or add it to a simple pasta dish. You can even use the carcass to make a rich and flavorful homemade chicken broth, ensuring zero waste and maximum flavor extraction from your initial roast.
More Quick and Tasty Chicken Recipes
If this Weeknight Roast Chicken has ignited your love for easy and delicious chicken dinners, you’re in luck! There’s a world of quick and tasty chicken recipes waiting to be explored, perfect for busy evenings when you crave flavor without the fuss. Here are some more fantastic chicken dishes that promise to be winners at your dinner table:
- Pesto Chicken: A vibrant and aromatic dish featuring tender chicken coated in rich, herbaceous pesto, ready in a flash.
- Vietnamese Lemongrass Chicken: Experience bold, fragrant flavors with this zesty and savory chicken recipe inspired by Vietnamese cuisine.
- Air Fryer Cracklin’ Chicken: Achieve unbelievably crispy chicken skin with juicy meat using the magic of your air fryer, making for a healthier and faster “fried” chicken experience.
- Air Fryer Whole Chicken: For another incredibly easy whole chicken option, the air fryer delivers a remarkably tender interior and perfectly crisp exterior with minimal fuss.
Looking for more recipe ideas to expand your culinary repertoire? Head on over to my Recipe Index for a treasure trove of delicious and healthy meal inspirations. You’ll also find exclusive, fan-favorite recipes in my bestselling cookbooks: Nom Nom Paleo: Food for Humans (Andrews McMeel Publishing 2013), Ready or Not! (Andrews McMeel Publishing 2017), and the latest addition, Nom Nom Paleo: Let’s Go! (Andrews McMeel Publishing 2022). Happy cooking!
Weeknight Roast Chicken
Ingredients
Ingredients for the chicken:
- 1 tablespoon Diamond Crystal brand kosher salt
- ½ teaspoon freshly ground black pepper
- 1 3½- to 4-pound whole chicken, giblets discarded
- 1 tablespoon melted ghee or fat of choice (e.g., olive oil or avocado oil)
For the optional Tarragon-Lemon Pan Sauce:
- 1 shallot minced (or substitute with onion or leek)
- 1 cup chicken broth or bone broth
- 2 teaspoons Dijon mustard
- 2 tablespoons unsalted butter or cold ghee (for Whole30)
- 2 teaspoons minced fresh tarragon (or other fresh herbs like thyme or rosemary)
- 2 teaspoons freshly squeezed lemon juice
- Freshly ground black pepper
Instructions
-
Position your oven rack in the middle. Place a 12-inch oven-safe skillet on it, close the oven door, and preheat your oven to 450°F (230°C).
-
In a small bowl, mix together the kosher salt and freshly ground black pepper. Have the melted ghee or fat of choice ready.
-
Thoroughly pat the chicken dry with paper towels. Remove any extra fat around the cavity and trim away extraneous skin or remaining feathers.
-
Brush the entire surface of the bird with the melted ghee. Don’t worry if it clumps slightly on a cold chicken.
-
Sprinkle the salt and pepper mixture generously all over the surface and interior of the chicken, then massage the seasoning into the skin and meat with your hands.
-
Tuck the chicken wings behind its back to prevent them from burning. Tie the legs together with a piece of kitchen twine to ensure even cooking and a neat presentation.
-
Carefully place the chicken, breast-side up, into the preheated hot skillet in the oven. Be mindful that the skillet is extremely hot.
-
Roast the chicken until the breast registers 120°F (49°C) and the thighs are 135°F (57°C), which will take approximately 25 to 35 minutes. Use an instant-read meat thermometer for accuracy.
-
Immediately turn off the oven, leaving the chicken inside. Continue to cook with the residual heat until the breast reaches 160°F (71°C) and the thighs are 175°F (79°C), about an additional 25 to 35 minutes. Verify internal temperatures with your meat thermometer.
-
Remove the cooked chicken from the pan and let it rest on a cutting board for 20 minutes before carving.
-
While the chicken rests, prepare the pan sauce. Remove all but 1 tablespoon of fat from the skillet, leaving the flavorful jus and brown bits. Heat the skillet over a medium-high burner. Once the liquid begins bubbling, add the minced shallots and cook until softened.
-
Pour in the chicken broth and Dijon mustard, scraping up any tasty browned bits from the bottom of the pan to deglaze. Simmer the sauce until it reduces to about ¾ cup, thickening slightly.
-
Remove the skillet from the heat. Whisk in the cold butter or ghee, fresh lemon juice, and minced tarragon. Season with salt and pepper to taste. Serve the carved chicken with the warm pan sauce.
Notes
- To avoid tearing the perfectly crisp, golden skin when transferring your roast chicken, bypass using tongs. Instead, insert the handle-end of a sturdy wooden spoon or spatula into the bird’s cavity. This method allows you to lift the chicken gently and also helps drain any excess juices from its interior back into the pan, enriching your drippings.
- This versatile roast chicken pairs beautifully with a simple green salad or any of your favorite roasted vegetables. It’s an ideal choice for transforming an ordinary weeknight into a delightful, satisfying feast for your family.
Nutrition
Nutrition information is automatically calculated, so should only be used as an approximation.