
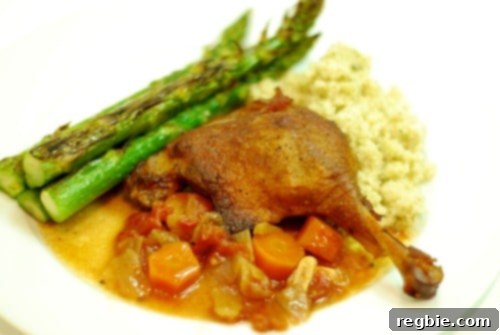
Mastering Crispy Braised Duck Legs: A Delectable Make-Ahead Recipe
Imagine a dish so effortlessly elegant, so profoundly flavorful, and so gloriously satisfying that it instantly becomes a cherished centerpiece for any special occasion or a comforting weeknight meal. Our recipe for Crispy Braised Duck Legs delivers precisely that – a culinary triumph where the succulent meat practically melts in your mouth, juxtaposed beautifully with a perfectly rendered, irresistibly crispy skin. This isn’t just a meal; it’s an experience designed for ease, allowing you to prepare ahead and simply finish with a flourish.
Braising is an age-old technique, revered for its ability to transform tougher cuts of meat into tender, falling-off-the-bone masterpieces. When applied to duck legs, this method unlocks an incredible depth of flavor, infusing the meat with aromatic herbs and a rich, savory liquid. What sets this particular recipe apart is the ingenious two-stage cooking process. We begin with a slow, gentle braise, coaxing out tenderness and building complex flavors. Then, after a convenient refrigeration period, the duck legs are finished with a high-heat roast, ensuring that iconic crispy skin that makes braised duck legs truly unforgettable.
This recipe draws inspiration and careful modification from Molly Steven’s Duck Ragu with Pasta, found in her exceptional cookbook, All About Braising. While her version expertly shreds the braised duck into a tomato-wine sauce for pasta, our adaptation focuses on preserving the whole, magnificent leg, allowing the skin to achieve its ultimate crispness directly on the plate. This subtle shift transforms a ragu component into a standalone star, ideal for those who appreciate both convenience and gourmet results.
The Art of Crispy Braised Duck Legs: A Step-by-Step Guide
Crispy Braised Duck Leg
Prep Time: 15 minutes
Cook Time: 3 hours
Total Time: 3 hours 15 minutes (excluding refrigeration)
Servings: 4
Author: Michelle Tam

Want a great, make-ahead, easy-peasy duck leg recipe where the meat is meltingly tender yet the skin is crispy? Make this recipe and thank me later.
Ingredients
- 6 duck legs
- 1 tablespoon avocado oil
- 1 medium yellow onion, chopped into ½-inch dice
- 2 carrots, cut into ½-inch rounds
- 1 celery stalk, cut into ½-inch pieces
- 4 garlic cloves, thinly sliced
- 2 large thyme sprigs
- ⅔ cup dry vermouth or white wine
- ¾ cup chicken broth
- 1 (14.5 ounce) can organic diced tomatoes
- 2 bay leaves
- Diamond Crystal kosher salt
- Freshly ground black pepper
Equipment
- A large Dutch oven
- Kitchen shears
- Storage container for duck fat
- Storage/baking dish (oven-safe)
- Parchment paper
Instructions
Preparing this dish is a rewarding culinary journey, divided into distinct phases that ensure both incredible flavor and irresistible texture. Follow these steps for perfect crispy braised duck legs:
-
Prepare the Duck Legs: Begin by taking the duck legs out of the fridge and allowing them to come closer to room temperature while you prepare the other ingredients. Use sharp kitchen shears to meticulously trim off as much excess fat as possible, being careful not to cut into the skin or the meat itself. Remove any loose flaps of skin, but ensure the top of each leg remains fully covered with skin – this is crucial for achieving that coveted crispiness. Season the duck generously on both sides with kosher salt and freshly ground black pepper.
-
Sear the Duck: Preheat your oven to 325°F (160°C). While the oven heats, place a large Dutch oven over medium-high heat. Once the pot is hot, arrange the seasoned duck legs in a single layer, skin-side down, on the ungreased surface. Sear for approximately 7 minutes, allowing the fat to render and the skin to become deeply golden and crispy. Flip the legs and continue to fry for another 3-4 minutes, or until both sides are beautifully browned. If cooking all legs at once is not possible in a single layer, work in batches to avoid overcrowding the pot, which can steam the duck instead of searing it. Transfer the browned legs to a separate dish as they are finished.
-
Harvest Duck Fat: After searing all the duck legs, carefully pour the rendered duck fat from the Dutch oven into a heat-proof storage container. This golden liquid is a culinary treasure, perfect for roasting vegetables, making confit, or adding richness to many other dishes. Store it in the fridge for future use.
-
Sauté the Aromatics: Return the Dutch oven to medium heat (or add 1 tablespoon of avocado oil if there isn’t enough residual fat). Add the chopped onions, carrots, celery, thinly sliced garlic, and thyme sprigs to the pot. Season lightly with salt and pepper. Sauté the vegetables for 7-8 minutes, stirring occasionally, until they have softened and become aromatic. Reduce the heat to medium-low to prevent burning.
-
Deglaze and Build the Braising Liquid: Pour the dry vermouth or white wine into the pot, scraping up any browned bits from the bottom of the Dutch oven with a wooden spoon – this step, called deglazing, adds incredible depth of flavor to your sauce. Simmer for about 6 minutes, or until the liquid has reduced by half. Next, add the chicken broth and continue to simmer until it, too, has reduced by half. Finally, stir in the entire can of diced tomatoes, including their juices, and let everything simmer for another 2-3 minutes to allow the flavors to meld beautifully.
-
Braise the Duck Legs: Once the rich braising liquid is ready, carefully nestle the browned duck legs back into the Dutch oven, ensuring they are skin-side up and resting comfortably in the sauce. Tuck the bay leaves among the duck legs. Take a piece of parchment paper, crinkle it slightly, and press it directly onto the surface of the duck legs and sauce, ensuring it almost touches the duck. This helps create a steamy environment, keeping the duck moist. Place the lid on the Dutch oven and transfer it to your preheated 325°F (160°C) oven. Braise for two hours. The meat should be incredibly tender, easily pulling away from the bone.
-
Cool and Store (Make-Ahead Step): After two hours, remove the Dutch oven from the oven. Carefully transfer the braised duck legs and the accompanying sauce to an oven-safe storage or baking dish. Arrange the duck legs skin-side up, ensuring the rich sauce is beneath them. This position is vital for maintaining the integrity of the skin for the final crisping stage. Allow the dish to cool completely at room temperature, then cover it and refrigerate for at least a few hours, or ideally, for 1-2 days. This resting period allows the flavors to deepen and the fat to solidify, making it easier to achieve extra-crispy skin later.
-
The Final Crisp: When you’re ready to serve, preheat your oven to 400°F (200°C), preferably on a convection roast setting if available (convection helps significantly with crisping). Place the dish with the refrigerated duck legs on the middle rack of the oven. Roast for approximately 25 minutes. During this time, the skin will transform into a delightful, crackling crisp, while the meat beneath remains unbelievably tender and juicy. Keep an eye on the duck to prevent over-browning. Serve immediately and savor the incredible contrast of textures and the rich, savory flavors.
Nutrition
The following nutrition information is an approximation per serving:
- Calories: 673 kcal
- Carbohydrates: 12g
- Protein: 71g
- Fat: 33g
- Fiber: 2g
- Sugar: 5g
Nutrition information is automatically calculated, so should only be used as an approximation and may vary based on specific ingredients and preparation.
Serving Suggestions for Your Crispy Braised Duck Legs
These magnificent crispy braised duck legs are a showstopper on their own, but pairing them with the right sides can elevate the meal to new heights. Consider serving them alongside creamy mashed potatoes or a rich polenta, which will beautifully soak up the delicious braising sauce. Roasted root vegetables like parsnips or sweet potatoes, or a vibrant green vegetable like asparagus or sautéed spinach, will add balance and freshness. For a touch of acidity and brightness, a simple green salad with a vinaigrette can cut through the richness of the duck. Don’t forget some crusty bread to mop up every last drop of the flavorful sauce!
Tips for Success
- Quality Duck: Starting with good quality duck legs makes a significant difference in the final taste and texture.
- Don’t Skimp on Searing: The initial sear is vital for rendering fat and developing a deep, rich flavor foundation for your dish. Patience here pays off!
- Save the Fat: Duck fat is liquid gold! Don’t discard it; store it for future culinary adventures.
- Overnight Chill: The make-ahead aspect is not just for convenience; chilling the duck allows the flavors to deepen and makes the final crisping stage more effective.
- Parchment Paper Trick: Pressing parchment paper directly onto the braising liquid helps ensure even cooking and moisture retention, mimicking a confit-like environment.
Looking for more culinary inspiration? Head on over to our Recipe Index for a treasure trove of delicious ideas. You’ll also find exclusive recipes on our iPhone and iPad app, and in our acclaimed cookbooks: Nom Nom Paleo: Food for Humans (Andrews McMeel Publishing 2013), Ready or Not! (Andrews McMeel Publishing 2017), and Nom Nom Paleo: Let’s Go! (Andrews McMeel Publishing 2021). Happy cooking!