

Embrace the cozy flavors of autumn and winter with this incredibly delicious and effortlessly prepared Instant Pot Butternut Squash Soup. If you own an Instant Pot and are searching for a wholesome, comforting, and satisfying paleo soup that’s also Whole30-compatible and naturally gluten-free, your quest ends here. This recipe is not just easy; it’s bursting with savory bacon goodness, transforming simple ingredients into a truly gourmet experience that will warm you from the inside out.

Table of Contents
- Experience Unmatched Speed & Flavor with Your Instant Pot!
- Slow Cooker Alternative: A Gentle Approach to Flavor
- Mastering the Art of Cutting Butternut Squash
- Butternut Squash Dermatitis: Should You Wear Gloves?
- Treating and Preventing “Squash Hands”
- Essential Ingredients for Your Butternut Squash Soup
- Step-by-Step: Crafting Your Instant Pot Butternut Squash Soup
- Storing Your Delicious Leftovers
- Explore More Instant Pot Soup Creations
- Printer-Friendly Recipe Card
- Full Instant Pot Butternut Squash Soup Recipe
Experience Unmatched Speed & Flavor with Your Instant Pot!
The Instant Pot is a game-changer when it comes to preparing delicious, wholesome meals quickly, and this butternut squash soup is no exception. Utilizing the magic of pressure cooking, you can dramatically accelerate the cooking time while simultaneously intensifying the natural sweetness and savory depth of the butternut squash. Unlike many traditional recipes that demand the extra effort of roasting the squash beforehand to achieve concentrated flavor, the Instant Pot allows you to skip this step entirely without compromising on taste. The high-pressure environment tenderizes the squash rapidly, locking in its delicate flavors and creating a rich, profound base for your soup.
But the Instant Pot’s efficiency is just the beginning. What truly elevates this Instant Pot Butternut Squash Soup to dinner party-worthy status are its carefully selected flavor and texture boosters. Crispy bacon bits contribute a delightful smoky crunch and a foundational savory element that permeates the entire soup. A touch of Magic Mushroom Powder (or a good quality kosher salt) introduces an umami richness that makes the soup incredibly satisfying. Finally, a drizzle of aged balsamic vinegar at the end adds a bright, tangy counterpoint, balancing the sweetness of the squash and the richness of the bacon. These additions transform a simple vegetable soup into a sophisticated culinary delight, making every spoonful a luxurious experience – even if you’re the only “fancy pants person” enjoying it!
Slow Cooker Alternative: A Gentle Approach to Flavor
Even if you don’t have an Instant Pot or a traditional pressure cooker, you can still enjoy this incredible butternut squash soup by preparing it in a slow cooker, such as a Crock-Pot. The process is remarkably simple and still yields a wonderfully flavorful result, albeit with a longer cooking time. To adapt this recipe for your slow cooker, combine all the main ingredients – that’s the peeled, seeded, and cubed butternut squash, diced onion, smashed garlic cloves, and your choice of broth (bone, chicken, or vegetable) along with the Magic Mushroom Powder or salt – directly into your slow cooker insert. Set your slow cooker to the low setting and allow it to cook gently for approximately 6 hours, or until the butternut squash is fork-tender and easily mashed.
Once the soup has cooked to perfection, you’ll want to add those crucial finishing touches. While the soup simmers, prepare your bacon separately: crisp it up on the stovetop in a skillet or easily in the microwave. Once crispy, drain the bacon bits on a paper towel. After blending your soup to a smooth consistency (which you can do right in the slow cooker with an immersion blender or transfer to a regular blender), ladle it into bowls and garnish generously with the crispy bacon bits and a delightful drizzle of aged balsamic vinegar. The slow cooking process allows the flavors to meld beautifully, creating a comforting and robust soup that’s just as delicious as its pressure-cooked counterpart.
Admittedly, the most challenging part of preparing this recipe, regardless of your cooking method, is tackling the butternut squash itself – specifically, peeling and chopping it. Many find this task daunting due to the squash’s firm texture. However, don’t let that deter you! I’ve got you completely covered with detailed, easy-to-follow steps below. With a few simple techniques, you’ll confidently transform a whole butternut squash into a generous bowl of perfectly cubed pieces, ready for your soup.
Mastering the Art of Cutting Butternut Squash
Cutting a butternut squash can seem intimidating, but with the right technique and a sharp knife, it becomes a much simpler task. Safety and stability are key. Here’s a detailed, step-by-step guide to help you prepare your squash with ease:
Step 1: Stabilize and Trim the Ends. Begin by placing the butternut squash horizontally on a sturdy cutting board. Using a large, sharp chef’s knife, carefully slice off about a quarter-inch from both the stem end and the blossom end of the squash. This creates two flat, stable surfaces, which are crucial for safe handling during the subsequent cutting steps. Never try to cut a squash that is rocking or unstable.

Step 2: Halve the Squash Crosswise. With the squash now stable on one of its cut ends, use a smaller, sharp paring knife or the tip of your chef’s knife to cut the squash in half crosswise. Aim for the point where the thinner, neck section meets the wider, bulbous base. This natural division makes it easier to handle the two distinct sections for peeling and deseeding. The neck typically contains solid flesh, while the bulbous end houses the seeds.
Step 3: Peel the Skin. Now that the squash is in manageable halves, you can proceed with peeling. A good quality, sharp vegetable peeler is your best tool here. Firmly hold one half of the squash and, with a downward motion, peel away the tough outer skin. Continue peeling around the entire surface until all the green and light orange skin is removed, revealing the bright orange flesh beneath. Repeat this process for the other half of the squash.

Step 4: Deseed the Bulbous Section. Take the bulbous part of the squash and carefully slice it in half lengthwise. You will now expose the stringy pulp and seeds in the hollow center. Use a sturdy spoon to scoop out all the seeds and fibrous strands. Discard these. The neck section typically won’t have any seeds, simplifying that part of the preparation.
Step 5: Cube the Squash. With both sections peeled and deseeded, it’s time to cube the squash. Lay the squash halves flat on your cutting board. First, cut them into thick planks or wedges, and then proceed to cut these planks into roughly 1-inch cubes. The goal is to achieve pieces of approximately the same size, which ensures even cooking in the Instant Pot. The smaller and more uniform the cubes, the faster and more consistently they will cook, resulting in a perfectly tender soup base. And just like that, you’re done with the hardest part – you now have a large batch of beautiful butternut squash cubes ready for your soup!

Butternut Squash Dermatitis: Should You Wear Gloves?
You might be surprised to learn that handling butternut squash can sometimes lead to a curious skin reaction, commonly known as “squash hands” or, more formally, irritant contact dermatitis from cucurbita moschata (the scientific name for butternut squash). After repeatedly preparing batches of squash for recipe testing, I’ve personally experienced this phenomenon. My hands turned an odd orange hue, and the skin felt uncomfortably tight, almost as if I were wearing an invisible, non-removable pair of gloves. This reaction goes beyond simple discoloration.
Initially, I always attributed the orange tint to harmless squash sap simply staining my skin. However, I’ve since experienced more severe symptoms, including itching and even minor cracking of the skin. This isn’t just an aesthetic issue; it can be genuinely uncomfortable. The sap from butternut and acorn squash contains compounds that can irritate sensitive skin, causing it to dry out, feel tight, and sometimes become itchy. If you’ve noticed similar symptoms after handling raw squash, or if you have generally sensitive skin, it’s highly advisable to wear a pair of kitchen gloves or disposable gloves before you begin the peeling and chopping process. This simple precaution can save you from an uncomfortable and annoying skin reaction, allowing you to enjoy your cooking experience without the aftermath of “squash hands.”
Treating and Preventing “Squash Hands”
Once you’ve developed “squash hands,” there isn’t a miraculous instant cure, but the good news is that the effects are temporary and usually resolve on their own within a couple of days. The best approach to manage the discomfort is gentle care and patience. Focus on thoroughly moisturizing your hands multiple times a day. Rich, emollient creams or lotions can help restore hydration to the dry, tight skin. Additionally, a soft exfoliation using a wet hand towel can help to gently remove any surface discoloration and alleviate the sensation of tightness. Avoid harsh scrubbing or abrasive exfoliants, as this could further irritate your sensitive skin.
It’s important to note that experiencing “squash hands” due to skin contact with raw squash sap does not mean you cannot eat squash. The irritating compounds are typically denatured by cooking, making cooked squash perfectly safe and enjoyable to consume. I, for one, can eat cooked butternut squash with absolutely no issues – and I’m very glad, because I adore it! The easiest and most effective way to prevent “squash hands” altogether is to minimize direct contact with the raw squash. Many grocery stores now offer pre-cut butternut squash in their produce section, which eliminates the need for peeling and chopping. While it might be a bit pricier, the convenience and avoidance of skin irritation can be well worth the cost, especially if you know you’re prone to this peculiar, albeit harmless, reaction.
Essential Ingredients for Your Butternut Squash Soup
Crafting this flavorful Instant Pot Butternut Squash Soup requires just a handful of simple, wholesome ingredients. Each component plays a vital role in building the soup’s incredible depth and texture:
- Bacon: A cornerstone of this recipe, providing a rich, smoky flavor and crispy texture. The rendered bacon fat also serves as a delicious base for sautéing the aromatics. For a vegan version, simply omit the bacon and use a high-quality extra virgin olive oil to sauté the onion and garlic instead.
- Onion: Diced onion forms the aromatic foundation of the soup, adding a subtle sweetness and savory depth when sautéed until translucent.
- Garlic cloves: Freshly smashed and peeled garlic cloves infuse the soup with their pungent, warm flavor, complementing the sweetness of the squash beautifully.
- Medium butternut squash: The star of the show! Choose a firm, unblemished squash that feels heavy for its size. You’ll need to peel, deseed, and cut it into 1-inch chunks, as detailed in the section above. Approximately 3 pounds will yield a generously thick and creamy soup.
- Bone broth, chicken broth, or vegetable broth: The liquid base for your soup. Bone broth adds a rich, collagen-rich depth, while chicken broth offers a classic savory flavor. For a vegan soup, opt for a good quality vegetable broth. Ensure your chosen broth is low sodium to control the overall seasoning of the soup.
- Magic Mushroom Powder or Diamond Crystal kosher salt: This special powder is a blend of dried mushrooms and seasonings that adds an incredible umami boost. If you don’t have it, don’t worry – high-quality Diamond Crystal kosher salt will adequately season your soup, bringing out all the natural flavors.
- Aged balsamic vinegar: This is the secret ingredient that truly elevates the soup! A drizzle of aged balsamic vinegar at the end provides a bright, tangy finish that cuts through the richness and balances the sweetness, adding a sophisticated touch.
Step-by-Step: Crafting Your Instant Pot Butternut Squash Soup
Creating this velvety butternut squash soup in your Instant Pot is a straightforward process, maximizing flavor with minimal effort. Follow these simple steps for a truly delightful meal:
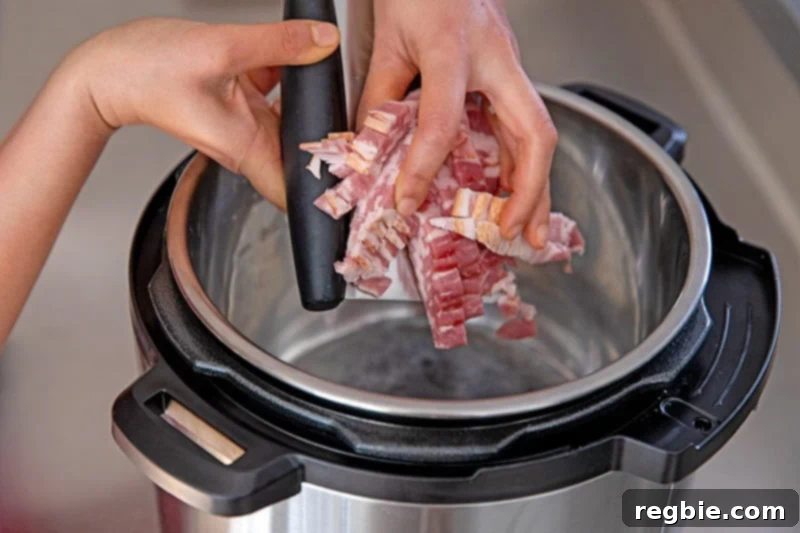
Step 1: Sauté the Bacon. Begin by pressing the “Sauté” function on your Instant Pot. Allow the metal insert to heat up for a few minutes until it’s hot. Once hot, carefully add the ¼-inch strips of bacon to the pot. Sauté the bacon, stirring occasionally, for about 10 minutes. The goal is to cook the bacon until it’s wonderfully crispy and has rendered its delicious fat, which will form the flavor base for your soup. This initial step is crucial for developing a rich, savory foundation.
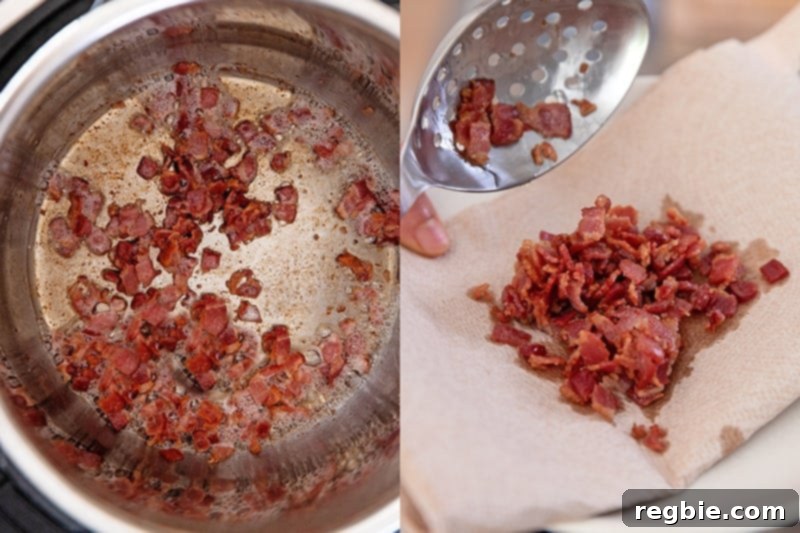
Step 2: Remove Crispy Bacon. Once the bacon has reached your desired level of crispness, use a slotted spoon to carefully transfer the bacon bits from the Instant Pot to a plate lined with paper towels. The paper towels will absorb any excess grease, leaving you with perfectly crispy bacon for garnish. Leave the rendered bacon fat in the pot; this flavorful oil will be used to sauté your aromatics.
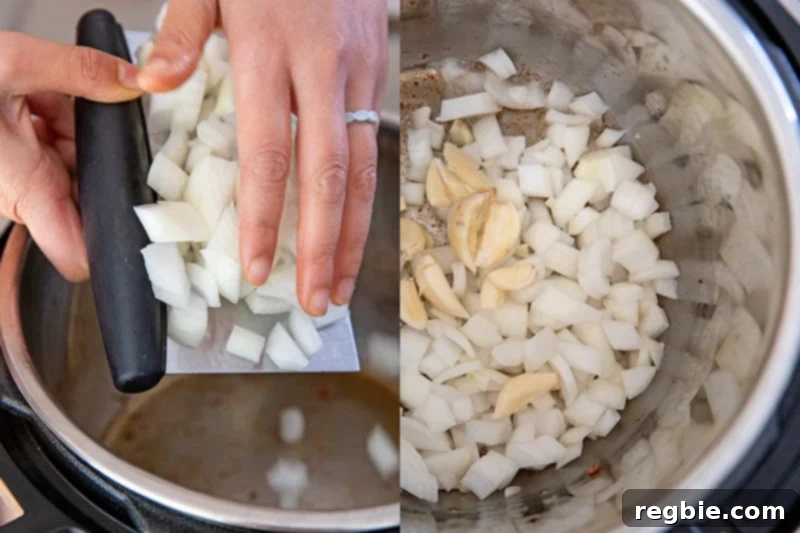
Step 3: Sauté Onions and Garlic. With the bacon fat still in the Instant Pot (or a tablespoon of olive oil if making it vegan), add the diced onions and smashed garlic cloves. Sauté them for 1 to 2 minutes, stirring frequently, until the onions become translucent and the garlic is fragrant. Be careful not to burn the garlic; it should smell sweet and aromatic, not bitter.
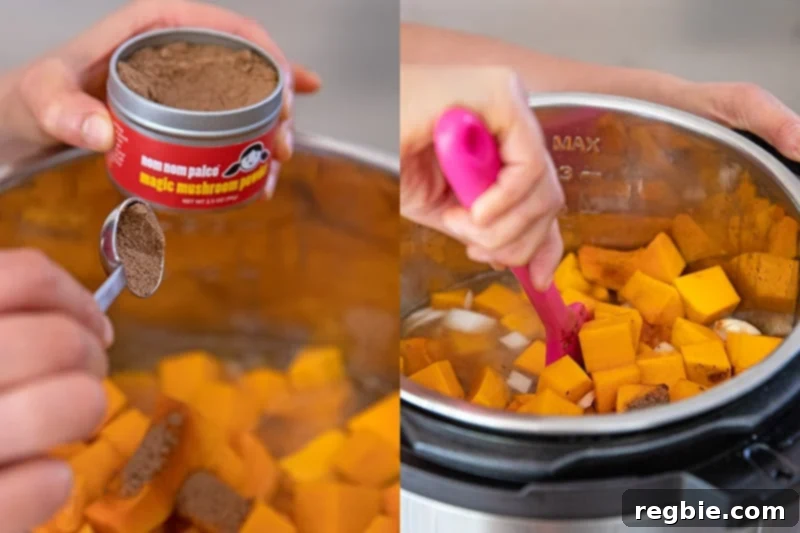
Step 4: Combine Main Ingredients. Add the prepared 1-inch cubed butternut squash to the pot, followed by the bone broth (or chicken/vegetable broth) and the Magic Mushroom Powder (or kosher salt). Stir gently to ensure all the ingredients are well combined and the squash is mostly submerged in the liquid. This ensures even cooking and allows the flavors to meld beautifully under pressure.
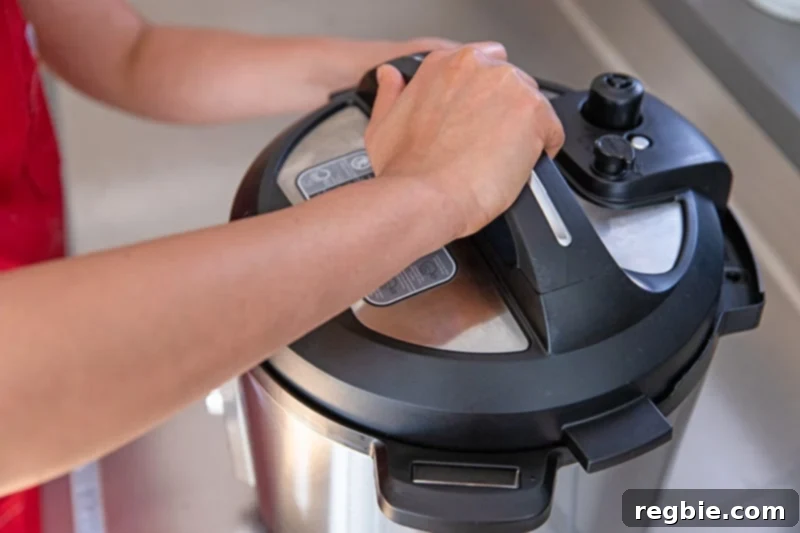
Step 5: Pressure Cook to Perfection. Secure the lid onto your Instant Pot, making sure the sealing ring is properly in place and the vent is set to the “Sealing” position. Program the Instant Pot to cook on “Manual” or “Pressure Cook” mode at high pressure for 7 minutes. The Instant Pot will take some time to come to pressure before the 7-minute countdown begins. This relatively short cooking time is all that’s needed to transform the firm squash into tender, buttery perfection.
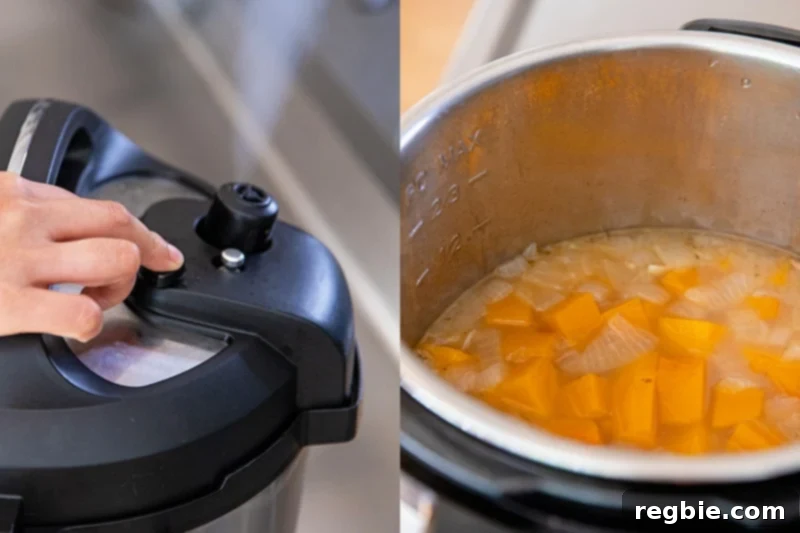
Step 6: Release the Pressure. Once the cooking cycle is complete, the Instant Pot will beep. Carefully perform a quick release of the pressure by turning the sealing valve to the “Venting” position. Stand clear of the steam release. Once all the pressure has been released and the float valve drops, you can safely open the lid. The squash should be incredibly tender, almost falling apart.
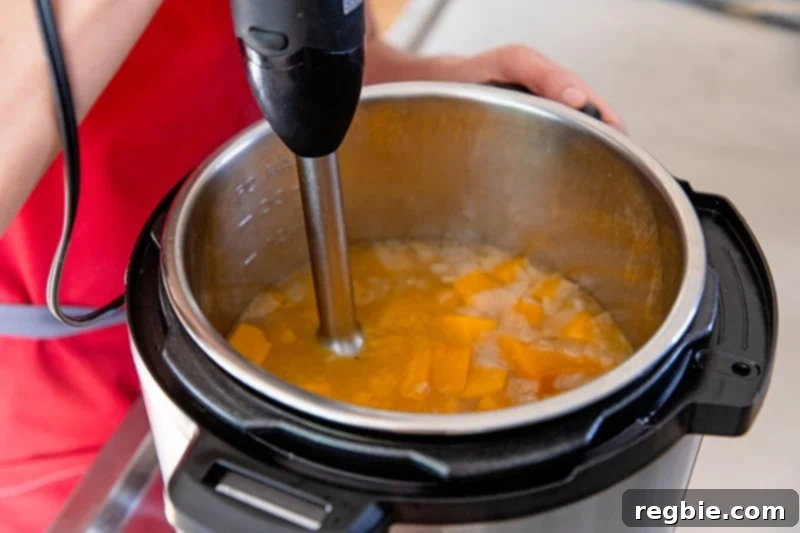
Step 7: Blend Until Silky Smooth. Before blending, taste the soup and adjust the seasoning with more salt or Magic Mushroom Powder if needed. Then, for that signature creamy texture, grab an immersion blender and carefully blend the soup directly in the Instant Pot insert. Blend until it transforms into a smooth, luxurious, and silky puree. If you don’t have an immersion blender, carefully transfer the soup in batches to a regular blender and blend until smooth, being sure to vent the lid to allow steam to escape.
Step 8: Serve and Garnish. Ladle the hot, creamy butternut squash soup into individual bowls. For the perfect finishing touch, drizzle a small amount of aged balsamic vinegar over each serving. The tanginess of the balsamic beautifully complements the sweet and savory notes of the soup. Finally, sprinkle generously with the crispy bacon bits you set aside earlier. You’ll be amazed at the rich, full-bodied flavor and velvety texture of this dairy-free soup – so good, you won’t even miss the heavy cream!

Storing Your Delicious Leftovers
This Instant Pot Butternut Squash Soup is not only delicious fresh but also makes for fantastic leftovers, becoming even more flavorful the next day. Proper storage is key to enjoying it for days to come. Once the soup has cooled completely, transfer it to an airtight container. You can safely store the soup in the refrigerator for up to 4 days. For longer storage, this soup freezes beautifully. Pour the cooled soup into freezer-safe containers or heavy-duty freezer bags, leaving a little headspace for expansion. It can be kept in the freezer for up to 4 months without significant loss of quality or flavor. When you’re ready to enjoy it again, simply thaw overnight in the refrigerator (if frozen) and reheat gently on the stovetop or in the microwave until warmed through. The creamy texture and rich flavors hold up exceptionally well, making it a perfect meal prep option for busy weeks.

Explore More Instant Pot Soup Creations
If you’ve fallen in love with the convenience and incredible results of making soup in your Instant Pot, you’re in luck! The possibilities are endless for crafting delicious, quick, and healthy soups using this versatile appliance. Here are a few more Instant Pot soup recipes that are sure to become new favorites in your kitchen:
- Instant Pot Curried Cream of Broccoli Soup
- Instant Pot Vegetable Soup
- Instant Pot Chicken Pho
- Easy Hamburger Soup
- Chinese Beef Noodle Soup
Each of these recipes leverages the Instant Pot’s efficiency to deliver maximum flavor with minimal fuss, proving that healthy, homemade meals can truly fit into any busy schedule. Dive in and expand your repertoire of comforting and nourishing pressure cooker soups!
Looking for more recipe ideas to inspire your culinary journey? Head on over to my Recipe Index for a comprehensive collection of delightful dishes. You’ll also uncover exclusive recipes and cooking tips in my acclaimed cookbooks: Nom Nom Paleo: Food for Humans (Andrews McMeel Publishing 2013), Ready or Not! (Andrews McMeel Publishing 2017), and the latest, Nom Nom Paleo: Let’s Go! (Andrews McMeel Publishing 2022). Happy cooking!
Printer-Friendly Recipe Card
Instant Pot Butternut Squash Soup
15 minutes
45 minutes
6
Michelle Tam

Ingredients
- ¼ pound bacon cut crosswise into ¼-inch strips
- 1 large onion diced
- 6 garlic cloves smashed and peeled
- 3 pounds butternut squash peeled, seeded, and cut into 1-inch chunks
- 3 cups bone broth or chicken broth (or vegetable broth for vegan)
- 2 teaspoons Magic Mushroom Powder or Diamond Crystal kosher salt, to taste
- aged balsamic vinegar for drizzling
Instructions
-
Turn on the sauté function on your Instant Pot. Once the metal insert is hot, add the bacon strips. Cook for approximately 10 minutes, stirring occasionally, until the bacon is crispy.
-
Using a slotted spoon, transfer the crispy bacon bits to a paper towel-lined plate to drain. Leave the rendered bacon drippings in the Instant Pot.
-
Add the diced onions and smashed garlic to the bacon drippings in the pot. Sauté for 1 to 2 minutes, until the onions are translucent and the garlic is fragrant.
-
Stir in the cubed butternut squash, followed by the bone broth (or chosen broth) and Magic Mushroom Powder (or kosher salt). Ensure ingredients are well mixed.
-
Secure the lid on the Instant Pot, ensuring the vent is in the “Sealing” position. Program it to cook on high pressure for 7 minutes.
-
Once cooking is complete, carefully perform a quick release of the pressure by turning the valve to “Venting.”
-
Open the lid, taste the soup for seasoning, and adjust if necessary. Then, use an immersion blender to purée the soup directly in the pot until it is smooth and silky.
-
Ladle the finished soup into bowls. Drizzle with aged balsamic vinegar and sprinkle with the reserved crispy bacon bits before serving.
Video
A video tutorial demonstrating the steps for making this Instant Pot Butternut Squash Soup would typically appear here.
Notes
Nutrition
Calories:
209
kcal
|
Carbohydrates:
29
g
|
Protein:
9
g
|
Fat:
8
g
|
Fiber:
5
g
Nutrition information is automatically calculated and should be used as an approximation.
Enjoy this recipe? Share your thoughts below!