
Prepare to revolutionize your cooking experience with the unparalleled ease and sensational results of Sous Vide Pork Ribs. Forget the days of dry, tough ribs or hours spent meticulously monitoring a smoker or grill. This method guarantees pork ribs that are so tender they practically melt in your mouth, infused with deep flavor, and consistently perfect every single time. If you’re looking for a foolproof way to achieve restaurant-quality ribs with minimal fuss, look no further – sous vide is your secret weapon. Get ready to impress your family and friends with ribs that are not just easy, but truly extraordinary.
Mastering Sous Vide Pork Ribs: A Guide to Unforgettable Tenderness and Flavor
Dive into the world of precision cooking and discover how sous vide transforms ordinary pork ribs into an exceptionally tender, flavor-packed masterpiece. This comprehensive guide will walk you through every step, from selecting the perfect rack to achieving that irresistible caramelized crust. Experience the joy of fall-off-the-bone ribs that burst with seasoning, all thanks to the magic of water bath cooking followed by a quick, fiery finish. Whether you’re a seasoned sous vide enthusiast or a curious beginner, this recipe will demystify the process and deliver the best pork ribs you’ve ever made.
Why Sous Vide Ribs? The Secret to Unmatched Tenderness and Consistency
Sous vide, a French term meaning “under vacuum,” involves cooking food that has been vacuum-sealed in a precisely temperature-controlled water bath. While it might sound like a technique reserved for professional chefs, it’s remarkably simple to execute at home and offers distinct advantages, especially when it comes to preparing cuts like pork ribs.
- Perfectly Tender, Every Time: The primary benefit of sous vide for ribs is the ability to cook them at a consistent, low temperature over an extended period. This gentle heat allows the tough connective tissues and collagen in the ribs to slowly break down into succulent gelatin without overcooking the muscle fibers. The result is an incredible tenderness that can’t be achieved as consistently with traditional grilling or baking methods. You’ll get ribs that are juicy, moist, and practically fall off the bone.
- Enhanced Flavor Penetration: Vacuum-sealing the ribs with your chosen seasoning and letting them marinate in the bag before cooking ensures that every bit of flavor is locked in and deeply infused into the meat. The sous vide process further encourages this flavor absorption, resulting in a more profound and even taste throughout the entire rack.
- Consistent Results from Edge to Edge: Say goodbye to dry edges and undercooked centers. The water bath ensures that the ribs cook uniformly from the exterior to the core, eliminating any guesswork and guaranteeing a perfectly cooked product every single time. This precision removes the risk of overcooking, which is common with high-heat methods.
- Hands-Off Convenience: Once your ribs are seasoned, sealed, and submerged in the water bath, the sous vide machine does all the work. You can set it and forget it for several hours, freeing up your time to prepare side dishes, entertain guests, or simply relax. This makes it an ideal method for entertaining or for busy weeknights when you want gourmet results without constant attention.
- Flexibility in Finishing: After their long sous vide bath, the ribs are fully cooked and tender. The final step is a quick sear to develop a delicious, caramelized crust, which can be done on a grill, under a broiler, or in a hot cast iron skillet. This flexibility allows you to customize the texture and char to your liking, adding another layer of flavor and appeal.
In essence, sous vide transforms ribs from a challenging cut to master into an effortlessly delicious meal. It takes the stress out of barbecue, delivering a consistently tender and flavorful experience that will make these ribs a staple in your culinary repertoire.
Ingredients for Exceptionally Tender Sous Vide Pork Ribs
Serves: 6-8 people
- 2 racks of pork ribs (approximately 1.5 – 2 pounds each). Both baby back ribs and St. Louis style ribs are excellent choices for this method. Look for ribs with good meat coverage and marbling for the best texture and flavor.
- Kosher Salt: A generous amount of kosher salt is essential for seasoning. Diamond Crystal kosher salt is often preferred by chefs for its flakiness and consistent seasoning power, but any high-quality kosher salt will work. Remember, pork ribs love salt, and the long cooking process will mellow its intensity.
- Freshly Ground Black Pepper: Freshly ground pepper adds a robust, aromatic kick that complements the richness of the pork.
- Your Favorite Dry Rub: A quality dry rub is paramount for building a deep, complex flavor profile. The original recipe suggests a Chili Con Carne Seasoning, but feel free to use your preferred blend. Whether you lean towards smoky, spicy, or a sweeter profile, ensure your chosen rub enhances the pork without overpowering it. If your rub contains sugar, be mindful during the searing stage, as sugar can burn quickly at high temperatures.
Essential Equipment for Sous Vide Ribs
Having the right tools makes the sous vide experience even more seamless and enjoyable. Here’s what you’ll need to prepare your perfect pork ribs:
- Sous Vide Immersion Circulator or Water Oven: This is the cornerstone of sous vide cooking. An immersion circulator clips to the side of any pot and heats the water to a precise temperature, while a water oven is a self-contained unit. Either will provide the necessary temperature control for perfect ribs.
- Large Pot or Food-Grade Container: To hold the water bath and your sous vide device. Ensure it’s large enough to fully submerge both racks of ribs without them touching the bottom or sides of the container too much, allowing for even water circulation.
- Vacuum Sealer and Bags: A vacuum sealer is crucial for creating an airtight seal around your ribs, preventing water from entering the bag and ensuring optimal cooking. If you don’t own a vacuum sealer, heavy-duty freezer bags can be used with the water displacement method (submerge the bag in water, letting the water pressure push out the air before sealing).
- Paper Towels: You’ll need plenty of paper towels for thoroughly drying the ribs both before seasoning and after their sous vide bath. This step is critical for achieving a beautiful sear.
- Grill, Cast Iron Skillet, or Broiler Pan: For the final searing stage. A charcoal or gas grill imparts a delicious smoky char, while a blazing hot cast iron skillet creates an incredible crispy crust. A broiler can also work in a pinch for caramelizing the surface.
- Kitchen Shears or Sharp Knife: For easily and cleanly separating the tender ribs into individual portions after cooking and searing.
- For a comprehensive guide to my favorite kitchen tools that make cooking a breeze, including sous vide essentials, visit my curated list here.
Step-by-Step Method for Delicious Sous Vide Pork Ribs
Embark on this culinary adventure and follow these steps to create pork ribs that will become an instant favorite. The process is straightforward, but each stage plays a vital role in achieving ultimate tenderness and flavor.
1. Prepare and Season the Ribs (Overnight Marination Recommended)
Begin by meticulously patting down your two racks of pork ribs with paper towels until they are completely dry. Removing surface moisture is a critical first step, as it helps the seasoning adhere properly and sets the stage for a superior crust later. Now, it’s time to season! Liberally apply kosher salt, freshly ground black pepper, and your chosen dry rub (such as Chili Con Carne Seasoning) to both sides of each rib rack. Don’t shy away from being generous with the salt; the long cooking process of sous vide tends to mellow out the saltiness, so a robust initial seasoning is key to perfectly flavored ribs.
Once seasoned, carefully place each individual rack into a separate vacuum sealable bag. Using a vacuum sealer, remove all air to create an airtight seal. If you’re using the water displacement method with heavy-duty freezer bags, slowly submerge the bag into a pot of water, allowing the water pressure to force the air out before sealing the bag just above the waterline. With your ribs securely sealed, transfer the bags to the refrigerator and allow them to marinate overnight, or for at least 8 hours. This extended marination time in a vacuum-sealed environment allows the flavors to deeply penetrate the meat, enhancing its overall taste and tenderness.
2. Sous Vide Cooking: The Path to Unrivaled Tenderness
The next morning, or once your ribs have finished marinating, prepare your sous vide water bath. Fill a large pot or food-grade container with water and place your immersion circulator. Set the desired temperature to 175°F (79.4°C). While culinary expert Douglas Baldwin suggests a cooking range of 8-12 hours for ribs at this temperature, we’ve discovered that 9 hours is the sweet spot for achieving ribs that are incredibly tender while still holding their shape beautifully. If you prefer them to be truly “falling off the bone” with almost no resistance, consider extending the cooking time to 10-12 hours. Allow the water bath to reach the precise target temperature before moving to the next step.
Once the water is heated, carefully lower the two vacuum-sealed packets of seasoned ribs into the water bath. Ensure they are fully submerged; you might need to use a heavy plate or weights to keep them from floating. The beauty of sous vide truly shines during this phase: you can set it and forget it! Let the ribs cook undisturbed for the full 9 hours. This hands-off cooking method means you’re free to attend to other tasks, knowing that your ribs are being perfectly cooked to an ideal tenderness.
3. The Grand Finale: Searing for a Perfect Crust
After the 9-hour sous vide bath, carefully remove the rib packets from the water. Transfer the cooked ribs from their bags onto a clean plate or cutting board. This next step is paramount for achieving that desirable barbecue finish: thoroughly pat the ribs dry with paper towels. Any residual moisture on the surface will hinder the browning process and prevent the formation of a crisp, flavorful crust. So, take your time and ensure they are as dry as possible.
Now, prepare for the glorious sear! Preheat your outdoor grill to high heat, or place a heavy cast-iron skillet on your stovetop over high heat until it’s screaming hot. Carefully place the dried rib racks onto the hot surface. Sear them for approximately 2-3 minutes per side, or until a beautiful, deeply caramelized and slightly charred crust develops. The goal here is purely to create flavor and texture on the exterior, not to cook the ribs further, as they are already perfectly done. Watch them closely to prevent burning. If you wish to apply a barbecue sauce, brush it on during the final minute of searing, allowing it to caramelize slightly onto the ribs.
4. Slice and Serve Your Masterpiece
Once your ribs have achieved that perfect sear, transfer them to a clean cutting board. Using a pair of sharp kitchen shears or a very sharp chef’s knife, carefully separate the ribs into individual portions. You’ll notice how incredibly tender the meat is; it might even effortlessly pull away from the bone as you cut. Arrange the succulent ribs on a serving platter and prepare for an unforgettable dining experience.
Upon tasting, you’ll be amazed by the fork-tender texture and the rich, concentrated flavor that this sous vide method delivers. A small but important note from my own experience: remember to be quite heavy-handed with the salt during the initial seasoning. The long, slow cooking process of sous vide, combined with some moisture loss during searing, can sometimes mellow the saltiness more than expected. A well-seasoned rib from the start truly makes all the difference, ensuring a perfectly balanced and deeply satisfying flavor profile.
Sauce Pairings and Serving Suggestions for Your Perfect Ribs
While these sous vide pork ribs are bursting with flavor on their own, a complementary sauce or thoughtful side dishes can elevate your meal to new heights. My culinary journey sometimes means I’m a bit “too lazy” to whip up an elaborate homemade barbecue sauce, especially when trying to maintain specific dietary goals like Paleo, which often means avoiding added sugars. However, that doesn’t mean you have to skip the saucy goodness entirely!
- Smart Sauce Choices: If you’re opting for convenience, look for high-quality, store-bought barbecue sauces that prioritize natural ingredients and have lower sugar content. There are many excellent Paleo or keto-friendly options available now that deliver great flavor without compromise. Alternatively, a quick, homemade vinegar-based sauce can be incredibly refreshing and simple to make, often just requiring apple cider vinegar, a touch of mustard, pepper, and perhaps a dash of natural sweetener like a date paste or maple syrup (if your diet allows).
- Bright Herb Garnishes: A sprinkle of fresh, finely chopped herbs like parsley or cilantro can add a vibrant color and a burst of fresh flavor that cuts through the richness of the ribs.
- Classic and Creative Sides: These versatile sous vide ribs pair beautifully with a wide array of side dishes. Consider classic barbecue accompaniments such as creamy coleslaw, perfectly grilled corn on the cob, or a crisp green salad. For those following a Paleo lifestyle, roasted sweet potatoes, a vibrant cauliflower rice, or steamed green beans tossed with garlic are fantastic choices that complement the robust flavor of the pork without heavy starches.
- Family-Style Presentation: Arrange the cut ribs on a large platter, perhaps with a small bowl of dipping sauce on the side, allowing everyone to easily serve themselves. The presentation is as delightful as the taste!
Ultimately, the beauty of these ribs lies in their inherent deliciousness, allowing you the freedom to customize your meal with your favorite pairings. Enjoy the process of creating a memorable dining experience around this truly spectacular main course!
Hungry for more innovative and health-conscious recipe ideas? Be sure to explore my extensive Recipe Index, where a world of culinary inspiration awaits. Additionally, you can discover exclusive recipes and invaluable cooking tips on my iPhone and iPad app, designed to make healthy eating delicious and accessible. Don’t forget to check out my acclaimed cookbooks: Nom Nom Paleo: Food for Humans (Andrews McMeel Publishing 2013), Ready or Not! (Andrews McMeel Publishing 2017), and Nom Nom Paleo: Let’s Go! (Andrews McMeel Publishing 2021). Happy cooking and bon appétit!
Printer-Friendly Recipe Card: Sous Vide Pork Ribs
Sous Vide Pork Ribs
Cook Time: 9 hrs 5 mins
Total Time: 17 hrs 5 mins
Servings: 8
Author: Michelle Tam
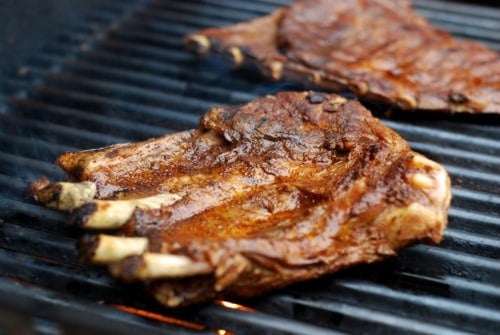
These ribs are incredibly easy to make with the sous vide method and deliver unbelievably tender, flavorful results!
Ingredients
- 2 racks pork ribs (~1½ – 2 pounds each)
- Diamond Crystal kosher salt (or preferred kosher salt)
- Freshly ground black pepper
- Chili Con Carne Seasoning or your favorite dry rub
Instructions
- Dry the two racks of pork ribs thoroughly with paper towels. Liberally season them with salt, pepper, and chili con carne seasoning (or your chosen dry rub). Be generous with the salt!
- Vacuum seal each rack of ribs individually and place them in the fridge to marinate overnight (minimum 8 hours for best flavor).
- When ready to cook, fill a large pot with water and set your sous vide device to 175°F (79.4°C). Once the water reaches temperature, carefully submerge the sealed rib packets. Cook for 9 hours.
- After cooking, remove the ribs from their bags and pat them completely dry with paper towels. This step is crucial for achieving a good sear.
- Preheat a grill to high heat, or heat a cast iron pan until very hot. Sear the rib racks for 2-3 minutes per side, creating a beautiful caramelized crust.
- Use sharp kitchen shears or a knife to separate the ribs into individual servings. Serve immediately and enjoy the tender, flavorful results!
Nutrition Information (per serving)
Calories: 650kcal | Carbohydrates: 5g | Protein: 36g | Fat: 54g | Fiber: 3g | Sugar: 1g
Nutrition information is automatically calculated and should only be used as an approximation. Actual values may vary based on ingredients and preparation methods.
Like this recipe? We’d love to hear your thoughts! Leave a comment below!