
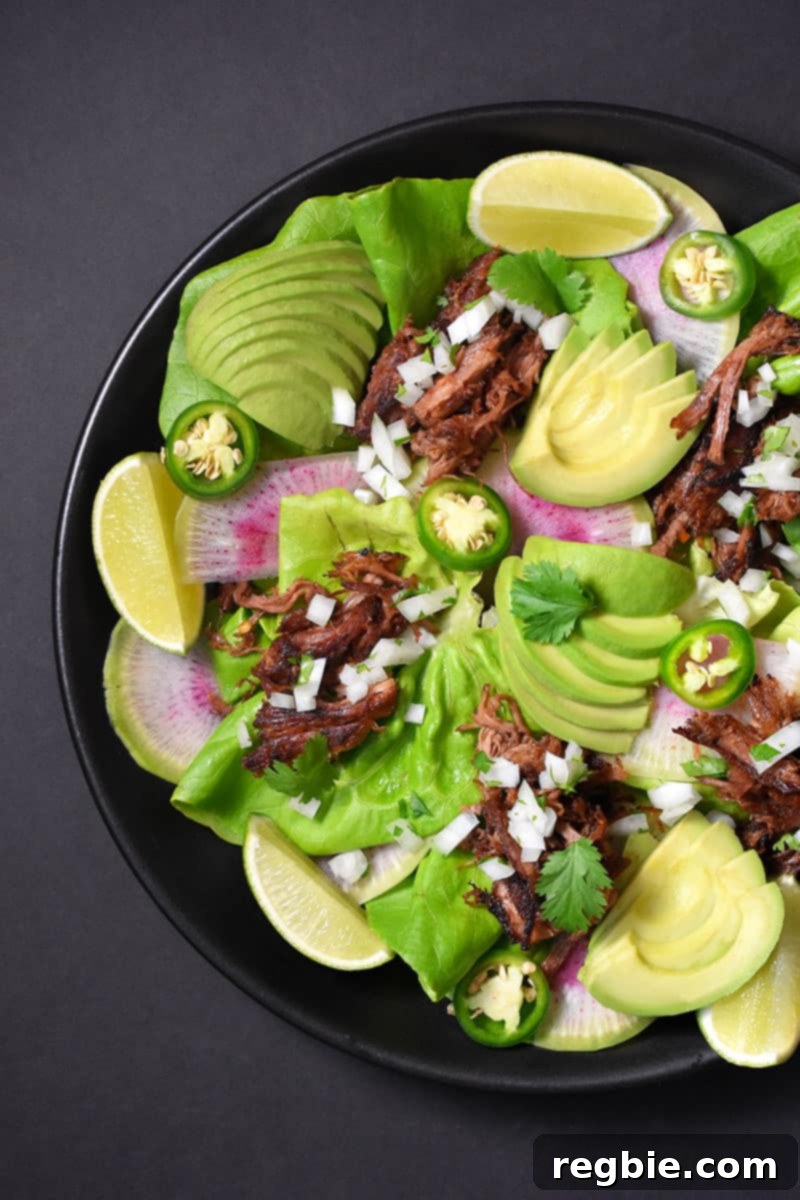
Craving the rich, tender, and irresistibly crispy Mexican shredded pork that transports you straight to your favorite taqueria? Look no further! This **Instant Pot Carnitas recipe** is a game-changer, delivering authentic flavors and textures with incredible ease. We’ve perfected a method that’s not only **Whole30-friendly, Paleo, and low carb**, but also guarantees juicy pork with those coveted golden, crispy edges every single time. Get ready to make homemade carnitas a staple in your kitchen!
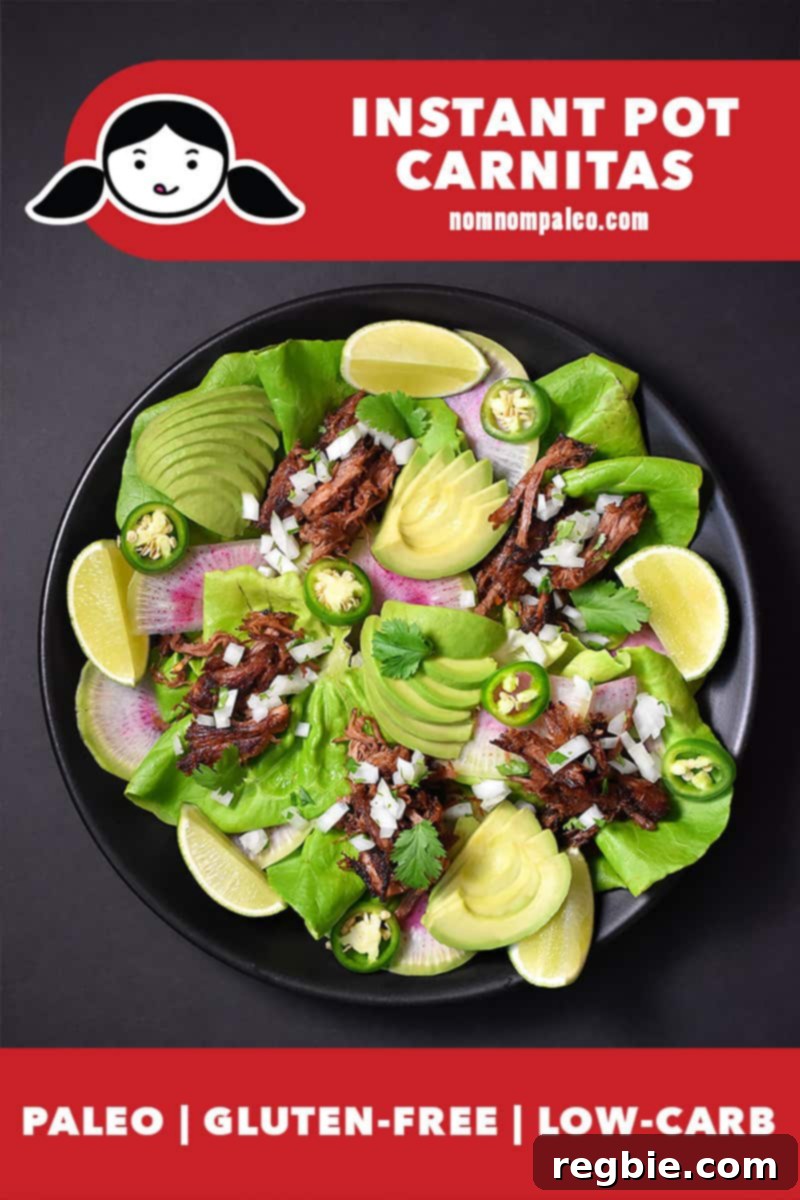
Table of Contents
- Mastering Restaurant-Quality Carnitas with Ease
- What Exactly Is Carnitas?
- Why the Instant Pot is Your Carnitas Secret Weapon
- Can I Use a Different Protein?
- Slow Cooker or Crock Pot Alternative
- Essential Ingredients for Perfect Instant Pot Carnitas
- For the Instant Pot Pork Carnitas
- Optional Garnishes and Toppings to Elevate Your Meal
- My Go-To Instant Pot Model
- Step-by-Step: How to Make Instant Pot Carnitas
- Achieving Perfectly Crispy Carnitas
- Stovetop Crisping Method
- Oven Broiler Crisping Method
- Creative Ways to Serve Your Carnitas
- Delicious Side Dishes to Complement Your Carnitas
- Storage Tips for Leftover Carnitas
- Repurposing Leftover Carnitas: Endless Possibilities
Mastering Restaurant-Quality Carnitas with Ease
Imagine succulent, flavorful carnitas that taste like they were lovingly slow-braised for hours, yet come together quickly in your own kitchen. This isn’t just a dream; it’s the reality with our foolproof Instant Pot method! For years, our family has been captivated by the rich, savory depth of authentic Mexican shredded pork, especially when it’s crisped to perfection in a hot skillet. Carnitas always tops our list when ordering tacos out.
At home, I once attempted to pass off Instant Pot Kalua Pig (or Slow Cooker Kalua Pig) as carnitas, but my children, discerning connoisseurs as they are, quickly saw through my charade. While they happily devoured the tender pork, their critique was clear: “This is excellent kalua pig, Mom, but it’s not quite carnitas!” They instinctively recognize that true carnitas boasts a uniquely profound and intricate flavor profile, distinct from other pork preparations.
Inspired by their refined palates, I rolled up my sleeves and dedicated myself to crafting a genuinely authentic and easy-to-follow carnitas recipe for home cooks. This recipe delivers all the complex, savory notes and mouthwatering tenderness you expect from your favorite Mexican eatery, making it a new family favorite!
What Exactly Is Carnitas?
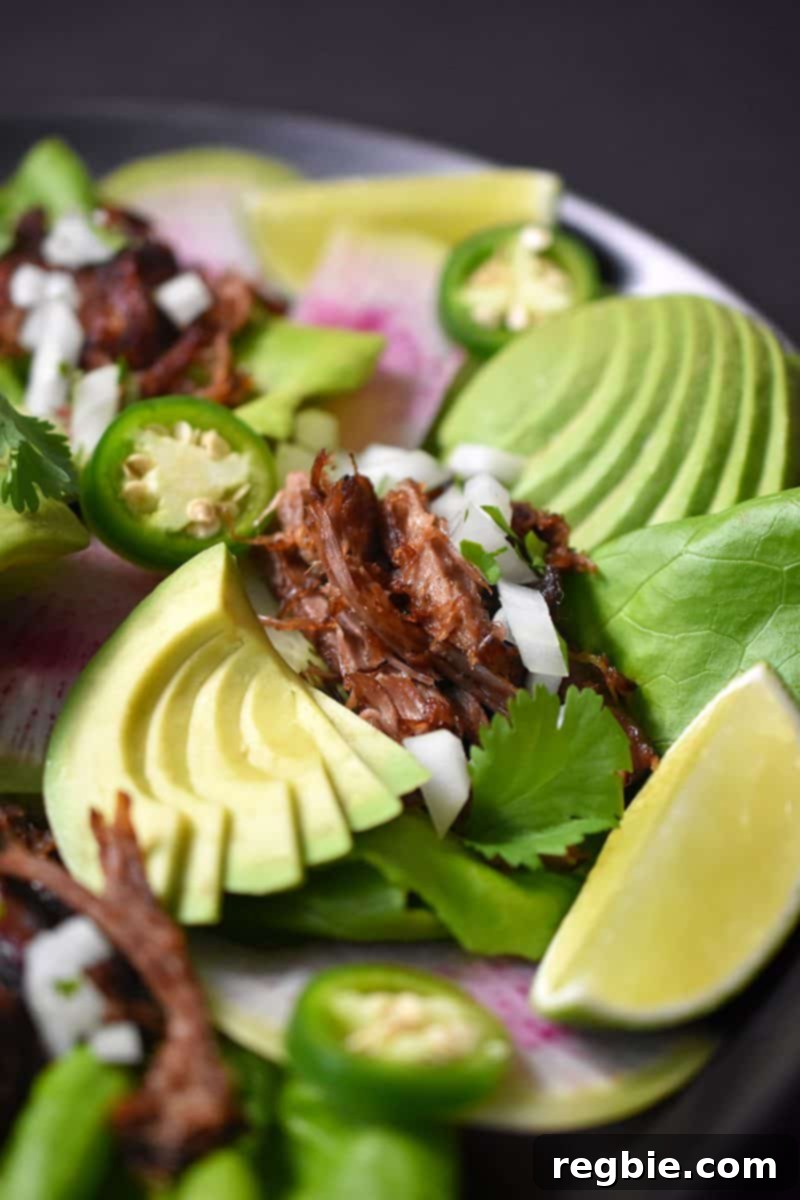
Carnitas, translating to “little meats” in Spanish, is a quintessential Mexican delicacy celebrated for its deeply flavorful and incredibly tender shredded pork. Traditionally, this dish involves slowly simmering pork shoulder (also known as pork butt) in its own fat, often referred to as a confit, along with aromatic ingredients like onions, garlic, oregano, and a touch of orange. This lengthy braising process renders the meat exceptionally tender and moist, allowing it to fall apart effortlessly. The final, crucial step involves crisping the pork in a hot pan, creating those irresistible crunchy bits that contrast beautifully with the tender interior.
While classic carnitas recipes demand hours of slow cooking on the stovetop or in the oven, my innovative approach leverages the magic of the Instant Pot. This modern marvel allows us to achieve that coveted tender, flavorful result in a fraction of the time, without compromising on authenticity or taste. The pressure cooking method infuses the pork with all the rich spices and citrus notes, setting the stage for the ultimate crispy finish.
Why the Instant Pot is Your Carnitas Secret Weapon
The Instant Pot is truly a game-changer for making carnitas, transforming a traditionally time-consuming dish into an accessible weeknight meal. Here’s why it’s the perfect tool:
- **Speed and Efficiency:** Pressure cooking significantly reduces the cooking time. Instead of hours of simmering, you can have fall-apart tender pork in under an hour of active cooking.
- **Unmatched Tenderness:** The high-pressure environment forces moisture and flavor deep into the meat, resulting in pork that is unbelievably tender and juicy, mirroring the texture achieved through long, slow braising.
- **Hands-Off Cooking:** Once you set the Instant Pot, it does all the hard work. This frees you up to prepare your toppings, sides, or simply relax, without constantly monitoring a pot on the stove.
- **Flavor Infusion:** The sealed environment of the Instant Pot ensures that all the aromatic spices, garlic, onion, and orange notes are intensely infused into the pork, creating a deeply rich and authentic flavor profile.
- **Less Mess:** A single pot means fewer dishes to clean, making your cooking experience even more enjoyable.
Embracing the Instant Pot allows you to enjoy truly restaurant-quality carnitas with maximum convenience and minimal effort.
Can I Use a Different Protein?
While pork is the traditional star of carnitas, you absolutely can adapt this recipe using other proteins if you prefer not to eat pork or are looking for a delicious variation. The key is choosing a cut that isn’t too lean, as the fat content is crucial for achieving moist, flavorful, and shreddable results. Dry, powdery meat is definitely something we want to avoid!
- **Chicken Thighs:** For a poultry alternative, boneless and skinless chicken thighs are an excellent choice. They have enough fat to remain juicy during pressure cooking. You will need to significantly decrease the cooking time for chicken; aim for about **10 minutes under high pressure** with a natural pressure release.
- **Beef Options:** If beef is your preference, cuts like cubed chuck roast, boneless short ribs, or brisket work wonderfully. These cuts are known for their marbling and tenderness when slow-cooked, making them perfect substitutes. For beef, you can follow the cooking time and instructions for pork exactly as written in this recipe.
- **Duck Carnitas:** For a truly gourmet twist, consider duck! My third cookbook, Nom Nom Paleo: Let’s Go!, features a fantastic duck carnitas recipe specifically for those who love this rich game bird.
Slow Cooker or Crock Pot Alternative
Absolutely! If you don’t own an Instant Pot or simply prefer the low-and-slow method, this carnitas recipe can be easily adapted for a slow cooker or Crock-Pot. While it will take significantly longer, the result will still be incredibly tender and flavorful.
To cook your carnitas in a slow cooker:
- Follow the initial steps for seasoning the pork and adding all the aromatic ingredients (orange zest and juice, garlic, onion, bay leaf) to the slow cooker insert.
- Set your slow cooker to the **LOW** setting and cook for approximately **8 to 10 hours**, or until the pork is fork-tender and can be easily shredded with two forks.
- Once cooked, proceed with the crisping steps (stovetop or oven broiler) as outlined in the recipe to achieve those delicious crispy edges.
The slow cooker offers convenience for those who prefer to set it and forget it, allowing the flavors to meld beautifully over an extended period, though without the speed of the Instant Pot.
Essential Ingredients for Perfect Instant Pot Carnitas
Crafting these succulent carnitas requires a blend of traditional spices and fresh aromatics that work in harmony to create their iconic flavor profile. Here’s what you’ll need:
For the Instant Pot Pork Carnitas
- Boneless pork shoulder roast or pork butt: This is the star of our carnitas. Pork shoulder, often called Boston butt, is rich in marbling and connective tissue, which breaks down during cooking to yield incredibly moist, shreddable, and fall-apart tender pork. It’s crucial for achieving that authentic juicy texture, so please avoid leaner cuts like pork tenderloin, which will dry out.
- Orange: A whole orange is vital. The zest contributes bright, aromatic oils that cut through the richness of the pork, while the juice adds a sweet and tangy liquid base, infusing the meat with classic Mexican citrus notes.
- Garlic: A generous amount of fresh garlic provides a pungent, foundational flavor that is indispensable in Mexican cuisine.
- Onion: Yellow or white onion, quartered, adds a subtle sweetness and depth to the cooking liquid, becoming deliciously tender as it braises with the pork.
- Ground cumin: Earthy and warm, cumin is a cornerstone spice in many Mexican dishes, imparting a distinctive savory aroma.
- Dried oregano: Preferably Mexican oregano, which has a more robust, citrusy, and slightly minty flavor compared to Mediterranean varieties, enhancing the authentic taste.
- Bay leaf: A single bay leaf contributes a subtle, herbaceous note that complements the other spices beautifully.
- Crushed red pepper flakes: For a gentle warmth and a hint of spice that awakens the palate without overwhelming the dish. Adjust to your heat preference.
- Diamond Crystal kosher salt: Essential for seasoning the pork evenly and drawing out its natural flavors. We’ll add more to taste after cooking if needed.
- Ghee, avocado oil, or lard: Used for the final crisping stage, these fats have high smoke points and impart a wonderful golden-brown crust and extra richness to your carnitas.
Optional Garnishes and Toppings
No carnitas feast is complete without a vibrant array of fresh garnishes and toppings. These additions provide texture, acidity, and freshness, making each bite a delightful experience.
- Minced fresh cilantro: Bright and herbaceous, cilantro adds a refreshing counterpoint to the rich pork.
- Finely diced white onion: Offers a crisp texture and sharp, fresh bite that complements the savory carnitas.
- Haas avocados or guacamole : Creamy, rich avocado or a dollop of homemade guacamole adds a luxurious texture and healthy fats.
- Salsa or pico de gallo: A fresh, vibrant salsa or pico de gallo brings juicy tang and a medley of fresh flavors.
- Limes: A squeeze of fresh lime juice just before serving is absolutely essential! Its acidity brightens all the flavors and adds a zesty finish that elevates the entire dish.
- Sliced radishes: Provides a peppery crunch and beautiful color.
- Sliced jalapeño peppers: For those who enjoy an extra kick of heat and fresh spice.
- Butter lettuce, Siete grain-free tortillas, or corn tortillas (if not paleo or Whole30): Your vessel of choice! Butter lettuce offers a crisp, low-carb wrap, while Siete grain-free tortillas are perfect for paleo/Whole30 adherence. Traditional corn tortillas are a delicious option if your dietary preferences allow.
My Go-To Instant Pot Model
Step-by-Step: How to Make Instant Pot Carnitas
Making delicious, tender carnitas in your Instant Pot is surprisingly straightforward. Follow these steps for an authentic result:
First, prepare your pork. Take your boneless pork shoulder roast (also known as Boston butt), and using a sharp knife, cut it into uniform 2-inch cubes. This ensures even cooking and helps the meat absorb flavors more effectively.
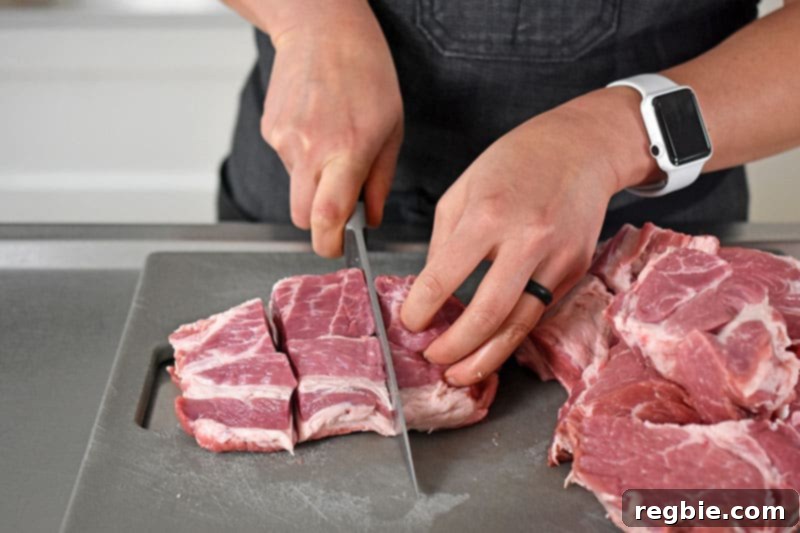
Transfer the cubed pork to a large mixing bowl. Generously sprinkle it with the Diamond Crystal kosher salt, ground cumin, crushed red pepper flakes, and dried oregano. These spices are key to building the foundational Mexican flavor profile of the carnitas.
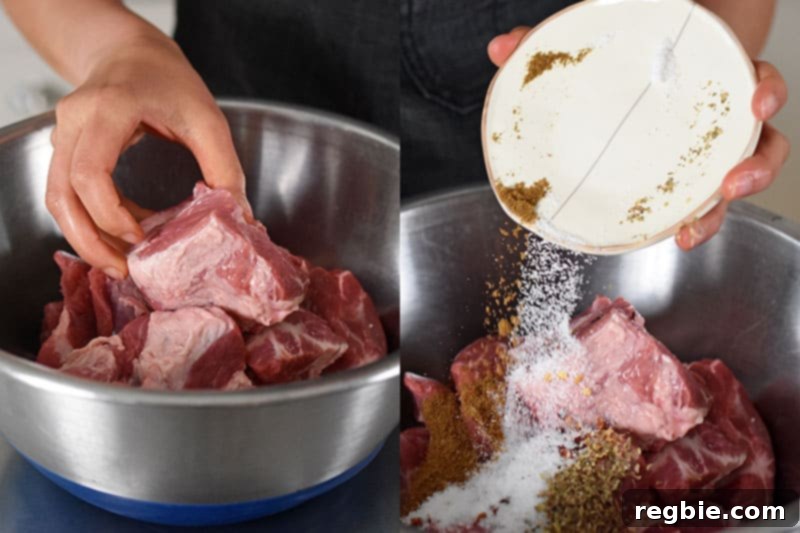
Thoroughly toss the pork cubes to ensure they are evenly coated with all the fragrant spices. This step guarantees that every piece of meat is infused with flavor. Once seasoned, transfer the pork into the Instant Pot insert, ready for pressure cooking.
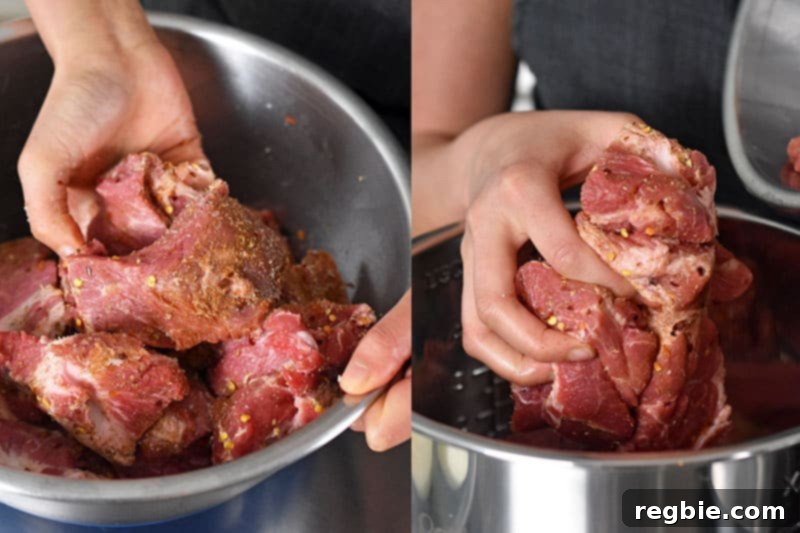
Next, prepare your orange. Using a vegetable peeler, carefully peel wide strips of zest from the orange. Be sure to stay close to the surface, avoiding the white pith underneath, as the pith can impart a bitter taste to your carnitas.
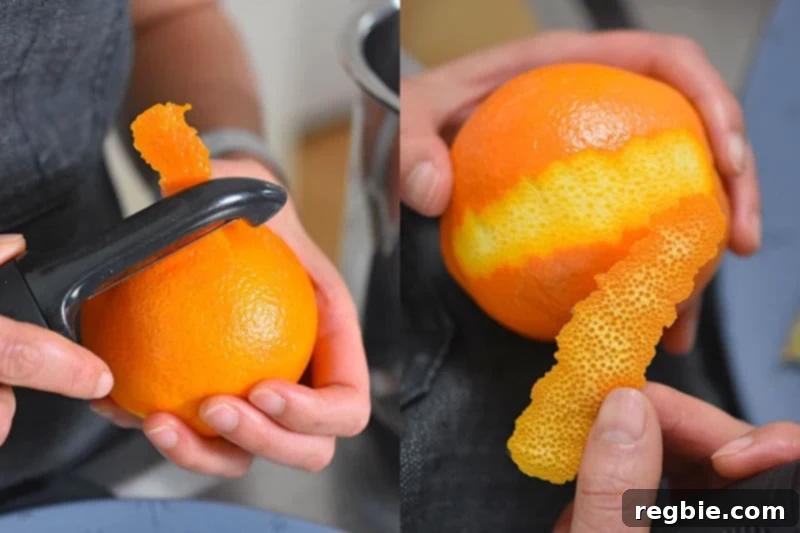
Add the aromatic orange zest strips to the Instant Pot, along with the peeled garlic cloves, the quartered yellow onion, and the bay leaf. These ingredients will infuse the pork with a complex, savory, and slightly citrusy depth during cooking.
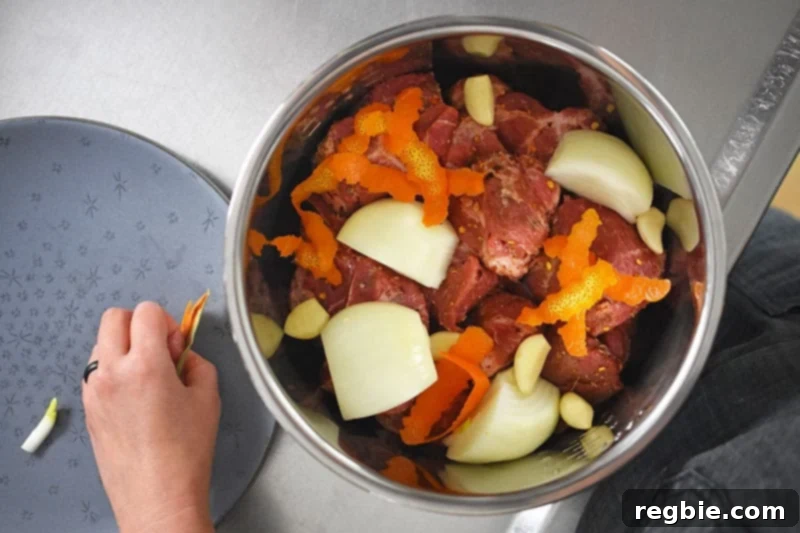
After zesting, cut the orange in half and squeeze out all its juice. The fresh orange juice provides essential liquid for the pressure cooking process and adds a bright, tangy element that balances the richness of the pork.
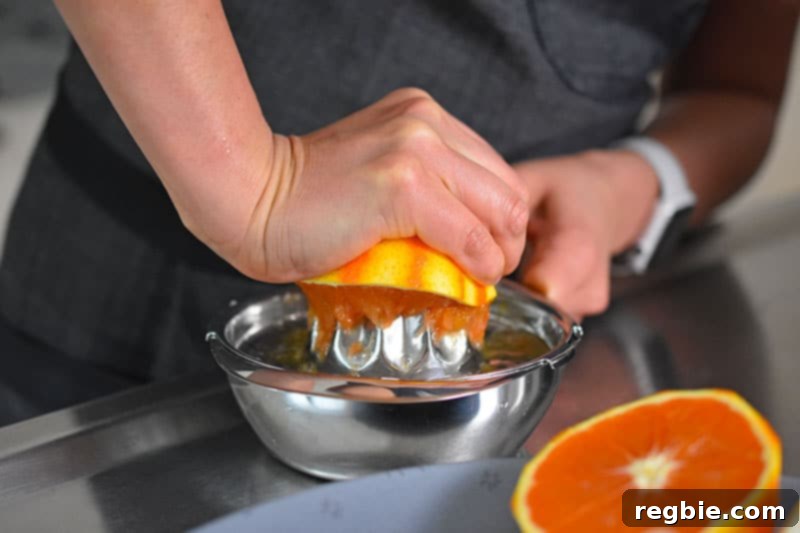
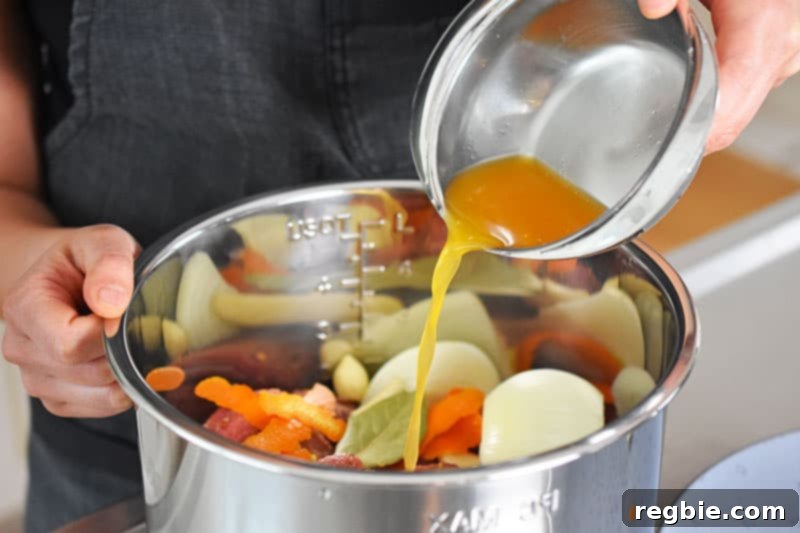
Pour the freshly squeezed orange juice directly into the Instant Pot insert, over the pork and aromatics. This liquid will create the savory braising broth during pressure cooking.
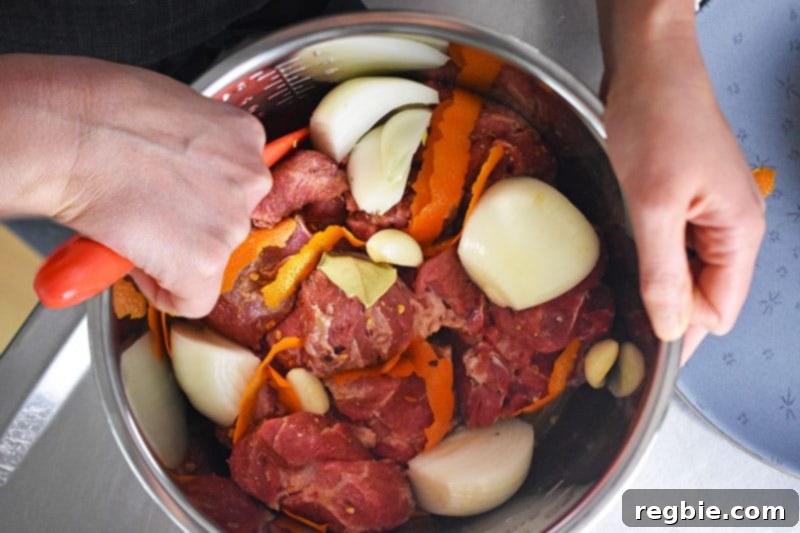
Give all the ingredients a good stir within the Instant Pot insert. This ensures that the pork is well-submerged in the liquid and all the flavors are evenly distributed, ready for cooking.
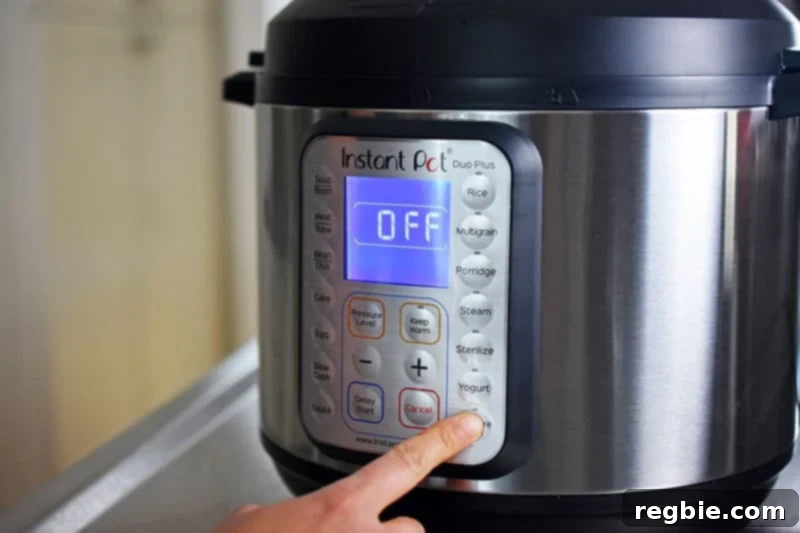
Place the insert back into the Instant Pot base and secure the lid, ensuring it’s locked into place. Crucially, verify that the steam release valve on the lid is set to the “Sealing” position. Select the “Manual” or “Pressure Cook” button (depending on your Instant Pot model) and set the cooking time to **35 minutes on high pressure**. For stovetop pressure cooker users, cook under high pressure for 30 minutes. Once cooking is complete, allow the pressure to release naturally for about 20 minutes. This natural release method is vital for tenderizing the meat and preventing it from drying out.
After the 20-minute natural pressure release, if there’s any remaining pressure (indicated by the float valve), you can carefully manually vent it by turning the release valve. Once all pressure is gone, open the lid. At this stage, discard the cooked garlic, onion, and bay leaf as their flavors have already been infused into the pork. Taste the pork for seasoning and add additional salt if necessary. The pork is now incredibly tender and can be shredded and served as is, or you can store it in the refrigerator (along with all its flavorful liquid and fat) for up to 4 days, or freeze it for up to 4 months for future meals.
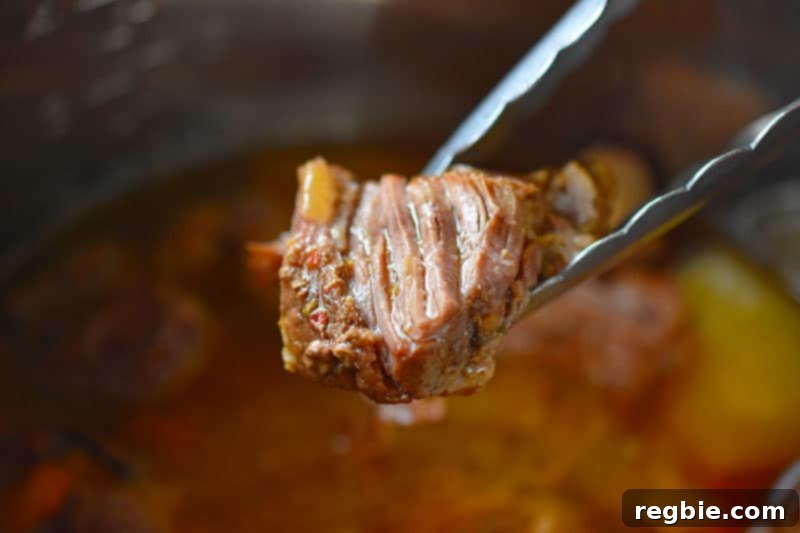
However, for the ultimate carnitas experience, I always advocate for the final crisping stage. I typically scoop out the cooked pork with a slotted spoon and fry it in a hot cast iron skillet until delightful crunchy bits form. This crispy, tender pork is then ready to be piled onto fresh lettuce leaves (or grain-free tortillas) and topped with all your favorite taco fixings.
How to Fry Up Crispy Carnitas
The hallmark of truly outstanding carnitas is that delightful contrast between tender, juicy pork and perfectly golden, crispy edges. After pressure cooking, the pork is incredibly tender, but it needs a final touch to achieve that signature crunch. Here are two effective methods for crisping your carnitas:
Stovetop Crisping Method
This method offers excellent control over the crispness and is ideal for smaller batches or if you want to cook and crisp immediately.
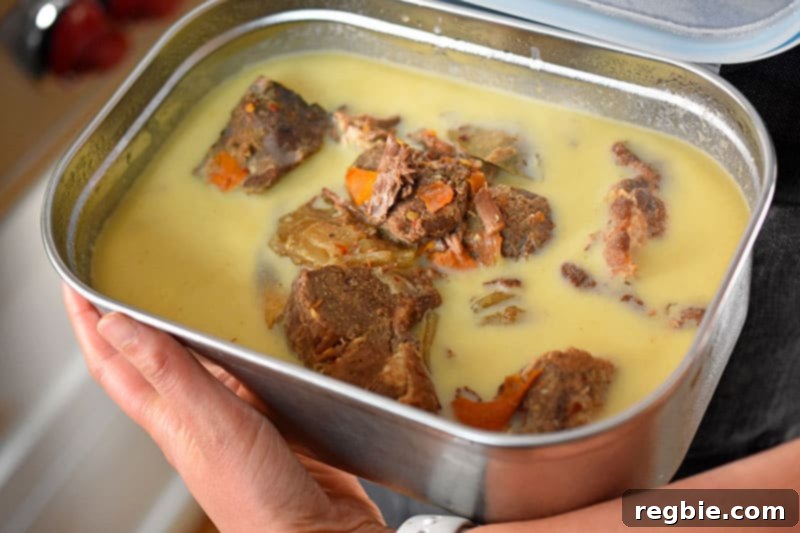
- **Prepare the Pork:** If using chilled pork, take it out of the fridge. Notice the hardened fat cap on top of the liquid – this is flavorful, but you’ll want to discard most of it for crisping, saving the flavorful liquid below. Using a slotted spoon, dig out the pieces of carnitas from the liquid.
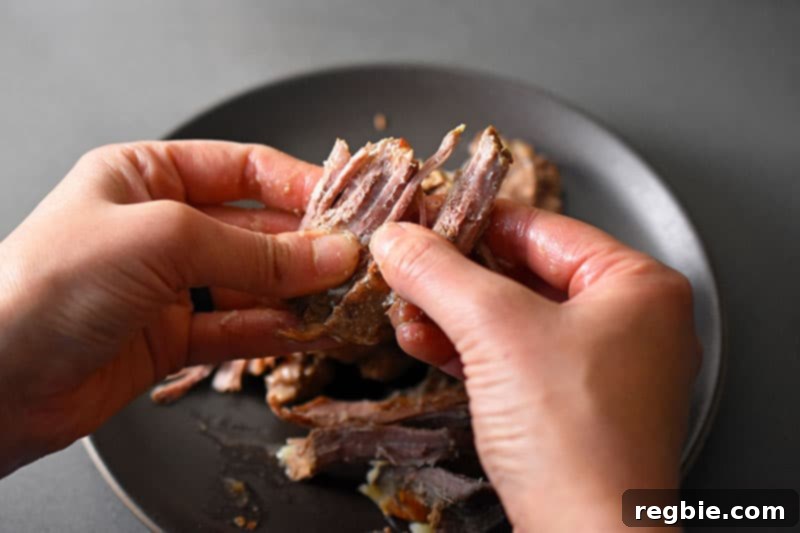
- **Shred the Meat:** While the pork is still slightly warm or at room temperature, use your fingers (or two forks) to shred the tender meat into smaller, manageable pieces. This creates more surface area for crisping.
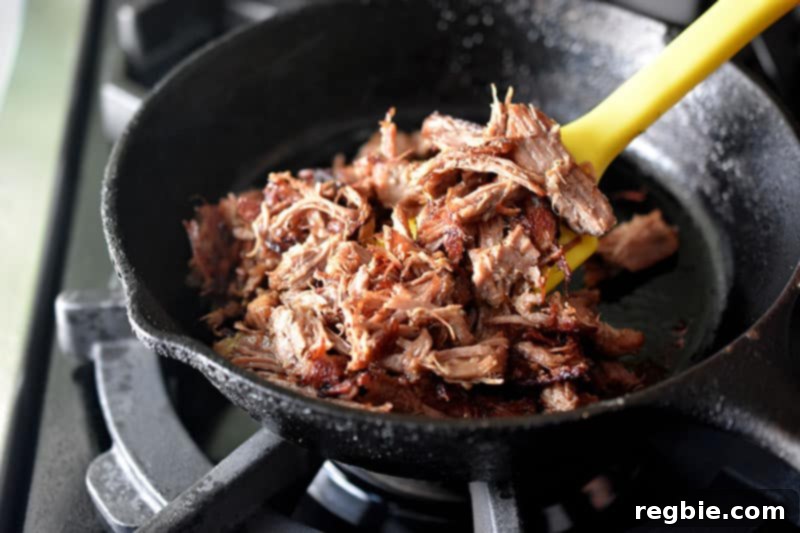
- **Heat the Skillet:** Heat a large cast iron skillet (or any heavy-bottomed pan) over medium-high heat. Add a tablespoon of your preferred high-temperature cooking fat (ghee, avocado oil, or lard) to the hot pan. Ensure the fat is shimmering but not smoking.
- **Fry to Perfection:** Once the pan is hot and the fat is ready, add the shredded pork in a single layer if possible, avoiding overcrowding. Fry the pork, stirring occasionally, for 5-10 minutes. Allow the pork to sit undisturbed for a few minutes between stirs to develop a deep golden-brown crust and achieve your desired crispness.
In the Oven (Broiler) Crisping Method
This is a fantastic option for crisping a larger batch of carnitas all at once, offering even browning with minimal effort.
- **Preheat Broiler:** Position an oven rack about six inches from the heating element and preheat your broiler on high.
- **Prepare Baking Sheet:** Arrange the shredded carnitas in a single layer on a rimmed baking sheet. Ensure the pieces are spread out and not overlapping to allow for maximum crisping.
- **Broil to Crispness:** Carefully slide the baking sheet under the broiler. Broil for approximately 4 to 8 minutes, watching closely to prevent burning. The pork will quickly develop golden, crispy edges. You may need to stir once halfway through for more even browning, or leave it undisturbed for a truly crispy top layer.
Both methods will transform your tender Instant Pot pork into the crispy, flavorful carnitas you know and love!
Creative Ways to Serve Your Carnitas
With your perfectly crispy and tender carnitas ready, it’s time to assemble your feast! While tacos are the classic choice, these versatile carnitas can elevate a variety of dishes. Here’s how to prepare and serve them:
- **Prepare Your Toppings:** While your pork is crisping, take a moment to prepare your garnishes. Combine the finely diced white onion with fresh minced cilantro in a small bowl. Wash and spin dry your butter lettuce leaves for crisp wraps. Slice your Haas avocados (or prepare a fresh batch of guacamole), thinly slice radishes, and cut jalapeños if using. Don’t forget your favorite salsa or pico de gallo, and cut those zesty lime wedges!
- **Assemble Your Tacos (or Bowls!):** Lay out your lettuce wraps, grain-free tortillas, or corn tortillas. Spoon a generous portion of the crispy carnitas onto each. Then, let everyone customize their creation with a colorful medley of fresh cilantro, diced onion, creamy avocado, crisp radishes, spicy jalapeños, and a dollop of salsa. A final squeeze of fresh lime juice is a must for that bright, finishing touch!
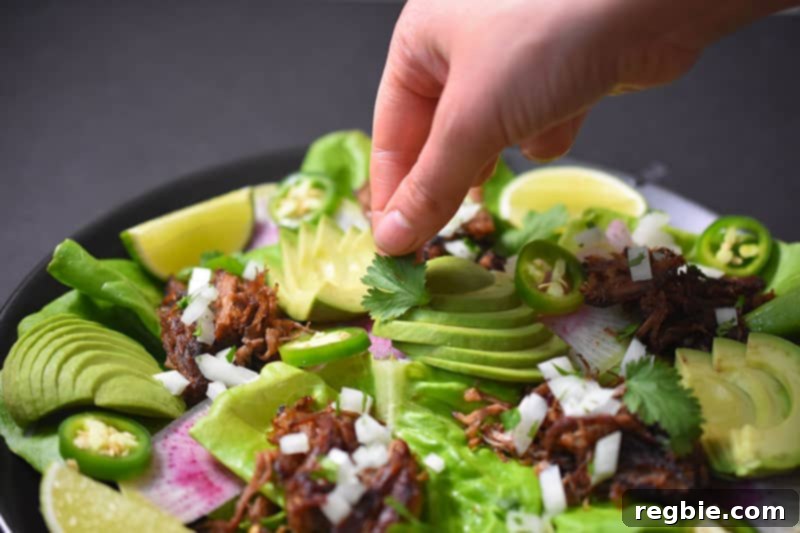
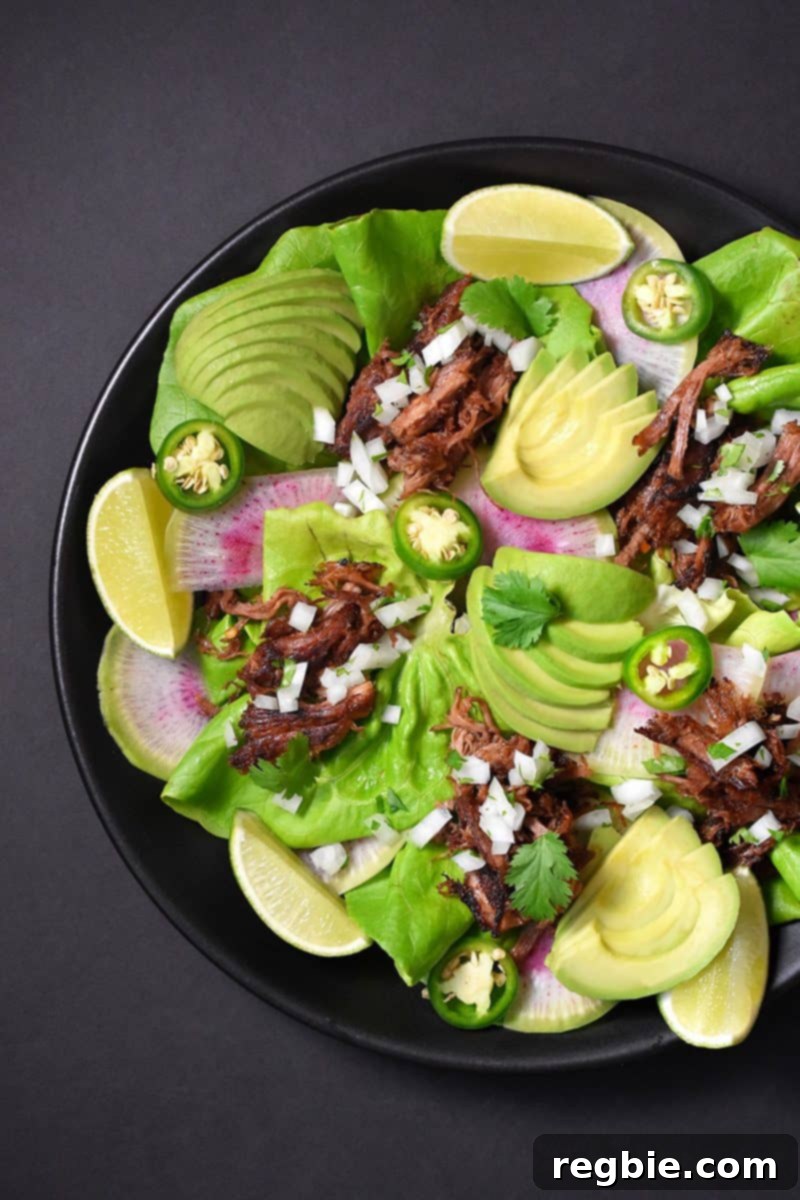
Beyond traditional tacos, consider serving your carnitas as a hearty filling for burrito bowls, topping for a vibrant green salad, or even nestled into breakfast scrambles. The possibilities are endless!
Delicious Side Dishes to Complement Your Carnitas
Pairing your flavorful Instant Pot Carnitas with the right side dishes can transform your meal into a full Mexican-inspired feast. Here are some fantastic options that range from paleo-friendly to classic comforts:
- **Mexican Cauliflower Rice**: A low-carb, grain-free alternative to traditional rice, packed with vibrant flavors and textures. It’s the perfect paleo-friendly base for a carnitas bowl.
- **Mexican Watermelon Salad**: A refreshing and unexpected side that offers a sweet and savory contrast with its juicy watermelon, fresh herbs, and a hint of spice.
- **Traditional Mexican Rice + Refried Beans or Whole Black Beans**: For those not strictly adhering to paleo or Whole30, classic Mexican rice and creamy refried beans or wholesome black beans are quintessential accompaniments that create a satisfying and hearty meal. Enjoy them if they fit your dietary preferences!
- **Simple Green Salad**: A light and crisp green salad with a zesty vinaigrette can provide a refreshing balance to the rich carnitas.
- **Grilled Vegetables**: Asparagus, bell peppers, or zucchini grilled to perfection make for a healthy and flavorful side.
Storage Tips for Leftover Carnitas
One of the best things about making a generous batch of Instant Pot Carnitas is having delicious leftovers ready for future meals. Proper storage ensures your carnitas remain juicy and flavorful.
After cooking, allow the carnitas to cool slightly. Then, transfer the leftover pork along with all its flavorful cooking liquid and rendered fat into an airtight container. Store this in the refrigerator for up to **four days**. The fat cap that solidifies on top acts as a protective layer, sealing in moisture and flavor.
For longer storage, carnitas freeze beautifully! In an airtight, freezer-safe container, your carnitas can be stored in the freezer for up to **4 months**. When you’re ready to enjoy them, simply thaw the pork overnight in the refrigerator. This slow thawing process helps preserve the meat’s texture and makes reheating a breeze.
When reheating, I typically discard the solidified fat cap (though some prefer to keep a bit for extra richness) and scoop out the desired amount of meat. I then toss the pieces into a hot skillet to crisp them up, just like fresh carnitas. The reserved cooking liquid, often referred to as “carnitas juice,” is also incredibly versatile and can be used as a tasty base for soups, stews, or savory sauces, adding a concentrated burst of flavor.
Repurposing Leftover Carnitas: Endless Possibilities
Leftover Instant Pot Carnitas are a gift that keeps on giving! Their tender texture and robust flavor make them incredibly versatile, allowing you to quickly whip up a variety of new and exciting meals throughout the week. Don’t let a single shred go to waste!
- **Build Hearty Bowls & Salads**: Sprinkle crispy carnitas generously over a large green salad for a satisfying lunch, or create vibrant **cauliflower rice burrito bowls** with your favorite toppings. It’s also a fantastic addition to a comforting bowl of vegetable soup, adding depth and protein.
- **Elevate Breakfast & Brunch**: Tuck carnitas into savory frittatas, quesadillas (if applicable to your diet), nachos, scrambles, or omelets for a truly elevated breakfast or brunch experience.
- **Stir-Fries & Fried Rice**: Transform your carnitas into an Asian-inspired delight by adding it to a cauliflower fried rice dish or a simple stir-fry for a quick and flavorful dinner.
- **Unique Fillings**: Use the shredded pork as the savory filling for creative dishes like Egg Foo Young, delicious Paleo Meat Pies, or hearty burritos (Siete now offers fantastic grain-free, burrito-sized tortillas!).
Looking for even more incredible recipe ideas? Be sure to head over to my comprehensive Recipe Index. You’ll also discover a wealth of exclusive recipes and culinary inspiration within my acclaimed cookbooks: Nom Nom Paleo: Food for Humans (Andrews McMeel Publishing 2013), Ready or Not! (Andrews McMeel Publishing 2017), and the latest, Nom Nom Paleo: Let’s Go! (Andrews McMeel Publishing 2022).
PRINTER-FRIENDLY RECIPE CARD
Foolproof Instant Pot Carnitas – Crispy, Juicy, & Easy
15
35
1 25
6 servings
Michelle Tam
Ingredients
For the Instant Pot Carnitas
- 3 pounds boneless pork shoulder roast
- 2 teaspoons Diamond Crystal kosher salt more to taste
- 2 teaspoons ground cumin
- 1 teaspoon crushed red pepper flakes
- 1 teaspoon crushed dried oregano leaves preferably Mexican
- 1 medium orange I like using Cara Cara
- 6 garlic cloves peeled
- 1 large yellow onion peeled and quartered
- 1 dried bay leaf
- 1 tablespoon ghee avocado oil, lard, or favorite high temperature cooking fat (optional)
For the toppings and garnishes
- 1 small white onion finely diced
- 2 tablespoons cilantro minced
- 1 head butter lettuce leaves removed, washed and spun dry (Siete’s grain-free tortillas are awesome as well.)
- 2 Hass avocados peeled and sliced or guacamole
- 1-2 radishes thinly sliced
- 2 jalapeño peppers sliced (optional)
- 1 cup salsa or pico de Gallo
- 3 limes quartered
Instructions
-
Grab your boneless pork shoulder roast (a.k.a. Boston butt) and cut it into 2-inch cubes.
-
Plop the pork in a large bowl and sprinkle on the salt, cumin, red pepper flakes, and oregano. Toss well to coat. Then, transfer the seasoned pork to the Instant Pot insert.
-
Use a vegetable peeler to peel wide strips of zest off the orange. Stay close to the surface, making sure you don’t peel into the white pith, ’cause that stuff is bitter. Add the strips of orange zest to the Instant Pot, along with the garlic, quartered yellow onion, and bay leaf.
-
Cut the bald orange in half and juice it. Pour the juice into the Instant Pot insert and stir to distribute.
-
Place the insert into the Instant Pot and lock the lid. Make sure the valve on the lid is pointed at the “Sealing” position. Press the “Manual” button (or “Pressure Cook” if you have the new IP-DUO Plus60) and cook on high pressure for 35 minutes. (Stovetop pressure cooker users should cook under high pressure for 30 minutes.) Then, let the pressure release naturally (about 20 minutes).
-
If the pressure hasn’t completely released after 20 minutes and you’re hungry, manually vent the pressure by turning the release valve on the lid. Open the lid and discard the garlic, onion, and bay leaf. Taste for seasoning and add salt if needed. You can shred and serve the pork as-is, or store it in the fridge (with all the liquid/fat) for up to 4 days (or in the freezer for up to 4 months).
-
If you prefer crispy carnitas, heat up a large cast iron skillet over medium heat with a tablespoon of your favorite cooking fat.
-
Grab the pork out of the fridge and dig out the pieces of carnitas. Shred the meat up with your fingers.
-
Once the pan is hot, add the pork and fry, stirring occasionally, until it reaches your desired crispness.
-
Wanna crisp the carnitas in the oven? Heat up the broiler on high with the oven rack six inches from the heating element. Place the shredded carnitas in a single layer in a rimmed baking sheet and pop under the broiler for about 4 to 8 minutes or until shredded pork has golden crispy edges.
-
While the pork is getting crispy, combine the diced white onion and cilantro in a bowl. Also, wash some butter lettuce leaves, slice up the avocados, radishes, and jalapeños. Grab your favorite salsa, and cut up some lime wedges.
-
Last but not least, grab your plate and assemble your own delicious tacos!
Notes
The leftover carnitas can be stored in the leftover liquid in the refrigerator in an airtight container in the refrigerator for up to four days or in the freezer for up to 4 months. If you freeze the leftovers, make sure to thaw the pork in the fridge overnight so reheating is a breeze.
When I want to reheat the carnitas, I discard the fat cap and dig out the pieces of meat and throw them in a hot skillet. The reserved cooking liquid can also be a tasty base for soups and sauces!
Nutrition
Nutrition information is automatically calculated, so should only be used as an approximation.
Like this? Leave a comment below!