
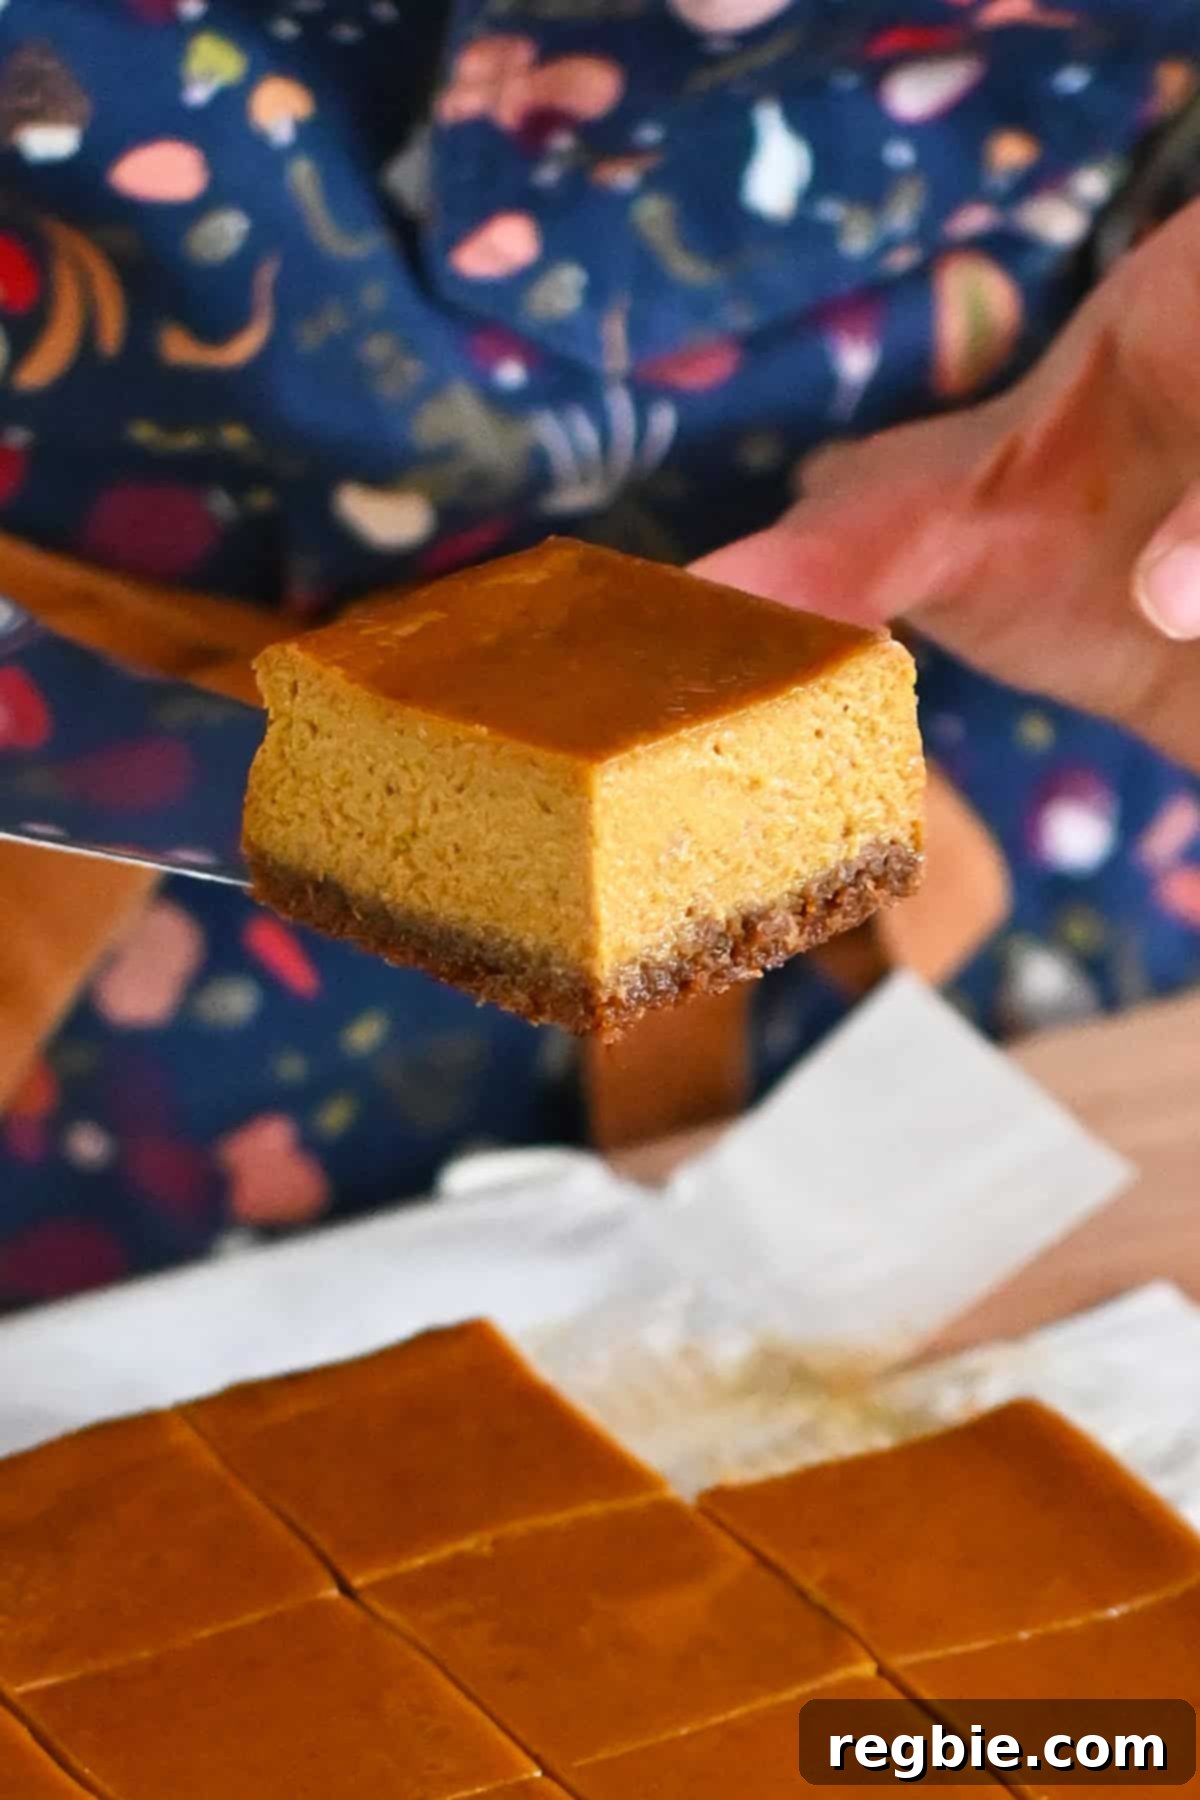
Irresistible Grain-Free Pumpkin Pie Bars: Your New Favorite Healthy Fall Dessert
Dive into the delightful world of pumpkin with these incredibly easy, 10-ingredient pumpkin pie bars! Crafted with wholesome, grain-free ingredients, these paleo-friendly treats offer all the beloved flavors of classic pumpkin pie without the fuss. Their rich, creamy texture and perfectly spiced filling are guaranteed to be a crowd-pleaser, even among those who don’t typically follow a paleo diet. Get ready to bake a batch of pure autumn bliss that everyone will adore!
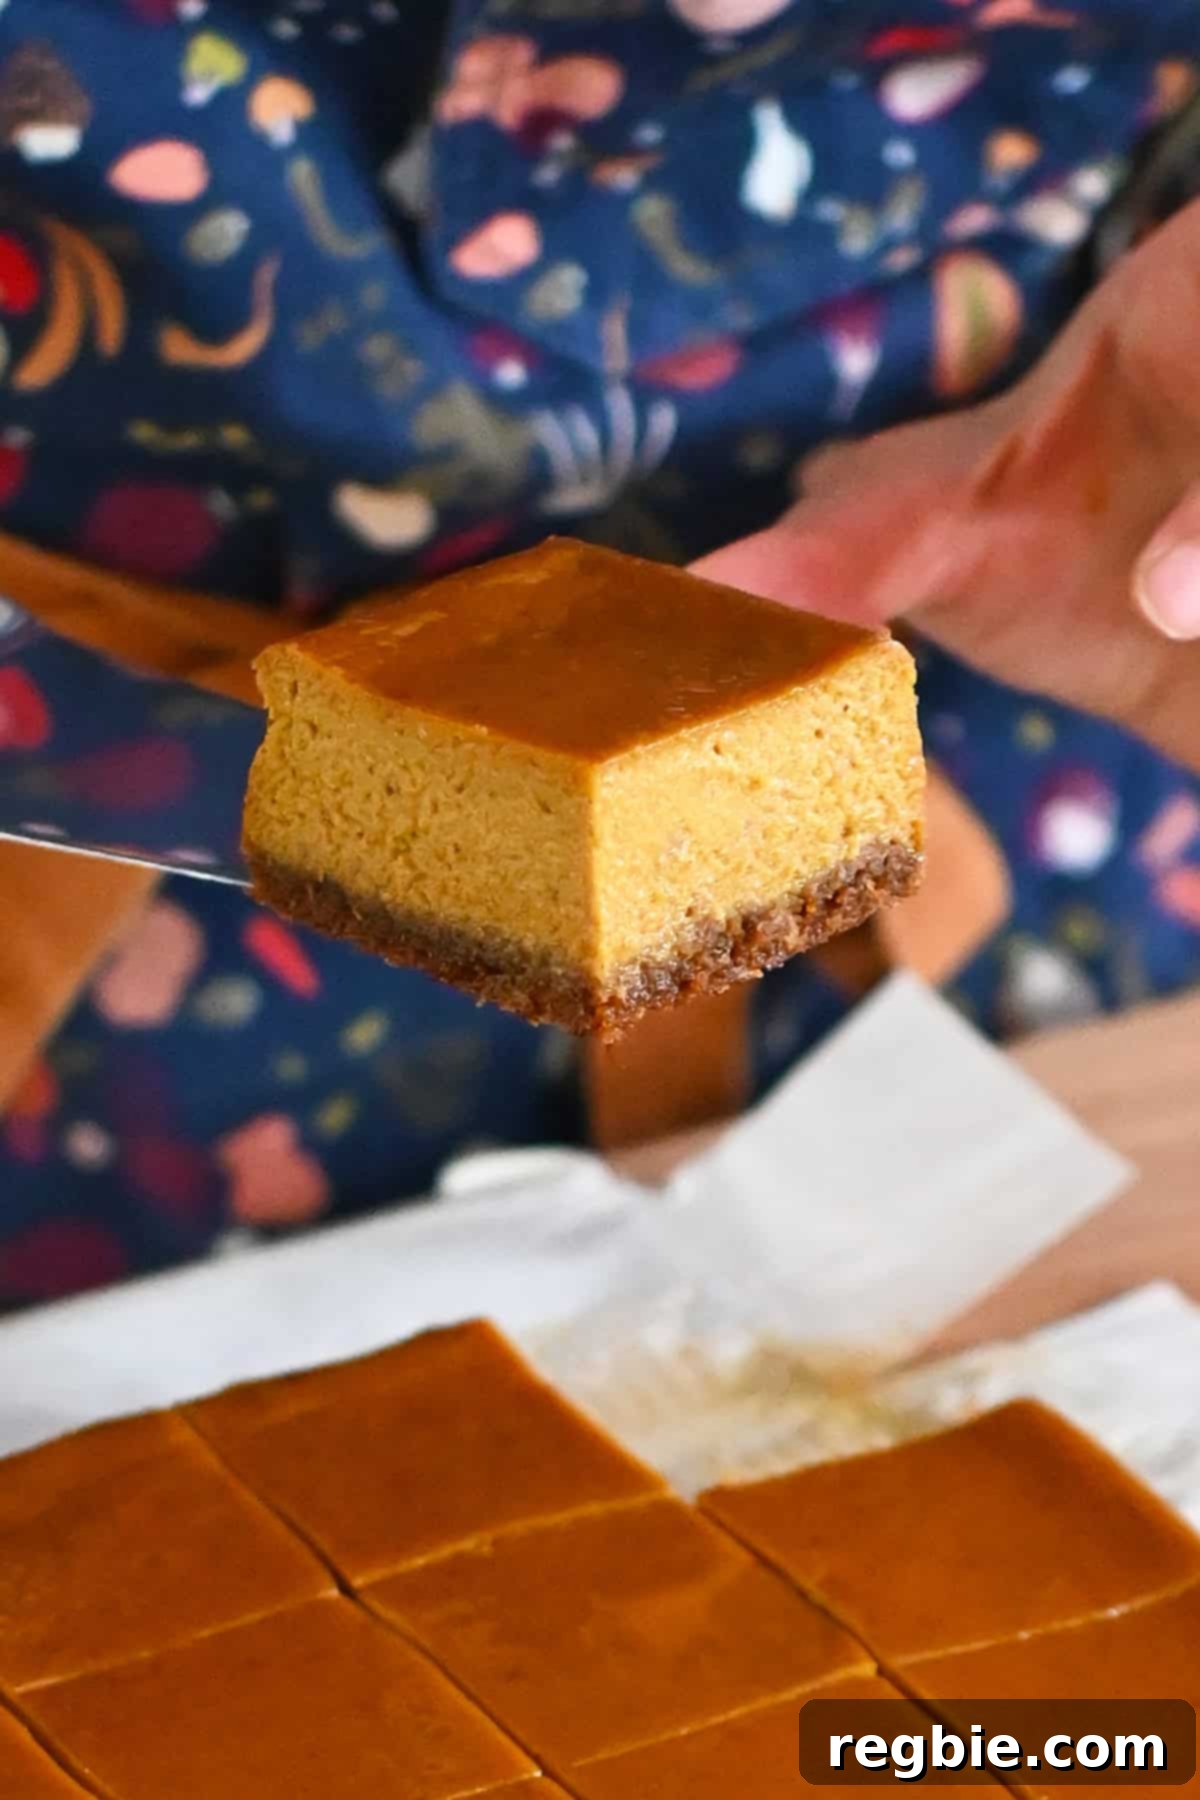
Table of Contents
- A Healthy Spin on Pumpkin Pie Bars
- A Hit with Non-Paleo Eaters!
- Ingredients Overview
- Grain-Free & Gluten-Free Cookie Crust
- Creamy Pumpkin Pie Filling
- How to Make Pumpkin Pie Bars
- Prepare Your Oven and Baking Pan
- Craft the Perfect Cookie Crust
- Whip Up the Smooth Pumpkin Pie Filling
- Bake to Golden Perfection
- Cool for Ideal Texture
- Storing Leftover Pumpkin Pie Bars
- More Healthy Pumpkin Recipes to Explore
- Full Pumpkin Pie Bars Recipe
A Healthy Spin on Pumpkin Pie Bars: Guilt-Free Indulgence
Imagine all the comforting flavors of your favorite pumpkin pie, but in a convenient, shareable bar format. These pumpkin pie dessert bars deliver exactly that – an effortless twist on a beloved fall classic. Far more convenient than a traditional pie, these bars are perfect for any occasion, whether you’re hosting a gathering or simply craving a satisfying treat. What makes them truly special is their commitment to wholesome ingredients, offering a healthier alternative without compromising on taste.
The star of the show is a rich, creamy, and warmly spiced pumpkin filling that rests elegantly atop a simple yet flavorful cookie crust. Forget the laborious process of making a traditional pie crust from scratch; our version uses crushed store-bought grain-free and gluten-free cookies, bound together with refined coconut oil, a touch of coconut sugar, and a hint of salt. This combination creates a perfect sweet-salty balance that elevates the entire dessert. It’s an ingenious way to satisfy those undeniable pumpkin cravings with minimal effort and maximum deliciousness, ensuring a delightful treat that aligns with your dietary preferences.
A Hit with Non-Paleo Eaters! Deliciousness for Everyone
You might be wondering if a “healthy” or “paleo” dessert can truly win over everyone, especially those with more traditional tastes. Let me assure you, these pumpkin pie bars are an absolute triumph! They’ve even been tested and enthusiastically approved by picky eaters, including my son’s teenage friends who aren’t on a paleo diet. They devoured them and asked for more, proving that exceptional taste knows no dietary bounds.
With their ideal balance of cozy autumn spices and just the right amount of sweetness, these bars are a fantastic addition to any holiday table, from Thanksgiving feasts to casual fall get-togethers. But why wait for a special occasion? They’re also perfect for satisfying that sudden pumpkin spice craving any day of the week, offering all the festive flavor without any of the fuss associated with a full pie. Beyond their incredible taste, these bars are incredibly practical. Their sturdy, bar-like structure makes them super portable, making them an ideal choice for potlucks, long road trips, or even as a sneaky midnight snack. Just a friendly warning: consider making a double batch, because these delightful treats have a tendency to disappear remarkably fast!
Ingredients Overview: Simple & Wholesome
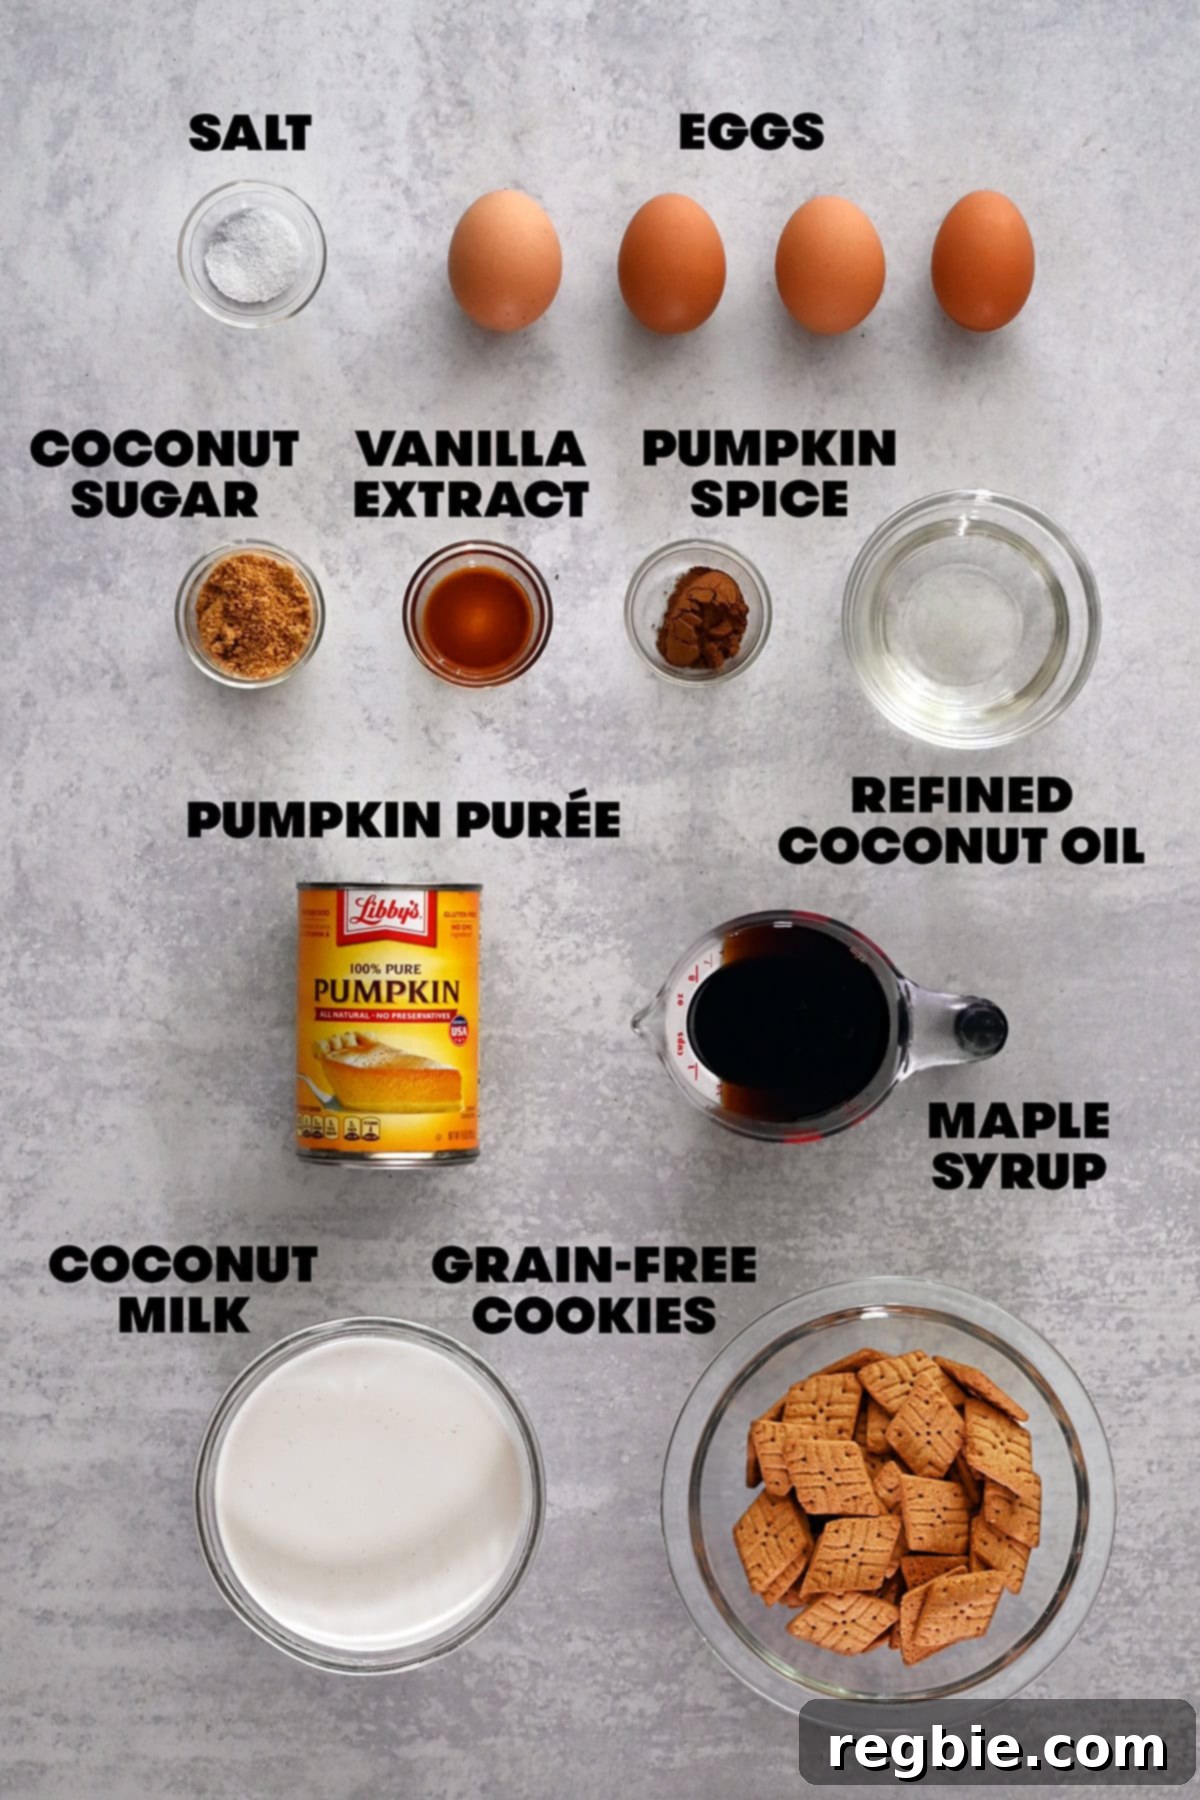
Crafting these delectable pumpkin pie bars requires a surprisingly short list of ingredients, most of which you likely already have on hand or can easily find at your local grocery store. We’ve meticulously selected each component to ensure a perfect blend of flavor, texture, and nutritional value. The recipe is designed for ease, minimizing complex steps and maximizing the natural goodness of fall ingredients. Here’s a detailed look at what you’ll need for both the delightful grain-free crust and the rich, creamy pumpkin filling.
Grain-Free & Gluten-Free Cookie Crust Essentials
The foundation of these bars is a simple yet incredibly flavorful crust. It’s designed to be quick, easy, and satisfying, mimicking the classic graham cracker crust without any grains.
- Grain-free cookies: For a superb texture and taste, I highly recommend using Simple Mills Honey Cinnamon Sweet Thins. Their subtle sweetness and crisp texture make them an ideal base. However, feel free to substitute with your preferred brand of gluten-free graham cracker style cookies. The key is a firm, crumbly cookie that holds its shape when crushed.
- Coconut sugar: This natural sweetener provides a lovely caramel-like note and enhances the overall sweetness of the crust without being overpowering. It’s an excellent paleo-friendly alternative to traditional brown sugar, offering a deeper flavor profile.
- Diamond Crystal kosher salt: Don’t underestimate the power of salt in a sweet recipe! A pinch of Diamond Crystal kosher salt is crucial here, as it perfectly balances the sweetness, enhancing the cookie flavors and preventing the crust from tasting one-dimensional. If you’re using Morton’s brand kosher salt or sea salt, remember to use approximately half the amount, as they are saltier by volume.
- Melted refined coconut oil: This ingredient acts as the binder for our delicious paleo graham cracker-style crust. Refined coconut oil is preferred because it has a neutral flavor, ensuring your crust tastes like cookies and not coconut. If you don’t adhere to a dairy-free diet, feel free to substitute with an equal amount of melted ghee or unsalted butter for a rich, buttery flavor.
Creamy Pumpkin Pie Filling: The Heart of the Bars
The velvety smooth filling is what truly makes these bars sing, delivering that quintessential taste of autumn in every bite.
- Canned pumpkin puree: Opt for high-quality, pure pumpkin puree—not pumpkin pie filling, which contains added sugar and spices. My personal favorite for its consistent texture and flavor is Libby’s brand. Make sure it’s 100% pumpkin.
- Canned full-fat coconut milk: This is the secret to achieving that wonderfully creamy, dairy-free texture. Be sure to use full-fat coconut milk, not light, as the fat content is essential for the richness and setting of the filling.
- Large eggs: Eggs serve as a vital binding agent and contribute to the smooth, custardy texture of the pumpkin filling. They help the bars set beautifully. Please note: I haven’t experimented with egg substitutes for this recipe, so I can’t offer specific recommendations. If you do try a substitute, I’d love to hear about your results in the comments!
- Maple syrup: Pure maple syrup is the ideal sweetener for this recipe, imparting a natural sweetness and a delicate, earthy flavor that perfectly complements the pumpkin and spices. Its unique profile enhances the fall essence of the bars, so I strongly recommend sticking with maple syrup over other sweeteners.
- Pumpkin pie spice blend: This pre-mixed blend of cinnamon, nutmeg, ginger, and cloves is key to achieving that classic, comforting pumpkin pie aroma and taste. It simplifies the spice addition and ensures a balanced flavor profile.
- Vanilla extract: A touch of vanilla extract rounds out the flavors, adding warmth and depth to the pumpkin filling. It’s a subtle but essential ingredient that brightens the overall taste.
- Diamond Crystal brand kosher salt: Just like in the crust, a small amount of salt in the filling is crucial for balancing the sweetness and enhancing the spices. It prevents the filling from tasting flat, making all the other flavors pop. Again, if using Morton’s kosher salt or sea salt, halve the quantity.
- Whipped coconut cream or whipped cream (optional topping): While the bars are divine on their own, a dollop of whipped coconut cream (for a paleo/dairy-free option) or traditional whipped cream adds an extra layer of indulgence and a beautiful finish. It’s the perfect flourish for serving!
How to Make Perfect Pumpkin Pie Bars: A Step-by-Step Guide
Creating these delightful pumpkin pie bars is a straightforward process, designed to be enjoyable for bakers of all skill levels. Follow these simple steps to achieve a perfectly balanced, creamy, and flavorful dessert that will impress everyone.
Prepare Your Oven and Baking Pan for Success
Begin by preheating your oven to 375°F (190°C), ensuring the oven rack is positioned in the middle for even baking. This initial step is crucial for both the crust and the filling to cook through uniformly.
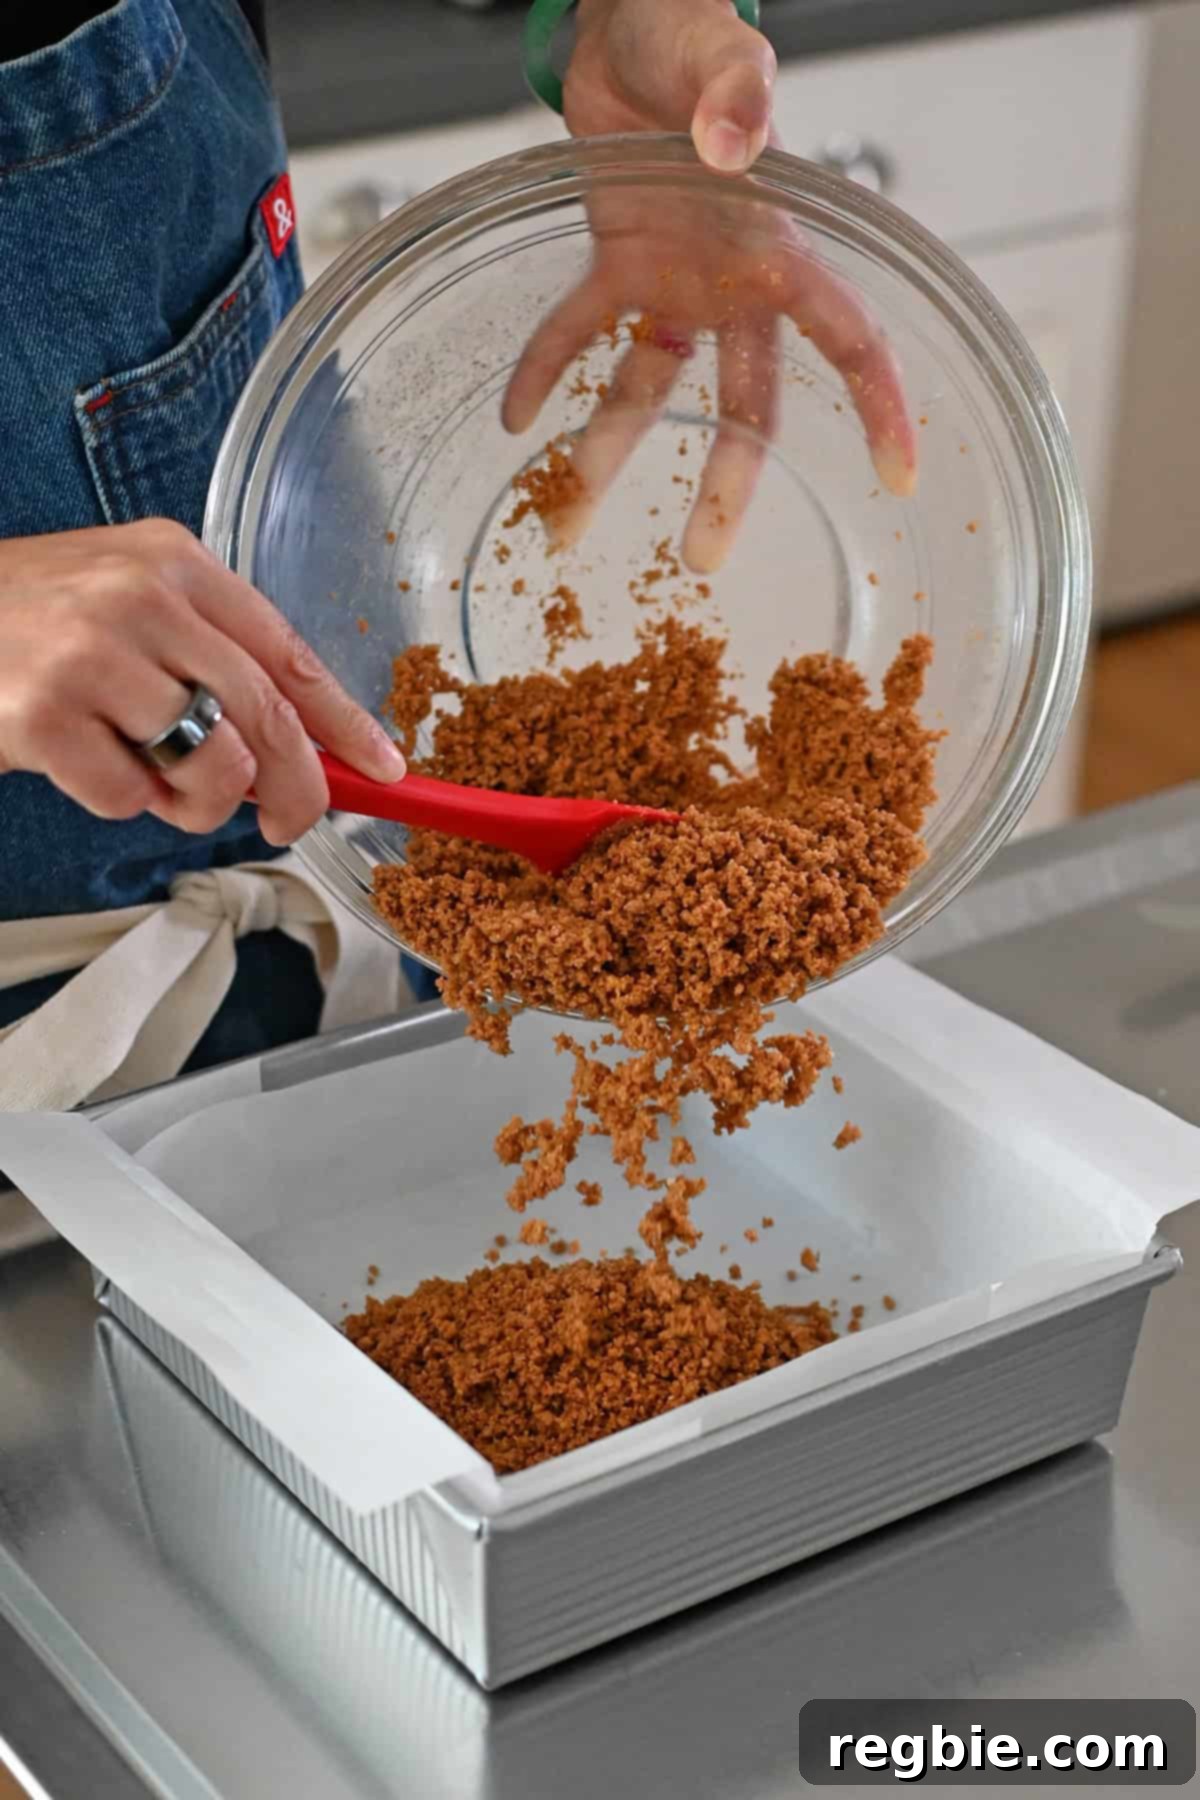
While the oven warms up, prepare your 8 x 8-inch metal square baking pan. Although you can simply grease the pan, I highly recommend lining it with parchment paper. This simple trick makes removing the finished bars effortless and simplifies cleanup considerably. It’s a game-changer for neatly cutting and serving your dessert.
There are various ways to line a square baking dish, but here’s my tried-and-true method for a perfect fit. Take a pre-cut parchment sheet that typically fits an 18 x 13-inch pan. Fold the sides inward to match the width and length of your 8×8-inch pan. Next, make four strategic cuts at the folded corners, allowing the paper to seamlessly fold into the pan without creasing excessively.
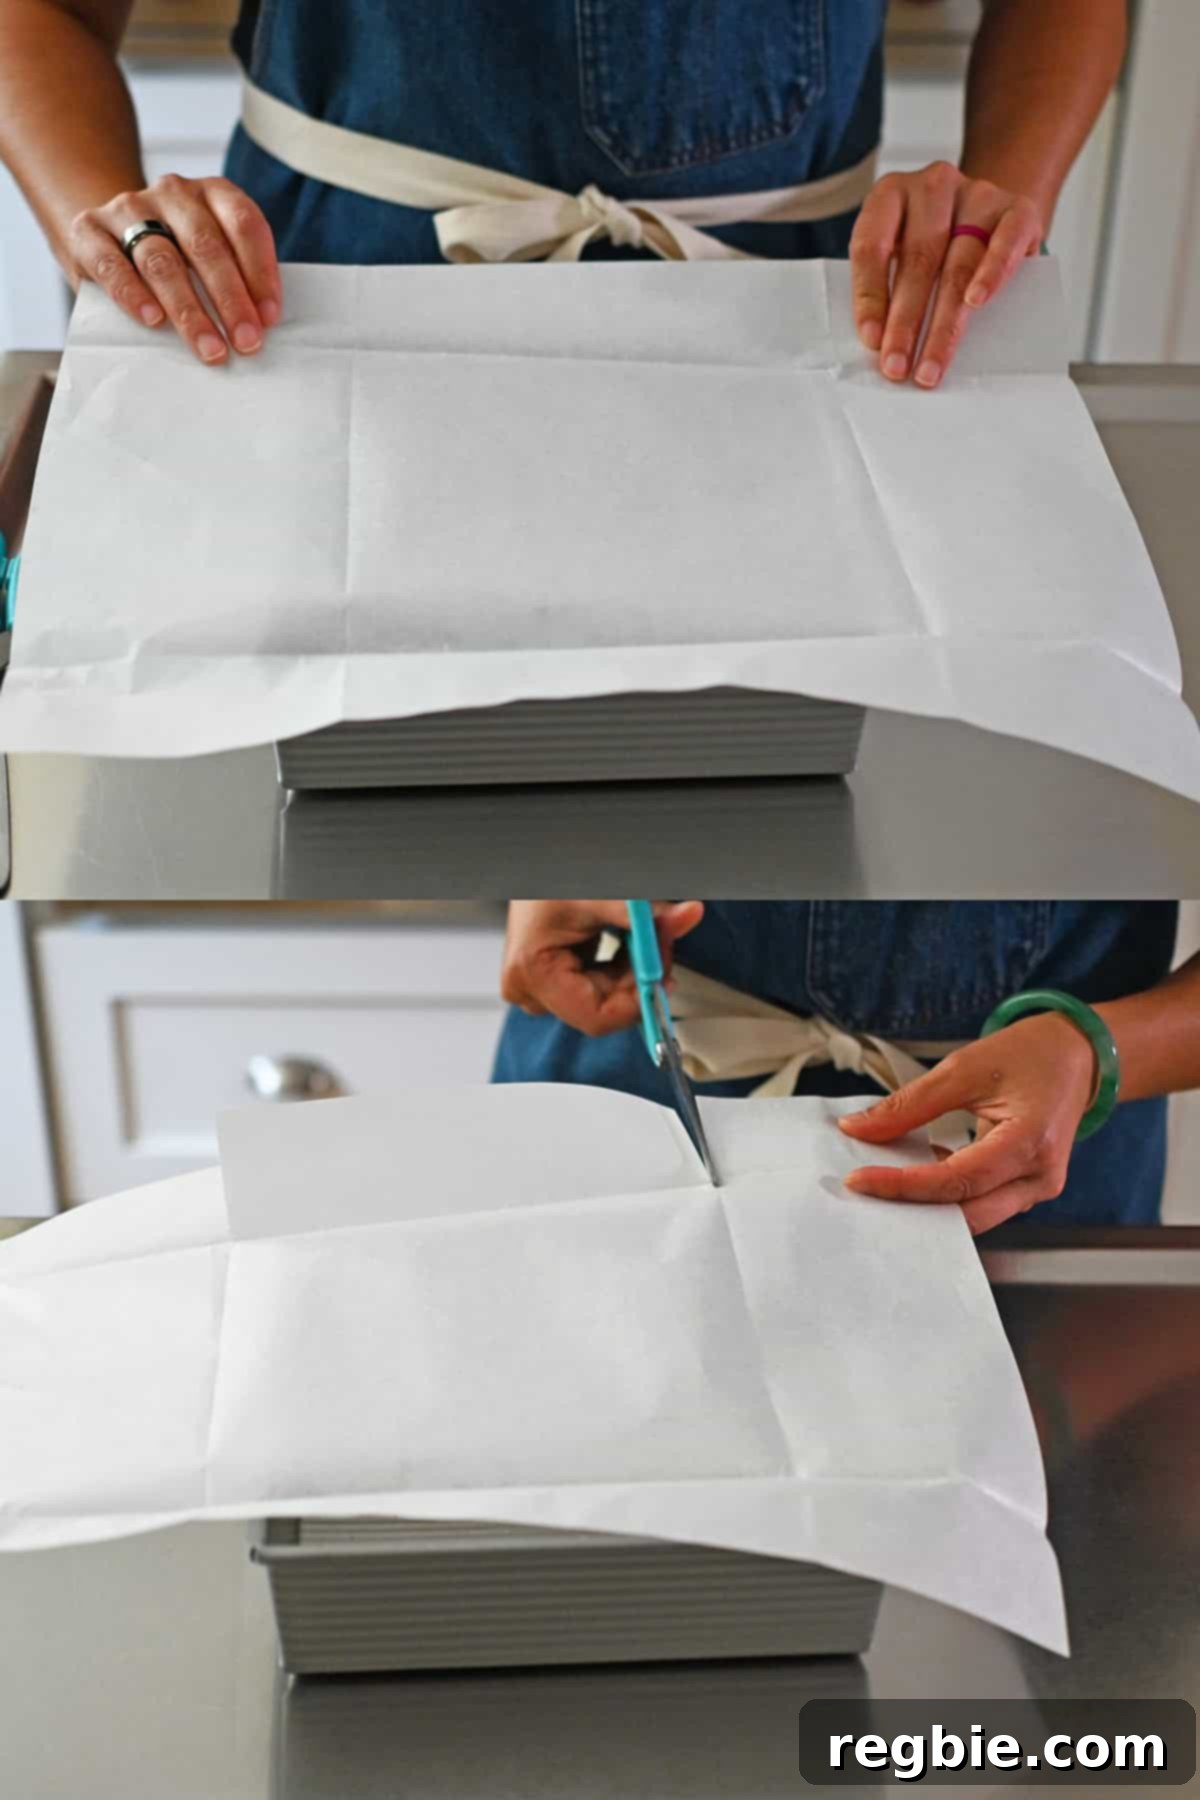
Once your cuts are made, gently tuck the parchment paper into the pan, ensuring it snugly lines the bottom and sides. Trim any excess parchment paper that extends too far beyond the edges, creating neat, manageable flaps.
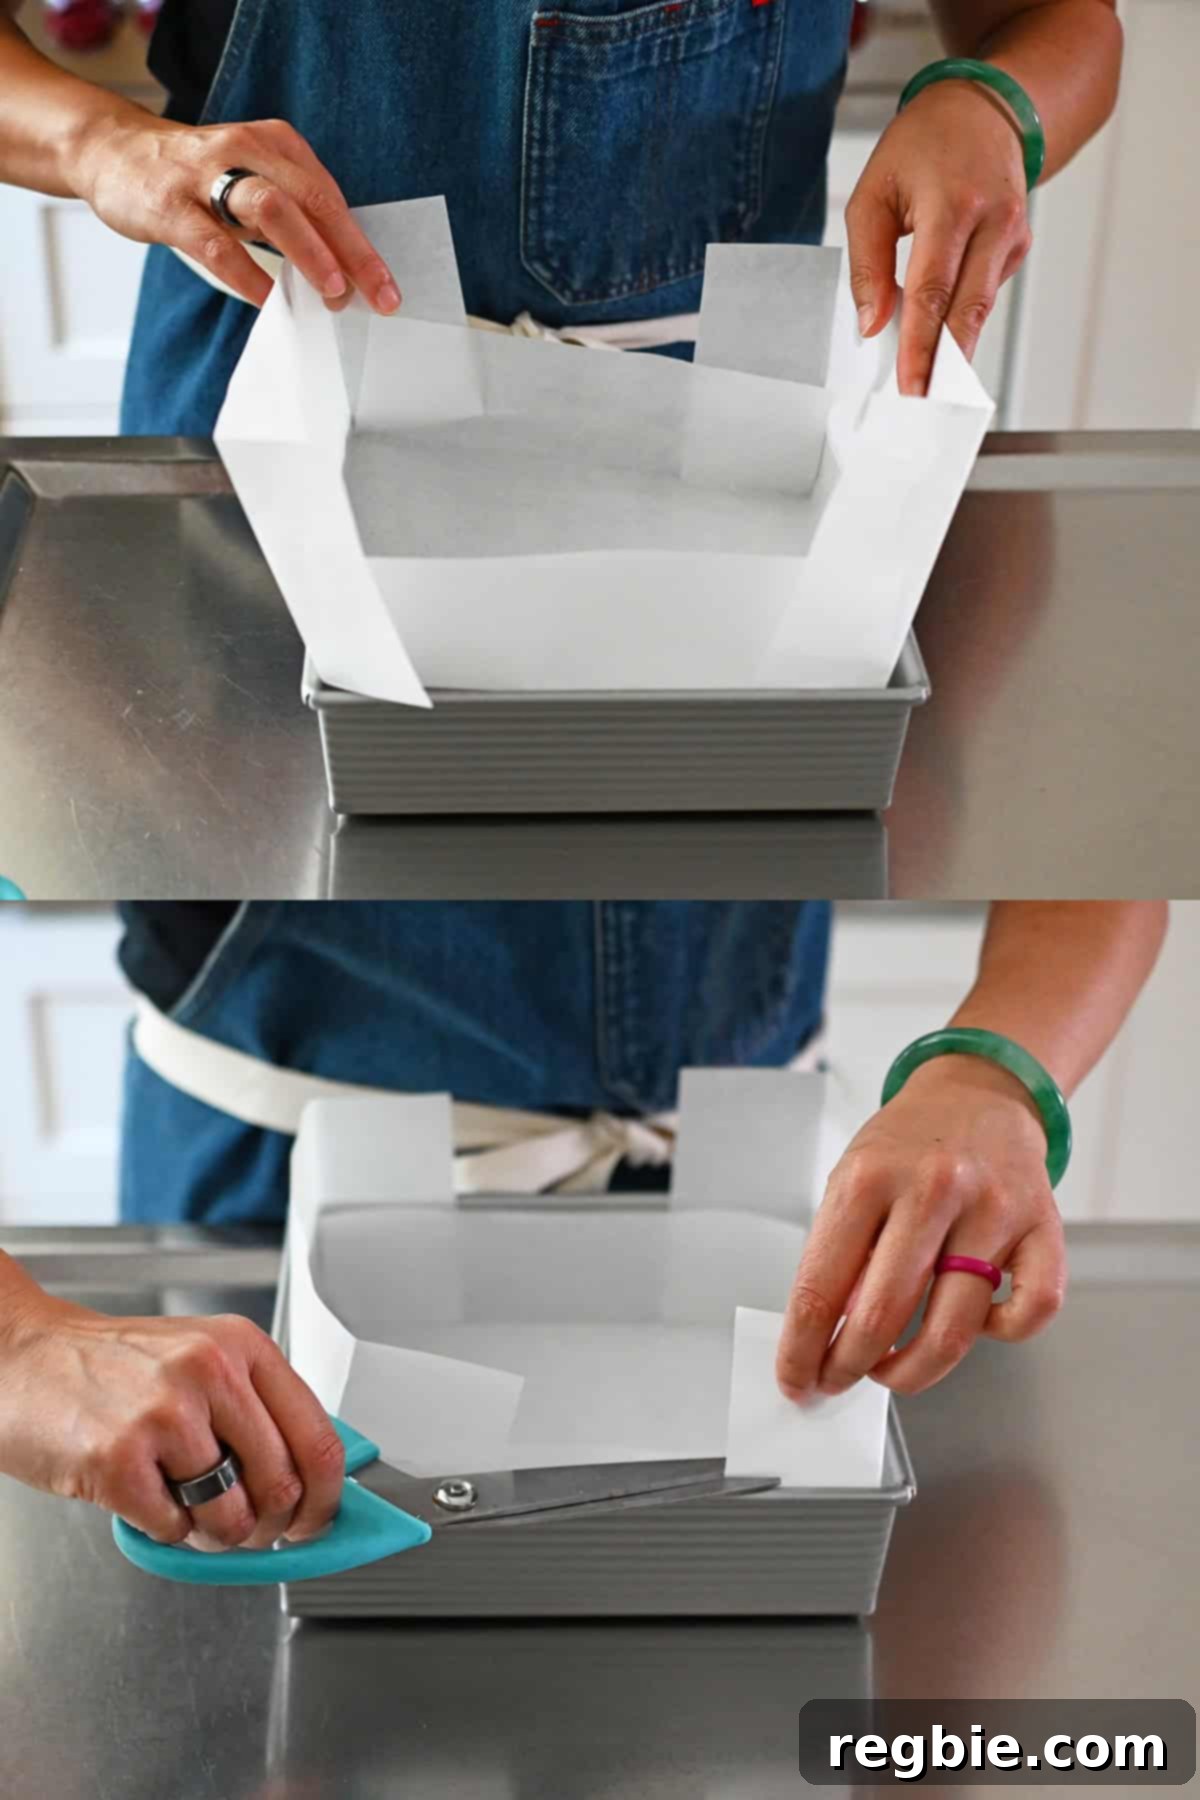
Finally, fold over the remaining side flaps to create a neat, elevated edge. Your pan is now perfectly lined and ready for the delicious crust! This meticulous preparation ensures your pumpkin pie bars will lift out cleanly and present beautifully.
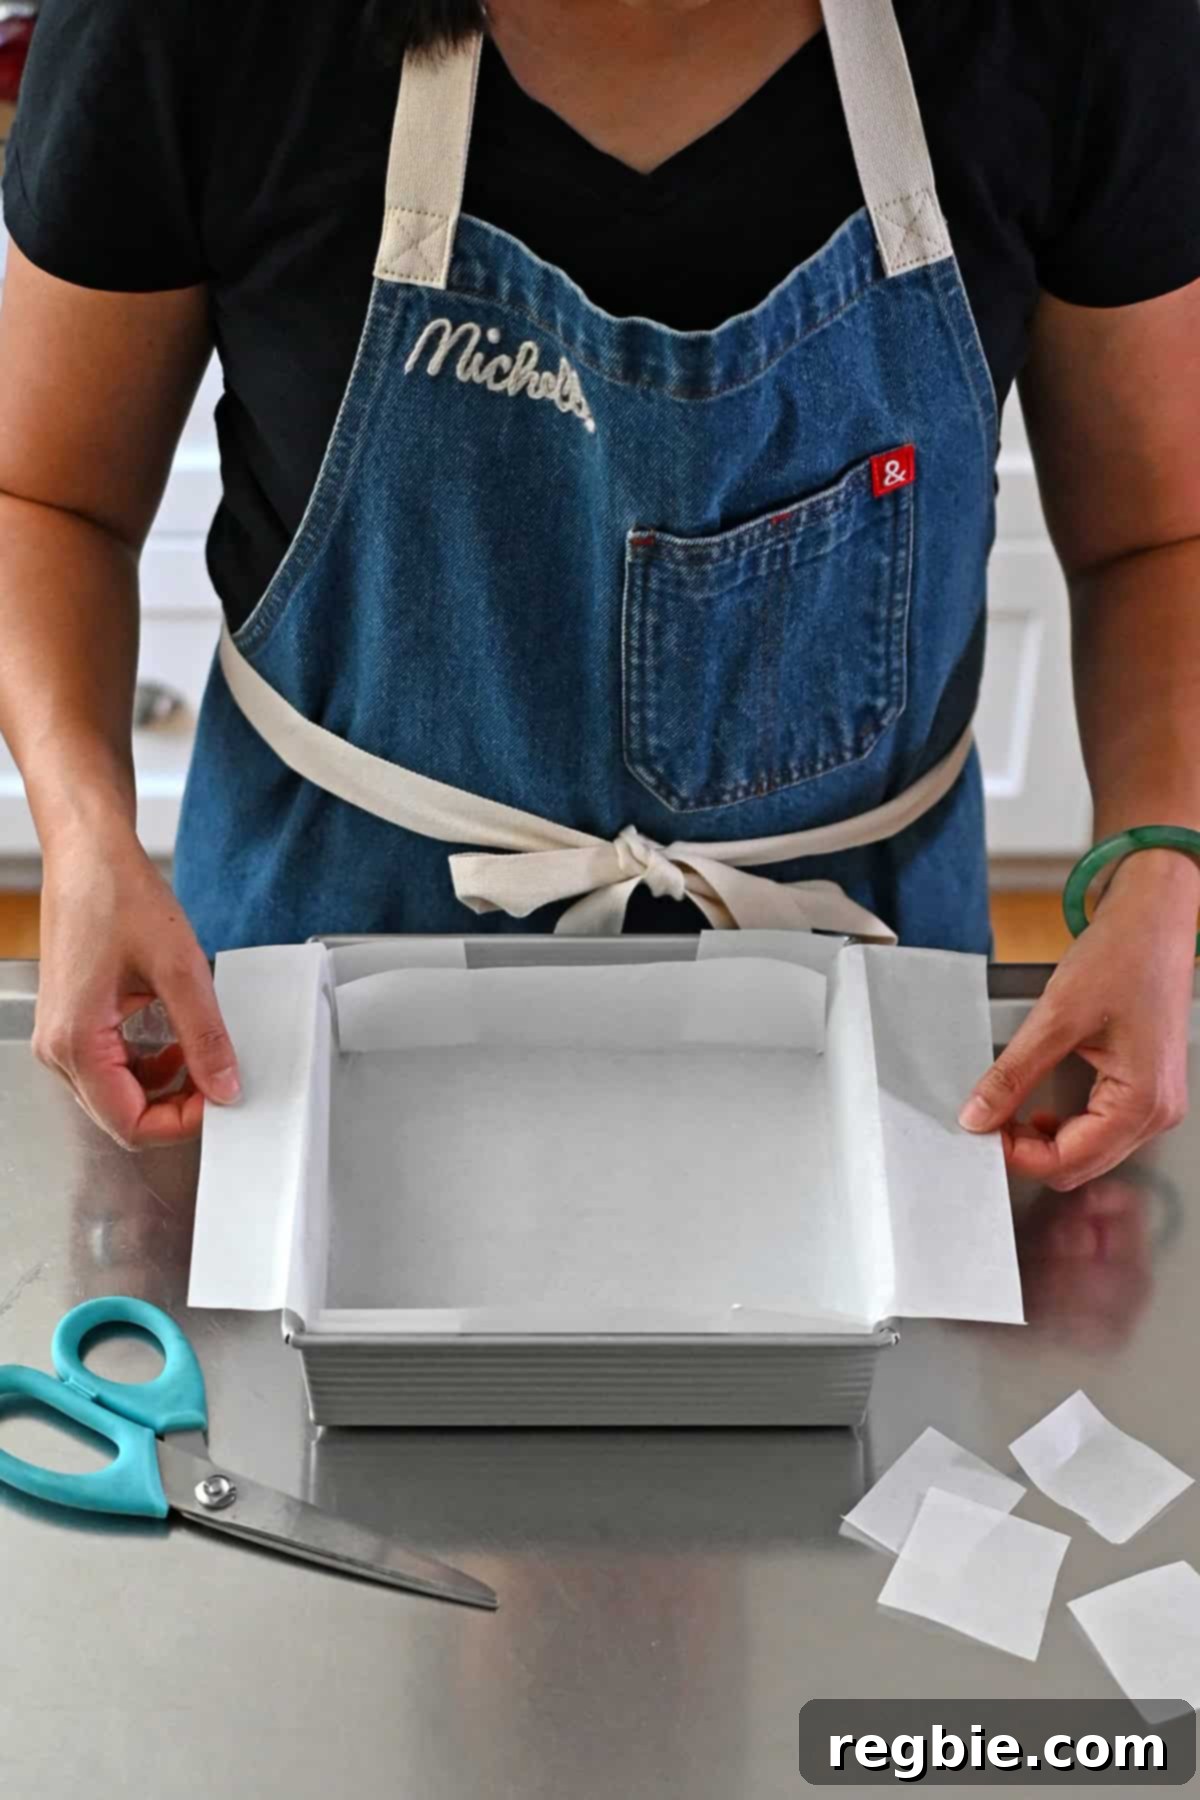
Craft the Perfect Cookie Crust: Simple & Flavorful
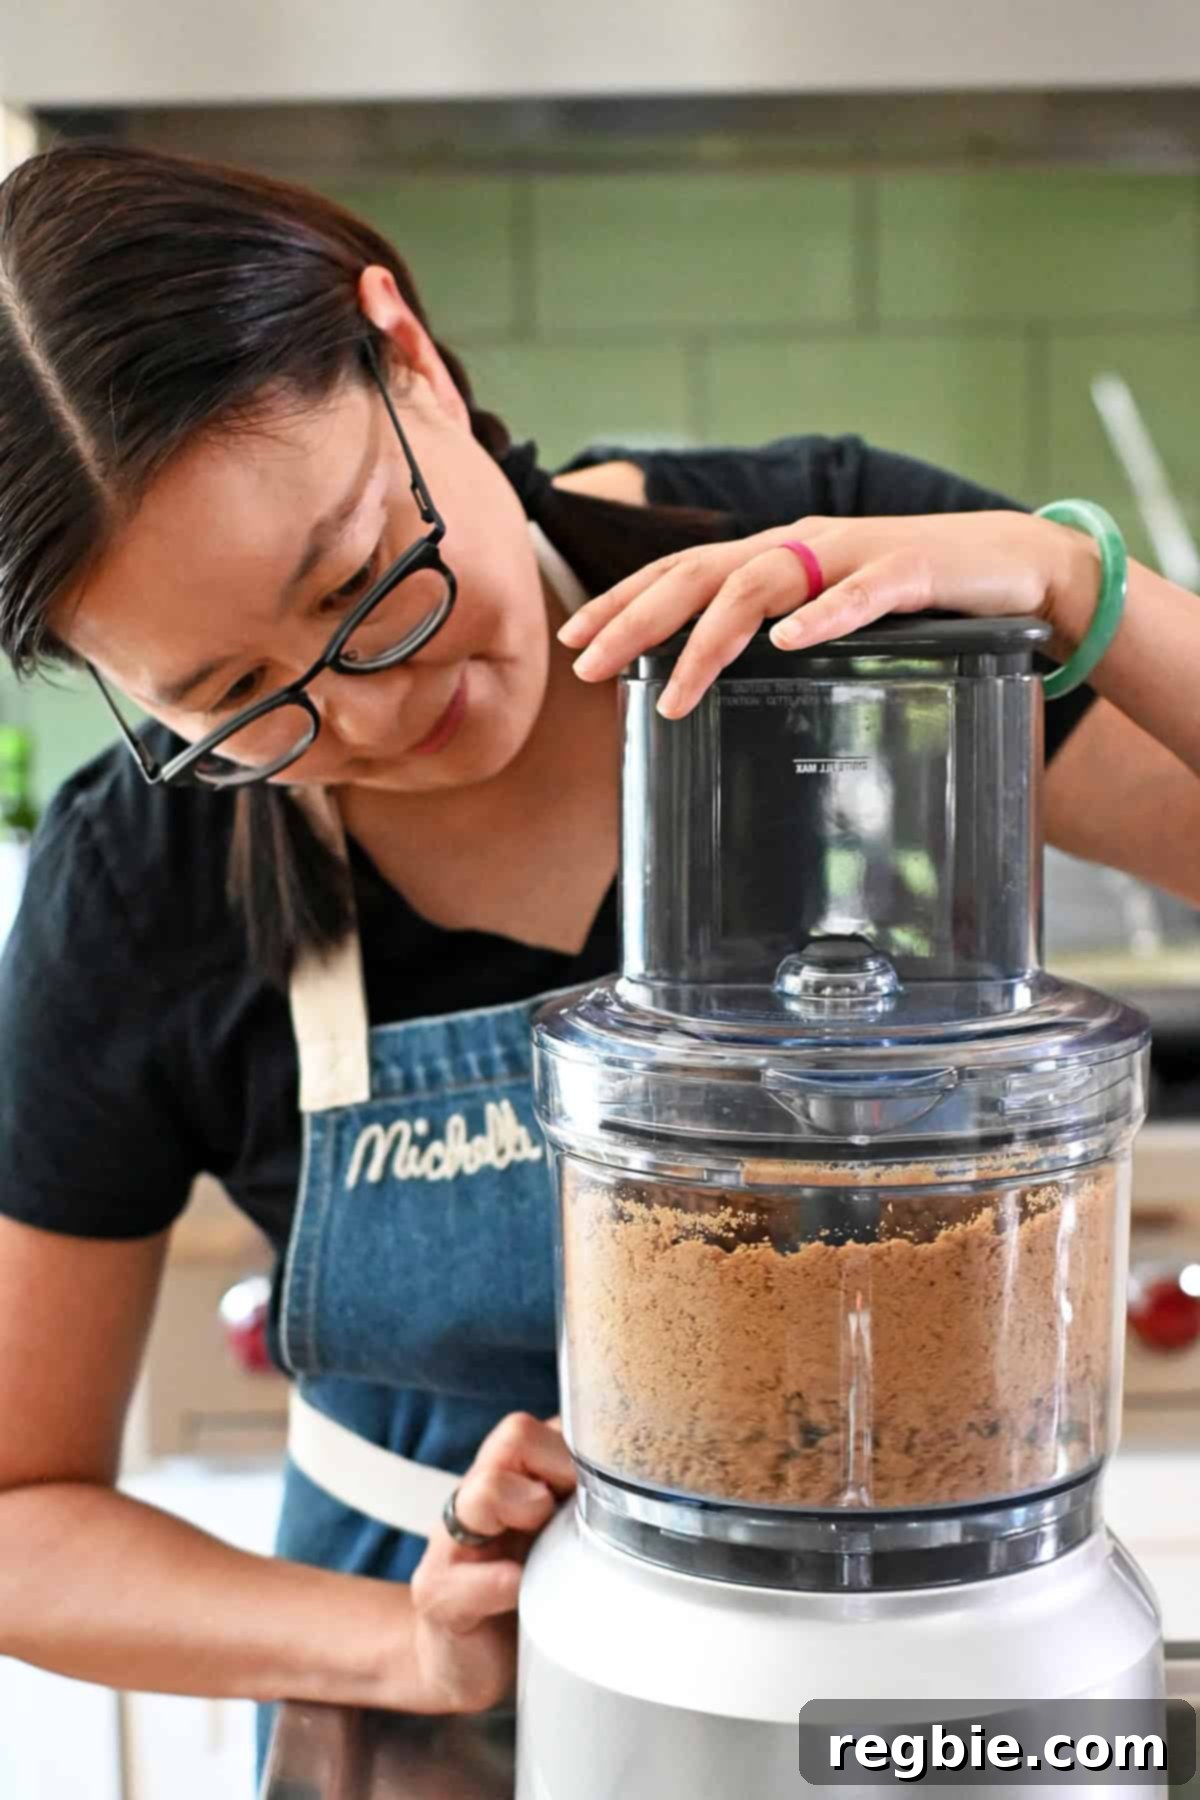
The crust for these bars is incredibly simple and comes together in minutes. Start by adding your chosen grain-free cookies into a food processor. Process them until they transform into fine, even crumbs. The consistency should be similar to that of fine sand, with no large chunks remaining.
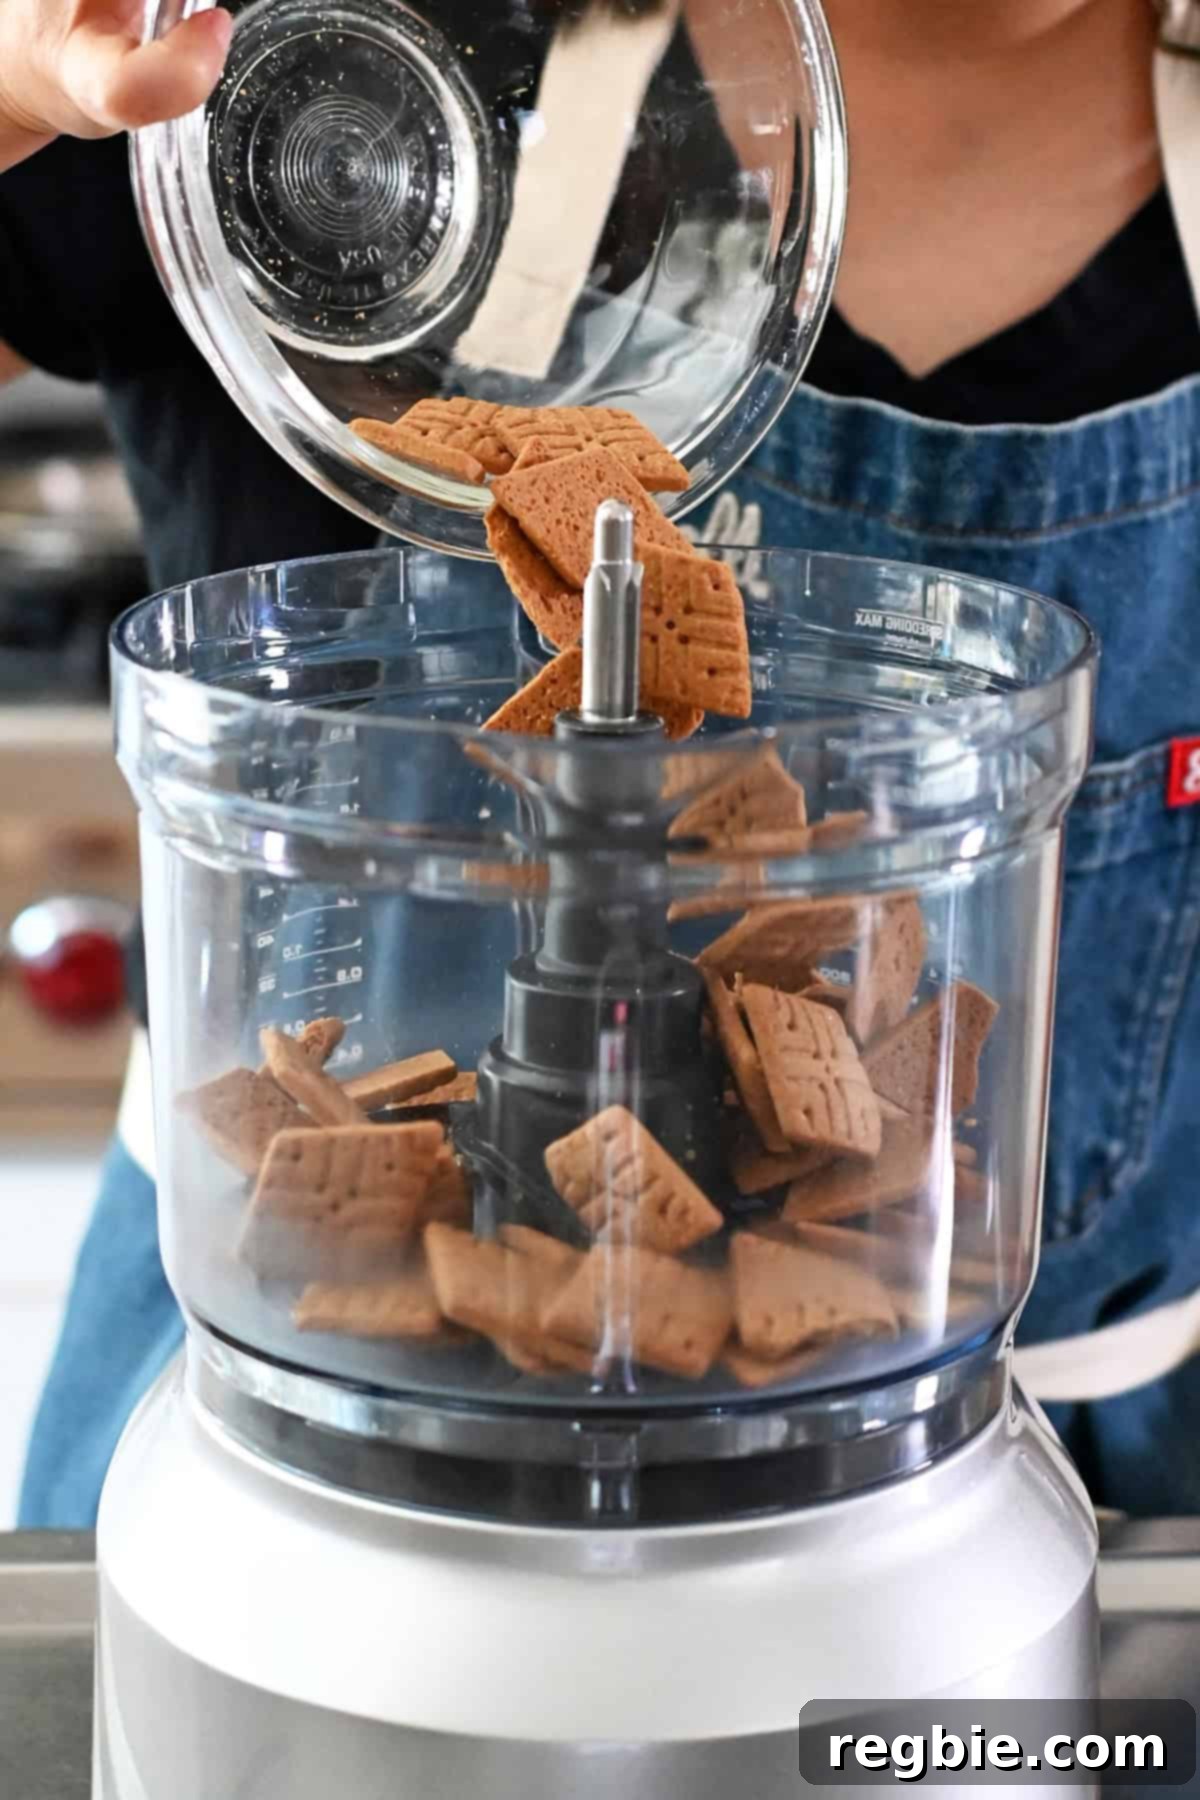
Continue to pulse until the crumbs are uniform and fine, which will create a solid, cohesive crust when pressed.
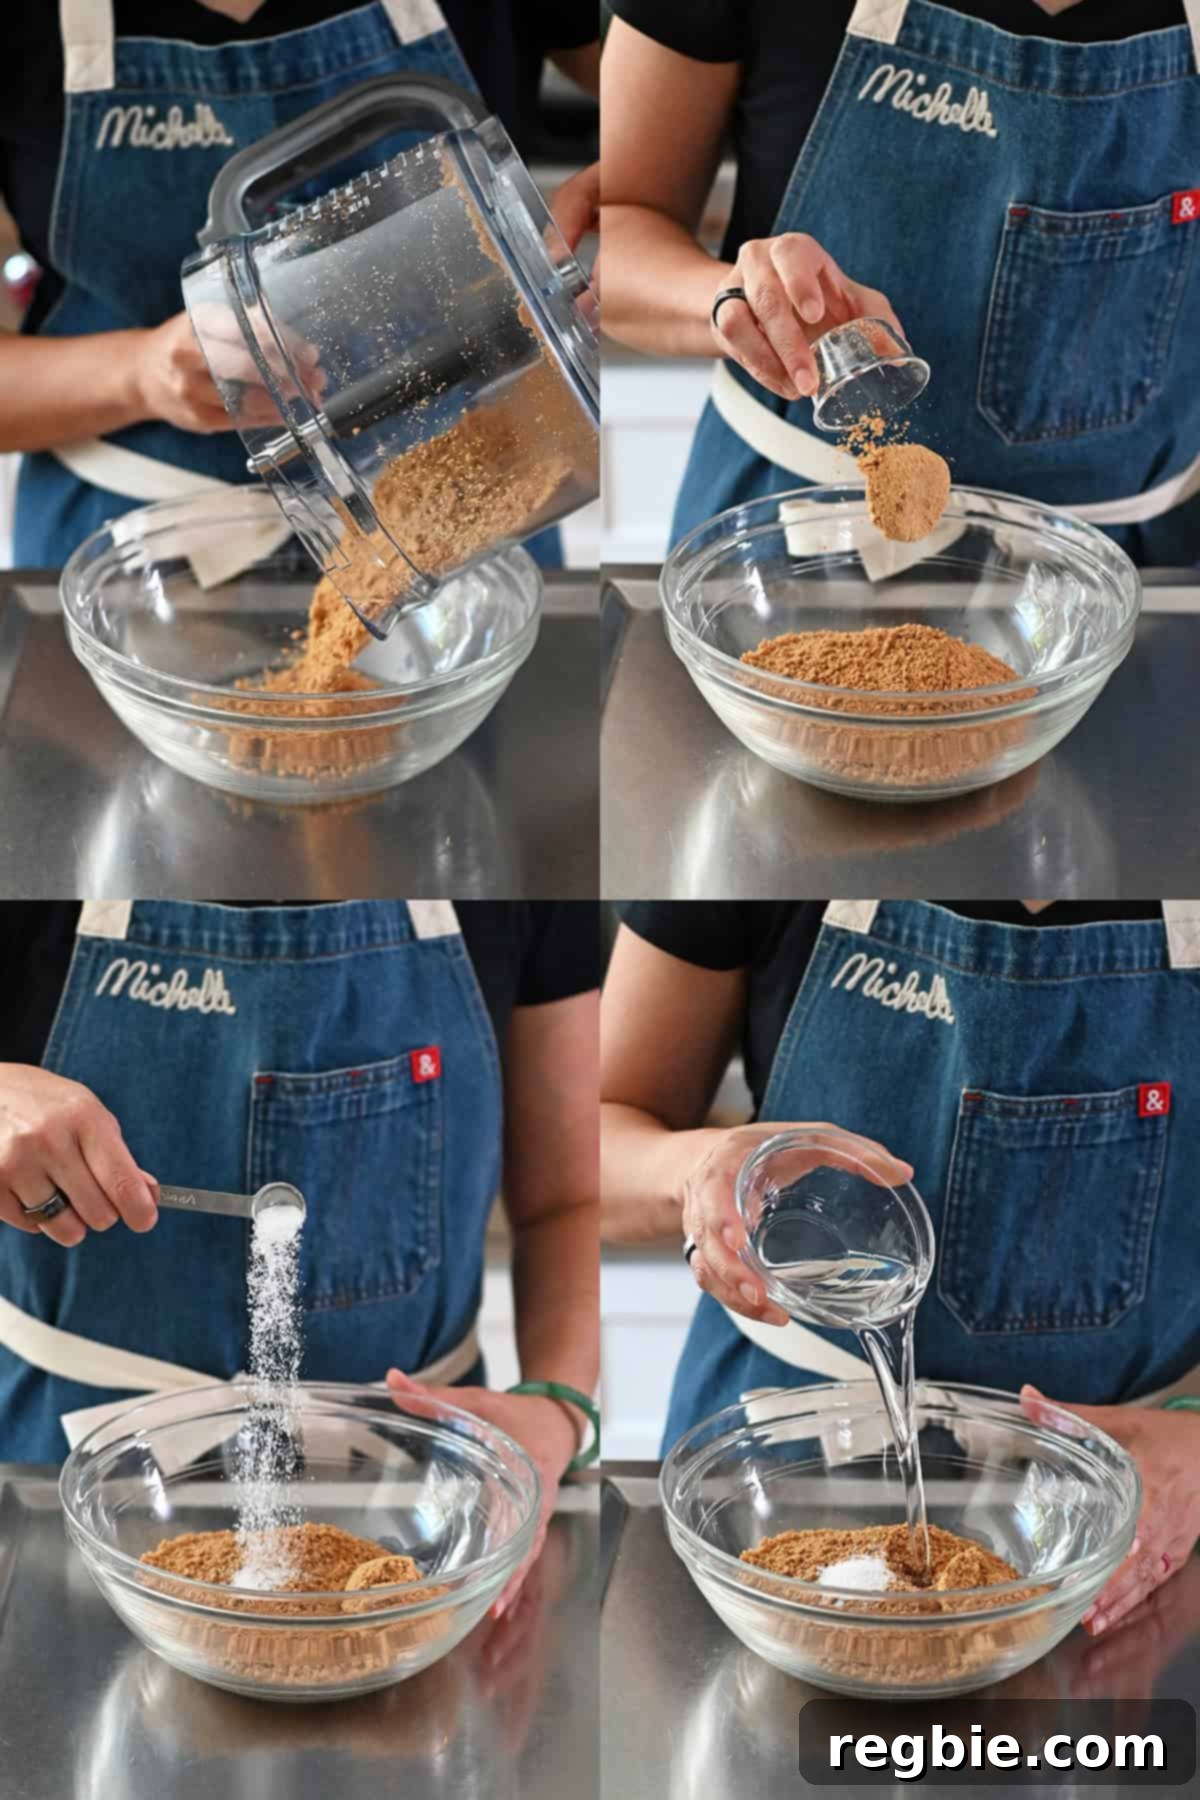
Next, transfer the cookie crumbs to a large mixing bowl. Add the coconut sugar, the crucial pinch of salt, and the melted refined coconut oil. These ingredients will bind the crumbs together and enhance their flavor.
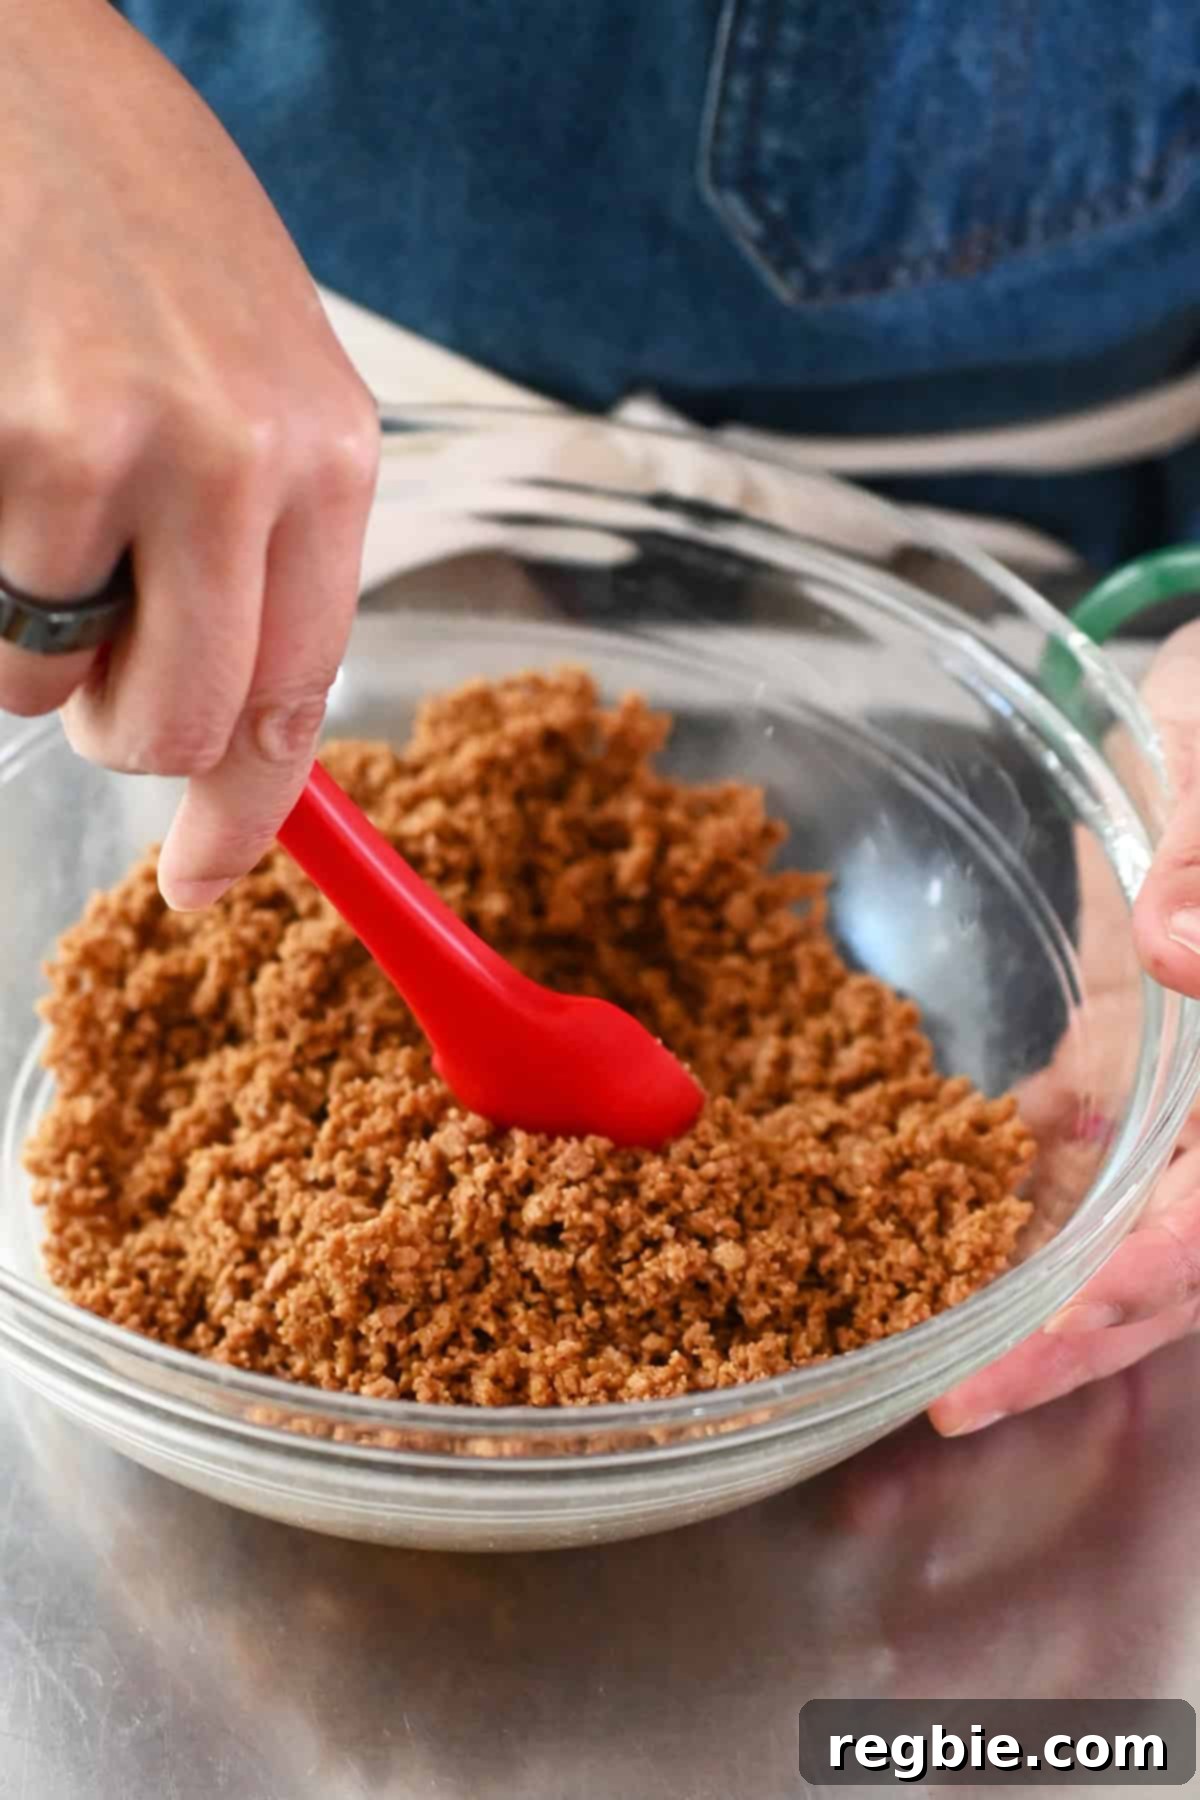
Mix all the ingredients thoroughly until the mixture resembles wet sand. It should be moist enough to hold its shape when squeezed. This consistency is perfect for forming a sturdy crust.
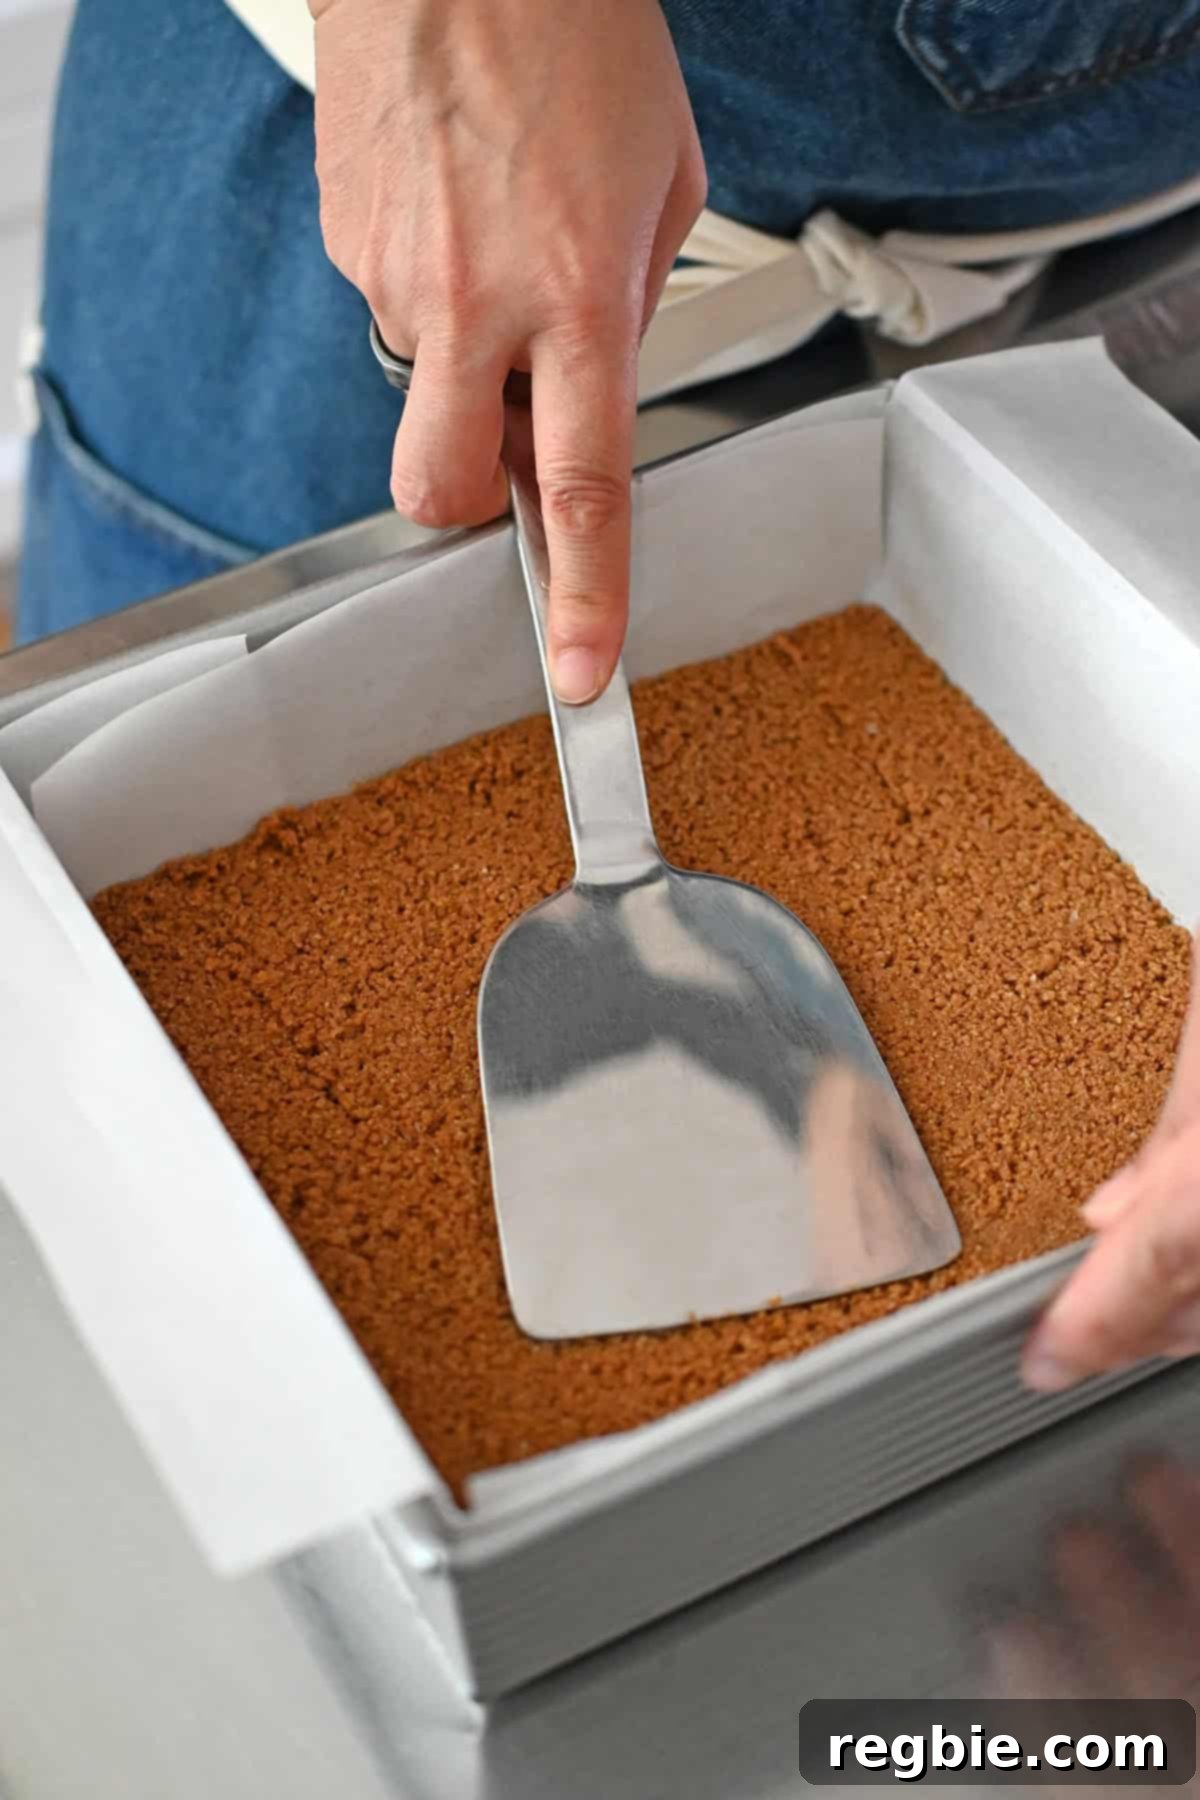
Firmly press the crumb mixture into the bottom of your parchment-lined baking pan. Use the back of a spoon, a flat-bottomed glass, or a spatula to create an even, compact layer across the entire base of the pan. This ensures a consistent crust thickness and prevents the filling from seeping through.
Utilize a metal spatula or an offset spatula to smooth and flatten the crust, making sure it is perfectly even and reaches all corners of the pan. A well-pressed crust provides the ideal foundation for your pumpkin filling.
Bake the cookie crust in the preheated oven for 6 to 9 minutes, or until it’s lightly golden brown around the edges and fragrant. This par-baking step helps to set the crust, giving it a delightful crispness that contrasts beautifully with the creamy filling. Keep a close eye on it to prevent burning.
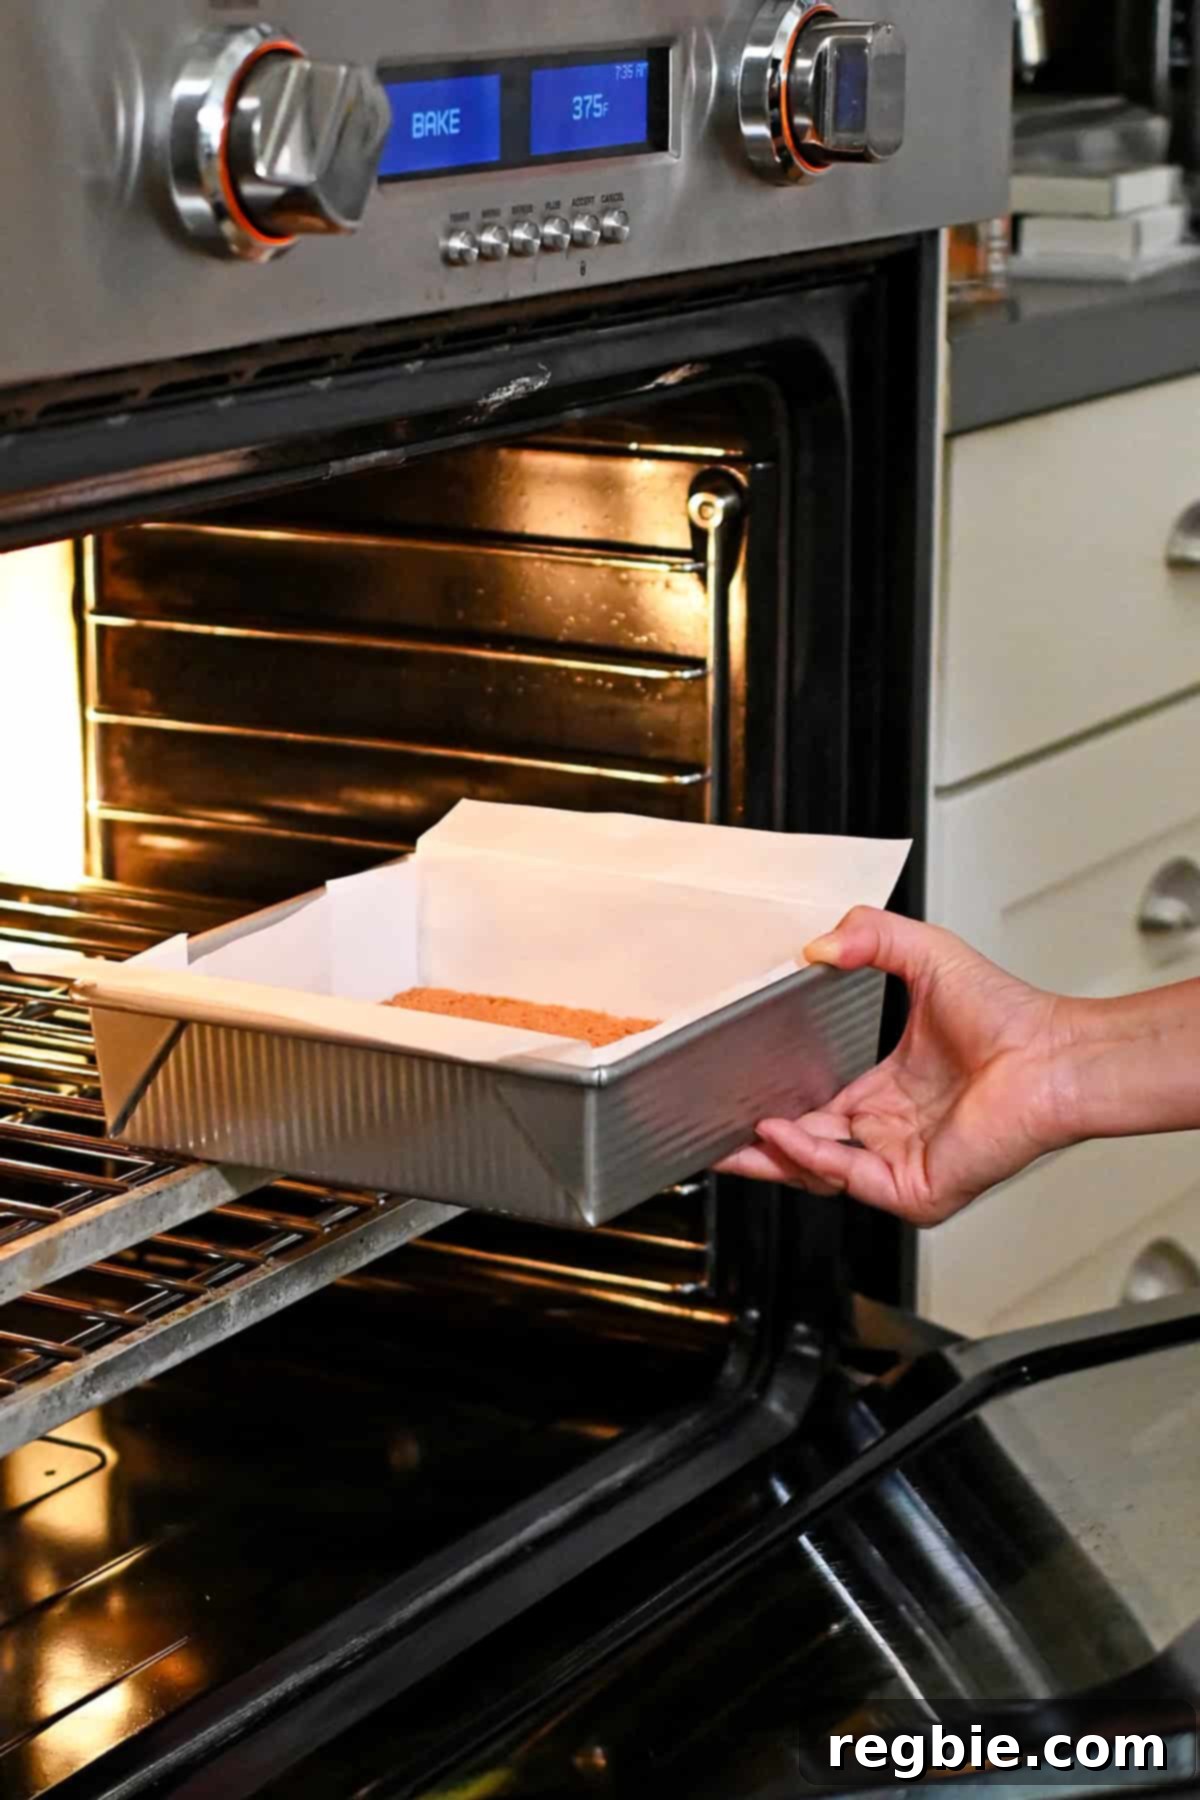
Once baked, remove the pan from the oven and place it on a wire rack. Allow the cookie crust to cool completely to room temperature before adding the filling. This prevents the filling from warming prematurely and ensures a perfectly set final product.
Whip Up the Smooth Pumpkin Pie Filling: Creamy & Spiced
Now, it’s time to prepare the star of the show: the rich and spiced pumpkin filling. This step requires a bit of care to ensure a perfectly smooth and custardy texture.
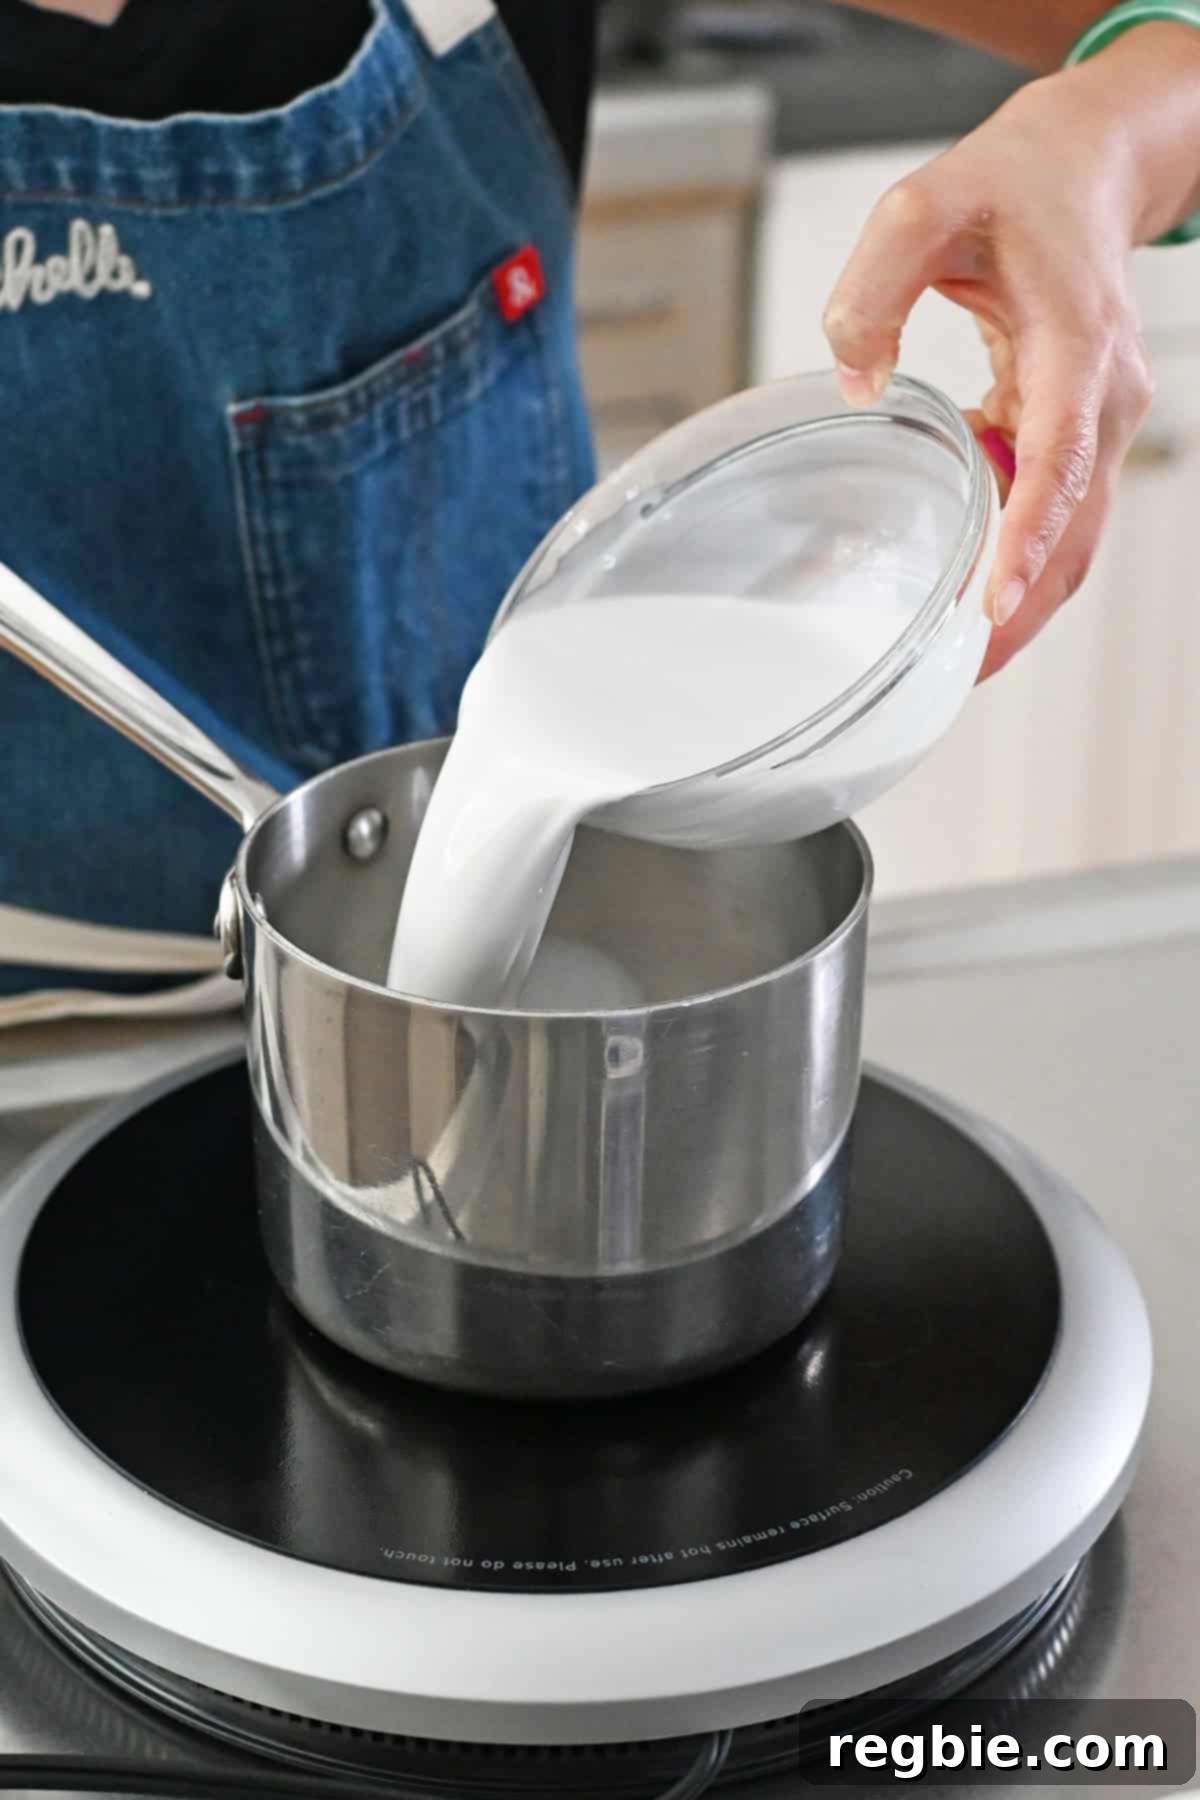
In a small saucepan, gently heat the full-fat coconut milk over low heat until it’s steaming but not boiling. You’ll see small bubbles forming around the edges. Alternatively, you can microwave it in a glass measuring cup until it’s steamy. Warming the coconut milk is crucial for tempering the eggs later, preventing them from scrambling.
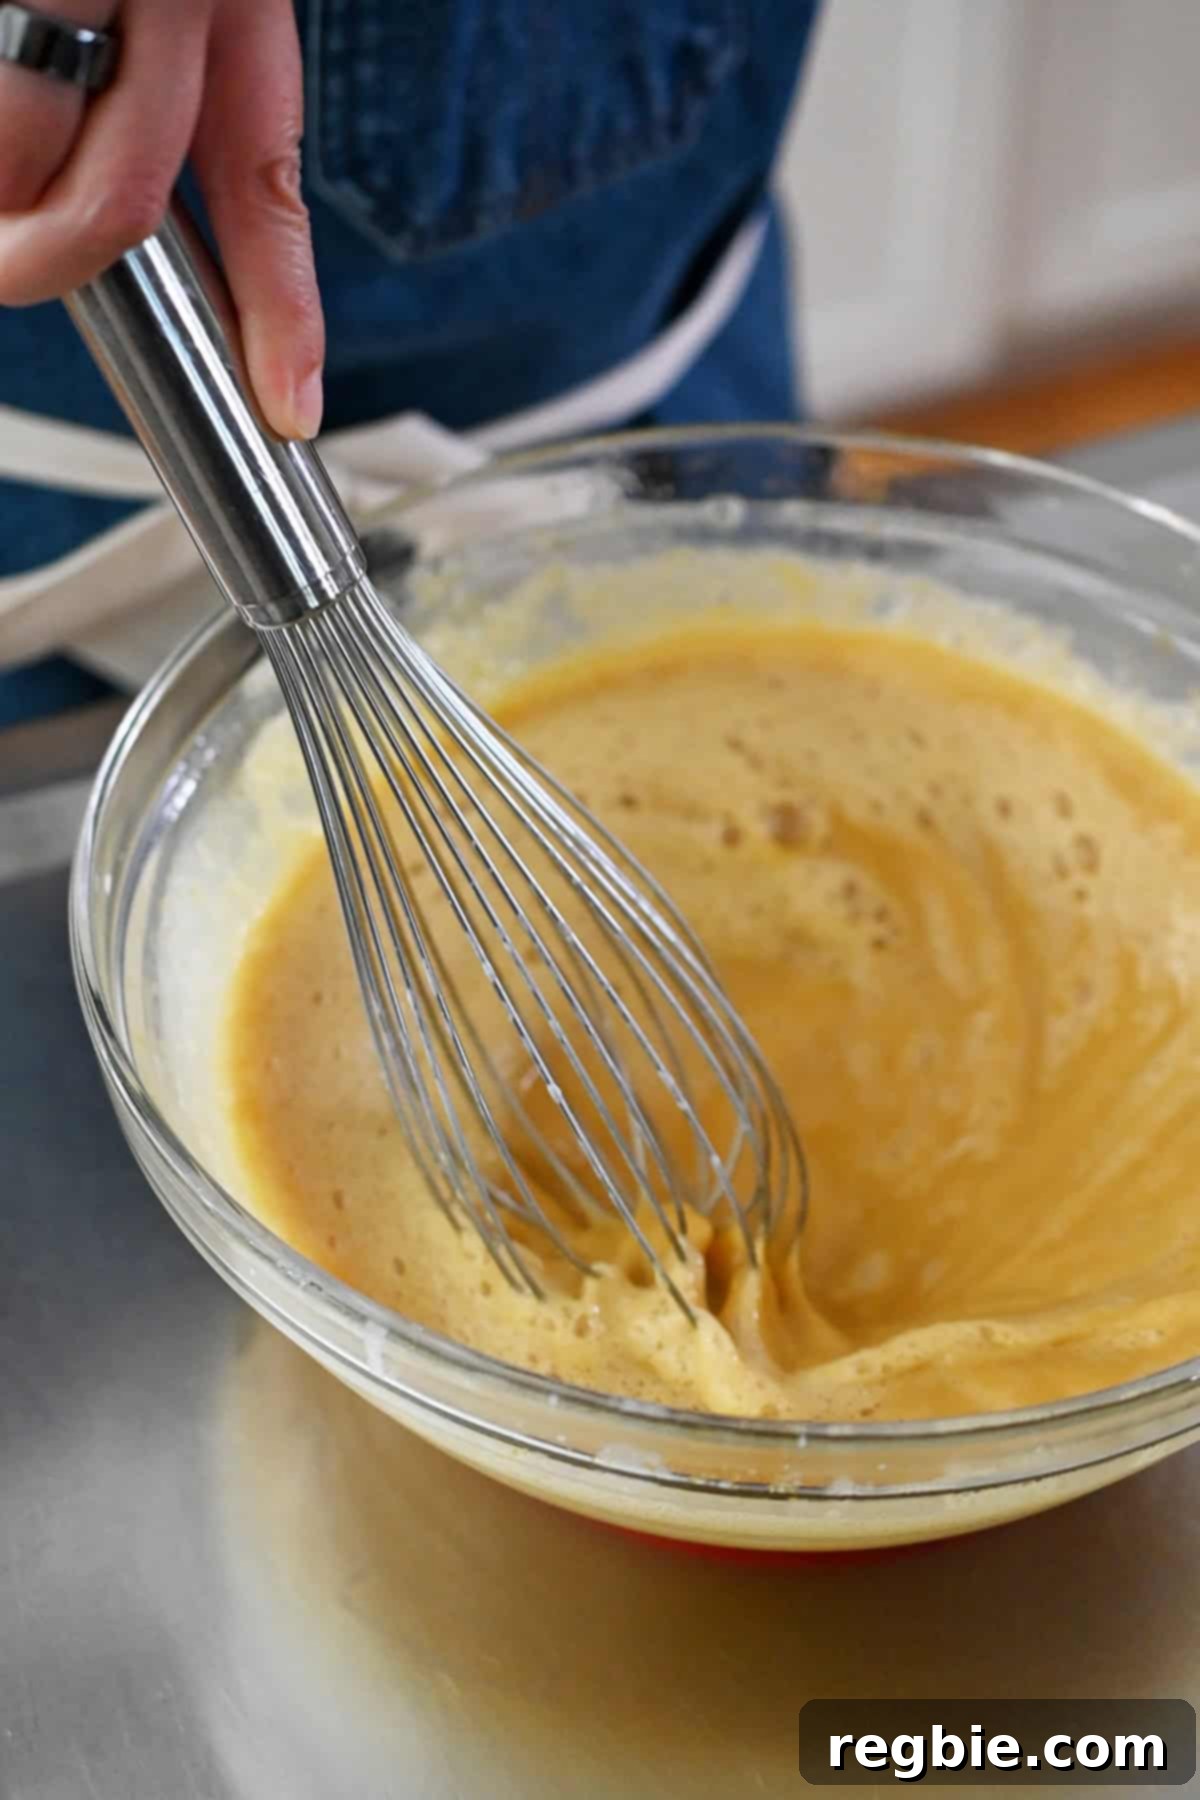
Grab a large mixing bowl and add the large eggs and maple syrup. Whisk them together thoroughly with a hand whisk or a hand mixer until the mixture is light yellow, smooth, and well combined. This ensures the eggs are fully incorporated before tempering.
Here’s the key to a silky-smooth filling: slowly and steadily, pour the warmed coconut milk into the egg and maple syrup mixture while whisking vigorously. Add only a little bit at a time initially, continually whisking, to gradually bring the egg mixture up to temperature. This process, known as tempering, prevents the eggs from cooking too quickly and scrambling. Patience is vital here – avoid dumping all the hot coconut milk in at once! Continue whisking until you achieve a creamy, uniform mixture. Pro tip: place a silicone trivet or a damp kitchen towel under your mixing bowl to keep it stable while you whisk.
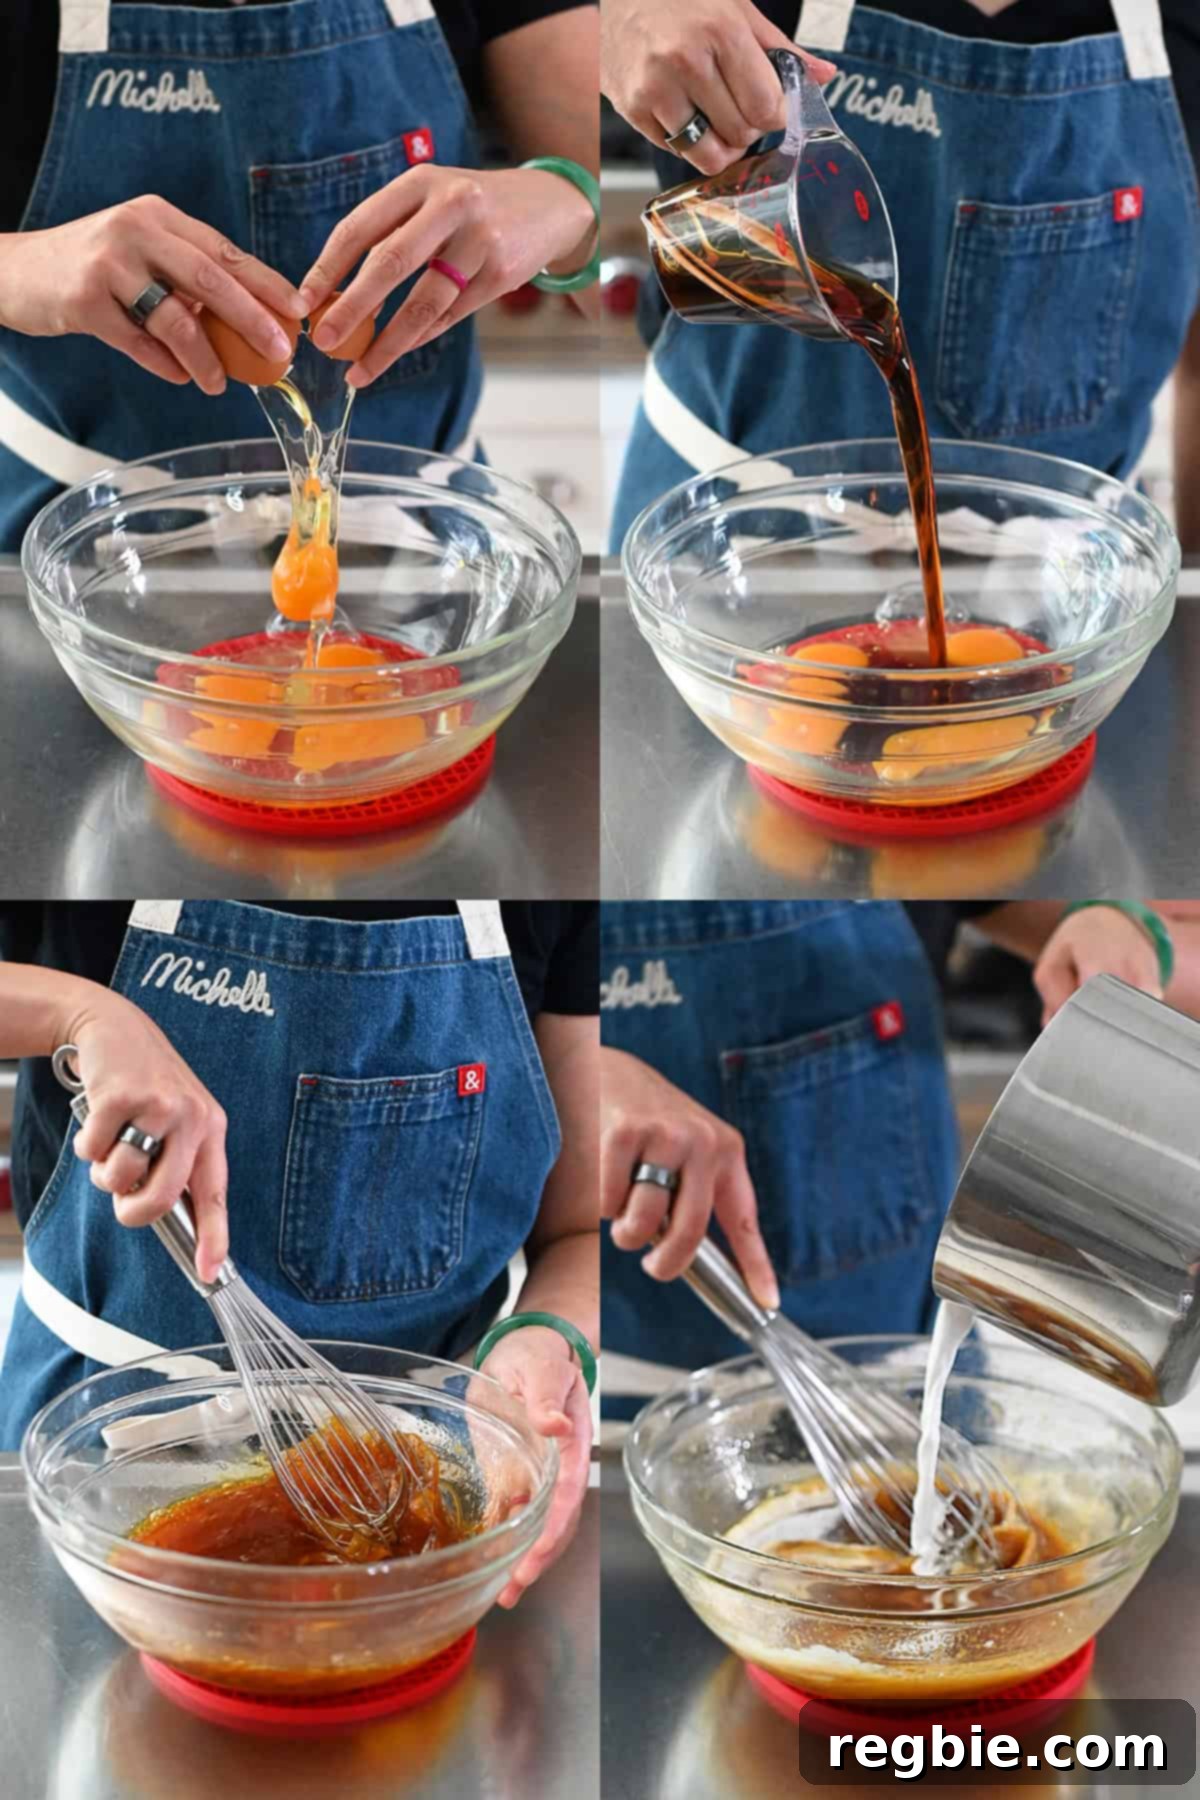
The resulting mixture should be perfectly smooth and homogenous, ready for the pumpkin. Any lumps indicate the need for more vigorous whisking or a slower tempering process.
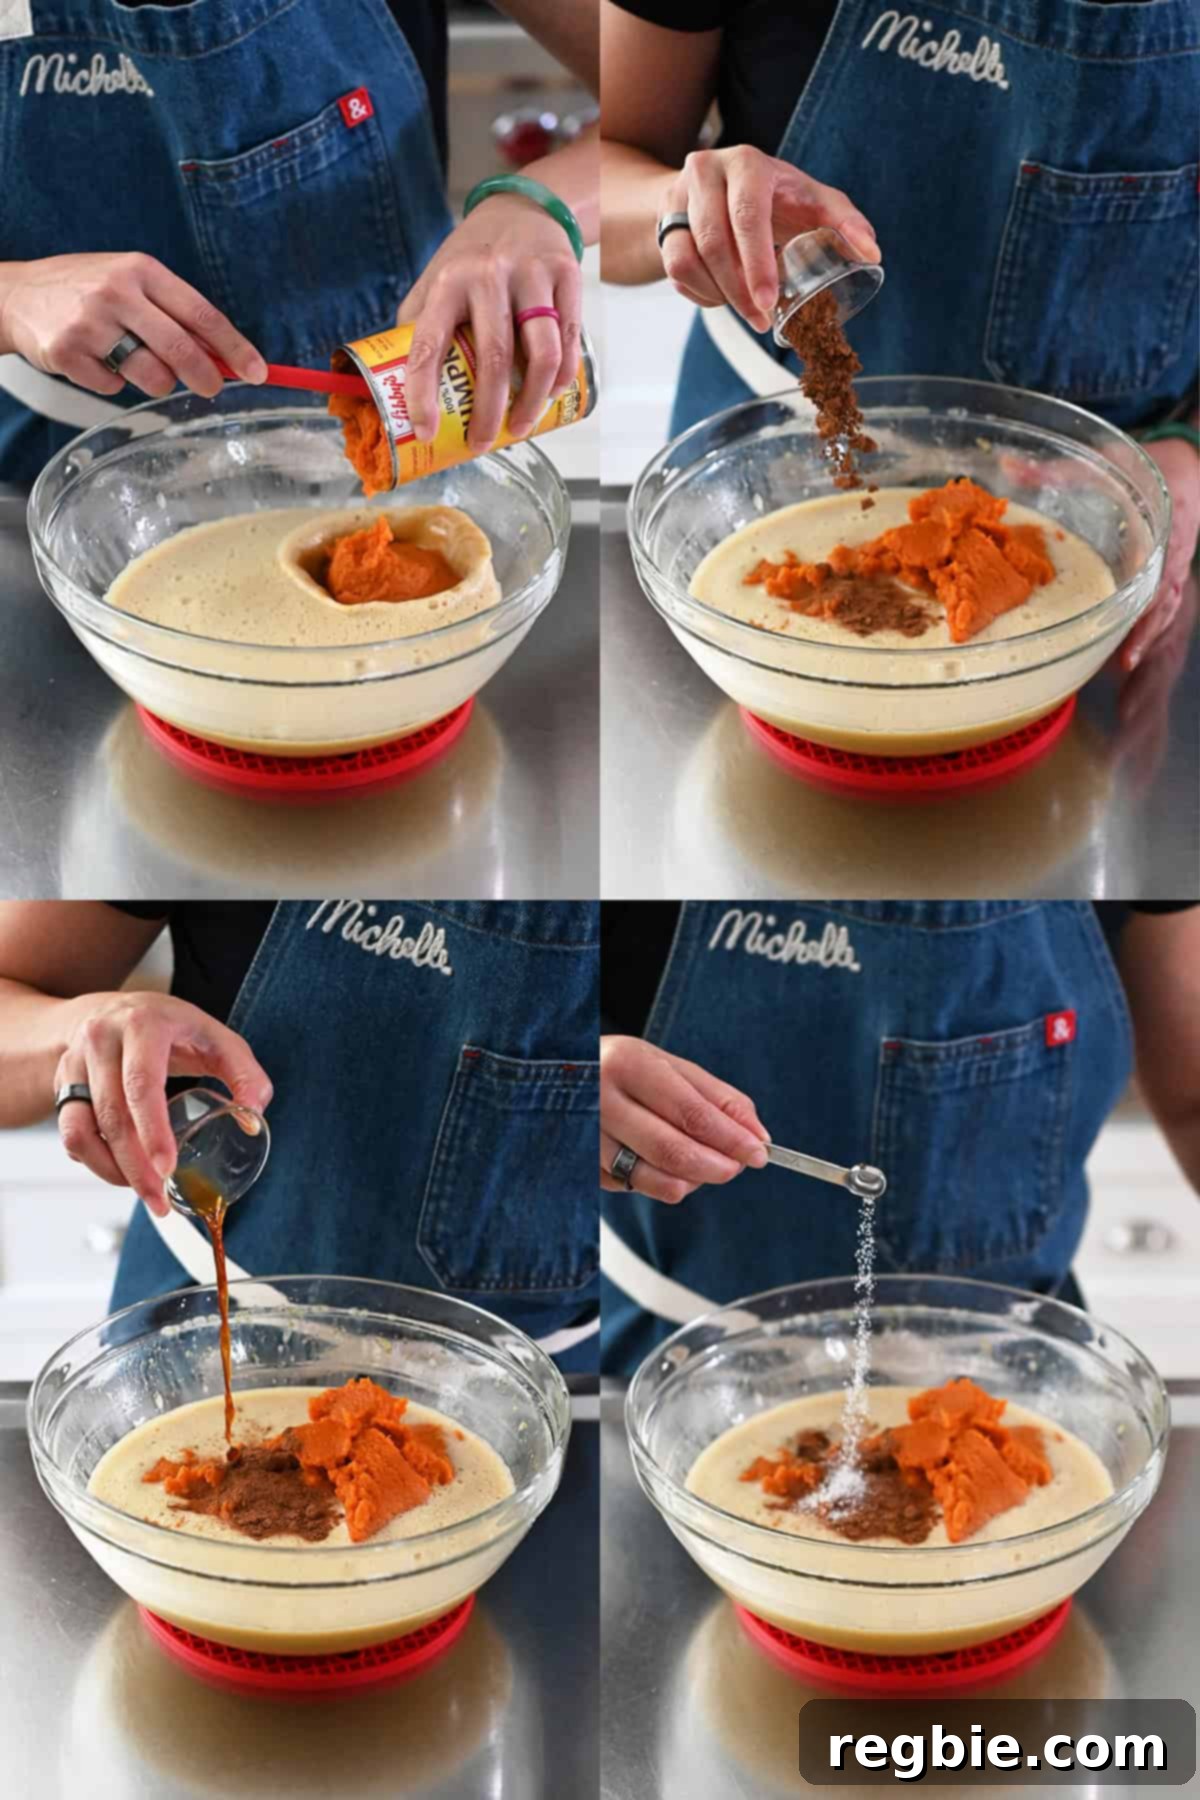
Now, add the canned pumpkin purée, pumpkin pie spice blend, vanilla extract, and the remaining salt to the tempered egg mixture. These ingredients will infuse the filling with its signature fall flavors.
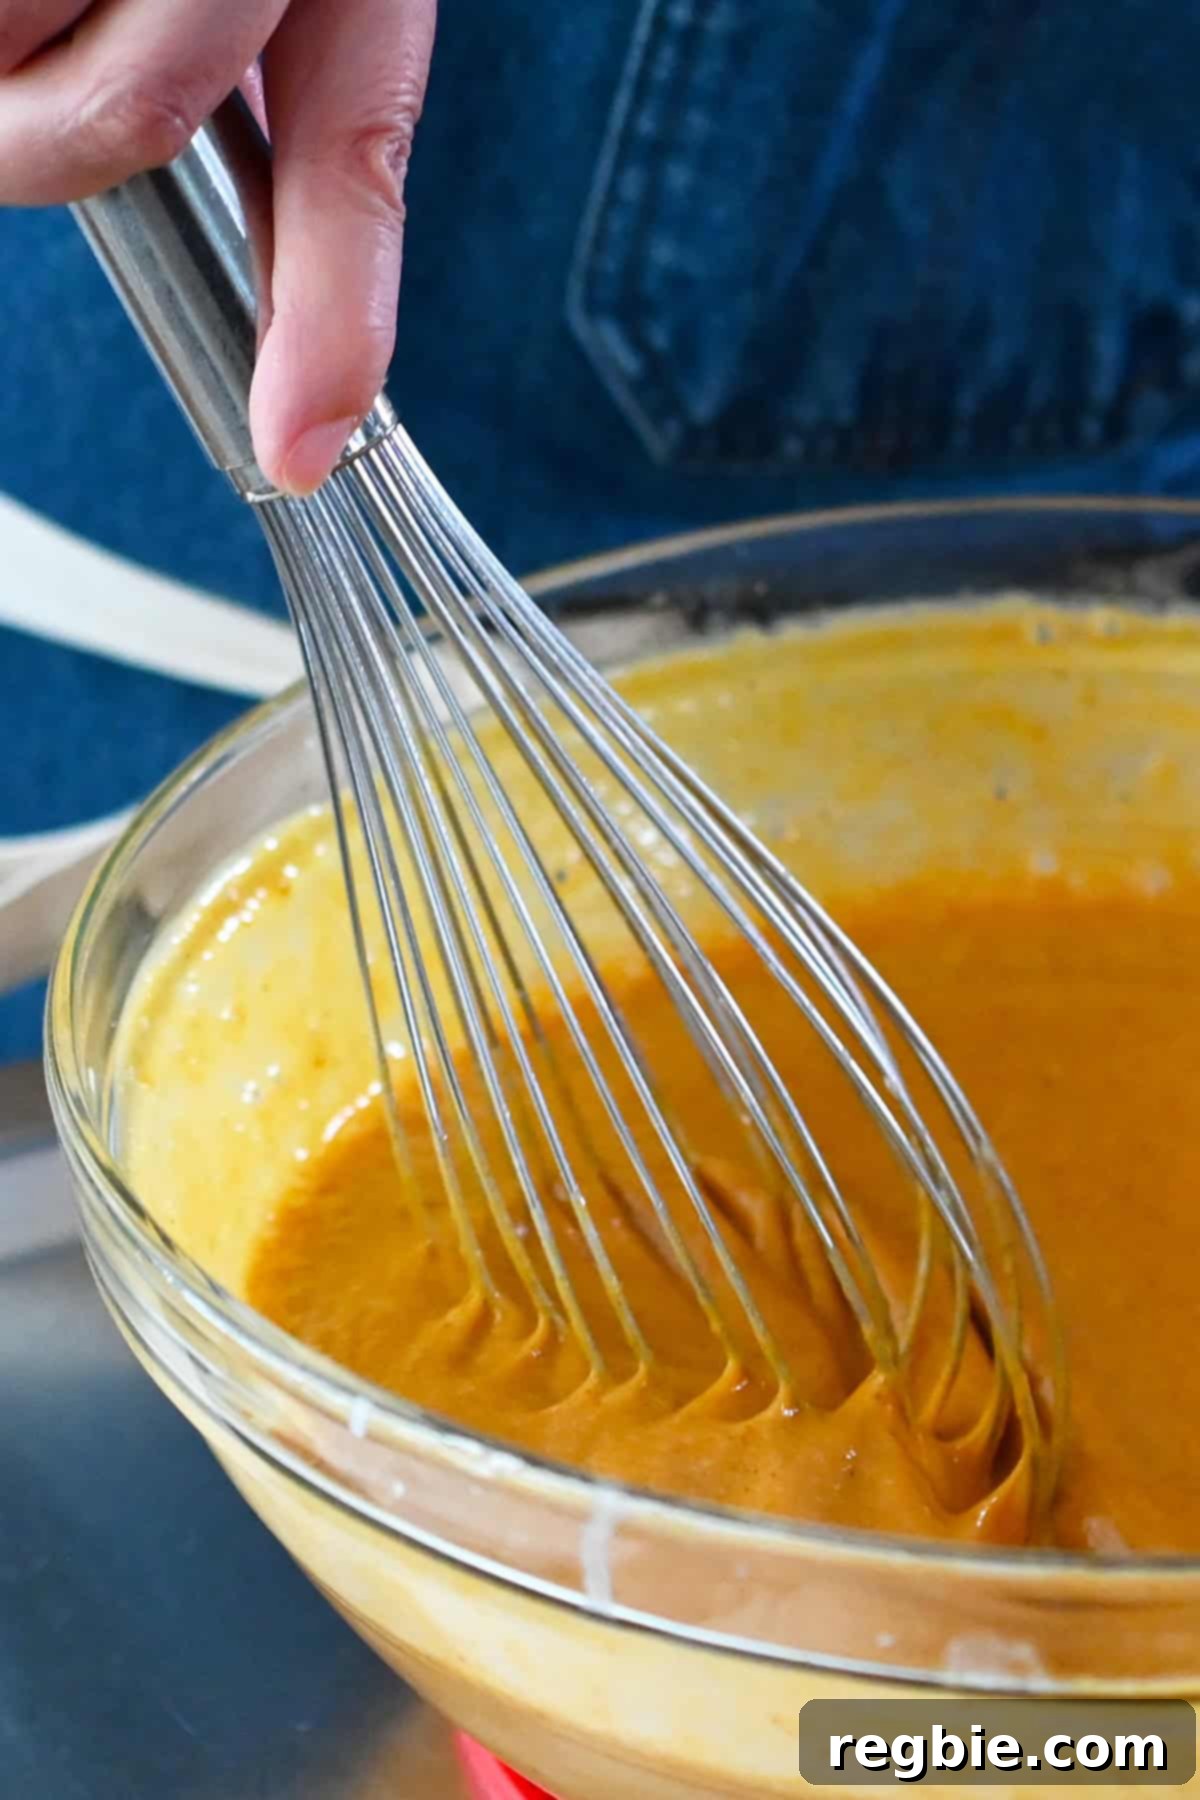
Whisk everything together until all the ingredients are thoroughly combined, and the filling is smooth, vibrant, and evenly spiced. There should be no streaks of unmixed pumpkin or spices. This beautifully blended mixture is now ready for baking.
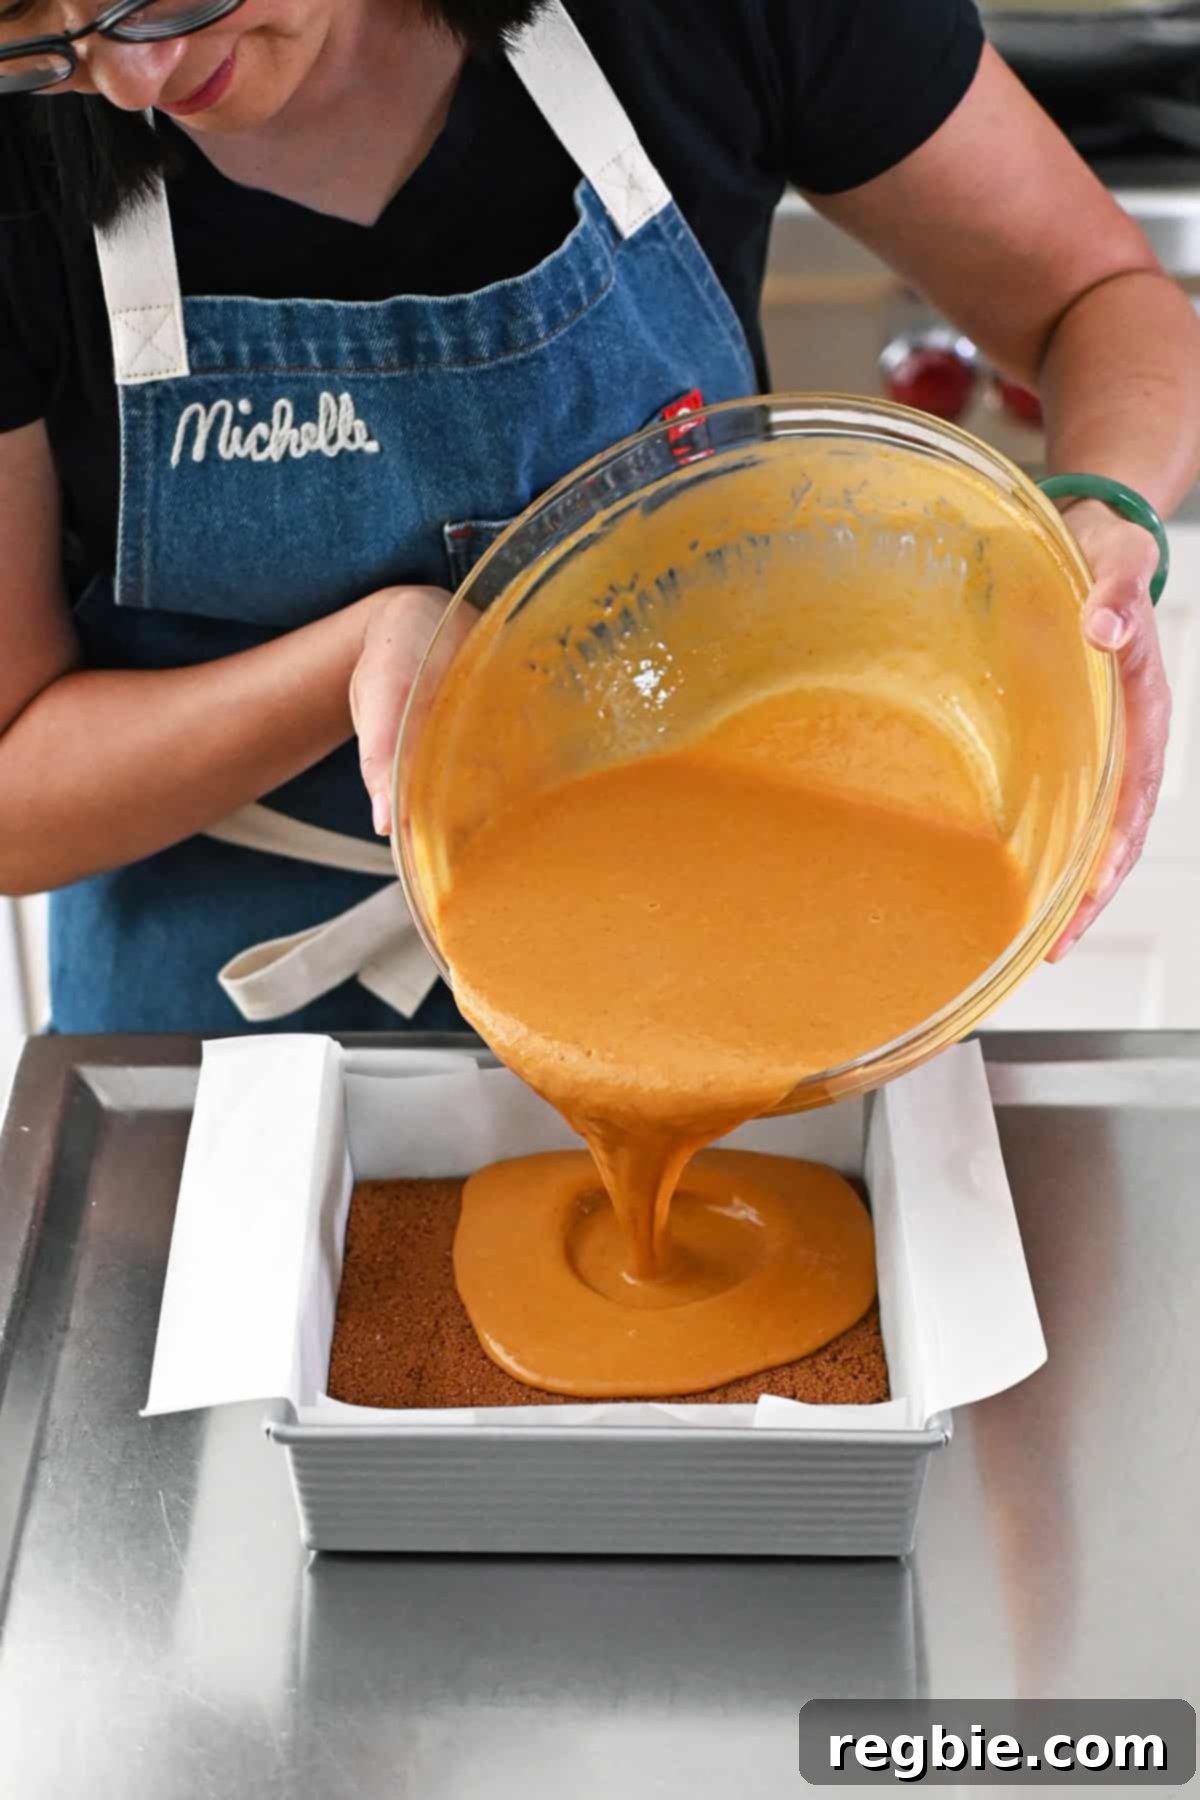
Carefully pour the creamy pumpkin filling over the cooled cookie crust in your prepared pan. Ensure the filling spreads evenly across the crust without disturbing it. A gentle shake of the pan can help to even out the surface.
Bake to Golden Perfection: Achieving the Ideal Texture
With the filling poured, it’s time to transform your creation into perfectly baked pumpkin pie bars. Gently place the pan into your preheated oven and bake at 375°F (190°C) for approximately 45-50 minutes. Baking times can vary slightly depending on your oven, so keep an eye on them.
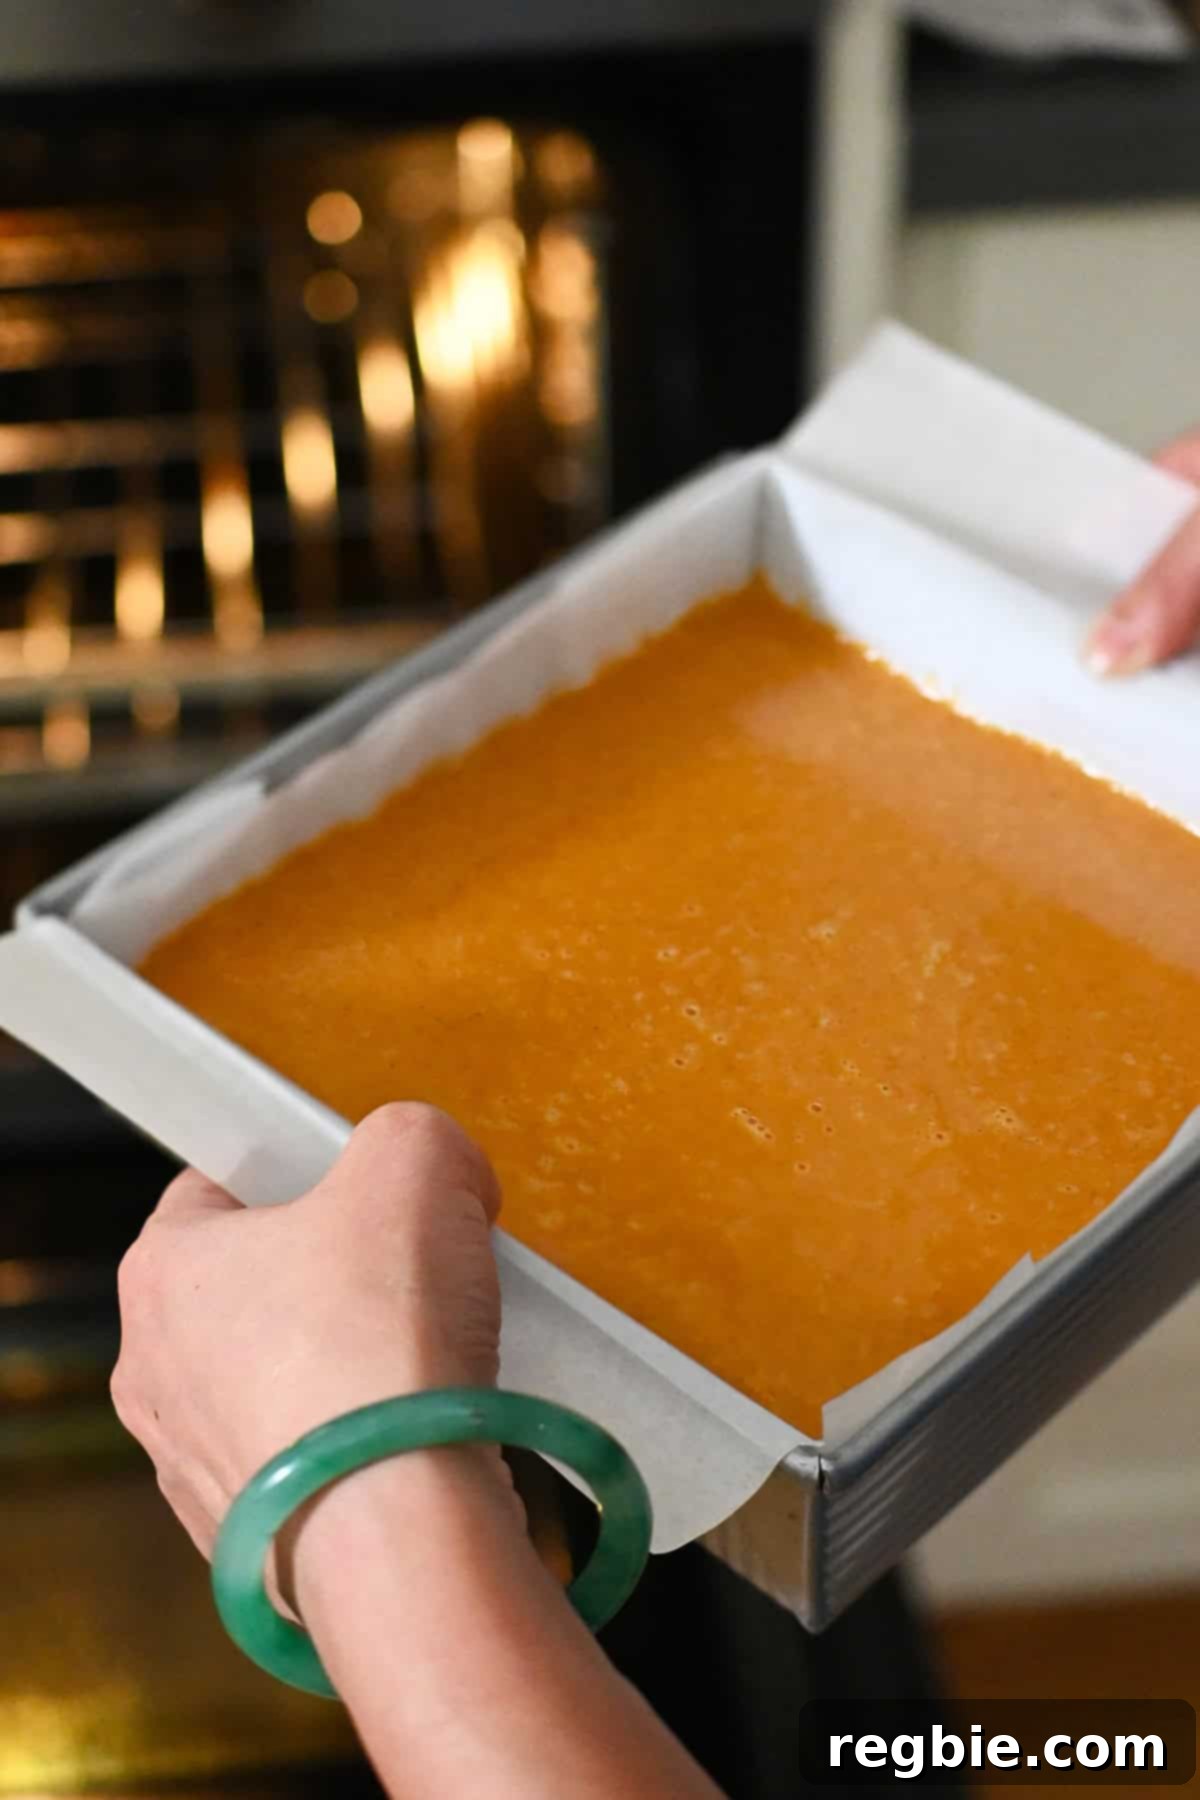
The pumpkin pie bars are ready when the filling appears puffed around the edges, looks mostly dry on the surface, and has only a slight jiggle in the very center when gently nudged. You might also notice a few hairline cracks forming around the perimeter, which is a good indication of doneness. For ultimate precision, you can use an instant-read thermometer to check the internal temperature; it should register 175°F (79°C) in the center. Overbaking can lead to a dry filling, so pull them out as soon as they reach these indicators!
Cool for Ideal Texture: Patience is a Virtue
This step is often overlooked but is absolutely critical for the perfect pumpkin pie bar experience. Once baked, remove the pan from the oven and transfer it to a wire rack. Allow the bars to cool completely in the pan to room temperature, which typically takes about 2 to 3 hours. Resist the urge to cut into them too soon, as the filling needs time to fully set and firm up. Rushing this step can result in a messy, unset filling.
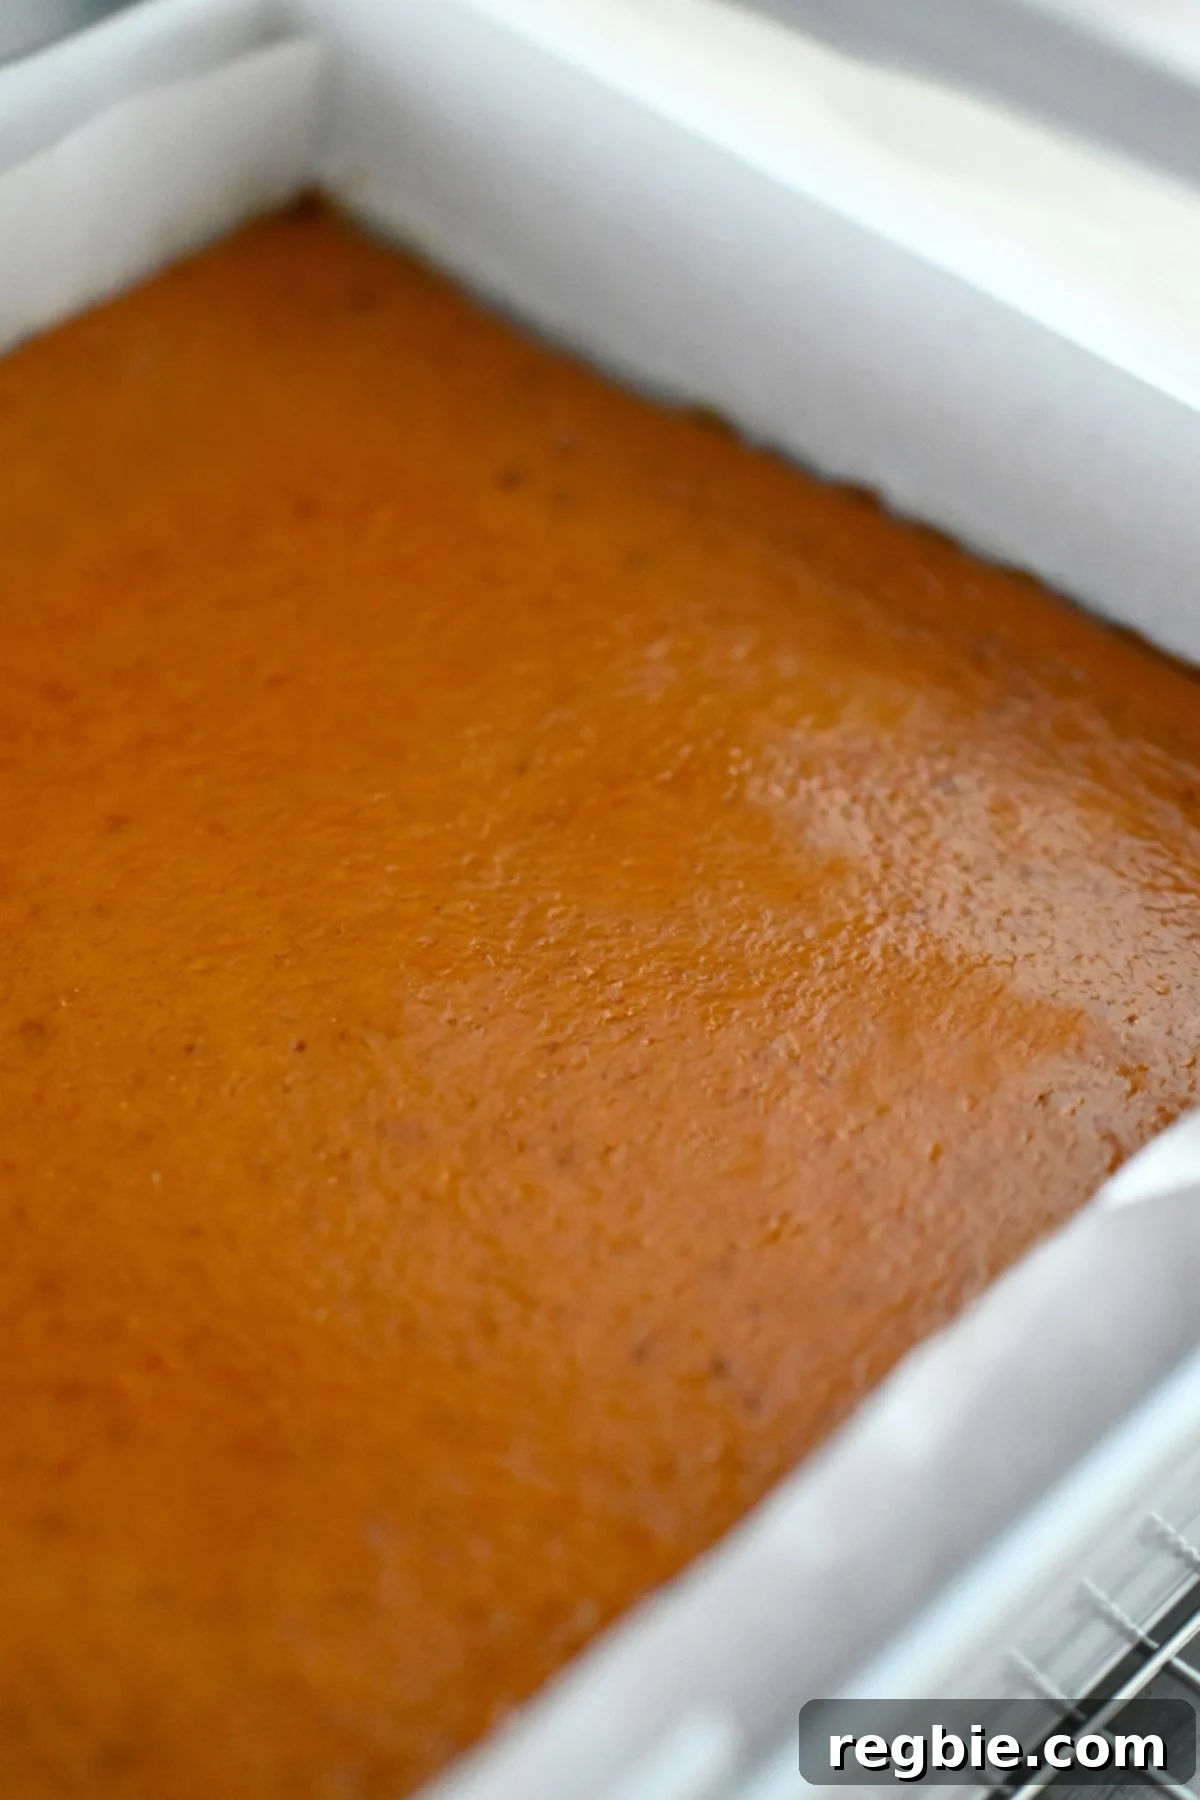
Once completely cool, carefully lift the bars out of the pan using the parchment paper overhang and transfer them to a cutting board. Using a sharp knife, cut them into sixteen even squares. For extra clean cuts, wipe your knife clean between each slice. Serve them as they are, letting the rich pumpkin flavor shine, or take them to the next level with an optional topping.
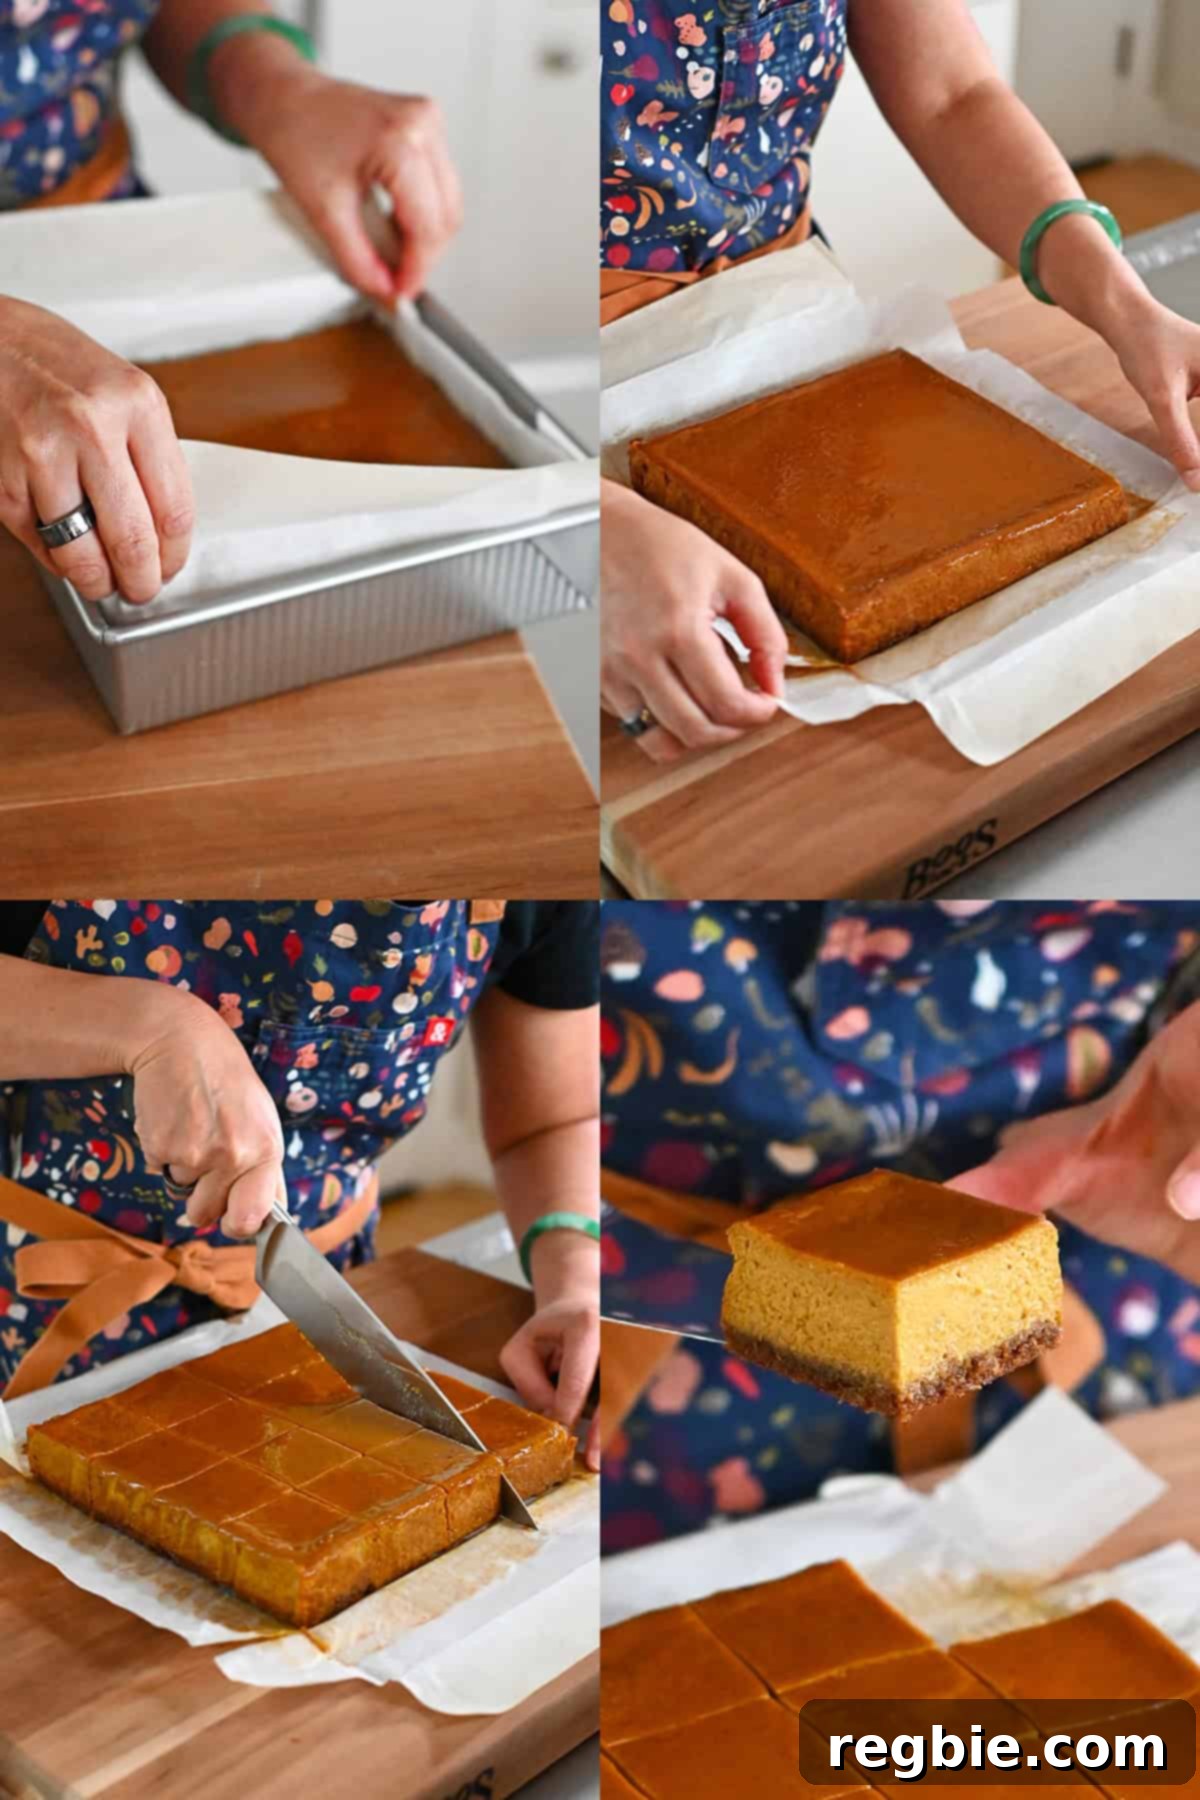
These bars are wonderfully delicious enjoyed plain, offering a pure taste of fall comfort. They make for an excellent snack, dessert, or even a healthier breakfast option.
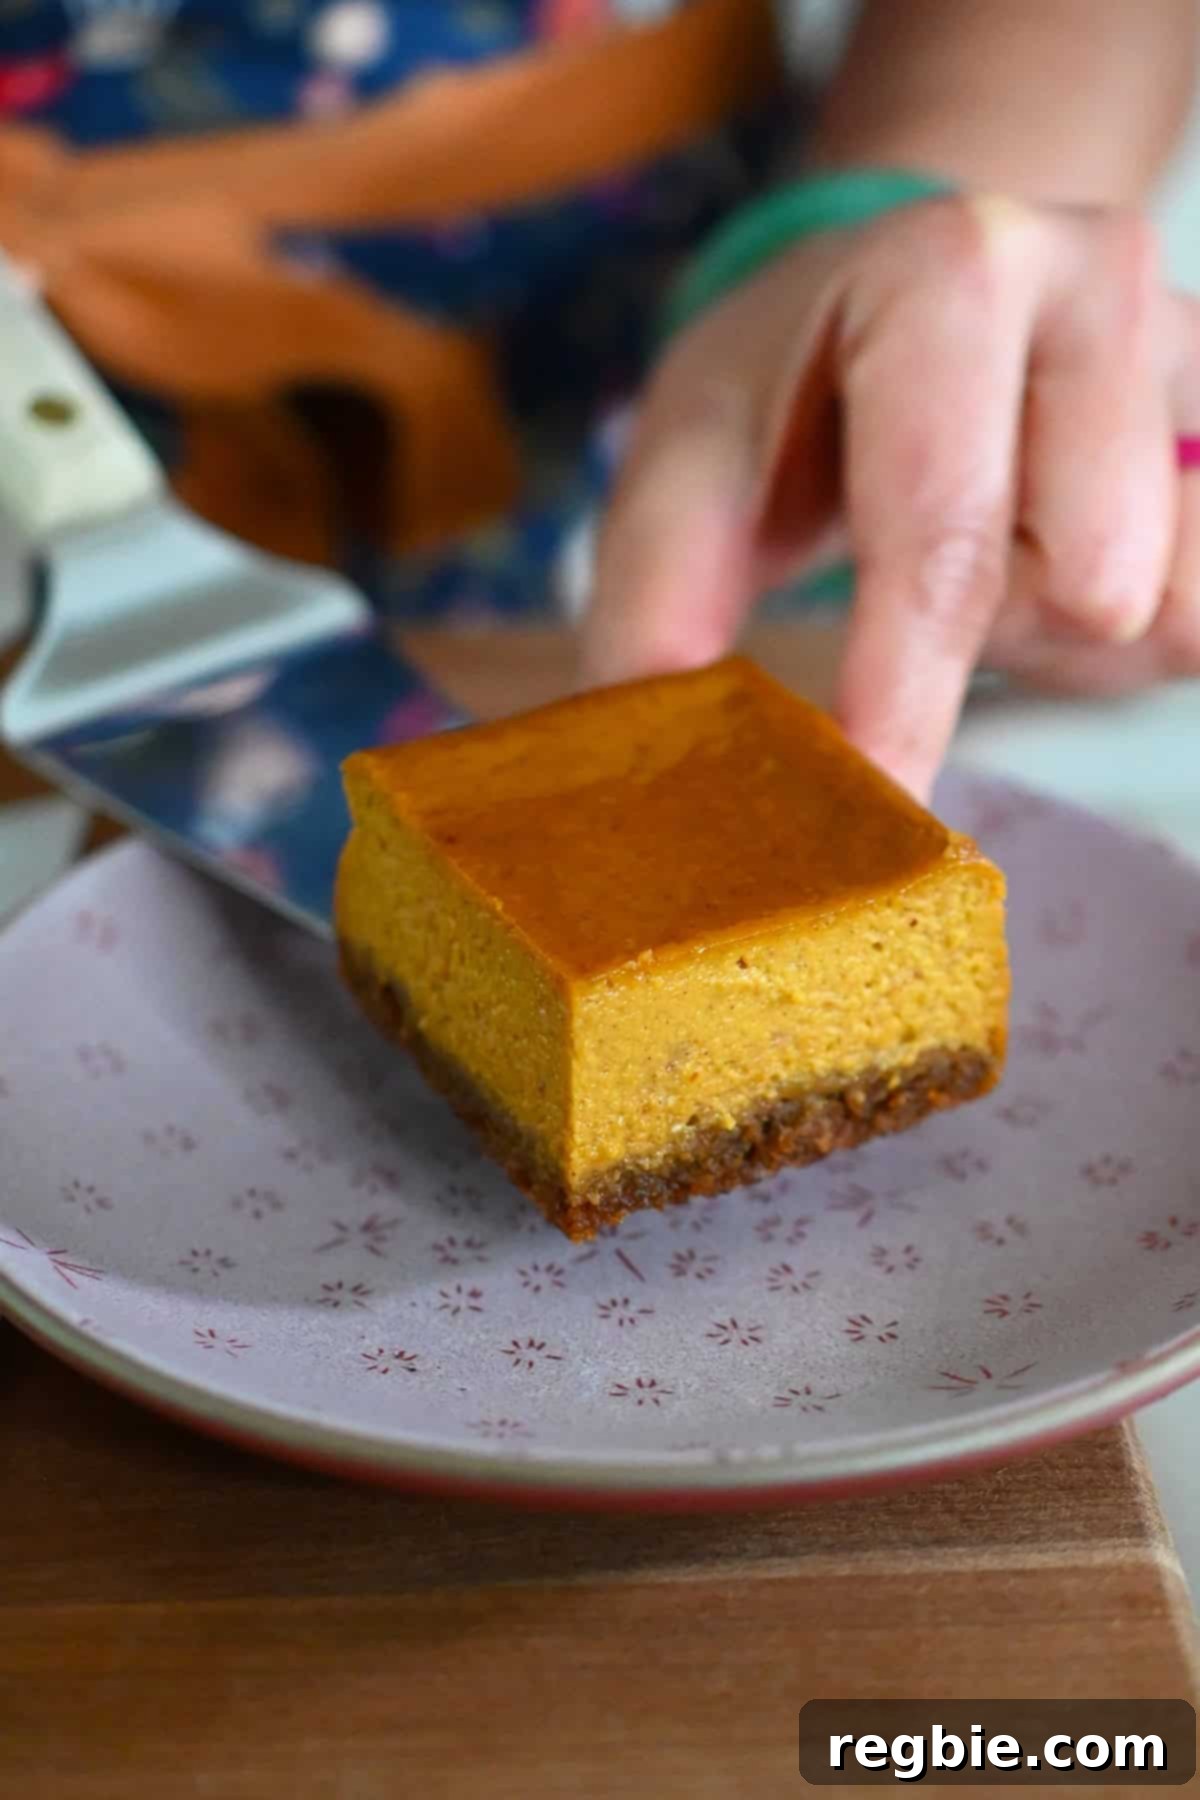
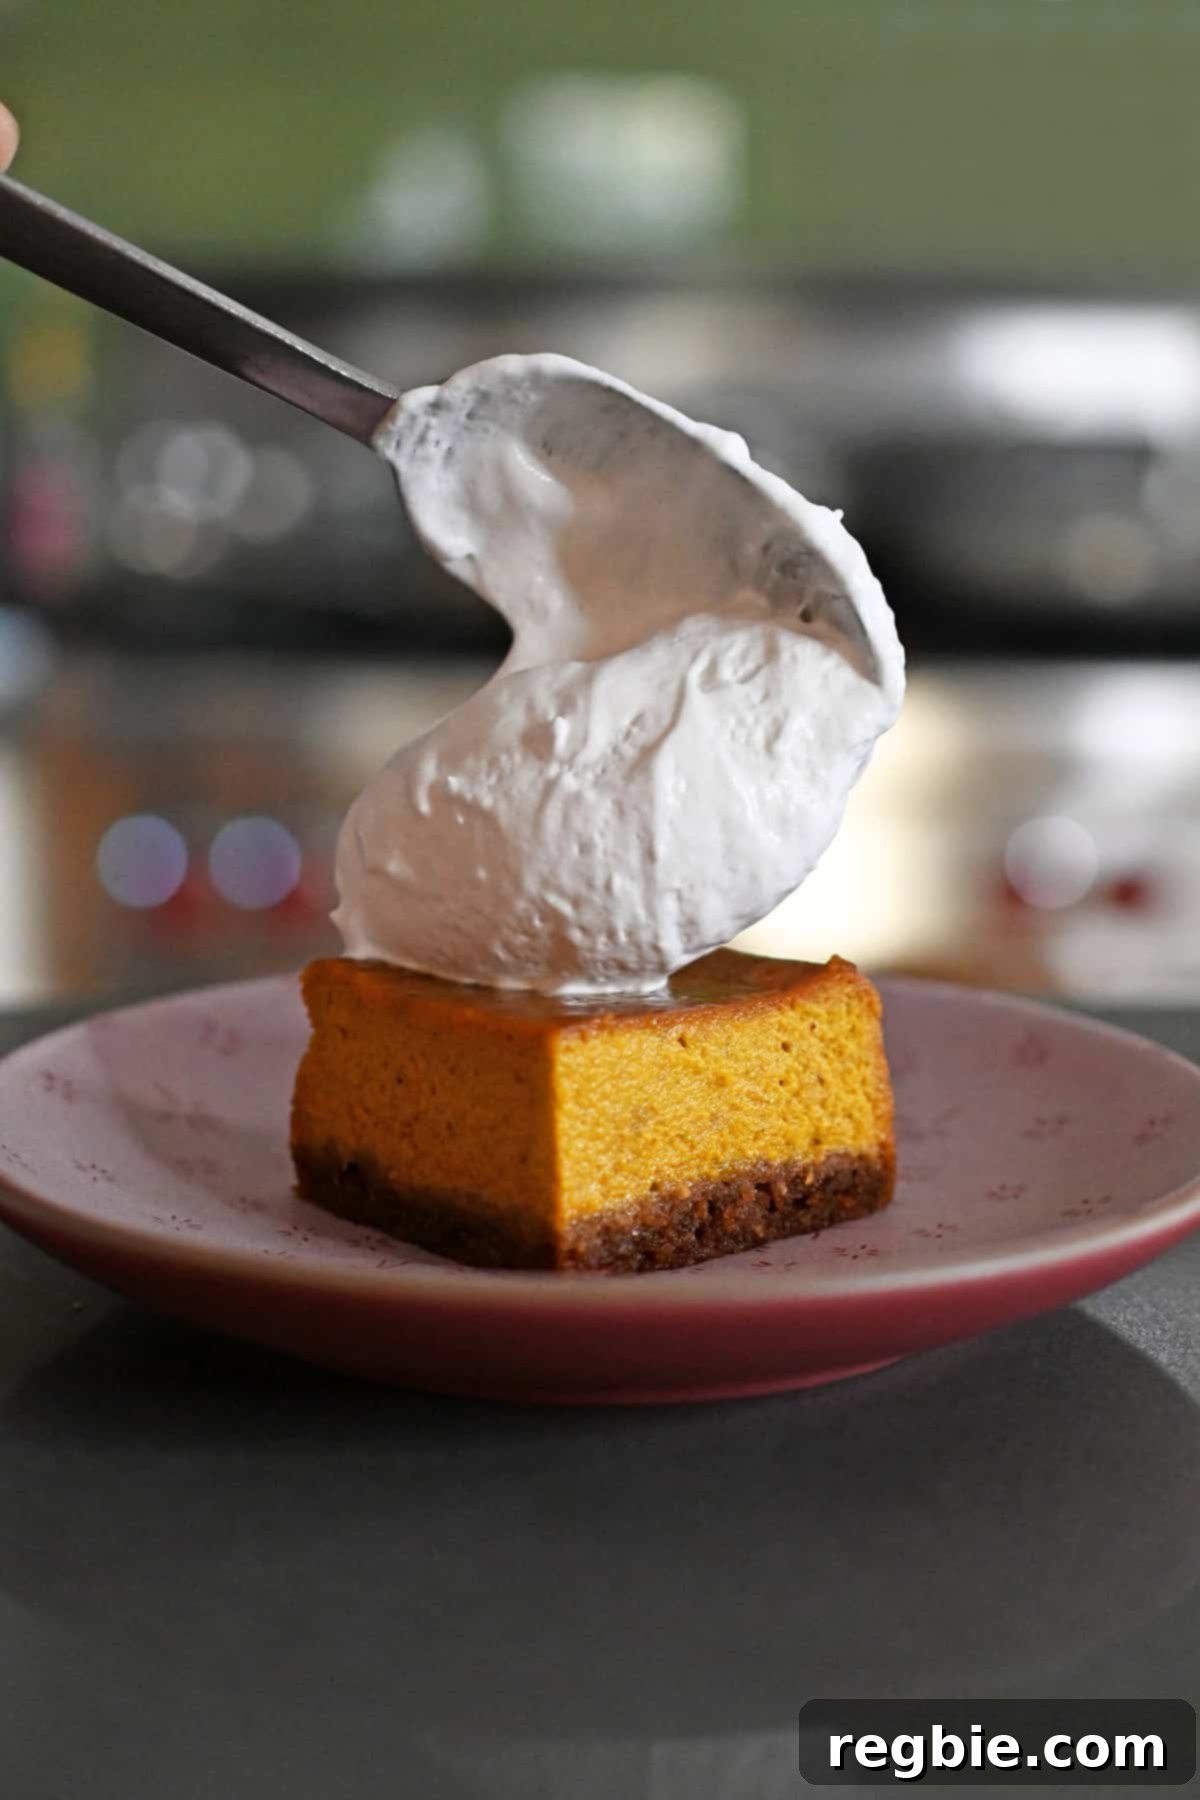
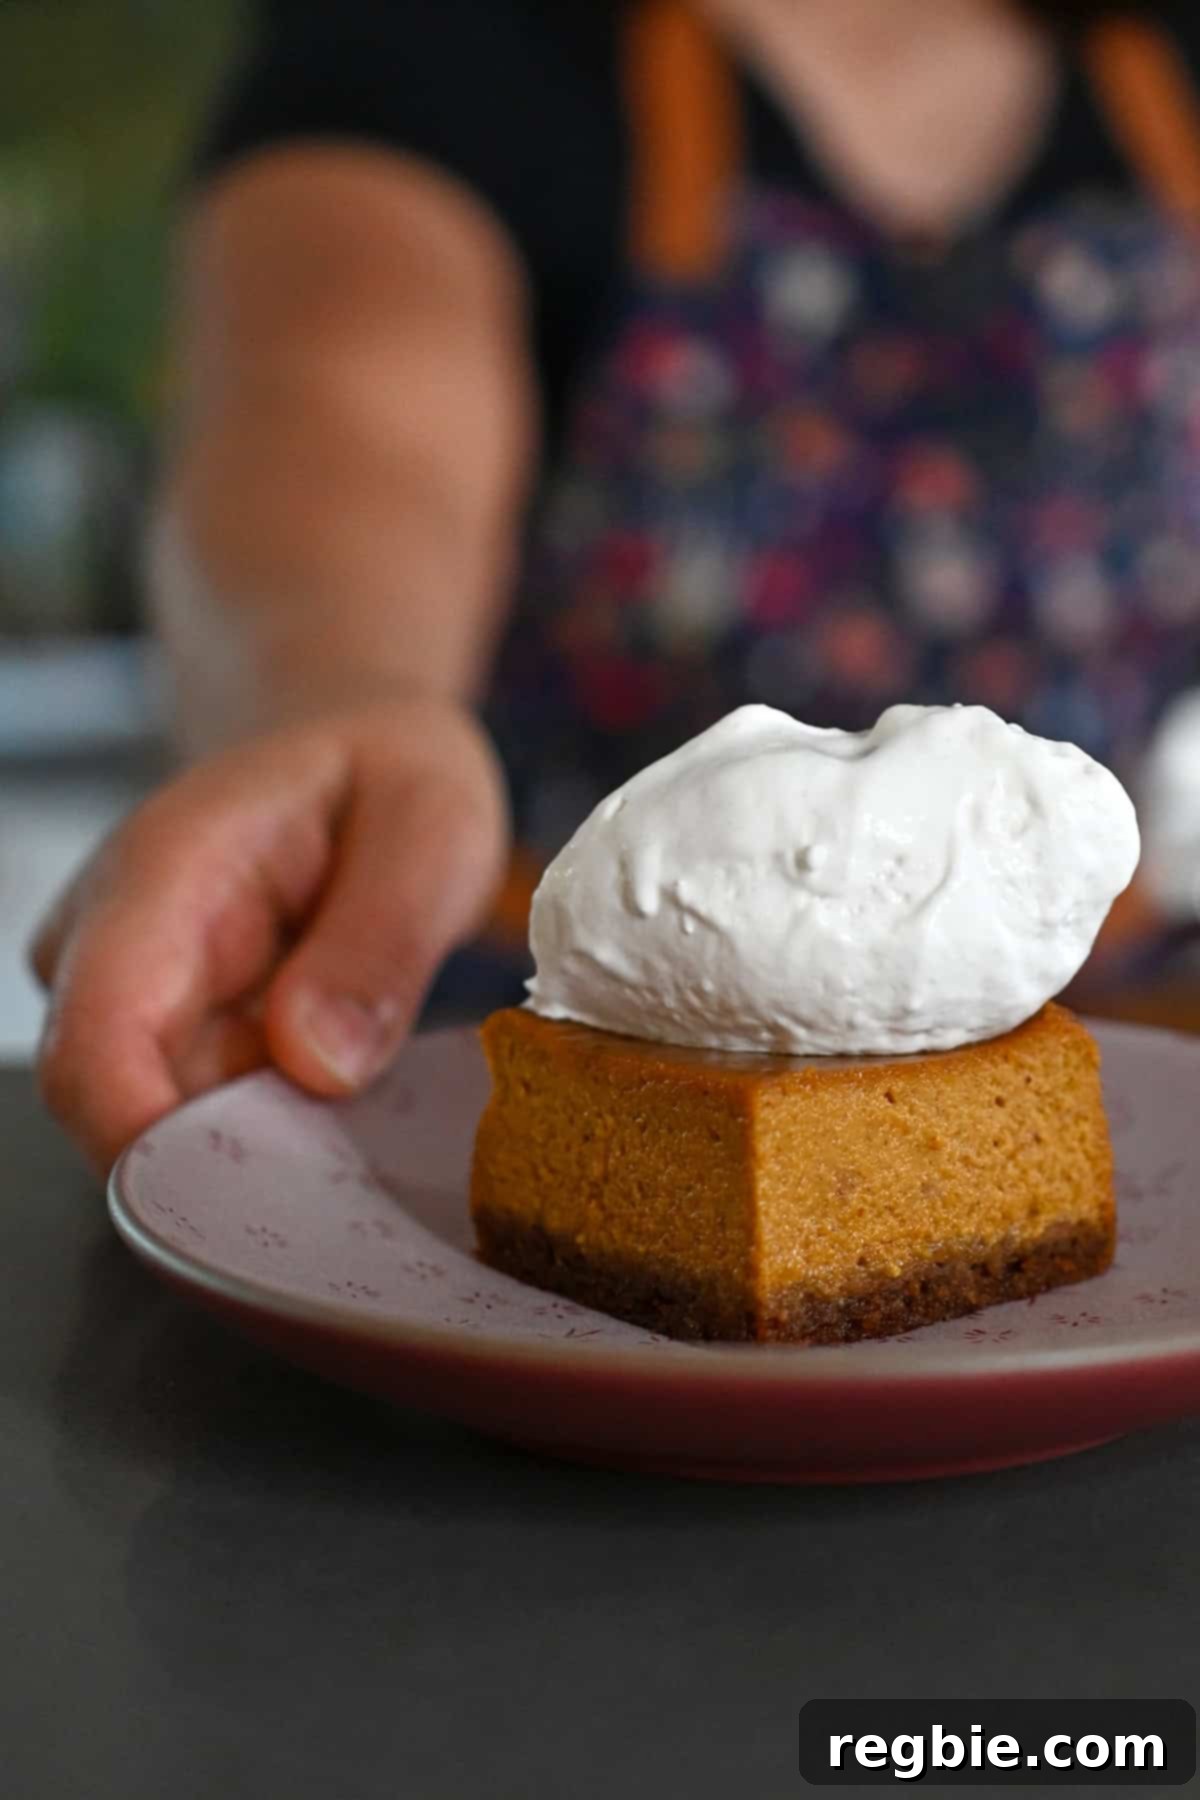
For an extra touch of indulgence, top each square with a generous dollop of whipped coconut cream (for a fully paleo and dairy-free treat) or a swirl of traditional whipped cream. A sprinkle of cinnamon or a tiny drizzle of maple syrup can also elevate the presentation and flavor.
Storing Leftover Pumpkin Pie Bars: Freshness for Days (or Months!)
Planning ahead or have some delicious leftovers? These paleo pumpkin bars are incredibly versatile when it comes to storage, allowing you to enjoy their fresh taste for longer. For immediate consumption, simply place them in an airtight container and store them in the refrigerator. They will maintain their delightful flavor and texture for up to 4 days, making them perfect for meal prepping your week’s dessert or a convenient healthy snack.
If you wish to save a batch for a later date, these bars freeze beautifully! Pop them into a freezer-safe airtight container, ideally with parchment paper between layers to prevent sticking, and they will remain fresh for up to 4 months. This is a fantastic way to ensure you always have a healthy, homemade treat on hand for unexpected guests or sudden cravings.
To thaw your frozen pumpkin pie bars, simply transfer them from the freezer to the refrigerator and allow them to defrost slowly over several hours or overnight. This gradual thawing process is key to preserving their original texture and rich flavor. When you’re ready to serve, they’ll taste almost as good as if they were freshly baked, offering a convenient and delicious option whenever you desire a taste of autumn.
More Healthy Pumpkin Recipes to Explore
If you’ve fallen in love with these pumpkin pie bars, you’ll be thrilled to discover a world of other healthy pumpkin-infused delights. Pumpkin is an incredibly versatile ingredient, offering not just a rich flavor but also a host of nutritional benefits. From comforting muffins to quick mug cakes, there’s a paleo pumpkin recipe for every craving. Expand your autumn baking repertoire with these fantastic grain-free and gluten-free options:
- Paleo Pumpkin Muffins: Perfect for breakfast or a snack.
- Quick Pumpkin Mug Cake: An instant, single-serving treat.
- Classic Pumpkin Bars (Paleo-Friendly): Another delightful bar variation.
- Chewy Pumpkin Cookies: A soft and spiced cookie option.
- Pumpkin Coconut Maple Custard Cups: A sophisticated, creamy dessert.
- Pumpkin Snickerdoodles: A beloved cookie with a seasonal twist.
Each of these recipes brings the wholesome goodness and warm spices of pumpkin to your table in a health-conscious way, proving that delicious and nutritious can go hand in hand.
Searching for even more inspiring recipe ideas? Be sure to visit my comprehensive Recipe Index, where you’ll find a treasure trove of delicious, healthy meals and treats. Additionally, discover exclusive recipes and culinary wisdom in my acclaimed cookbooks: Nom Nom Paleo: Food for Humans (Andrews McMeel Publishing 2013), Ready or Not! (Andrews McMeel Publishing 2017), and the latest installment, Nom Nom Paleo: Let’s Go! (Andrews McMeel Publishing 2022). Happy cooking!
Pumpkin Pie Bars
Prep Time: 10 mins
Cook Time: 1 hr 20 mins
Cooling Time: 2 hrs
Total Time: 3 hrs 30 mins
Servings: 16
Author: Michelle Tam
Whip up these easy, 10-ingredient pumpkin pie bars! With wholesome ingredients and a grain-free crust, these paleo treats taste amazing and are a hit with even non-paleo eaters!
Ingredients
Cookie Crust
- 5 ounces grain-free cookies (I use Simple Mills Honey Cinnamon Sweet Thins Cookies, about 60 cookies)
- 2 tablespoons coconut sugar
- ½ teaspoon Diamond Crystal kosher salt (Use half the amount if substituting with sea salt or Morton’s brand kosher salt.)
- ¼ cup melted refined coconut oil (or melted ghee or butter)
Pumpkin Pie Bar Filling
- 1¼ cup full-fat canned coconut milk
- 4 large eggs
- ¾ cup maple syrup
- 15 ounces canned pumpkin purée (I like Libby’s brand)
- 1½ teaspoons pumpkin spice blend
- 1 teaspoon vanilla extract
- ¼ teaspoon Diamond Crystal kosher salt (Use half the amount if substituting with sea salt or Morton’s brand kosher salt.)
- Whipped coconut cream (optional topping)
Instructions
Make the Cookie Crust
- Heat the oven to 375°F (190°C) with the rack in the middle. While the oven is heating, grab an 8 x 8-inch metal square baking pan and line it with parchment paper. You don’t have to line the pan with parchment paper (you can grease the pan instead) but I prefer parchment for ease of removal and cleaning.
- Dump the cookies into a food processor and pulse until fine crumbs form.
- In a large bowl, combine the cookie crumbs, coconut sugar, Diamond Crystal kosher salt, and melted coconut oil, and mix well until it looks like wet sand. Press the crumb mixture into the bottom of the parchment lined baking pan and press it into an even layer with a spatula or offset spatula.
- Bake the cookie crust in the oven for 6 to 9 minutes or until lightly browned. When the cookie crust is finished baking, place the pan on a wire rack and cool the cookie crust to room temperature.
Make the Pumpkin Pie Bar Filling
- Heat the coconut milk in a small saucepan over low heat until it’s steaming but not boiling. (You can also microwave it in a glass measuring cup until steaming.)
- Grab a large mixing bowl and add the eggs and maple syrup. Mix well with a hand whisk or hand mixer until thoroughly combined.
- Then, in a slow and constant stream, add the warmed coconut milk to the egg and syrup mixture, a little bit at a time, and mix vigorously. Don’t be impatient and add the hot coconut milk all at once or you’ll end up with scrambled eggs! You should end up with a creamy, uniform mixture. (Pro tip: put a silicone trivet or damp kitchen towel under the bowl so it stays in place).
- Next, add the pumpkin purée, pumpkin spice blend, vanilla extract, and salt to the egg mixture. Whisk until evenly combined.
- Pour the creamy pumpkin filling into the pan with the cooled cookie crust.
Bake the Pumpkin Pie Bars
- Pop the pan in the oven and bake the pumpkin pie bars at 375°F (190°C) for about 45-50 minutes. The pumpkin pie bars are ready when the filling is puffed, dry looking, only slightly jiggly in the center, and has a few cracks on the edges. You can double check if the filling is done by using an instant-read thermometer and checking that the filling temperature is 175°F (79°C).
- Before serving the pumpkin pie bars, cool them in the pan to room temperature on a wire rack, about 2 to 3 hours.
- Transfer to a cutting board and cut into sixteen even squares. Serve as-is or top with a dollop of whipped coconut cream.
Notes
Got leftovers? You can store these paleo pumpkin bars in an airtight container in the refrigerator for up to 4 days and they’ll stay just as delicious. If you want to save some for later, pop them in the freezer where they’ll last for up to 4 months. To thaw, simply move them from the freezer to the fridge and let them sit for several hours or overnight. This slow thawing process preserves the bars’ texture and flavor, so that when you’re ready to serve, they’ll taste almost as good as when they were freshly made.
Nutrition
Calories: 179 kcal | Carbohydrates: 23g | Protein: 3g | Fat: 10g | Trans Fat: -31.996g | Fiber: 1g | Sugar: 13g | Vitamin C: 1mg
Nutrition information is automatically calculated, so should only be used as an approximation.