
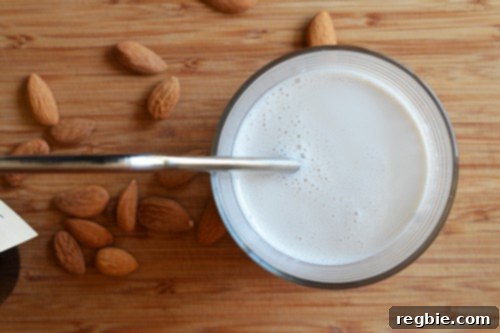
This comprehensive guide will show you how to effortlessly create delicious, creamy homemade vanilla almond milk that far surpasses any store-bought alternative. Say goodbye to watered-down, overpriced options and embrace the fresh, wholesome goodness of a truly homemade dairy-free delight!
Easy Homemade Vanilla Almond Milk: Your Guide to a Wholesome Dairy-Free Delight
There’s an undeniable charm and superior taste that comes with making things from scratch, and homemade vanilla almond milk is no exception. If you’ve ever felt underwhelmed by the thin texture or artificial taste of commercially produced almond milk, you’re in for a delightful surprise. Crafting your own nut milk at home is not only incredibly simple but also yields a product that is richer, creamier, and infinitely more flavorful, all while being free from unnecessary additives and sweeteners.
Why Choose Homemade Vanilla Almond Milk?
The journey to embracing homemade foods often begins with a realization: the store-bought versions, while convenient, often compromise on quality, taste, and nutritional value. This is particularly true for items like almond milk, which can be surprisingly costly for a product that’s often more water than nuts, filled with gums, thickeners, and added sugars.
A Journey from ’90s Skeptic to Modern Health Enthusiast
It’s funny how life transforms our perspectives. Not long ago, a conversation with an old college friend sparked a moment of reflection: What would my ’90s self think of the person I am today? Without hesitation, I knew the answer. My younger, tie-dye-clad, Doc Martens-wearing Berkeley self would have probably scoffed at my current lifestyle. She’d ridicule my newfound passions: fermenting kombucha, conscientiously collecting bones for homemade broth, and, yes, soaking almonds overnight to create dairy-free milk. The idea of a nearly 40-year-old still sporting pigtails, while deeply engaged in such “earthy” pursuits, would undoubtedly elicit an eye-roll of epic proportions from my younger, more cynical self.
Yet, the current me, a decidedly more grounded and health-conscious individual, wholeheartedly embraces this midlife transformation. This version of me would gently advise my ’90s counterpart to kick off those heavy boots, explore foods that nourish instead of irritate, unplug from the constant stream of television, and, most importantly, start making some glorious almond milk. It’s a testament to how our priorities shift and how we learn to value what truly makes us feel good.
Unmatched Freshness and Flavor
Once you’ve experienced the pure, vibrant taste of freshly made vanilla almond milk, it’s hard to go back. A frosty glass of this homemade elixir truly hits the spot, especially for those who abstain from dairy or are lactose intolerant. It’s so incredibly delicious that I’ve come to accept the “aging hippie” label that might come with my dedication to activating almonds. The subtly sweet, nutty flavor, enhanced by a hint of pure vanilla, creates a beverage that is both refreshing and satisfying, perfect for a morning cereal, coffee, smoothies, or enjoyed simply on its own.
Health Benefits and Dietary Advantages
Beyond taste, homemade almond milk offers significant health benefits. It’s naturally dairy-free, making it an excellent choice for individuals with lactose intolerance, dairy allergies, or those following vegan or plant-based diets. Almonds themselves are packed with essential nutrients, including Vitamin E (a powerful antioxidant), magnesium, healthy fats, and fiber. By making it at home, you control the ingredients, ensuring there are no unwanted sugars, artificial flavors, or chemical stabilizers often found in commercial brands. This allows you to reap the full nutritional benefits of the almonds in their most natural form.
The Simple Science of Soaking Almonds
The secret to wonderfully creamy and digestible homemade almond milk lies in a simple yet crucial step: soaking the almonds. While it adds a bit of planning time, the active preparation itself remains minimal. Soaking almonds for 12 to 18 hours softens them, making them easier to blend into a smooth, silky milk. More importantly, soaking helps to neutralize phytic acid, an antinutrient naturally present in nuts and seeds, which can inhibit the absorption of minerals. This process not only makes the milk more nutritious but also contributes to a noticeably smoother texture and a richer flavor profile.
Essential Equipment for Homemade Almond Milk
Making your own almond milk is surprisingly straightforward and doesn’t require a kitchen full of specialized gadgets. However, two pieces of equipment are truly indispensable for achieving the best results:
- High-Speed Blender: A powerful blender is the heart of this operation. While a regular blender can work, a high-speed model (like a Vitamix or Blendtec) will pulverize the almonds more effectively, creating a smoother, creamier milk with minimal pulp. Investing in a good blender is a long-term decision that will serve you well for many other kitchen tasks, from smoothies to soups.
- Nut Milk Bag: This fine-mesh bag is essential for straining the blended almond mixture, separating the smooth milk from the coarse almond pulp. While cheesecloth can be used in a pinch, a dedicated nut milk bag is far more efficient, easier to clean, and yields a clearer, pulp-free milk. These days, my nut milk bag is almost always within arm’s reach, hanging conveniently from a cabinet knob.
Crafting Your Own Vanilla Almond Milk: Step-by-Step Recipe
Let’s dive into making this delightful beverage. The process is simple, rewarding, and takes only about 5 minutes of active work once your almonds are soaked.
Ingredients
- 1 cup raw almonds (preferably organic)
- 2½ cups water, plus additional water for soaking
- 1 teaspoon pure vanilla extract
- Pinch of sea salt
Instructions
- Prepare the Almonds for Soaking: Begin by measuring out 1 cup of raw almonds. Place them in a colander and rinse them thoroughly under cold running water to remove any dust or debris.
- Initiate Soaking: Transfer the rinsed almonds to a large pitcher or a mason jar. Add at least twice the volume of water over the almonds. If your tap water has a strong taste or contains impurities, opt for filtered water for the best results. Cover the container with a clean towel to protect it from dust while allowing air circulation. Let the almonds soak at room temperature for a minimum of 12 hours, but no longer than 24 hours. Soaking for too long can lead to fermentation.
- Rinse Soaked Almonds: Once the soaking period is complete, your almonds should appear noticeably plumper. Drain the soaked almonds in a colander and rinse them exceptionally well with several changes of fresh water. This step is important to remove any residual phytic acid and ensures a clean taste.
- Blend the Milk: Transfer the plump, rinsed almonds to your high-speed blender. Add 2½ cups of fresh filtered water, the vanilla extract, and a pinch of sea salt. The salt helps to enhance the flavors and balance the sweetness of the vanilla, even without added sugar.
- Process Until Creamy: Secure the lid on your blender and blend on high speed until the almonds are completely pulverized and the mixture appears smooth and creamy. This typically takes 1 to 2 minutes, depending on the power of your blender. You should see a uniform, milky liquid with no large almond chunks remaining.
- Strain the Milk: Place your nut milk bag into a large pitcher or a generously sized measuring cup. Slowly pour the blended almond mixture into the nut milk bag. Gather the top of the bag and gently but firmly squeeze out all the liquid. Be patient with this step; the more thoroughly you wring out the bag, the more milk you’ll extract, maximizing your yield and minimizing waste.
- Storage: Transfer the freshly strained vanilla almond milk into a clean, spill-proof bottle or airtight container. Store it in the refrigerator for up to 4 days. After this time, the milk may begin to separate or develop an off-flavor.
Tips for Perfect Homemade Almond Milk
Achieving consistently perfect homemade almond milk is easy with a few extra considerations:
Storing Your Homemade Almond Milk
Freshly made almond milk is best enjoyed within 3-4 days when stored in an airtight container in the refrigerator. Natural separation is common; simply give it a good shake before each use to recombine the ingredients. Avoid storing it near foods with strong odors, as almond milk can absorb flavors easily.
Creative Uses for Almond Pulp
Don’t discard the leftover almond pulp! This fibrous byproduct is surprisingly versatile. You can dehydrate it in a low oven or dehydrator to make almond flour, which can be used in baking. Alternatively, incorporate the moist pulp into smoothies, oatmeal, energy bites, or even savory dishes like veggie burgers for added texture and nutrients.
Flavor Variations
While vanilla almond milk is a classic, don’t hesitate to experiment with other flavors:
- Sweeteners: If you prefer a sweeter milk, add a tablespoon or two of maple syrup, agave nectar, or a few pitted dates to the blender with the almonds and water. Adjust to your personal taste.
- Spices: A pinch of cinnamon, nutmeg, or cardamom can add warmth and complexity.
- Cacao: For a chocolatey treat, blend in 1-2 tablespoons of unsweetened cocoa powder or cacao powder.
My trusted high-speed blender has been a workhorse in my kitchen for years. It was my first significant appliance splurge, purchased back when smoothies were all the rage, and it has gracefully transitioned with me through various dietary phases, from low-fat vegetarian to full-on Paleo. From blending ingredients for Green Chicken to creating homemade Sriracha, it’s proven itself to be a worthwhile long-term investment for any home cook who values efficiency and quality.
Conclusion
Making your own vanilla almond milk is a simple act of self-care that reaps immense rewards in taste, health, and satisfaction. It’s a small but significant step towards a more wholesome and flavorful lifestyle. So go ahead, soak those almonds, fire up your blender, and treat yourself to the creamy, delicious difference of homemade!
Looking for more delicious and healthy recipe ideas? Head on over to my Recipe Index. You’ll also find exclusive recipes on my iPhone and iPad app, and in my cookbooks, Nom Nom Paleo: Food for Humans (Andrews McMeel Publishing 2013), Ready or Not! (Andrews McMeel Publishing 2017), and Nom Nom Paleo: Let’s Go! (Andrews McMeel Publishing 2021).
Printer-Friendly Recipe Card: Vanilla Almond Milk
Vanilla Almond Milk
5 mins
12 hrs
12 hrs 5 mins
3 cups
Michelle Tam
Print Recipe
Ingredients
- 1 cup raw almonds
- 2½ cups water plus extra for soaking the almonds
- 1 teaspoon vanilla extract
- 1 pinch salt
Instructions
-
Rinse and drain the almonds. Transfer the almonds to a large pitcher or mason jar and add at least twice the volume of water (use filtered water if your tap water is unpleasant).
-
Cover with a towel and let the nuts soak at room temperature for at least 12 hours (but no longer than 24 hours).
-
When the almonds are ready, dump them in a colander and rinse well with several changes of water.
-
Add the almonds, 2½ cups of water, vanilla, and salt to a high-powered blender. Blend on high until the almonds are pulverized.
-
Grab a nut milk bag and place it in a pitcher or large measuring cup. Pour in the blended almond milk and seal the top of the bag. Slowly squeeze out the milk from the top to the bottom.
-
Transfer the strained milk into a spill-proof bottle and store in the fridge for up to 4 days.
Nutrition
Calories: 278kcal
|
Carbohydrates: 11g
|
Protein: 10g
|
Fat: 24g
|
Fiber: 6g
Nutrition information is automatically calculated, so should only be used as an approximation.