
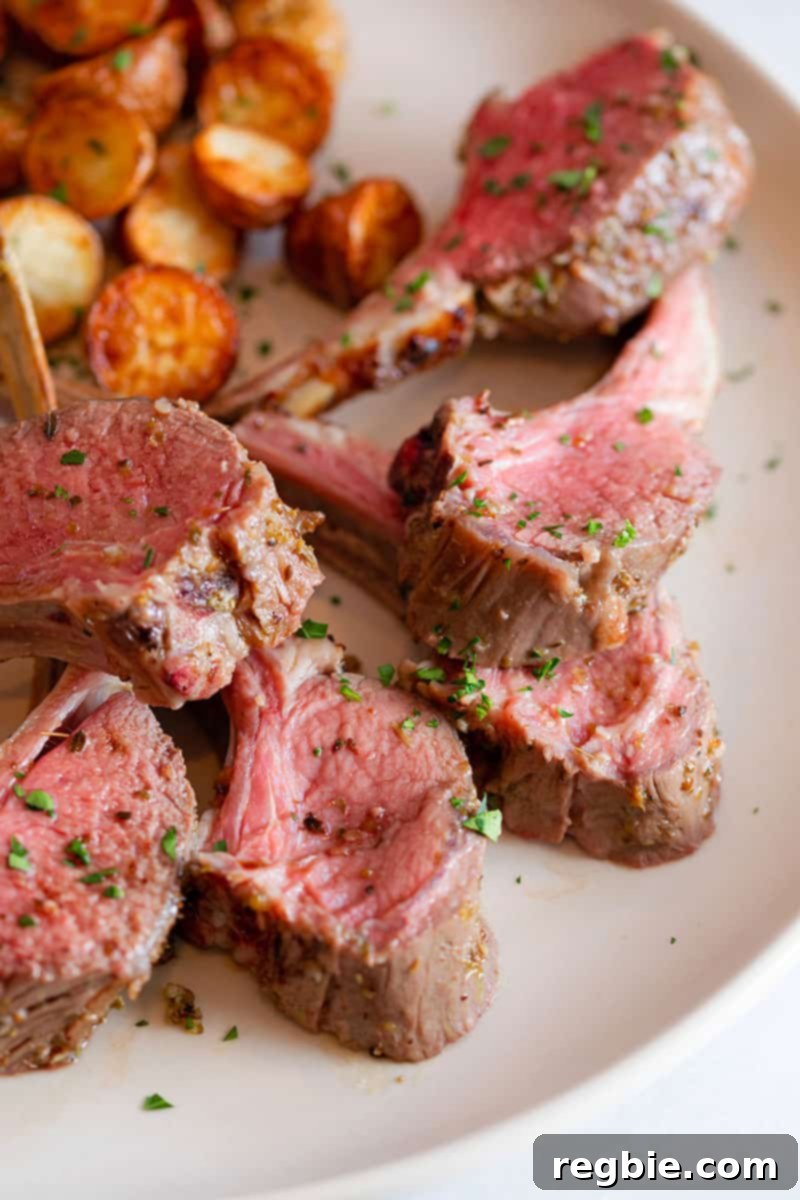
This simple yet elegant rack of lamb recipe promises perfectly cooked, showstopping results every time. Whether you’re a seasoned chef or a complete beginner, our foolproof reverse sear method will guide you to tender, juicy chops with an exquisite crust, making any meal truly special.
Table of Contents
- A Foolproof Guide to Rack of Lamb
- Why Rack of Lamb is the Ultimate Showstopper
- Mastering the Perfect Lamb Rack: Key Techniques
- Choosing and Preparing Your Lamb Rack
- The Power of Pre-Salting: Flavor & Tenderness
- The Reverse Sear Method: Crispy Exterior, Juicy Interior
- The Indispensable Meat Thermometer
- Ingredients for an Unforgettable Lamb Rack
- Step-by-Step: How to Make Rack of Lamb
- Flavor Variations & Serving Suggestions
- Tips for Success & Troubleshooting
- Frequently Asked Questions (FAQ)
- Printer-Friendly Recipe Card
A Foolproof Guide to Rack of Lamb
There’s something incredibly satisfying about presenting a perfectly cooked rack of lamb at the dinner table. It’s a dish that looks sophisticated and tastes divine, often reserved for special occasions like holidays, anniversaries, or simply a luxurious weekend meal. Many assume cooking lamb to perfection is challenging, but with the right techniques, it’s surprisingly straightforward. This guide is designed to make you feel confident, ensuring that every time you prepare this dish, you’ll achieve succulent, flavorful results that will leave your guests impressed.
I typically plan for one 1½-pound lamb rack per two guests, adjusting for appetites. To ensure maximum flavor and tenderness, I recommend purchasing your lamb a few days in advance. This allows ample time for proper salting and marinating, two critical steps that elevate the final dish from good to unforgettable. Follow the detailed advice below, and you’ll consistently create tender lamb chops with a beautiful crust, proving that gourmet cooking can indeed be stress-free.
Why Rack of Lamb is the Ultimate Showstopper
Rack of lamb isn’t just a meal; it’s an experience. Its elegant presentation, with beautifully ‘frenched’ bones, immediately signals a festive and luxurious occasion. The rich, distinctive flavor of lamb, when cooked correctly, is unparalleled. Each chop offers a perfect bite of tender, juicy meat encased in a savory, often herb-infused crust. Unlike larger roasts that can be daunting, a rack of lamb cooks relatively quickly, making it an ideal centerpiece for entertaining without spending hours in the kitchen. It pairs wonderfully with a myriad of side dishes, from simple roasted vegetables to more complex sauces, adapting to various culinary styles and preferences. This recipe emphasizes techniques that preserve its natural succulence while developing complex flavors, ensuring your rack of lamb is always a memorable highlight of any gathering.
Mastering the Perfect Lamb Rack: Key Techniques
Choosing and Preparing Your Lamb Rack
Selecting the right rack of lamb is the first step to success. Look for racks that are “frenched,” meaning the meat and fat have been trimmed from the ends of the rib bones, exposing them for a clean, elegant presentation. Most butchers or grocery stores like Costco or Trader Joe’s offer frenched racks. The meat itself should be bright red and firm, with a thin layer of fat cap on top. This fat layer is crucial for flavor and moisture during cooking, so don’t trim it all off. A quality rack of lamb will yield approximately 7-8 chops, making it perfect for sharing. If your rack isn’t frenched, you can easily do it yourself with a sharp knife, or ask your butcher to do it for you.
The Power of Pre-Salting: Flavor & Tenderness
Salting meat ahead of time is a culinary game-changer, a technique I swear by for deeply seasoned, tender results. Inspired by Chef Judy Rodger’s wisdom, I adhere to a ratio of approximately 1 tablespoon of medium-coarse salt (like Diamond Crystal kosher salt) for every 4½ pounds of meat. If you’re using a finer grain salt, remember to reduce the quantity to avoid over-salting, but generally, you’ll still use more than you might initially think is necessary. This generous pre-salting isn’t just about seasoning the surface; it actively draws moisture out of the meat, which then reabsorbs the seasoned brine, leading to a juicier and more tender final product. You can salt your lamb racks up to three days in advance, storing them uncovered in the refrigerator. This allows the salt to work its magic, transforming the texture and flavor profile of the lamb.
The Reverse Sear Method: Crispy Exterior, Juicy Interior
My preferred method for cooking rack of lamb is the reverse sear, a brilliant technique popularized by J. Kenji Lopez-Alt of Serious Eats. This method involves slowly roasting the lamb at a low temperature in the oven until it reaches an internal temperature just shy of your desired doneness (around 125°F for a perfect medium-rare). This slow cooking ensures the meat cooks evenly from edge to edge, minimizing the gray band often seen in traditionally seared meats. After the slow roast, the lamb is then finished with a quick blast of high heat – either in a screaming hot pan or under a broiler – to create a magnificent, deeply browned crust. While it takes a little longer than high-heat roasting, the reverse sear offers significantly more control and a wider margin for error, guaranteeing a consistently pink, tender interior and a wonderfully crispy exterior, making it ideal for a premium cut like rack of lamb.
The Indispensable Meat Thermometer
While this oven-roasted rack of lamb recipe is incredibly easy, the single most critical tool for guaranteeing success is a reliable meat thermometer. It takes the guesswork out of cooking and prevents both undercooking and overcooking. For this recipe, I highly recommend investing in both an instant-read thermometer (like the Thermapen One) for quick checks and a good in-oven thermometer that you can leave in the meat while it roasts. Knowing the exact internal temperature allows you to pull the lamb at the precise moment for your preferred doneness. For medium-rare lamb, aim for 125°F before the final sear. Remember, meat continues to cook after it’s removed from the heat (carryover cooking), so pulling it slightly before your target temperature is key. Don’t risk ruining a beautiful rack of lamb; let your thermometer be your guide to perfection!
Ingredients for an Unforgettable Lamb Rack
- Racks of lamb, “frenched”: Typically, two 1.5-pound racks from a reputable butcher, Costco, or Trader Joe’s will comfortably feed four people. Frenched bones make for a beautiful presentation.
- Diamond Crystal kosher salt: This is my go-to salt for its crystal structure, which makes it harder to over-salt and ensures even seasoning. Liberal and early salting is the secret to a flavor-packed and tender lamb.
- Extra virgin olive oil: A good quality olive oil forms the base of our simple marinade, adding richness and helping to distribute the herb flavors.
- Fresh lemon juice: Provides a bright, acidic counterpoint to the richness of the lamb, tenderizing the meat slightly and enhancing its natural flavors.
- Garlic: Minced fresh garlic infuses the lamb with a pungent, aromatic depth that complements the meat beautifully.
- Dried oregano or dried marjoram: These classic Mediterranean herbs pair wonderfully with lamb. Oregano offers a robust, slightly peppery note, while marjoram is milder and sweeter. Feel free to substitute with fresh or dried rosemary or thyme if those are your preferred herbs.
- Freshly ground black pepper: Adds a subtle warmth and spice, completing the seasoning profile. Grind it fresh for the best aroma and flavor.
Step-by-Step: How to Make Rack of Lamb
Follow these detailed steps to achieve a perfectly cooked rack of lamb:
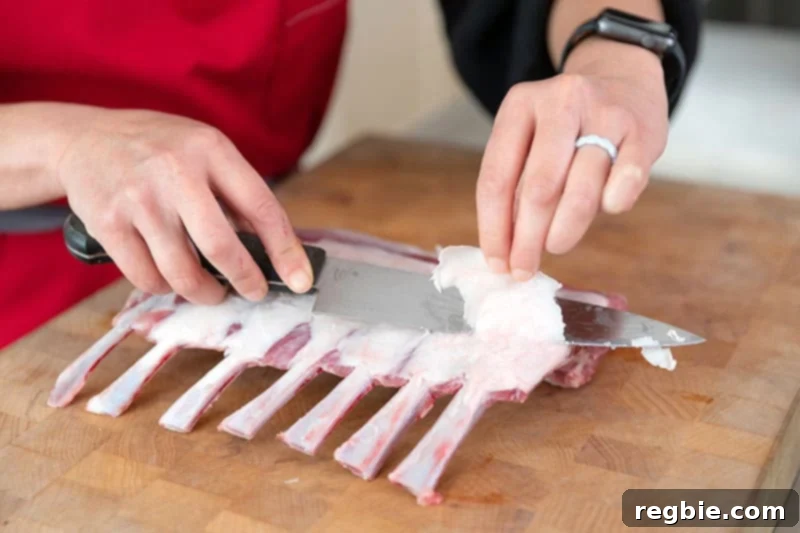
- **Prepare the Lamb:** Begin by trimming any excessive fat from the top of the lamb racks, leaving a thin, even layer. This layer will render during cooking, adding flavor and preventing the meat from drying out, while also allowing for a crispier exterior.
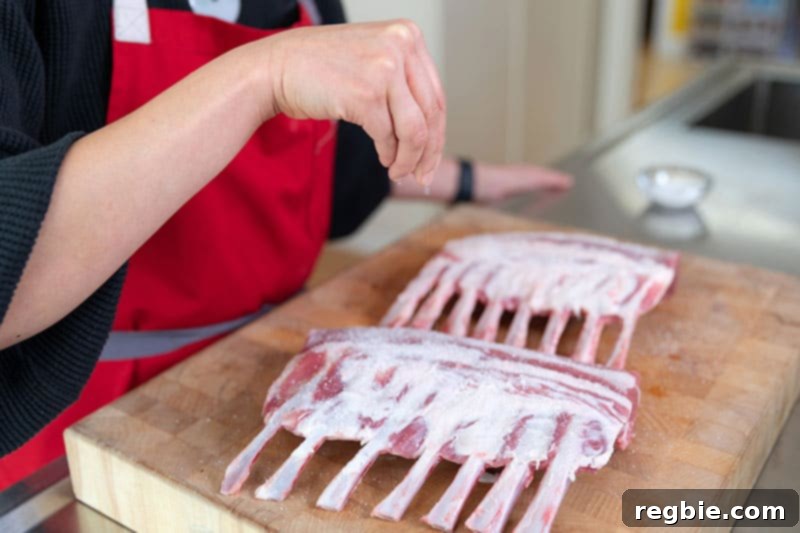
- **Salt Ahead of Time:** Generously rub the Diamond Crystal kosher salt all over the trimmed lamb racks. Ensure an even coating. Place the salted racks on a plate, cover loosely (or leave uncovered for a drier surface which aids in searing), and refrigerate overnight, or for up to three days. This crucial step deepens the flavor and tenderizes the meat.
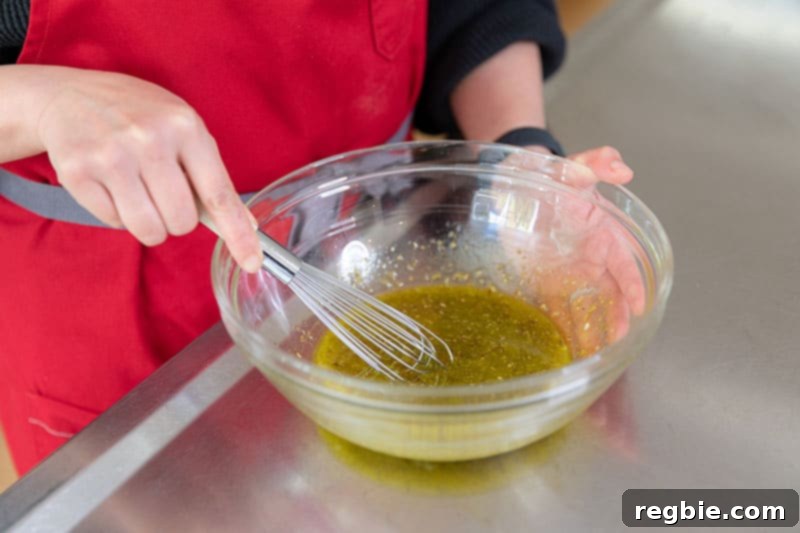
- **Prepare the Marinade:** On the day you plan to roast the lamb, prepare your flavorful marinade. In a large bowl, whisk together the extra virgin olive oil, fresh lemon juice, minced garlic, dried oregano (or marjoram), and freshly ground black pepper until well combined.
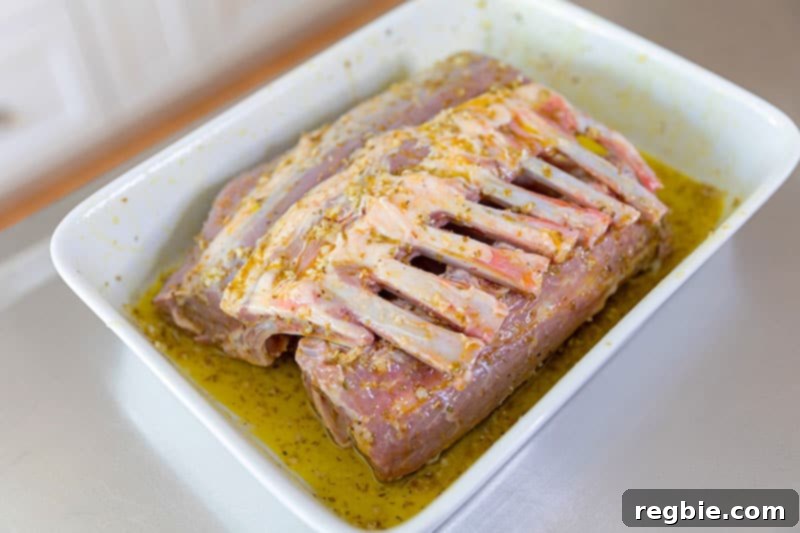
- **Marinate the Lamb:** Pour the prepared marinade over the lamb racks, ensuring they are thoroughly coated. For optimal flavor infusion, allow the lamb to marinate in the refrigerator for at least 1 hour and up to 12 hours. If you’re short on time, you can also let it marinate at room temperature for the duration it takes for your oven to preheat.
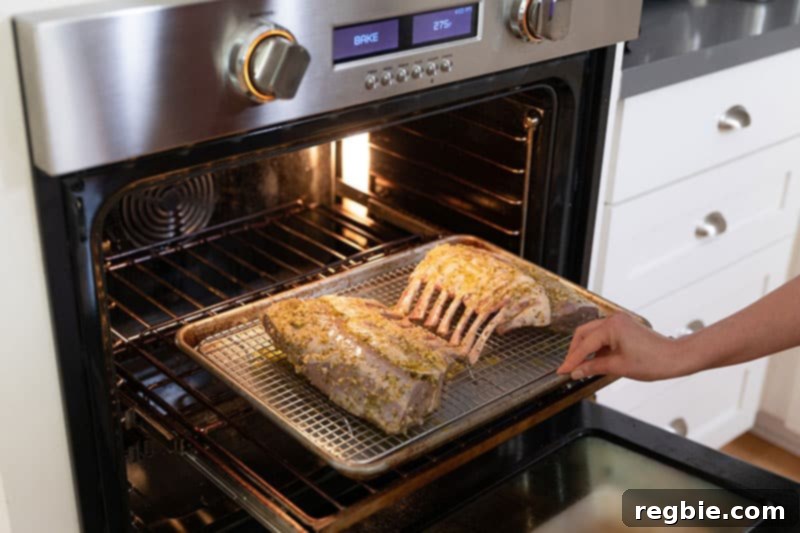
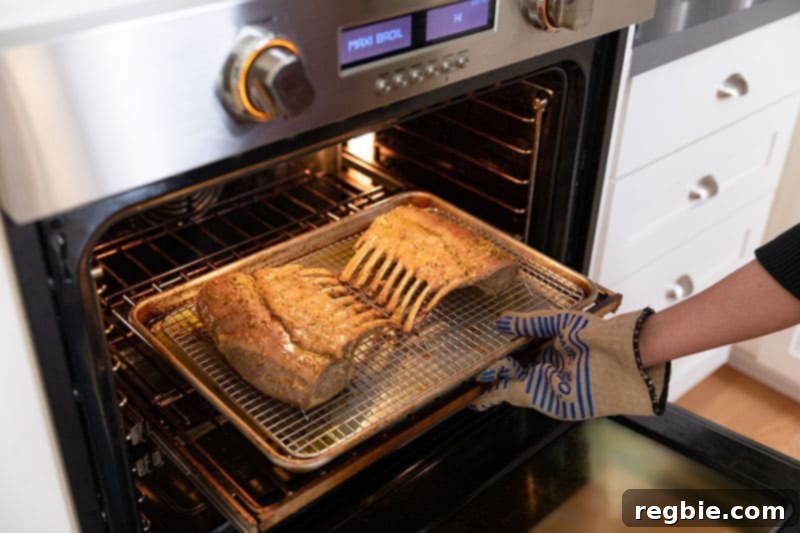
- **Slow Roast the Lamb (Reverse Sear – Step 1):** Preheat your oven to a low 275°F (135°C), positioning a rack in the middle. Place the marinated lamb racks on a wire rack set inside a rimmed baking sheet. This setup allows for even air circulation and prevents the bottom of the lamb from steaming. Transfer the baking sheet to the preheated oven.
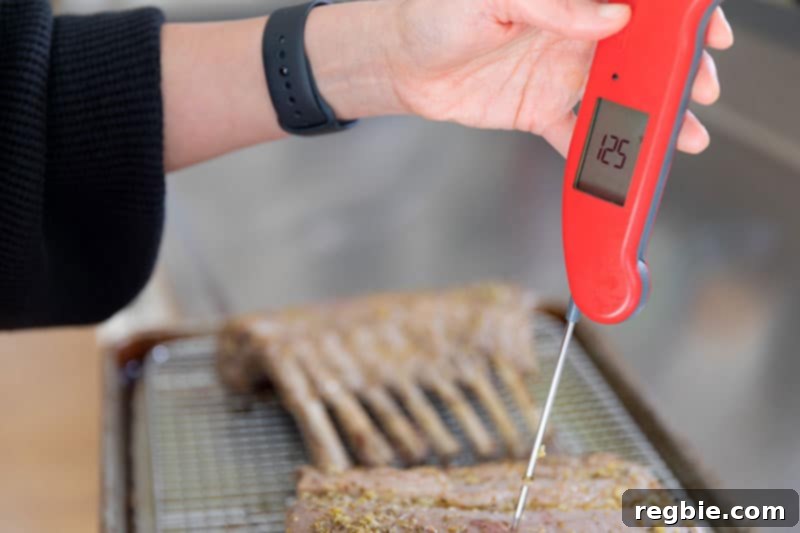
- **Monitor Internal Temperature:** Cook the lamb until its internal temperature reaches 125°F (52°C) for a perfect medium-rare. This typically takes about 30-45 minutes, but cooking time will vary depending on the thickness and starting temperature of your racks. Use an instant-read meat thermometer inserted into the thickest part of the meat, avoiding the bone.
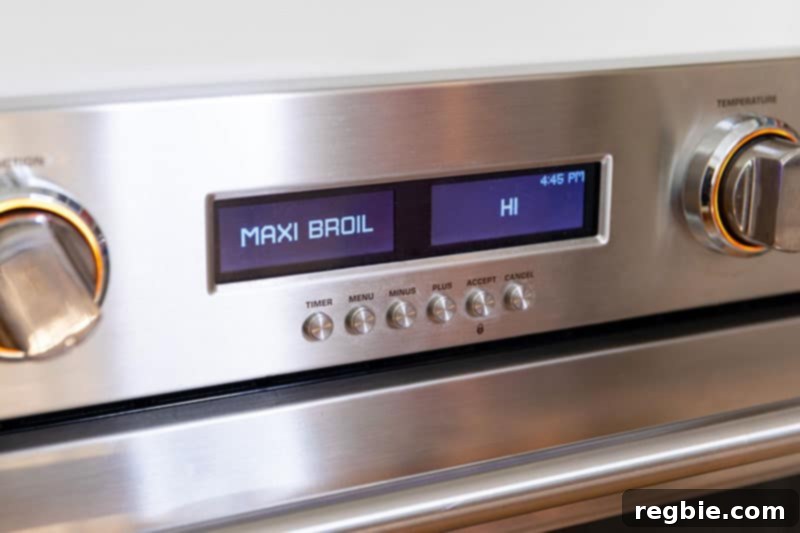
- **Prepare for Searing:** Once the lamb reaches 125°F, carefully remove it from the oven. Immediately turn on your oven’s broiler to its highest setting, or preheat a heavy-bottomed pan (like cast iron) over high heat on the stovetop until it’s smoking slightly.
- **Sear the Exterior (Reverse Sear – Step 2):** Place the lamb racks back into the oven, directly under the broiler, or transfer them to your preheated hot pan.
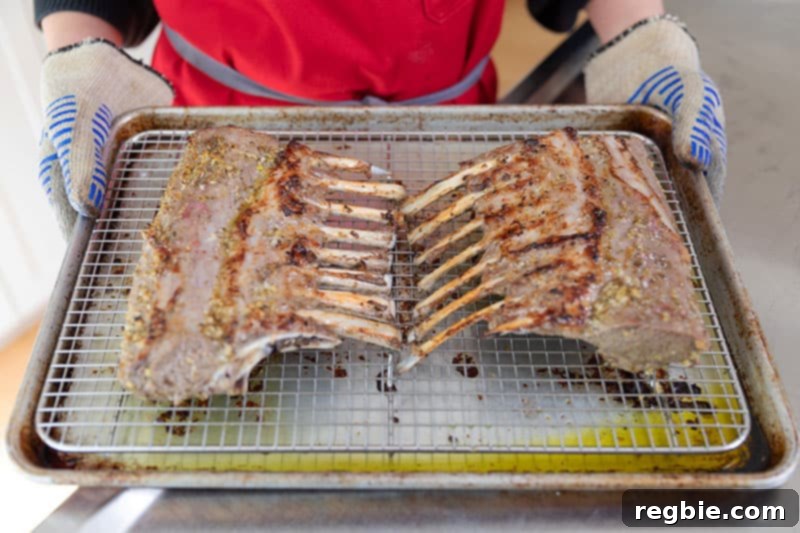
- **Achieve Golden Brown Crust:** Cook for approximately 5 minutes, rotating as needed, until the exterior is beautifully browned and crispy. Keep a close eye on it to prevent burning. The internal temperature will rise slightly during this stage, typically reaching a perfect 130-135°F (54-57°C) for medium-rare after resting.
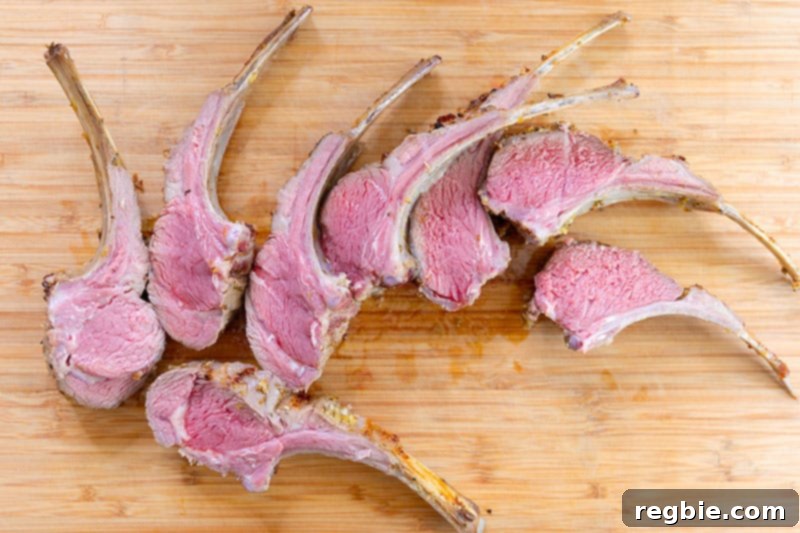
- **Rest and Slice:** Remove the lamb from the oven and let it rest on a cutting board for at least 10-15 minutes before slicing. This allows the juices to redistribute, ensuring every bite is moist and tender. After resting, use a sharp knife to slice between each rib bone, creating individual lamb chops.
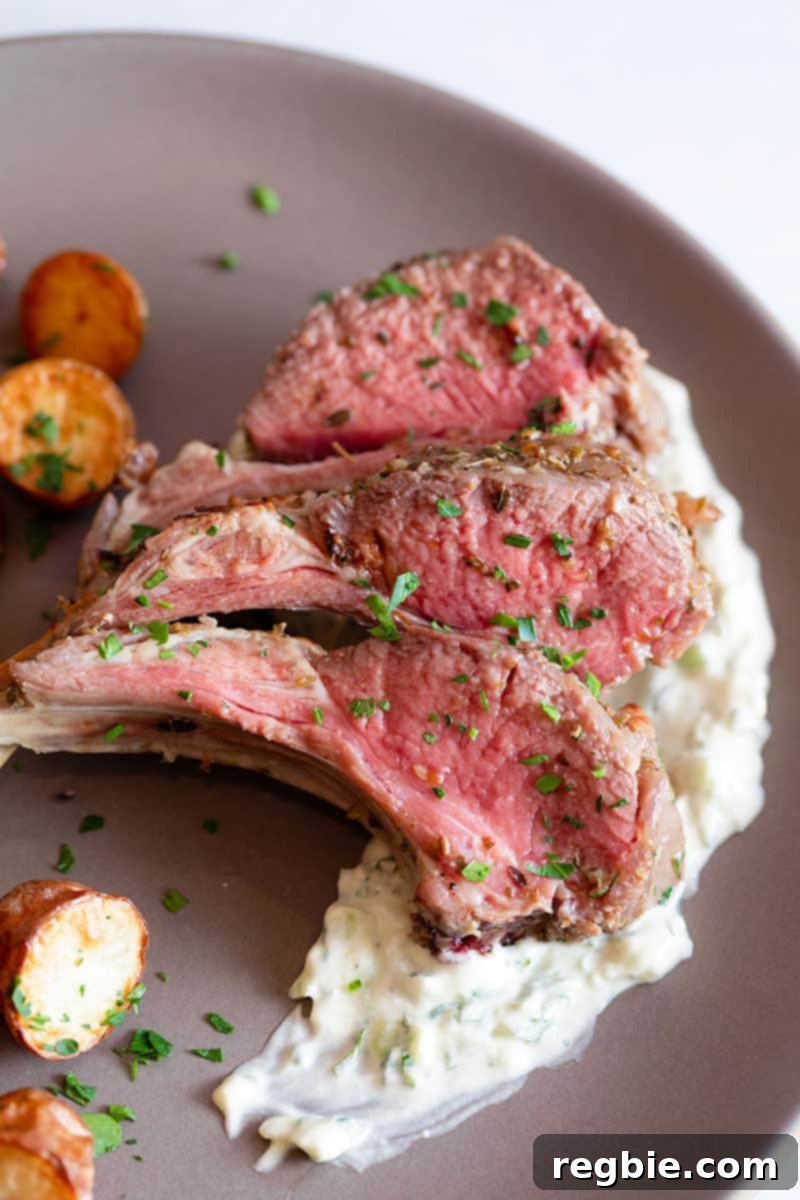
- **Serve:** Arrange the succulent lamb chops on a platter and serve immediately. They pair wonderfully with a refreshing Whole30 Tzatziki sauce and flavorful sides like Instant Pot Crispy Potatoes or a vibrant green salad.
Flavor Variations & Serving Suggestions
While the lemon-garlic-oregano marinade is a classic and delightful choice, don’t hesitate to experiment with different flavor profiles. For a more robust, earthy flavor, consider a marinade with fresh rosemary, thyme, Dijon mustard, and a splash of red wine. A Mediterranean twist could involve a rub of sumac, za’atar, and a hint of cinnamon. For those who enjoy a bit of spice, a marinade with smoked paprika, cumin, and a touch of cayenne pepper can add an exciting kick.
Rack of lamb is incredibly versatile when it comes to side dishes. Beyond the suggested Tzatziki and Crispy Potatoes, consider serving it with roasted asparagus, creamy polenta, a fresh quinoa salad, or a simple green bean almondine. For a truly luxurious meal, pair it with a rich mushroom risotto or a vibrant mint pesto to complement the lamb’s natural sweetness. Don’t forget a good bottle of red wine – a Cabernet Sauvignon, Merlot, or Pinot Noir would be excellent choices to enhance the dining experience.
Tips for Success & Troubleshooting
- **Don’t Skip the Rest:** Resting the lamb after cooking is as important as the cooking itself. It allows the muscle fibers to relax and reabsorb the juices, leading to a much more tender and moist chop.
- **Even Thickness:** Try to select lamb racks that are of similar thickness to ensure they cook evenly. If one rack is significantly thicker, it might require a few extra minutes of cooking time.
- **Room Temperature Start:** While not strictly necessary with the reverse sear, bringing the lamb closer to room temperature before roasting (after marinating) can help it cook more evenly.
- **Overcooking is the Enemy:** Lamb is best served medium-rare to medium. Overcooking can make it tough and dry, losing its exquisite flavor and texture. Trust your meat thermometer!
- **Broiler Watch:** When searing under the broiler, stay vigilant. Broilers can quickly go from perfect crust to burnt. It usually takes just a few minutes.
- **Troubleshooting Dry Lamb:** If your lamb turns out a bit dry, it’s likely overcooked. Ensure you’re using a reliable thermometer and pulling the lamb at the right internal temperature. Proper salting and resting also contribute significantly to moisture retention.
- **Uneven Browning:** If one side isn’t browning as much during the sear, simply rotate the rack or flip it over to ensure an even, golden crust all around.
Frequently Asked Questions (FAQ)
Q: What does “frenched” mean for a rack of lamb?
A: “Frenched” refers to the process of trimming the fat and meat from the ends of the rib bones, exposing them for a clean, elegant presentation. Most racks sold in stores are already frenched.
Q: Can I use fresh herbs instead of dried?
A: Absolutely! If using fresh herbs like rosemary, thyme, or oregano, you’ll generally need about three times the amount of dried herbs for a similar intensity of flavor. Finely chop them before adding to the marinade.
Q: How long does it take to reverse sear a rack of lamb?
A: The slow roasting phase typically takes 30-45 minutes to reach 125°F (for medium-rare), depending on the size of your racks. The final sear under the broiler is usually only about 5 minutes.
Q: What’s the ideal internal temperature for lamb?
A: For medium-rare, aim for 125-130°F (52-54°C) before resting. It will rise to 130-135°F (54-57°C) after resting. For medium, target 135-140°F (57-60°C) before resting. We do not recommend cooking lamb past medium as it can become tough.
Q: Can I prepare this recipe ahead of time for a dinner party?
A: Yes! You can salt the lamb up to three days in advance. The marinade can be applied up to 12 hours ahead. On the day of the event, simply follow the roasting and searing steps. This makes it a fantastic option for entertaining.
Looking for more delicious and healthy recipe ideas? Head on over to my Recipe Index. You’ll also find exclusive recipes in my cookbooks, Nom Nom Paleo: Food for Humans (Andrews McMeel Publishing 2013), Ready or Not! (Andrews McMeel Publishing 2017), and Nom Nom Paleo: Let’s Go! (Andrews McMeel Publishing 2022).
Printer-Friendly Recipe Card
Foolproof Rack of Lamb – Easy, No-Stress, Juicy Results
Ingredients
- 2 racks of lamb “frenched” about 1½ pounds per rack
- 2 teaspoons Diamond Crystal kosher salt
- ⅓ cup extra virgin olive oil
- 3 tablespoons lemon juice
- 4 garlic cloves minced
- 1 tablespoon dried oregano or marjoram
- ½ teaspoon freshly ground black pepper
Instructions
-
Trim any extra fat off of the top of the racks, leaving a thin layer.
-
Rub the salt all over the racks of lamb and cover and refrigerate them overnight and up to three days.
-
On the day you’re roasting the lamb racks, mix the marinade. In a large bowl, whisk together the lemon juice, olive oil, garlic, oregano, and pepper.
-
Pour the marinade over the lamb racks and marinate for at least 1 hour and up to 12 hours in the fridge.
-
Heat the oven to 275°F with the rack in the middle. Place the lamb racks on a wire rack in a rimmed baking sheet and pop it in the oven.
-
Cook until the internal temperature reaches 125°F for medium rare (about 30-45 minutes, depending on the size of your racks).
-
Take the lamb out of the oven and turn on the broiler or the highest temperature your oven can reach.
-
Place the lamb racks back in the oven and cook until the exterior is nice and browned, about 5 minutes.
-
Slice up the chops and serve with Whole30 Tzatziki sauce and Instant Pot Crispy Potatoes!
Notes
Nutrition
Carbohydrates: 3g |
Protein: 30g |
Fat: 32g |
Fiber: 1g
Nutrition information is automatically calculated, so should only be used as an approximation.
Like this? Leave a comment below!