
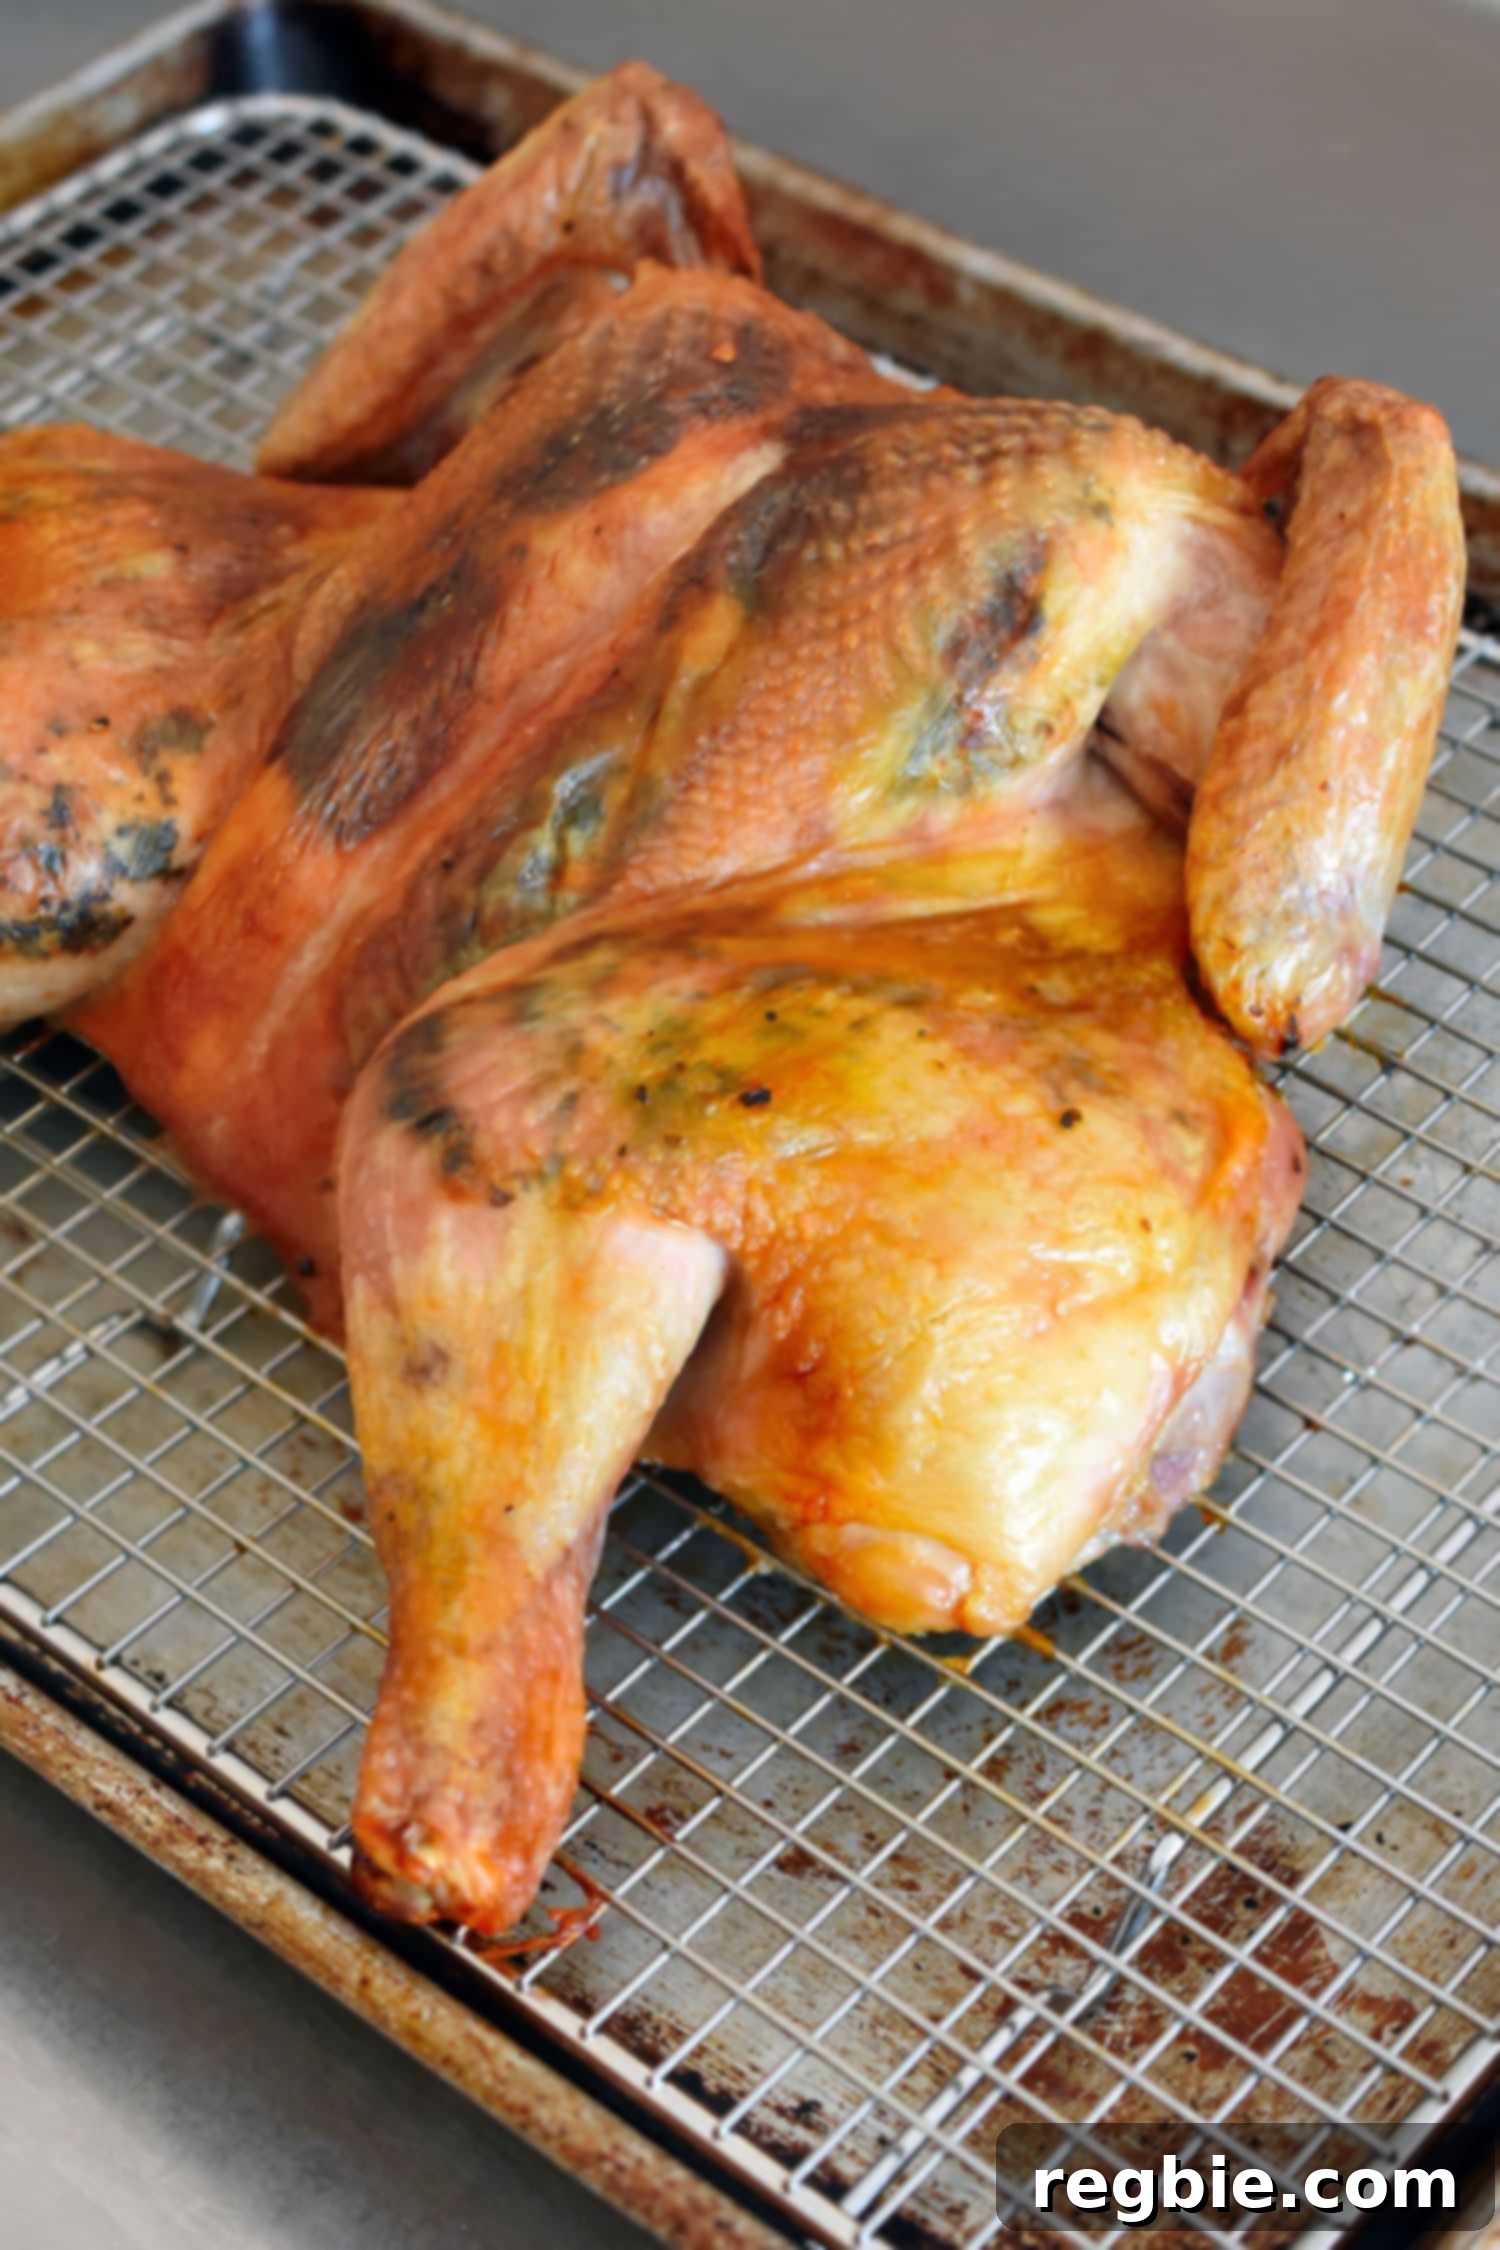
Effortless Herb Butter Spatchcock Chicken: Juicy, Crispy Perfection Every Time
If you’ve been searching for the ultimate roast chicken recipe that delivers unparalleled juiciness, crispy skin, and cooks faster than traditional methods, then mastering the art of spatchcock chicken is your answer. Combined with a luscious herb butter and a simple dry brine, this technique transforms an ordinary whole chicken into an extraordinary weeknight meal or a show-stopping centerpiece for any gathering. Forget dry breasts and unevenly cooked thighs – spatchcocking ensures every bite is tender and flavorful, simplifying your path to chicken dinner success.
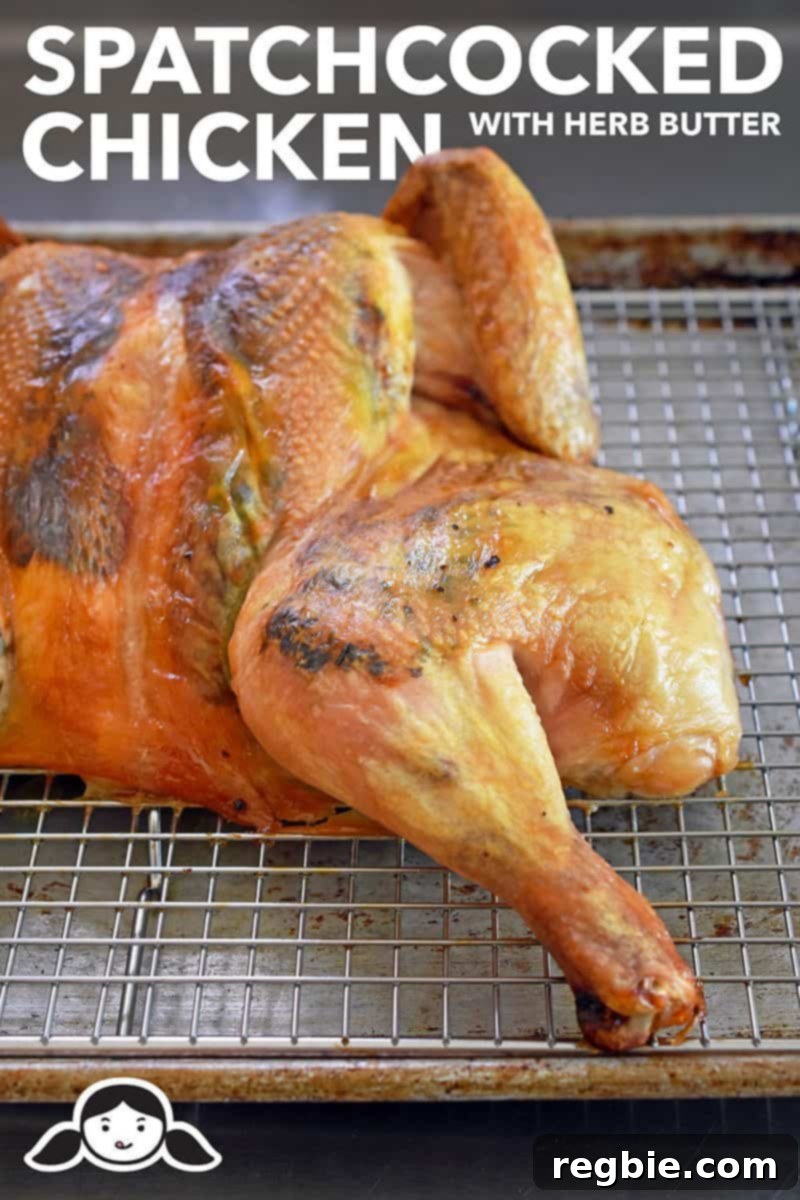
The Undeniable Appeal of a Perfectly Roasted Chicken
In the whirlwind of daily life, preparing a delicious and wholesome dinner can often feel like a race against the clock. While some highly organized individuals effortlessly navigate meal planning services and prepare their week’s menus in advance, many of us find ourselves in a last-minute scramble. Whether it’s due to an unexpected change in schedule, a sudden craving for something specific, or simply the daily demands of life, dinner decisions can sometimes feel overwhelming.
For those moments when spontaneity strikes or time is simply not on your side, a perfectly roasted chicken emerges as the culinary hero. It’s comforting, satisfying, and universally loved. But what if you could elevate this classic dish, making it even faster, juicier, and more irresistible? That’s where the spatchcock method shines, turning your default dinner into a gourmet experience without the added stress.
Unlock Culinary Excellence: The Power of Spatchcocking and Dry Brining
Imagine having a ready-to-roast chicken in your fridge, promising a magnificent meal with minimal effort. This seemingly magical dinner hack is entirely achievable through two fundamental techniques: spatchcocking and dry brining. These methods, though they may sound intimidating at first, are incredibly simple and foolproof, guaranteeing a crispy-skinned, evenly cooked, and exceptionally juicy bird every single time. Moreover, the beauty of this preparation is that a dry-brined and spatchcocked chicken can be prepped up to three days in advance, allowing you to roast it on demand and conquer those busy weeknights with ease.
Spatchcocking, also known as butterflying, involves removing the chicken’s backbone, allowing the bird to lay flat. This flattened profile offers several distinct advantages. Firstly, it ensures more even cooking across the entire bird. The breast and thigh meat, which typically cook at different rates, are now exposed to heat more uniformly, preventing the breast from drying out while the thighs finish cooking. Secondly, the increased surface area leads to incredibly crispy skin all around. Lastly, it significantly reduces cooking time, making a whole roasted chicken a viable option even on the busiest evenings. When combined with a dry brine, which draws moisture out of the skin for extra crispness and seasons the meat deeply, you get a combination that simply cannot be beaten.
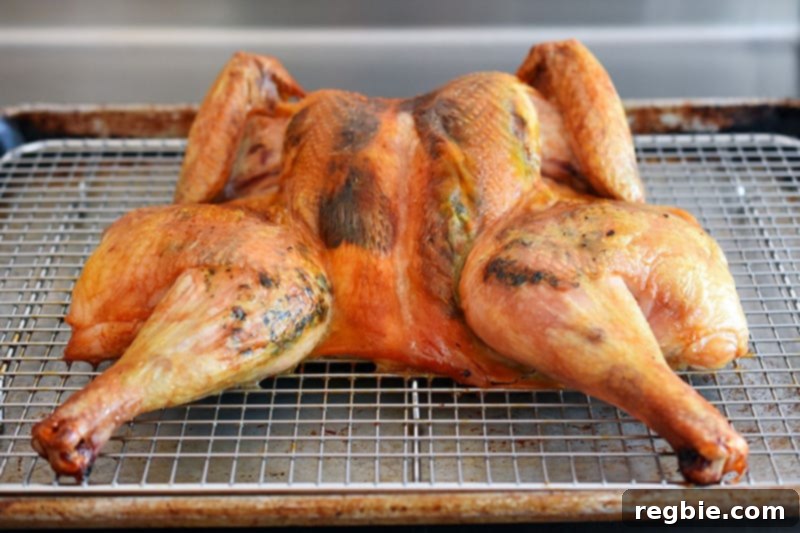
The spatchcock technique isn’t limited to just chickens; it’s also incredibly effective for larger poultry like turkeys. If you’re contemplating a show-stopping Thanksgiving turkey this year, consider doing a test run with a chicken beforehand. We’re confident you’ll be so impressed with the results – the tender meat, the shatteringly crispy skin – that it will become your preferred method for preparing all whole birds. For those who are ready to take their spatchcocking skills to the next level, our first cookbook features an exceptional Peruvian Roast Chicken with Aji Verde Chili Sauce, perfect for advanced culinary adventurers.
Ready to transform your roasting game? Let’s dive into the step-by-step instructions to create your own perfectly spatchcocked chicken with herb butter.
Essential Ingredients for Your Herb Butter Spatchcock Chicken
- Whole Chicken: Opt for a mid-sized bird, ideally around 4 pounds. This size fits comfortably on a standard rimmed baking sheet, ensuring even cooking and optimal crisping.
- Diamond Crystal Kosher Salt: This is our preferred salt for dry brining due to its consistent grain size, which allows for better control and even distribution compared to other salts.
- Softened Butter, Ghee, or Fat of Choice: A generous amount of softened fat is crucial for creating that rich, flavorful herb butter that will moisturize the meat from within and contribute to incredible skin crispness.
- Salt-Free Herb Blend of Choice: Since the chicken will already be dry-brined with salt, choosing a salt-free herb blend allows you to control the seasoning precisely and avoid over-salting. Popular choices include Italian seasoning, Herbs de Provence, or a custom blend of your favorite dried herbs.
Step-by-Step Guide: How to Prepare Your Perfect Spatchcock Chicken with Herb Butter
1. Prepare the Chicken: Remove the Innards
Begin by removing the chicken from its packaging and patting it thoroughly dry with paper towels. Reach into the main cavity and remove any giblets or the neck. These “extra bits” are valuable and shouldn’t be discarded! Reserve the heart, gizzards, and neck for making a rich, flavorful bone broth, adding depth to future soups and stews.
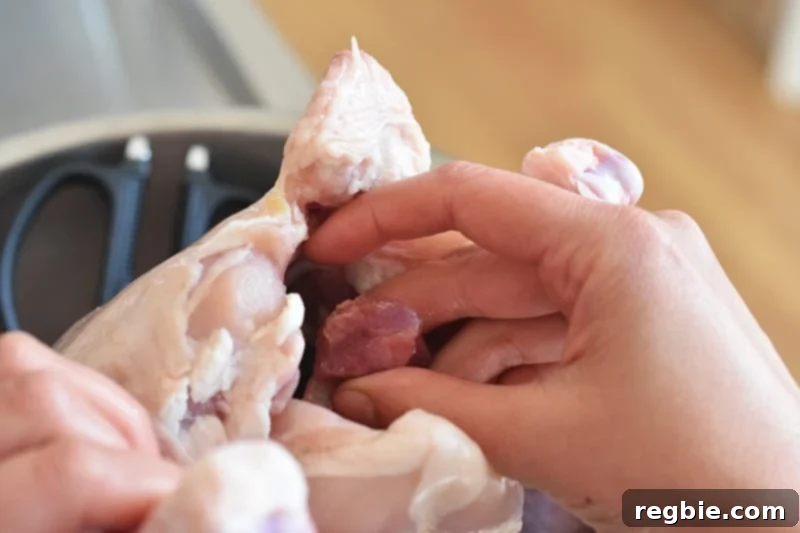
2. Spatchcock the Chicken: The Butterfly Technique
Lay the chicken breast-side down on a sturdy cutting board. Using a sharp pair of robust kitchen shears (our favorite are the Kershaw Taskmasters for their strength and precision), carefully cut along one side of the backbone, starting from the tail end up towards the neck. Make sure your cuts are parallel to the spine, going through the rib bones. Repeat this process on the other side of the backbone. You might encounter some resistance with thicker bones, so don’t be afraid to apply firm, steady pressure. If you hit a particularly tough spot, try rotating the bird and cutting from the neck side instead. Once both cuts are made, remove the backbone entirely. Just like the giblets, save this backbone – it’s an excellent base for that homemade bone broth!
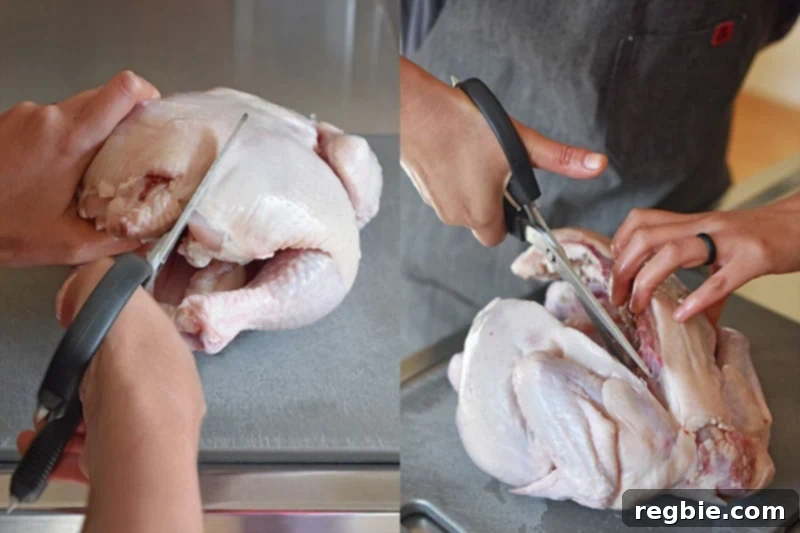
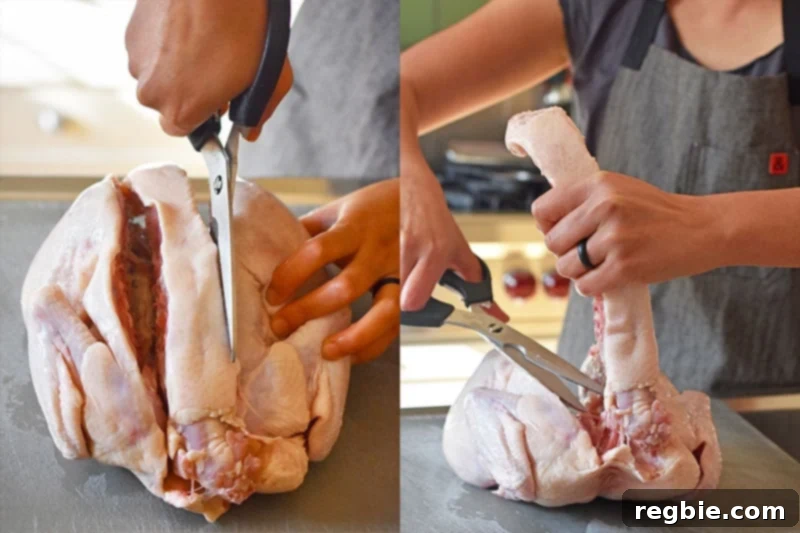
3. Flatten the Chicken for Uniform Cooking
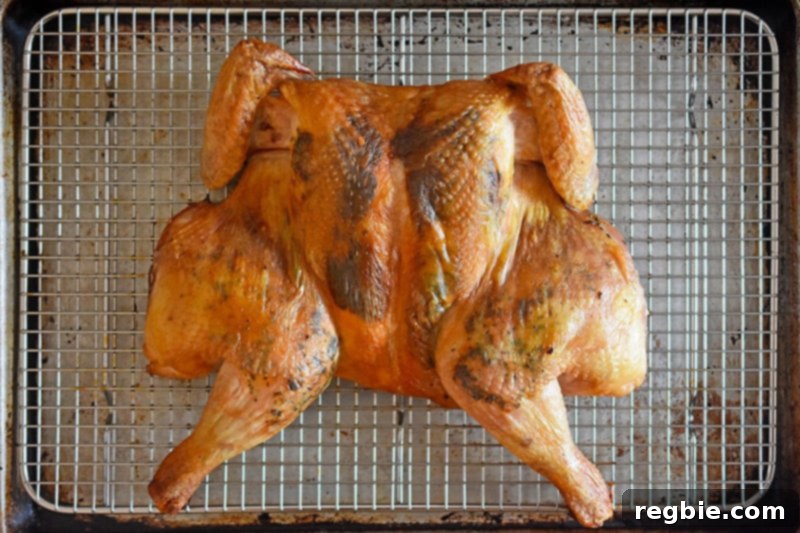
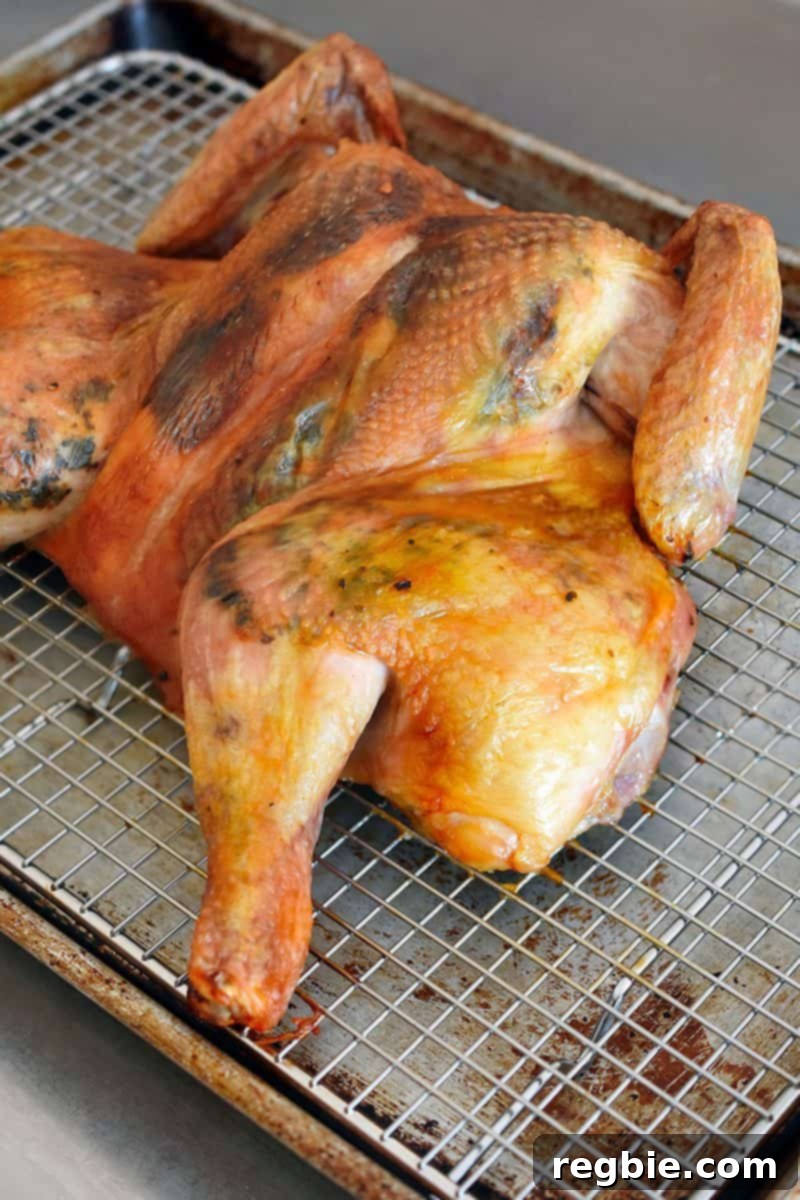
Flip the chicken over so it’s breast-side up. Using your kitchen shears, make a small, shallow incision in the cartilage that runs along the back of the breastbone. This helps release tension. Then, place both hands firmly on the breastbone and press down with considerable force until you hear a crack and the chicken flattens completely. This action ensures the chicken lies flat, exposing all parts to even heat and promoting uniform cooking. Once flattened, your chicken will resemble the “facehugger” from Aliens – a sure sign you’ve done it correctly!
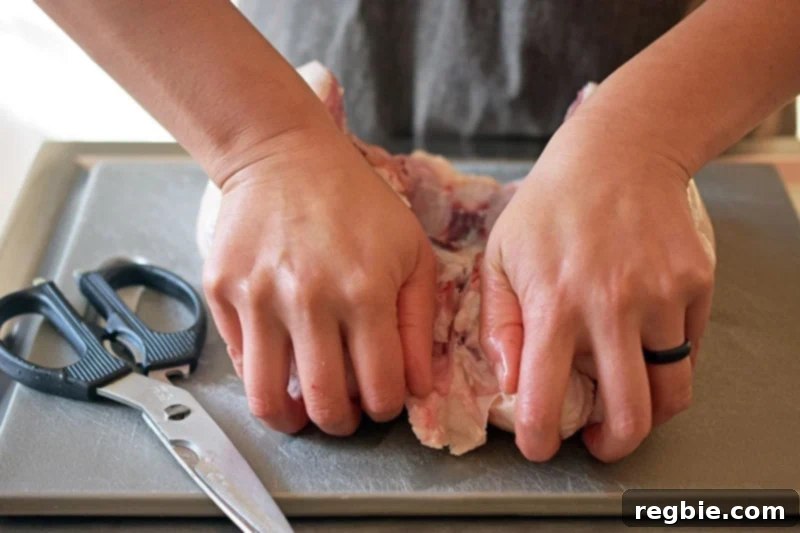
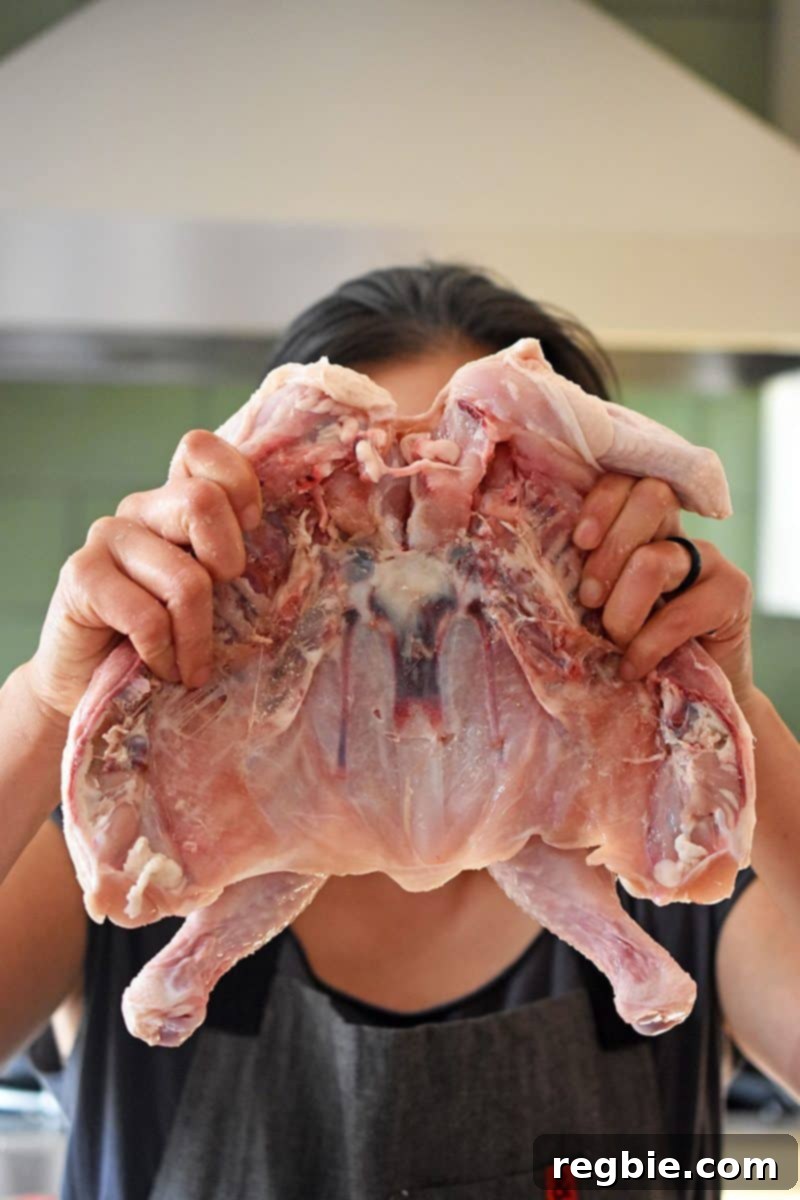
4. Prepare for Flavor: Gently Separate the Skin
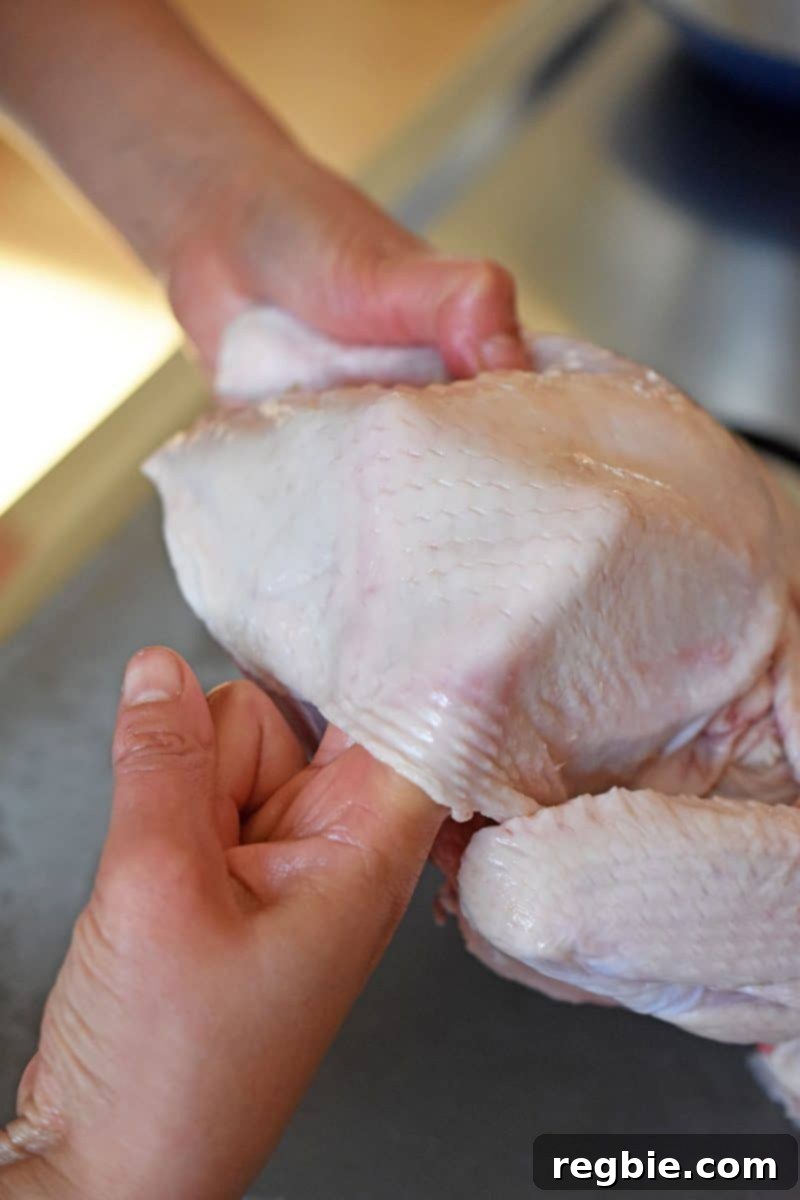
Flip the bird (the chicken, that is!) skin-side up. Carefully use your fingers to gently separate the skin from the breast and thigh meat, creating pockets. This step is crucial for later infusing the chicken with the herb butter, allowing the flavors to penetrate directly into the meat. Work slowly and gently to avoid tearing any holes in the skin or detaching it completely from the bird.
5. Season Liberally: The Dry Brine
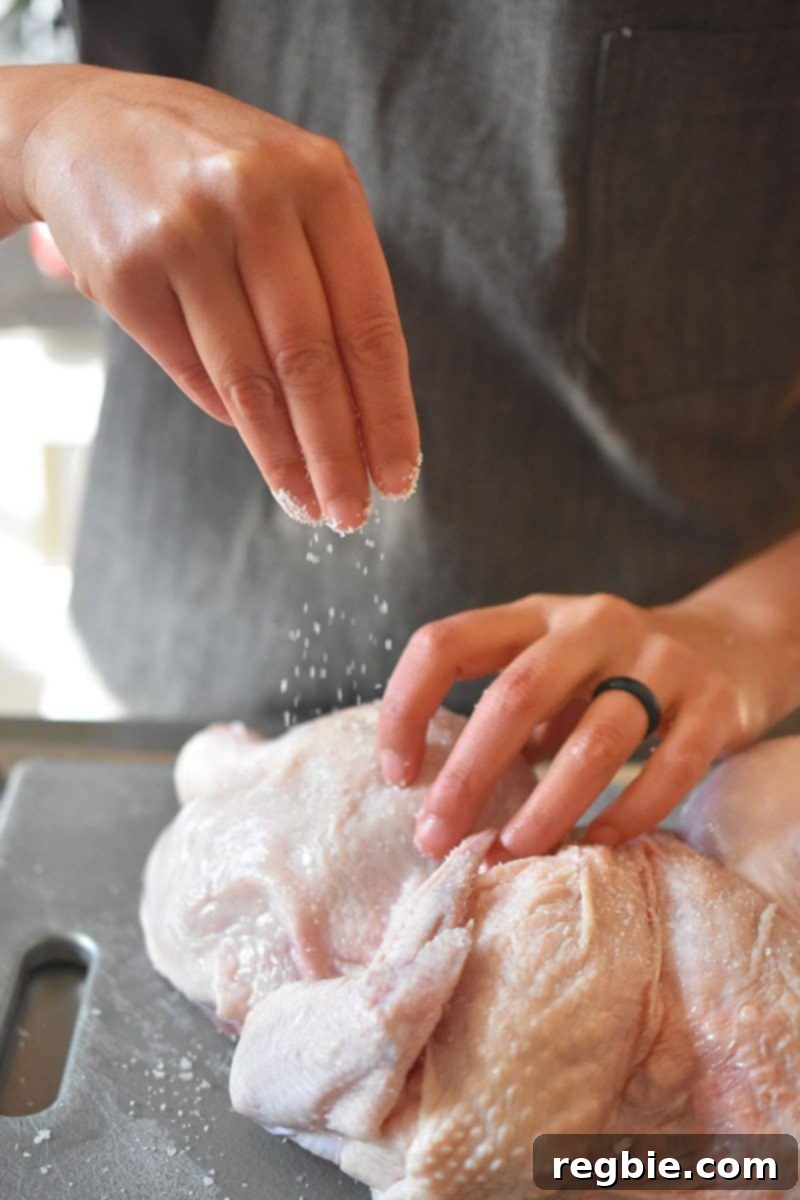
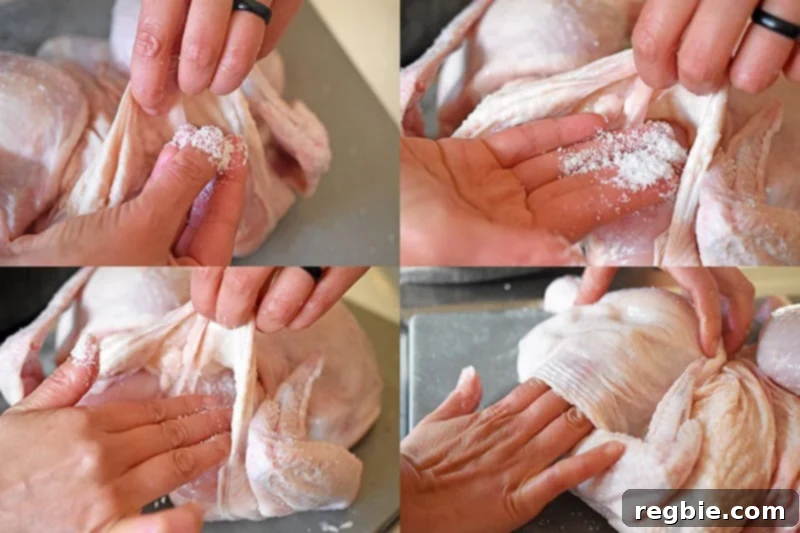
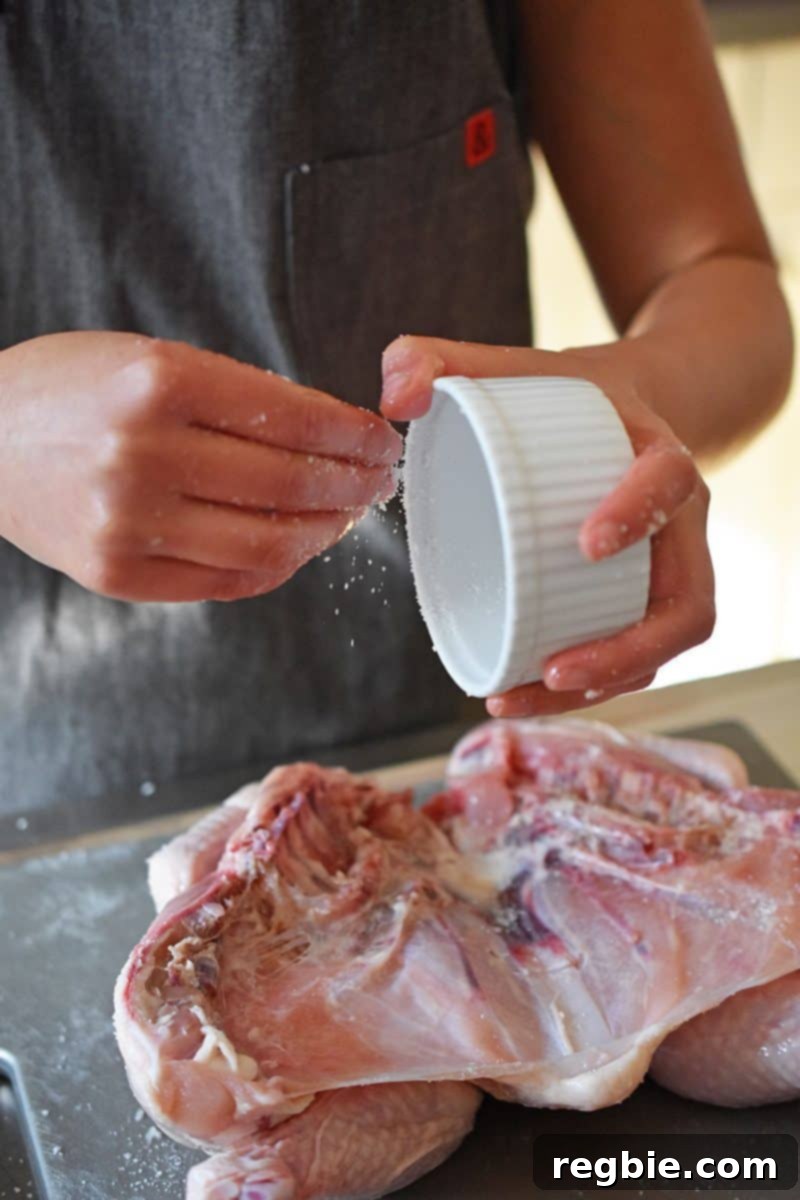
Measure out your Diamond Crystal kosher salt into a small ramekin. Sprinkle a generous amount of salt evenly over the entire exterior of the chicken’s skin. Then, reach into the pockets you created and gently massage salt directly onto the breast and thigh meat under the skin. Ensure the salt is distributed as widely as possible. Finally, season the underside of the bird with any remaining salt. This dry brining process will draw moisture from the skin, leading to exceptional crispness, and deeply season the meat, enhancing its natural flavors.
6. Protect the Wings: Proper Placement
Tuck the wing tips behind the breast meat. This simple step prevents the delicate wing tips from burning during the high-heat roasting process, ensuring they cook through without becoming overly charred.
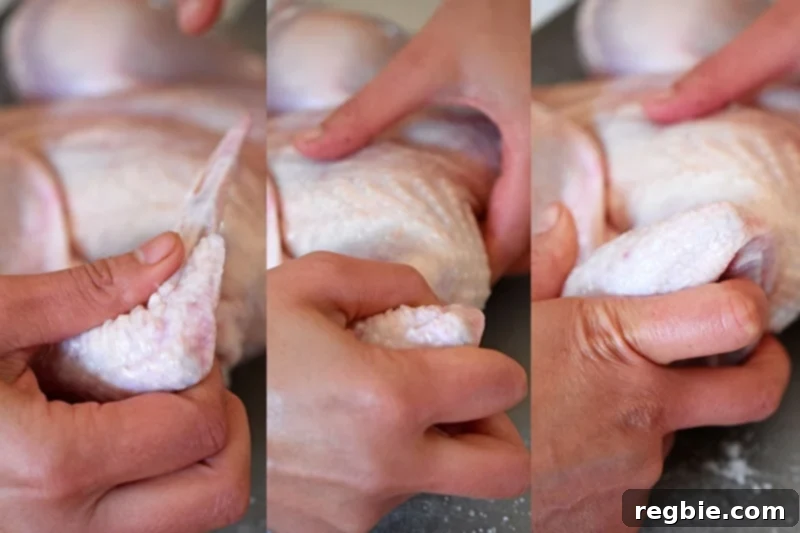
7. The Waiting Game: Dry Brine in the Fridge
Place a wire rack on top of a foil-lined rimmed baking sheet. Position the seasoned chicken, skin-side up, on the wire rack. Loosely cover the chicken with plastic wrap, allowing for some air circulation, and transfer it to the refrigerator. Allow it to dry brine for at least 12 hours, and up to 3 days. This extended period in the fridge is where the magic truly happens: the salt works its way into the meat, tenderizing it and enhancing flavor, while the exposure to cold air dries out the skin, which is paramount for achieving that incredibly crispy exterior. While pre-salting makes a significant difference, if you are truly pressed for time, you can proceed directly to the next step, though the results may not be quite as phenomenal.
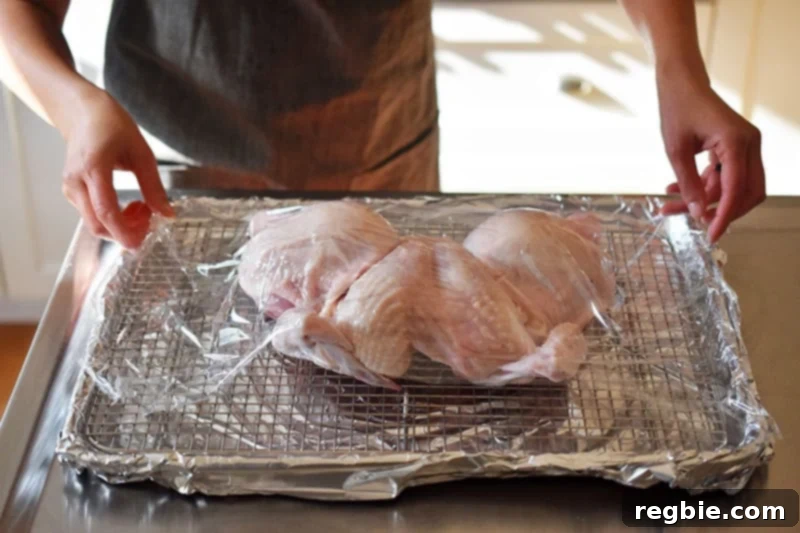
8. Preheat Your Oven
When you’re ready to roast, preheat your oven to 400°F (200°C) if using a convection roast setting, or 425°F (220°C) for a regular oven. Position an oven rack in the upper-middle position to ensure even browning.
9. Craft the Herb Butter
Ensure your chosen fat (butter, ghee, or another preferred option) is thoroughly softened. If using butter, it’s ideal to leave it out at room temperature for a few hours before starting, so it’s perfectly pliable. In a small bowl, combine the softened fat with your chosen salt-free herb or spice blend. This is your chance to get creative! Since the chicken is already brined, you don’t need additional salt in your herb blend. Experiment with various flavor profiles: try Penzey’s Sunny Paris for a delicate French touch, Dukkah for an aromatic Middle Eastern twist, or Madras Curry Powder for a vibrant Indian-inspired flavor. Trust your nose – if the blend smells enticing, it will likely make your chicken taste fantastic.
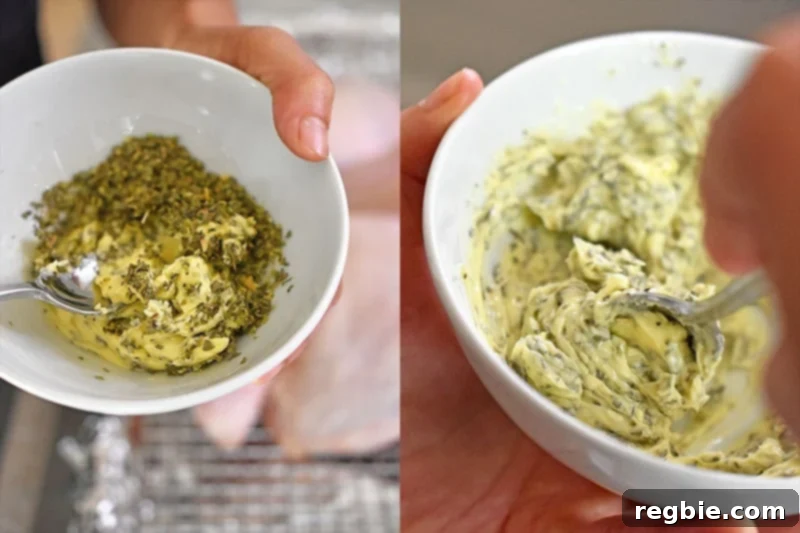
10. Infuse Flavor: Apply Herb Butter Under the Skin
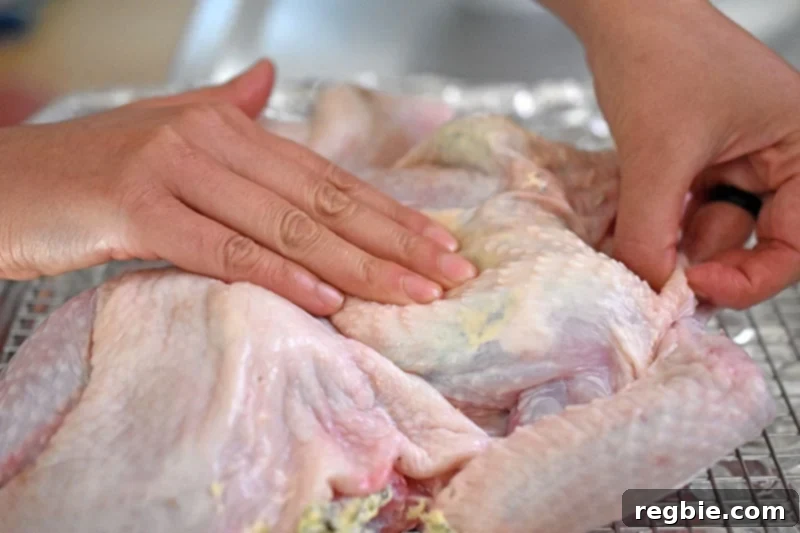
Take approximately one-fourth of the prepared herb butter and gently spoon it under the skin onto one side of the chicken breast. Repeat this process for the other breast. Then, using your fingers on top of the skin, gently massage the butter to spread it evenly over the entire breast meat. This ensures the breast stays moist and absorbs all the wonderful herby flavors.
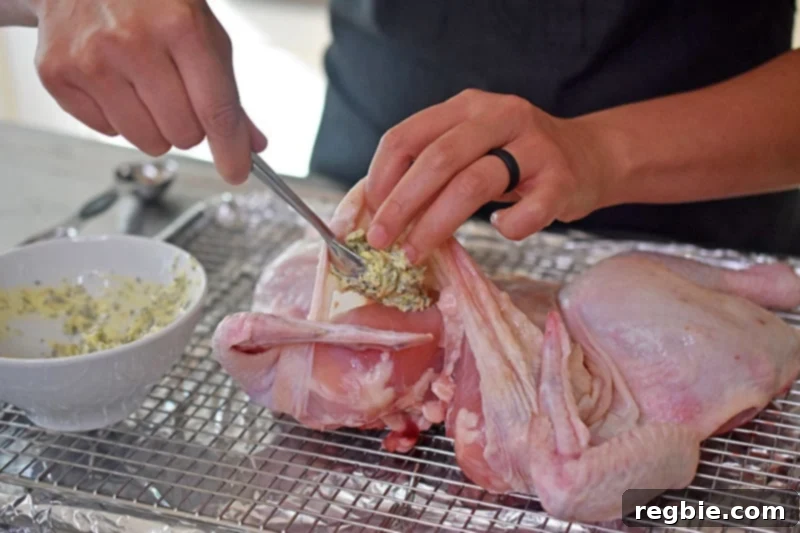
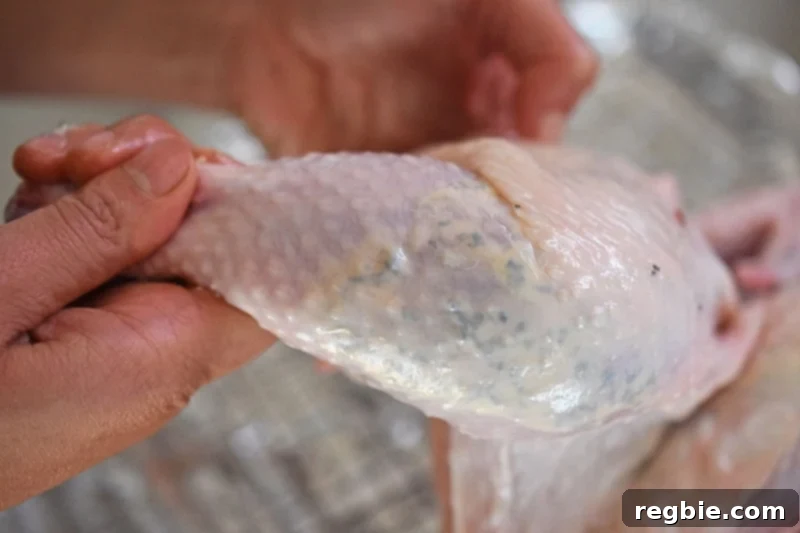
Divide the remaining herb butter and tuck it under the skin onto the thigh meat. Do your best to massage the butter downwards, reaching as close to the drumsticks as possible. You’ll be able to see the herbs through the skin, which will indicate how well you’ve distributed the butter. This step is vital for ensuring the dark meat, which can sometimes be less flavorful than the breast, also benefits from the herb infusion. Once buttered, carefully reposition the chicken on the wire rack, making sure the wingtips are still tucked securely, and rearrange the skin to fully cover all the meat. Now, your chicken is ready for its grand entrance into the oven.
11. Roast to Golden Perfection
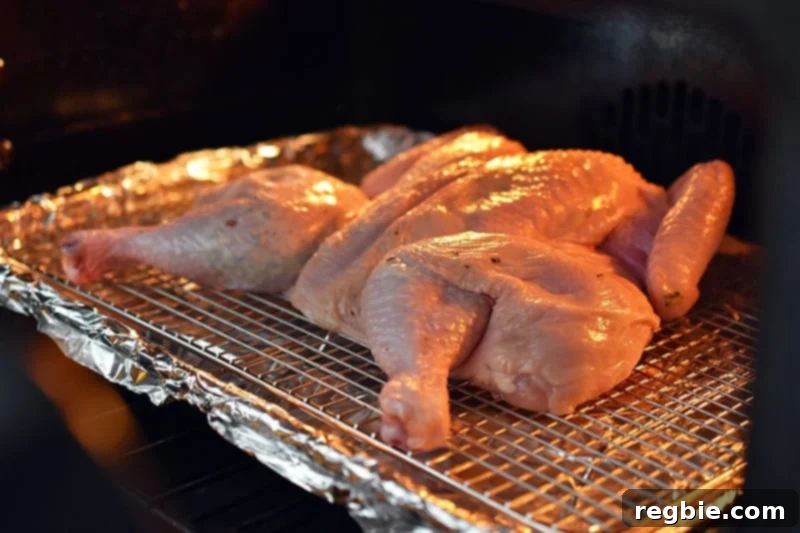
Carefully transfer the baking sheet with the chicken to the preheated oven. Roast the chicken for approximately 45 minutes, or until the breast meat reaches an internal temperature of 150°F (66°C) and the thigh meat registers 170°F (77°C). An accurate instant-read meat thermometer is your best friend here, ensuring perfectly cooked chicken that is neither underdone nor overcooked. Insert the thermometer into the thickest part of the breast and thigh, avoiding bones, for the most accurate reading.
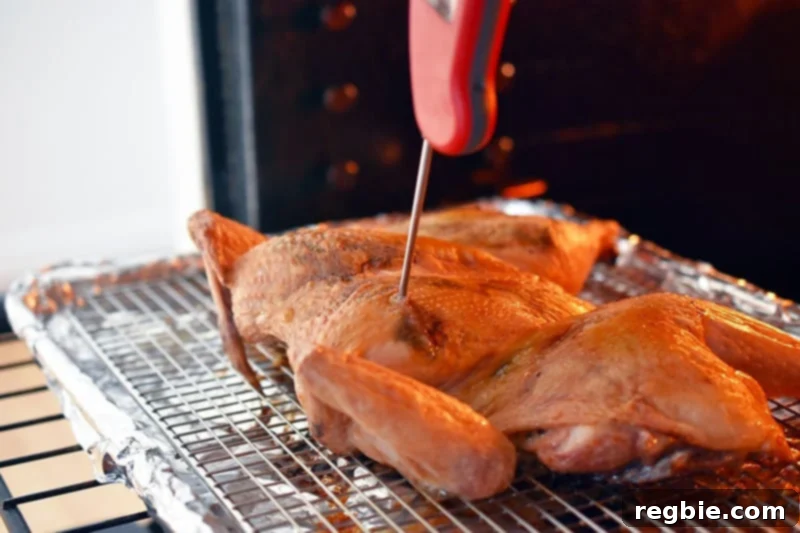
12. Rest Before Carving
Once cooked, remove the bird from the oven and allow it to rest, uncovered, on the wire rack for at least 10-15 minutes before carving. This resting period is critical; it allows the juices to redistribute throughout the meat, ensuring every slice is incredibly tender and moist. Cutting into the chicken too soon will cause all those precious juices to run out, resulting in a drier bird. After resting, carve and serve your magnificent spatchcock chicken. You’ll likely discover that this method will become your new favorite way to roast a whole chicken!
Expert Tips for the Ultimate Spatchcock Chicken
- **Choose the Right Shears:** A sturdy pair of kitchen shears is your most important tool for spatchcocking. Invest in a good quality pair that can effortlessly cut through bone.
- **Don’t Skip the Dry Brine:** This step makes a significant difference in both flavor and texture. The salt draws out moisture, resulting in crispier skin, and then reabsorbs, seasoning the meat from within.
- **Pat Dry, Always:** Before seasoning and especially before roasting, ensure your chicken is thoroughly patted dry. Excess surface moisture prevents the skin from crisping up properly.
- **Trust Your Thermometer:** Visual cues are helpful, but an instant-read thermometer is the only way to guarantee your chicken is cooked to perfection without being dry.
- **Butter Under the Skin:** This method provides direct moisture and flavor to the breast and thigh meat, keeping it succulent while the skin gets beautifully crisp.
- **Resting is Non-Negotiable:** Allow the chicken to rest for 10-15 minutes after roasting. This allows the juices to redistribute, ensuring a tender and juicy bird.
How to Store Leftovers
Should you be lucky enough to have any leftover spatchcock chicken, store it in an airtight container in the refrigerator for up to four days. For longer storage, the cooked chicken can be frozen for up to 4 months. Thaw overnight in the refrigerator before reheating gently.
Creative Leftover Makeover Ideas!
Transform your delicious leftover spatchcock chicken into exciting new meals:
- Curry Chicken Salad: A flavorful and exotic twist on classic chicken salad.
- Chicken Waldorf Salad: A refreshing mix of chicken, apples, grapes, and walnuts.
- Green Goddess Salad: Elevate your salad with tender chicken and a creamy dressing.
- Easy Chicken Divan: A comforting casserole dish that makes for a perfect family meal.
Looking for more recipe ideas to inspire your culinary adventures? Be sure to head over to my Recipe Index for a treasure trove of delicious dishes. You’ll also find a wealth of exclusive recipes and cooking tips in my acclaimed cookbooks: Nom Nom Paleo: Food for Humans (Andrews McMeel Publishing 2013), Ready or Not! (Andrews McMeel Publishing 2017), and Nom Nom Paleo: Let’s Go! (Andrews McMeel Publishing 2022). Happy cooking!
Printer-Friendly Recipe Card
Easy Spatchcock Chicken with Herb Butter – Juicy & Crispy!
20
45
1 15
Ingredients
- 1 4-pound whole chicken
- 1 tablespoon Diamond Crystal kosher salt not all salts are the same!
- ¼ cup softened butter ghee, or fat of choice
- 1 tablespoon salt-free herb-blend of choice
Instructions
-
Grab your chicken and remove the extra bits hidden in the cavity. We normally reserve the heart, gizzards, and neck for bone broth, and we recommend you do, too.
-
Next, spatchcock the bird. With a sharp pair of kitchen shears (the Kershaw Taskmasters are a favorite), cut out the backbone of the chicken by making parallel cuts along each side of the spine.
-
If you hit a bone that’s hard to crunch through, swing the bird around and cut from the neck hole side instead. Once you remove the backbone, save it for that bone broth you’re going to make.
-
Use your shears to snip a shallow incision in the cartilage on the back of the breast bone. Then, use both hands to firmly press down to flatten the chicken. (The splayed-open chicken should now resemble the facehugger from Aliens.)
-
Flip the chicken skin-side up, and use your fingers to gently separate the skin of the chicken from the breast and thigh meat to create pockets. Make sure you don’t tear any holes or detach the skin from the bird entirely.
-
Measure out the salt in a ramekin, then sprinkle it on the outside of the chicken and massage it under the skin wherever you can reach.
-
Season the underside of the bird with the remaining salt.
-
Tuck the wings behind the breast so the tips won’t burn.
-
Set a wire rack on top of a foil-lined rimmed baking sheet, and place the chicken skin-side up on the wire rack. Loosely cover with plastic wrap, and store it in the fridge for up to 3 days. Pre-salting truly makes a difference, but if you’re pressed for time, you can skip to the next part.
-
When you’re ready to roast the bird, heat the oven to 400°F (200°C) on convection roast or 425°F (220°C) in a regular oven, and place the rack in the upper middle position.
-
Grab your softened fat of choice—we leave our butter out in the morning so it’s ready to go at dinnertime—and mix in your preferred herb or spice blend. There’s really no wrong way to flavor-boost your chicken. (Caveat: We normally choose a salt-free blend because the chicken is already brined.) Some great blends include: Penzey’s Sunny Paris, Garlic Gold Italian Herb Nuggets, Dukkah, and Madras Curry Powder. Be bold and try something new! If it smells great, chances are it’ll make your chicken taste great.
-
Spoon one-fourth of the herb butter under the skin onto a chicken breast. Repeat on the other side.
-
Press your fingers on top of the skin to spread the herb butter evenly over the breast.
-
Divide the remaining herb butter and tuck it under the skin onto the thigh meat. Do your best to massage the butter down to the drumstick. You’ll be able to spot the herbs under the skin, so you’ll know if you were successful or not.
-
Re-position the chicken on top of the wire rack, making sure the wingtips are still tucked behind the breast, and rearrange the skin to fully cover the meat. Then, pop it in the oven.
-
Roast the chicken for 45 minutes or until the breast meat reaches 150°F (66°C) and the thigh meat hits 170°F (77°C) as measured by an instant-read thermometer. Remember: an accurate instant-read meat thermometer is the key to perfectly cooked chicken.
-
Take the bird out of the oven and rest it for at least 10 minutes before carving.
Video
How to Spatchcock a Chicken in 3 minutes!
It’s so simple and easy to spatchcock a chicken! A butterflied chicken will cook more evenly and faster—you can get a simple weeknight dinner on the table in no time!
Notes
Nutrition
Nutrition information is automatically calculated, so should only be used as an approximation.