
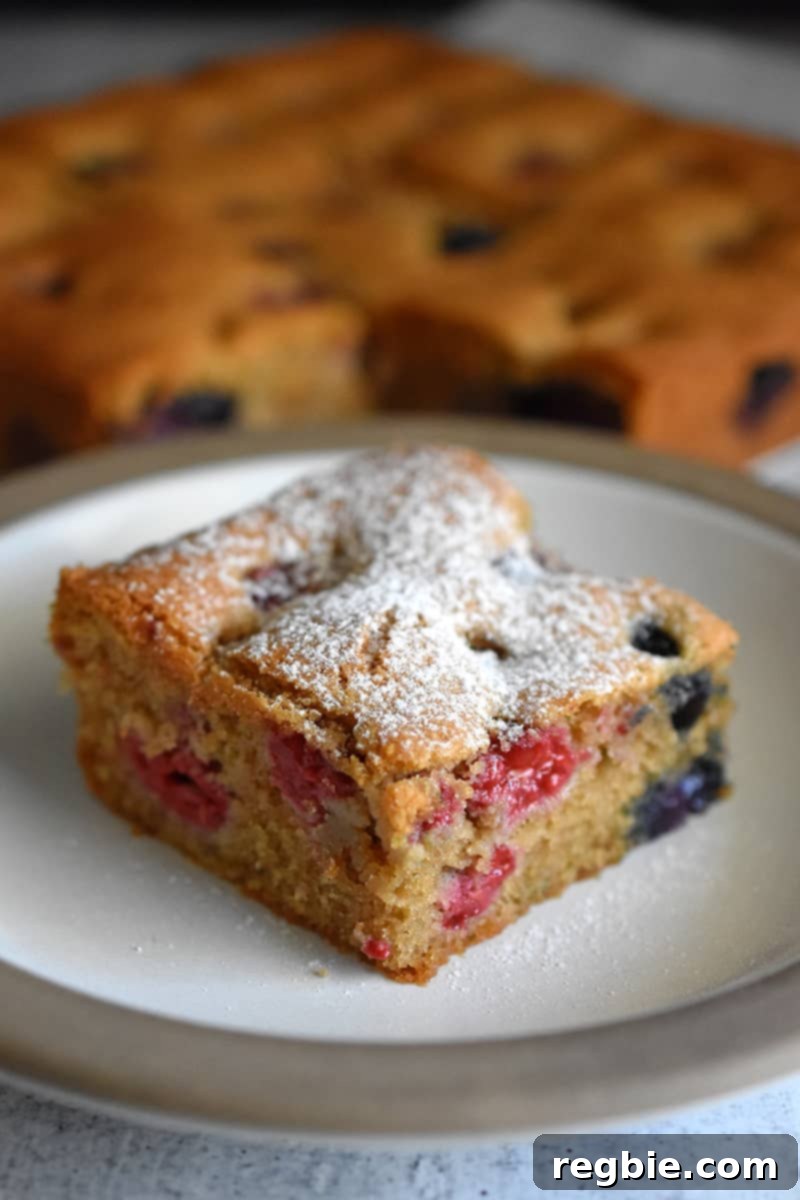
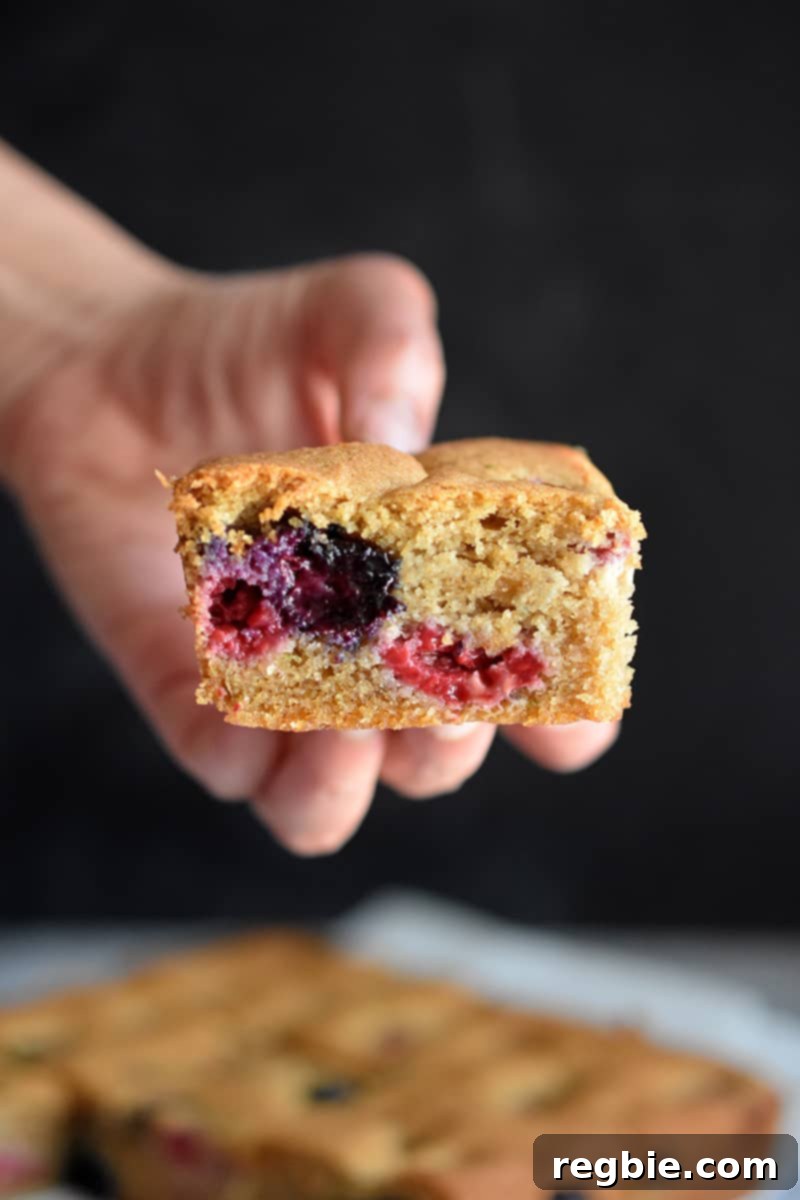
Welcome to your new favorite healthy indulgence! This incredibly simple yet utterly delicious Berry Snack Cake is designed to be the perfect paleo and gluten-free treat for any occasion, especially as a wholesome back-to-school snack. Its tender crumb, bursting with juicy berries, makes it a delightful handheld delight. Both children and adults alike will fall in love with this cake, not just for its exquisite taste, but also because it’s easily enjoyed without the need for utensils. What’s more, its naturally sweet and satisfying flavor profile is so rich that no one will ever suspect it’s entirely free of grains and refined sugar!
Table of Contents
- The Ultimate Berry Snack Cake Experience
- Embracing Paleo, Gluten-Free, and Grain-Free Delight
- Adapting for a Low-Carb Lifestyle
- Fruit Variations for Your Snack Cake
- Essential Ingredients for Your Berry Snack Cake
- Step-by-Step Guide to Baking Your Gluten-Free Berry Snack Cake
- Storage Tips for Freshness
- More Healthy Grab-and-Go Dessert Ideas
- Printer-Friendly Recipe Card
The Ultimate Berry Snack Cake Experience
This berry snack cake is more than just a dessert; it’s a wholesome treat designed to satisfy your sweet cravings without compromising your dietary preferences. Imagine a beautifully tender crumb, delicate and moist, generously dotted with vibrant, tangy berries that burst with flavor in every bite. The sweetness level is perfectly balanced, deriving its natural deliciousness from unrefined sweeteners like maple or coconut sugar. It’s light, flavorful, and incredibly satisfying, making it suitable for breakfast, an afternoon pick-me-up, or a light dessert. We even put it to the ultimate test with my discerning, gluten-eating in-laws, and it passed with flying colors! Their rave reviews confirmed what we already knew: this snacking cake is an absolute winner, proving that healthy can indeed be utterly delicious.
Beyond its fantastic taste, this cake boasts remarkable versatility. It’s sturdy enough to be packed in lunchboxes, perfect for picnics, or simply enjoyed as a quick, mess-free snack on the go. Its naturally appealing aesthetic, coupled with its wonderful aroma of fresh berries and warm spices, makes it an inviting option for any gathering. Whether you’re adhering to a paleo lifestyle, avoiding gluten, or simply looking for a more wholesome treat, this berry snack cake delivers an unparalleled experience that everyone can enjoy.
Embracing Paleo, Gluten-Free, and Grain-Free Delight
While I don’t delve into paleo dessert creation frequently, when I do, I ensure the recipe is meticulously tested and truly worth the effort. This Berry Snack Cake is a testament to that commitment, delivering an amazing taste and texture that defies its health-conscious roots. The secret lies in our choice of flours: a blend of finely ground almond flour and versatile cassava flour. This combination is key to achieving a tender, moist crumb that holds up beautifully, mimicking traditional cakes without any grains.
For those unfamiliar, a “paleo” diet emphasizes whole, unprocessed foods that our ancestors might have eaten, excluding grains, legumes, and refined sugars. “Gluten-free” means the absence of gluten, a protein found in wheat, barley, and rye, which is essential for individuals with celiac disease or gluten sensitivity. “Grain-free” takes it a step further, eliminating all grains, not just those containing gluten. This cake adheres to all these principles, making it a safe and delicious option for many dietary needs.
Using almond flour contributes a rich, nutty flavor and a moist texture, while cassava flour provides structure and a neutral taste, making it an excellent grain-free alternative. As a home baker, I encourage experimentation, but for optimal results with this specific recipe, sticking to almond and cassava flours is recommended. If you’re considering substitutions for eggs or other flours, I encourage you to share your successful adaptations in the comments below! Your insights are invaluable to our community of health-conscious bakers.
Adapting for a Low-Carb Lifestyle
Absolutely! This versatile berry snack cake can be easily adapted to fit a low-carb lifestyle. My recent tests with allulose, a natural sweetener that doesn’t metabolize in the body like sugar, yielded fantastic results. Allulose is an excellent choice for reducing net carbs and calories without sacrificing sweetness. However, it’s important to note that allulose is not as sweet as maple or coconut sugar, so you’ll need to increase the quantity. For this recipe, I recommend using a full cup of granulated allulose to achieve the desired level of sweetness.
Another characteristic of allulose is its tendency to brown more quickly than traditional sugars. To prevent your cake from becoming too dark on the outside before the center is fully cooked, I advise keeping a close watch during the last 10 minutes of baking. If you notice the top browning too rapidly, simply place a piece of aluminum foil lightly over the cake. This will shield the surface, allowing the inside to finish baking perfectly. For those aiming to further reduce carbs, you might also experiment with increasing the proportion of almond flour relative to cassava flour, as almond flour is lower in carbohydrates. While I haven’t tested the exact ratios for such a modification, if you decide to try it, please share your successful adjustments in the comments to help fellow low-carb enthusiasts!
Fruit Variations for Your Snack Cake
The beauty of this snack cake recipe lies in its adaptability to various fruits! While mixed berries create a classic and delightful flavor, feel free to unleash your creativity and substitute them with almost any other fruit you love. Think beyond berries for exciting new flavor profiles. Sliced peaches, nectarines, or plums can add a wonderful sweetness and soft texture. Tropical options like diced mango or even well-drained canned pineapple chunks (unsweetened, if possible) would also work beautifully, bringing a sunnier, exotic twist to your cake.
When selecting your fruit, consider its texture. If you opt for harder fruits, such as apples or pears, ensure they are sliced very thinly. This allows them to soften and cook through within the same baking time as the cake batter sets. For a seasonal touch, consider a blend of finely diced apples with a sprinkle of extra cinnamon and nutmeg in the fall, or juicy peaches in the summer. Frozen fruit is also a perfectly acceptable substitute and a convenient option when fresh berries are out of season. However, be aware that using frozen fruit might slightly increase the baking time and could result in a cake that is a bit wetter due to the extra moisture released during thawing. No matter your choice, ensure the fruit is gently folded into the batter to avoid crushing delicate pieces and to distribute them evenly throughout the cake.
Essential Ingredients for Your Berry Snack Cake
- Avocado oil spray or ghee: For greasing the baking pan, ensuring the cake doesn’t stick.
- Finely ground almond flour: The base for our gluten-free and grain-free cake, providing a rich flavor and moist texture.
- Cassava flour: I recommend Otto’s cassava flour for its fine texture and neutral taste, crucial for the cake’s structure.
- Ground cinnamon: Adds a warm, aromatic spice note that complements the berries beautifully.
- Baking soda: A leavening agent that helps the cake rise and achieve a light, airy texture.
- Diamond Crystal kosher salt: Enhances all the flavors in the cake, balancing the sweetness.
- Ground cardamom: An optional but highly recommended spice that adds a unique, subtle floral-citrus note.
- Ghee or coconut oil, softened: Provides richness and moisture to the cake. Ensure it’s softened, not melted, for proper creaming.
- Maple sugar or coconut sugar: Natural, unrefined sweeteners that give the cake its delightful sweetness. For a low-carb option, use granulated allulose (increase to 1 cup).
- Large eggs: Act as a binder, adding structure and richness to the cake.
- Full-fat coconut milk: Contributes moisture and a subtle creamy texture without dairy.
- Grated lime zest: Infuses a bright, fresh citrus aroma and flavor that lifts the entire cake.
- Lime juice: A touch of acidity to balance the sweetness and enhance the berry flavors.
- Vanilla extract: A classic flavor enhancer that deepens the overall taste profile.
- Blackberries, blueberries, strawberries, and/or raspberries: Your choice of mixed berries, fresh or frozen, to stud the cake with fruity goodness.
- Keto confectioners sugar (optional): For a beautiful, delicate dusting on top, adding a touch of elegance and extra sweetness.
Step-by-Step Guide to Baking Your Gluten-Free Berry Snack Cake
Crafting this healthy and delicious berry snack cake is a straightforward process, ensuring a perfect bake every time. Follow these detailed steps for a tender, flavorful, and wonderfully moist cake.
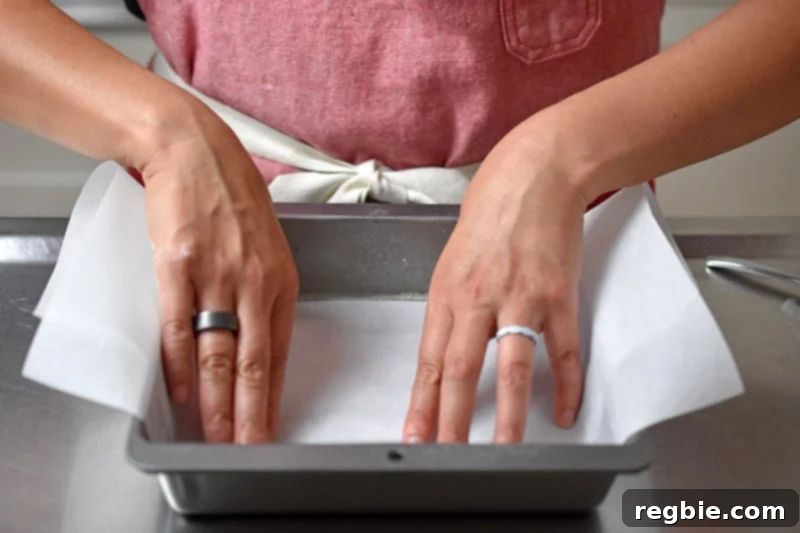
Step 1: Prepare Your Oven and Baking Pan. Begin by preheating your oven to 350°F (175°C), positioning an oven rack in the middle. This ensures even baking. Next, take an 8-inch square metal baking pan and lightly grease its sides and bottom with avocado oil spray or ghee. This initial greasing is crucial for preventing the cake from sticking. For an extra layer of non-stick assurance and incredibly easy removal, create a “sling” out of parchment paper. Cut a piece of parchment paper to fit the bottom of the pan, with extra length to hang over two opposite sides. This parchment sling will act as handles, allowing you to effortlessly lift the cooled cake out of the pan.
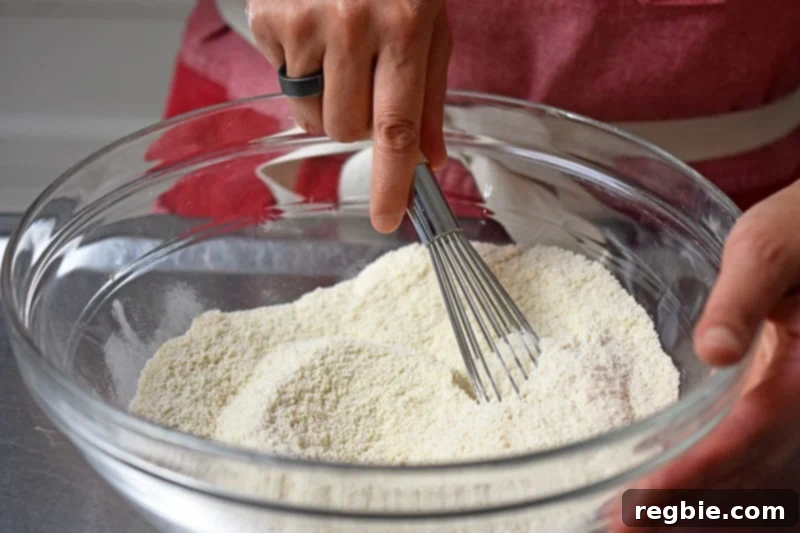
Step 2: Combine the Dry Ingredients. In a medium-sized bowl, measure out your dry ingredients: finely ground almond flour, cassava flour, ground cinnamon, baking soda, Diamond Crystal kosher salt, and ground cardamom. Using a whisk, vigorously combine these ingredients until they are thoroughly blended. This step is more important than it seems; it ensures that the leavening agents (like baking soda) and spices are evenly distributed throughout the mixture, leading to a consistent rise and flavor in your finished cake. Set this perfectly combined dry mixture aside for later.
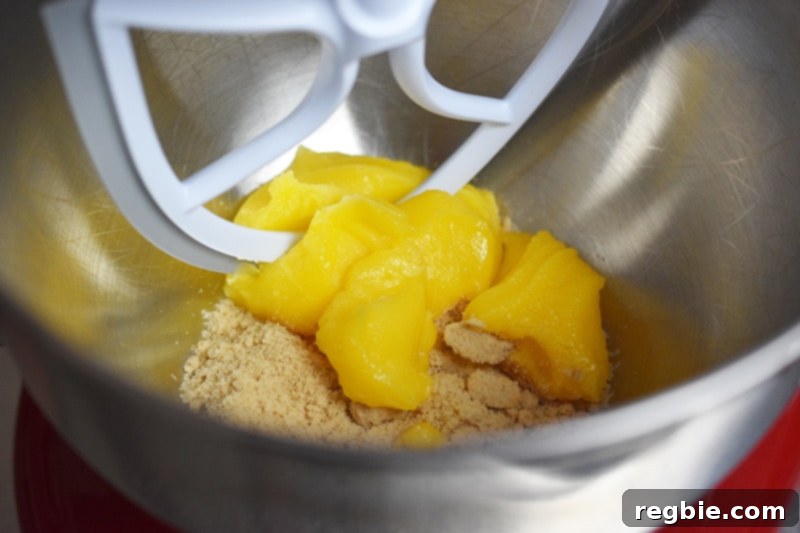
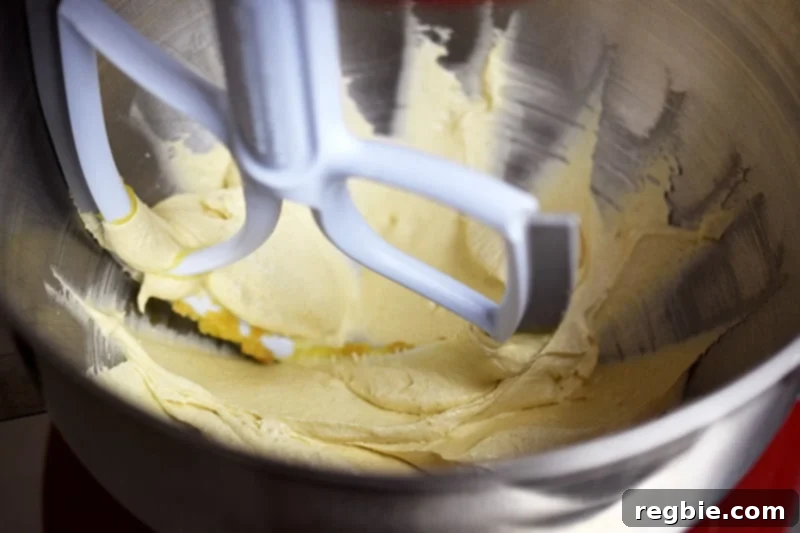
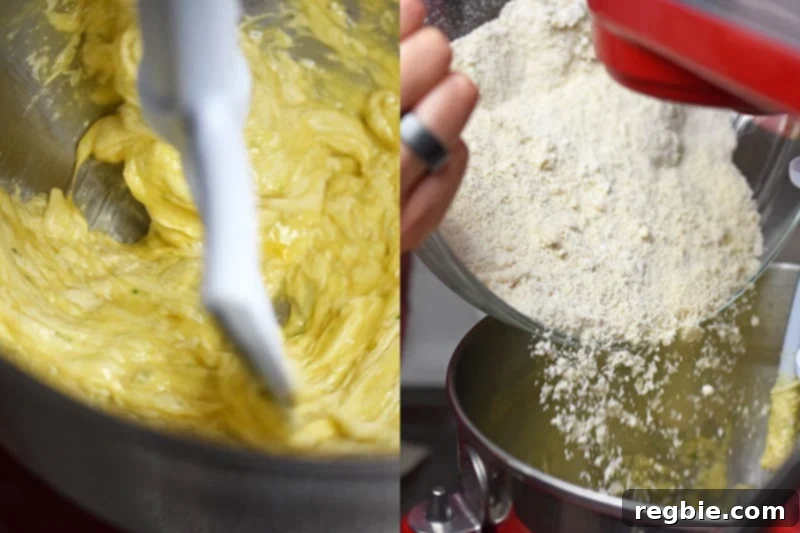
Step 3: Cream the Ghee and Sweetener. If using a stand mixer, place the softened ghee (or coconut oil) and your chosen sweetener (maple sugar, coconut sugar, or granulated allulose) into the mixer bowl. Attach the paddle attachment. If using a hand mixer, use a large mixing bowl. Blend this mixture on medium-high speed for 3 to 5 minutes. The goal is to “cream” them together until the mixture becomes notably lighter in color and develops a fluffy, airy texture. This process incorporates air into the fats, which is fundamental for creating a light and tender cake crumb. Don’t rush this step, as it significantly impacts the final texture of your cake.
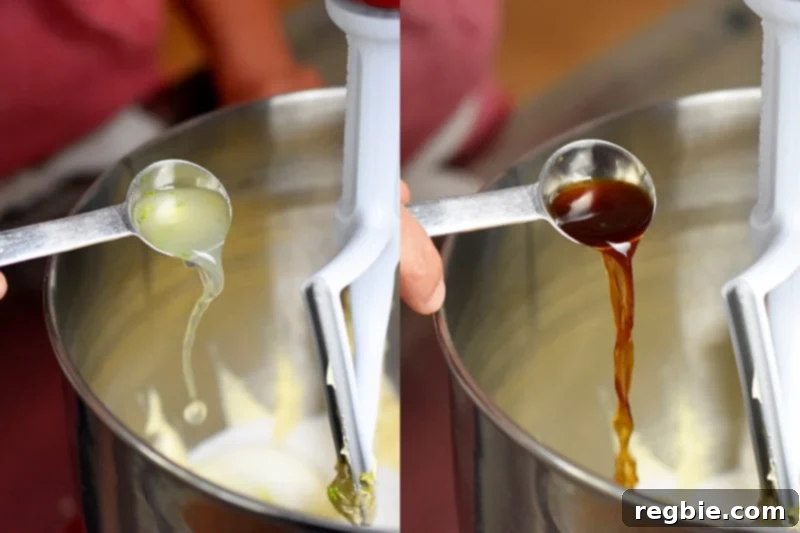
Step 4: Incorporate Wet Ingredients. After creaming, stop the mixer and use a spatula to scrape down any mixture clinging to the sides of the bowl, ensuring everything is well combined. Now, add the large eggs, full-fat coconut milk, grated lime zest, fresh lime juice, and vanilla extract to the bowl. Beat the mixture on medium speed for approximately 30 seconds, or until all these wet ingredients are fully combined and the batter appears smooth and uniform. This step infuses the batter with essential moisture and vibrant flavors.
Step 5: Gradually Add Dry Ingredients. With the wet mixture ready, it’s time to slowly introduce the dry ingredients. Add about half of your whisked flour mixture to the wet batter in the mixer bowl. Beat on low speed just until the flour is combined. Avoid overmixing at this stage. Then, add the remaining half of the flour mixture and continue to mix on low speed until it is fully incorporated and no streaks of dry flour remain. After mixing, scrape down the sides of the bowl one last time with a spatula and gently fold in any dry flour that might have settled at the bottom or clung to the edges. This gradual addition prevents overworking the batter, which can lead to a tough cake.
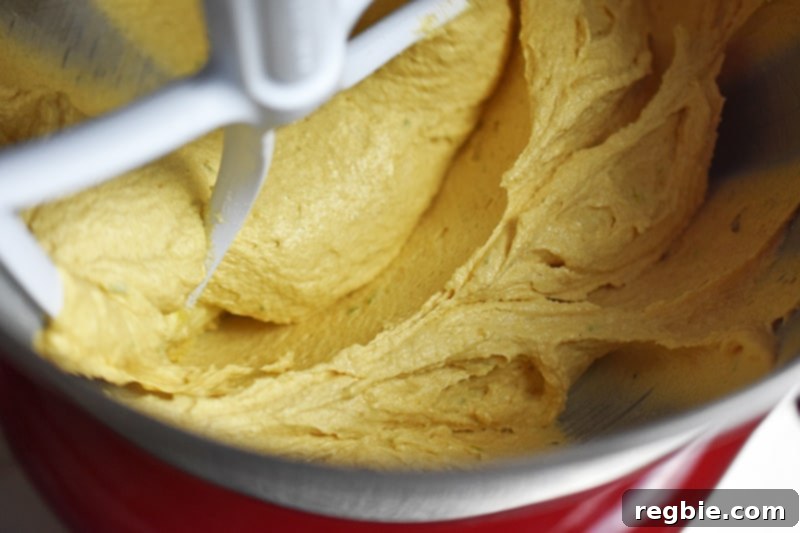
Step 6: Gently Fold in the Berries. Now for the star of the show! Pour your mixed berries into the thick cake batter. Using a spatula, carefully and gently fold the berries into the batter. The key here is to fold, not stir vigorously, to avoid crushing the delicate berries and to ensure they are evenly distributed throughout the cake without bleeding too much color into the batter. This step will ensure every slice is studded with fruity bursts.
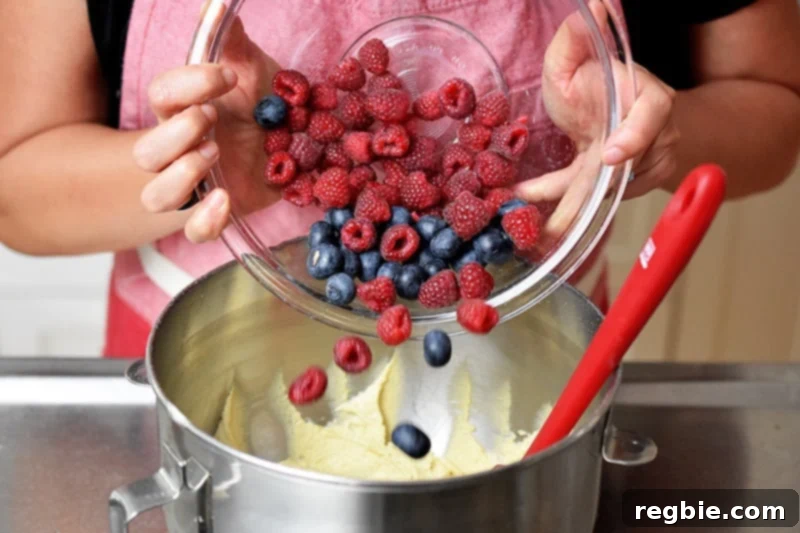
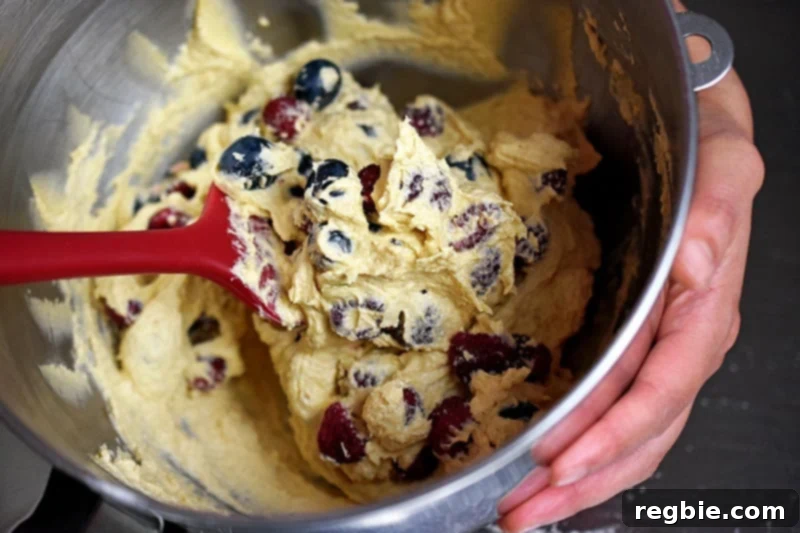
Step 7: Transfer and Smooth. Once the berries are gently folded in, transfer the entire batter mixture to your prepared parchment-lined baking pan. Use your spatula to carefully smooth the top of the batter. An even surface is important for a uniform bake and an appealing finished appearance. Distribute the batter evenly to prevent one part of the cake from cooking faster than another.
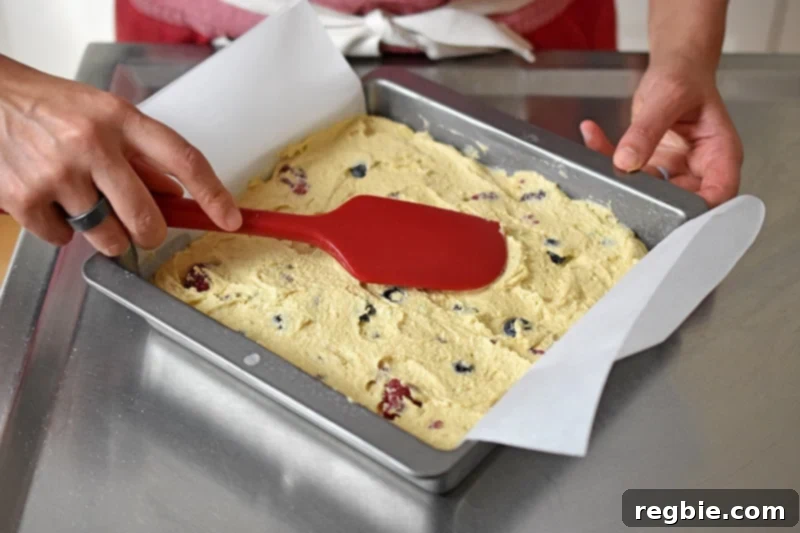
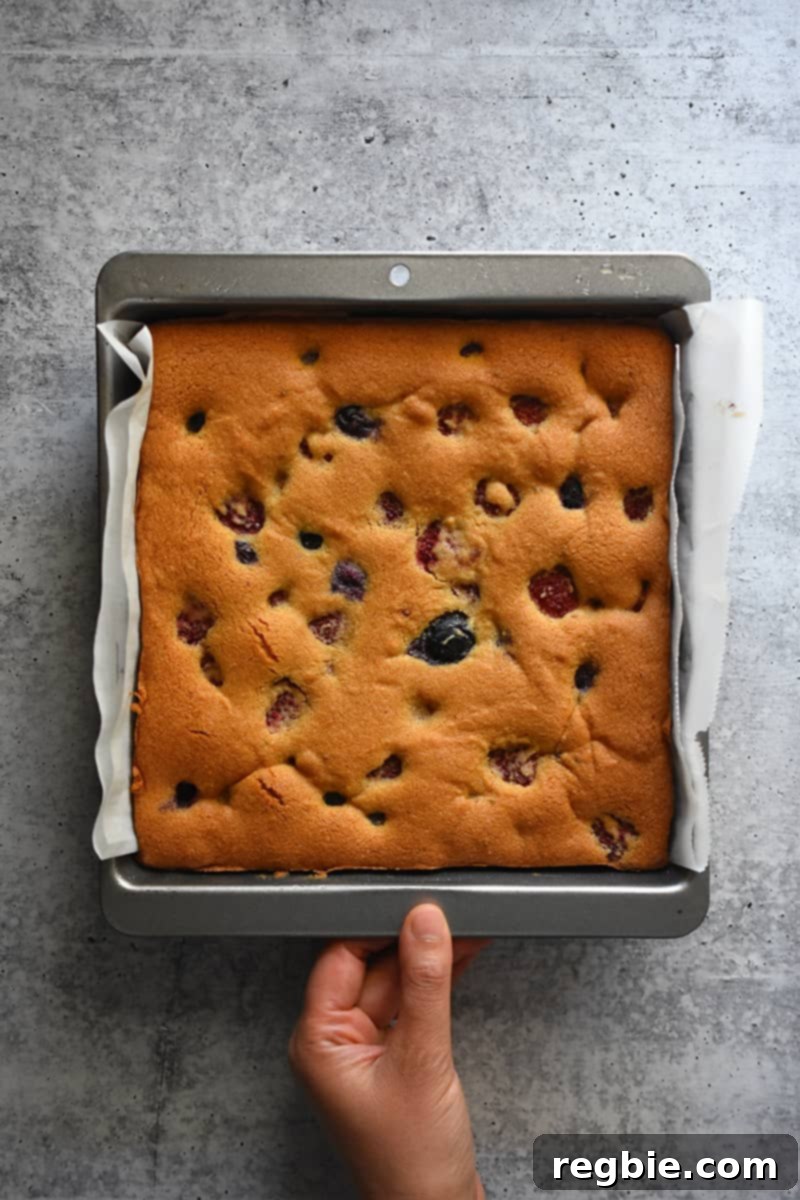
Step 8: Bake to Golden Perfection. Place the baking pan into your preheated oven. Bake for approximately 30-35 minutes. The cake is ready when it achieves a beautiful golden-brown color on top, and a wooden toothpick or cake tester inserted into the very center comes out clean, indicating it’s cooked through. If you are using allulose as your sweetener, remember that it browns more quickly. During the last 10 minutes of baking, you may need to lightly cover the top of the cake with aluminum foil to prevent it from getting too dark before the interior is fully baked. This will help you achieve a perfectly cooked cake with a lovely golden crust.
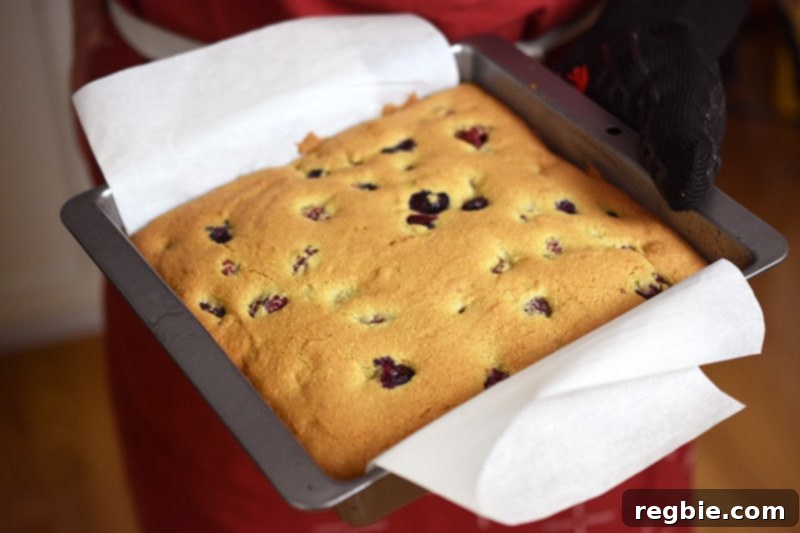
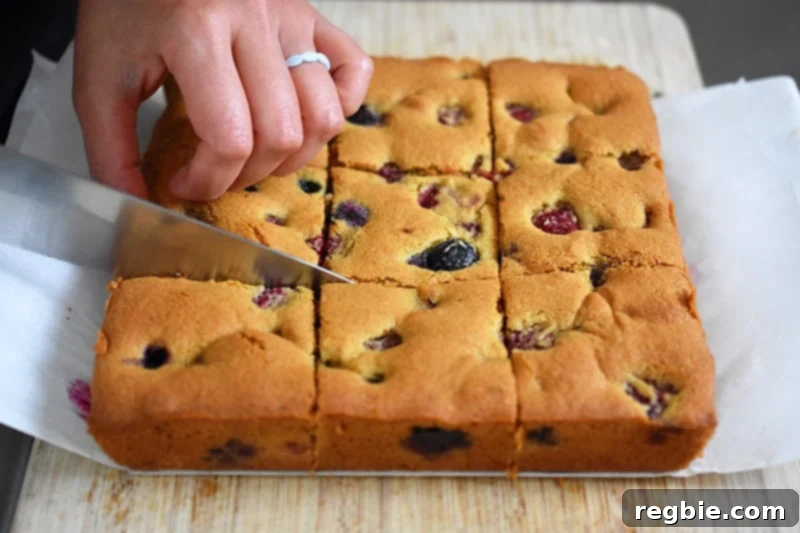
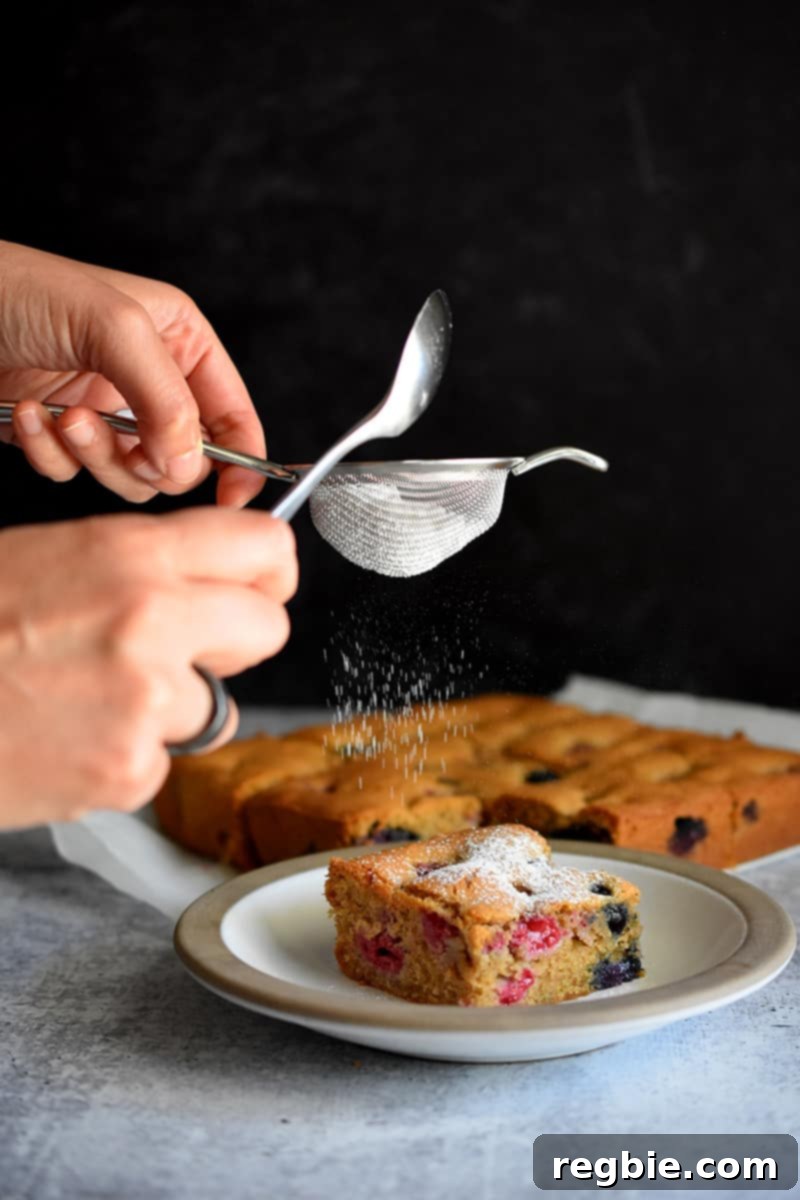
Step 9: Cool, Slice, and Serve. Once baked, carefully remove the cake from the oven and place the pan on a wire cooling rack. Allow the cake to cool completely in the pan. Cooling is essential as it allows the cake to set properly and prevents it from falling apart when sliced. Once cooled, use the parchment paper sling to lift the entire cake out of the pan. Place it on a cutting board and cut it into nine evenly sized squares. Serve the cake as is for a simple, delightful treat, or for an added touch of elegance and subtle sweetness, dust generously with keto confectioners sugar just before serving. Enjoy your homemade, healthy berry snack cake!
Storage Tips for Freshness
To ensure your delicious berry snack cake remains fresh and enjoyable, proper storage is key. For short-term storage, any leftover cake should be placed in a sealed airtight container or wrapped tightly in plastic wrap. Stored this way, it will keep beautifully in the refrigerator for up to 4 days. If you find yourself with more cake than you can enjoy in a few days, this recipe freezes exceptionally well! For long-term preservation, wrap individual slices securely in plastic wrap, then place them in a freezer-safe bag or container. This method allows the cake to maintain its quality in the freezer for up to 4 months. When you’re ready to enjoy a slice, simply thaw it at room temperature for an hour or so, or gently warm it in the oven for a freshly baked experience. Despite its excellent storage capabilities, something tells us this delightful cake will disappear quickly!
More Healthy Grab-and-Go Dessert Ideas
If you love the convenience and wholesome goodness of this paleo berry snack cake, you’ll be thrilled to discover more portable paleo dessert recipes perfect for busy days or healthy lunchboxes. These treats are designed to be easy to make and even easier to enjoy on the go, ensuring you always have a nutritious option at hand to satisfy your sweet tooth without compromising your dietary goals. Here are some of my top favorites:
- Cherry Chocolate Granola
- Easy Cinnamon Rolls in A Muffin Pan
- Liar Balls
- PB&J Energy Balls
- Pumpkin Muffins
- The World’s Easiest Cookies
Always on the hunt for more delightful and wholesome recipe ideas? Dive into our comprehensive Recipe Index, where a treasure trove of culinary inspiration awaits. You’ll also discover exclusive, never-before-seen recipes within my acclaimed cookbooks: Nom Nom Paleo: Food for Humans (Andrews McMeel Publishing 2013), Ready or Not! (Andrews McMeel Publishing 2017), and the latest addition, Nom Nom Paleo: Let’s Go! (Andrews McMeel Publishing 2022). Happy cooking!
Printer-Friendly Recipe Card
Berry Snack Cake (Paleo, Gluten Free) Recipe
This simple and delicious Berry Snack Cake is the perfect paleo and gluten-free treat for any time of day! Loved by kids and adults alike, it’s easy to eat without utensils and remarkably free of grains and refined sugar.
Recipe Details:
- Prep Time: 15 minutes
- Cook Time: 35 minutes
- Cooling time: 2 hours
- Total Time: 2 hours 50 minutes
- Servings: 9
- Author: Michelle Tam
Ingredients
- Avocado oil spray or ghee (for greasing)
- 1 cup finely ground almond flour
- ¾ cup cassava flour
- 1 teaspoon ground cinnamon
- ½ teaspoon baking soda
- ½ teaspoon Diamond Crystal kosher salt
- ½ teaspoon ground cardamom
- ½ cup ghee, softened (or coconut oil, softened)
- ⅔ cup maple sugar or coconut sugar (or 1 cup granulated allulose for low carb)
- 2 large eggs
- ⅓ cup full-fat coconut milk
- 2 teaspoons grated lime zest
- 1 teaspoon lime juice
- 1 teaspoon vanilla extract
- 1½ cups mixed berries (fresh or frozen)
- 1 tablespoon keto confectioners sugar (optional)
Instructions
- Prepare Oven & Pan: Preheat your oven to 350°F (175°C) with the rack in the middle. Lightly grease an 8-inch square metal baking pan with avocado oil or ghee. Line the bottom with a parchment paper sling, ensuring it hangs over the sides for easy removal.
- Combine Dry Ingredients: In a medium bowl, whisk together the almond flour, cassava flour, cinnamon, baking soda, salt, and cardamom until well combined. Set aside.
- Cream Ghee & Sweetener: In the bowl of a stand mixer (or a large bowl with a hand mixer), combine softened ghee and maple sugar (or chosen sweetener). Beat on medium-high speed for 3 to 5 minutes until light in color and fluffy.
- Add Wet Ingredients: Scrape down the sides of the bowl. Add the eggs, coconut milk, lime zest, lime juice, and vanilla extract. Beat on medium speed for 30 seconds until combined.
- Integrate Dry Ingredients: Add half of the flour mixture and beat on low speed until just combined. Slowly add the remaining flour and mix until fully incorporated. Scrape down the bowl and fold in any dry flour with a spatula.
- Fold in Berries: Carefully pour the mixed berries into the batter and gently fold them in with a spatula until evenly distributed.
- Transfer to Pan: Transfer the batter to the prepared parchment-lined baking pan and smooth the top evenly.
- Bake: Bake for 30-35 minutes, or until the cake is golden brown and a toothpick inserted into the center comes out clean. (If using allulose, lightly cover with foil during the last 10 minutes if browning too quickly.)
- Cool & Serve: Cool the cake completely in the pan on a wire rack. Once cooled, use the parchment sling to lift it out. Cut into nine squares. Serve as is or dust with keto confectioners sugar, if desired.
Video
A step-by-step video guide for this Berry Snack Cake recipe is available on the original blog post. Please visit the main article for a visual demonstration of the baking process.
Notes
- Storage: Store leftover cake in a sealed airtight container or wrapped in plastic wrap in the refrigerator for up to 4 days. For longer storage, freeze individual slices for up to 4 months.
- Nutrition (with Allulose per serving – approximate):
- Calories: 230kcal
- Carbohydrates: 30g
- Protein: 3g
- Fat: 18g
- Fiber: 3g
- Net carbs: 11 grams (Total carbs 30g – Fiber 3g – Allulose 16g = 11g Net carbs)
Nutrition Information (Approximate, per serving with Maple/Coconut Sugar)
Nutrition information is automatically calculated and should only be used as an approximation. Values may vary based on ingredients used and specific portion sizes.
- Calories: 301kcal
- Carbohydrates: 31g
- Protein: 4g
- Fat: 19g
- Fiber: 2g
- Sugar: 18g