
Irresistible No-Bake Strawberry Cheesecake Bars: Your Go-To Vegan, Paleo, & Gluten-Free Dessert
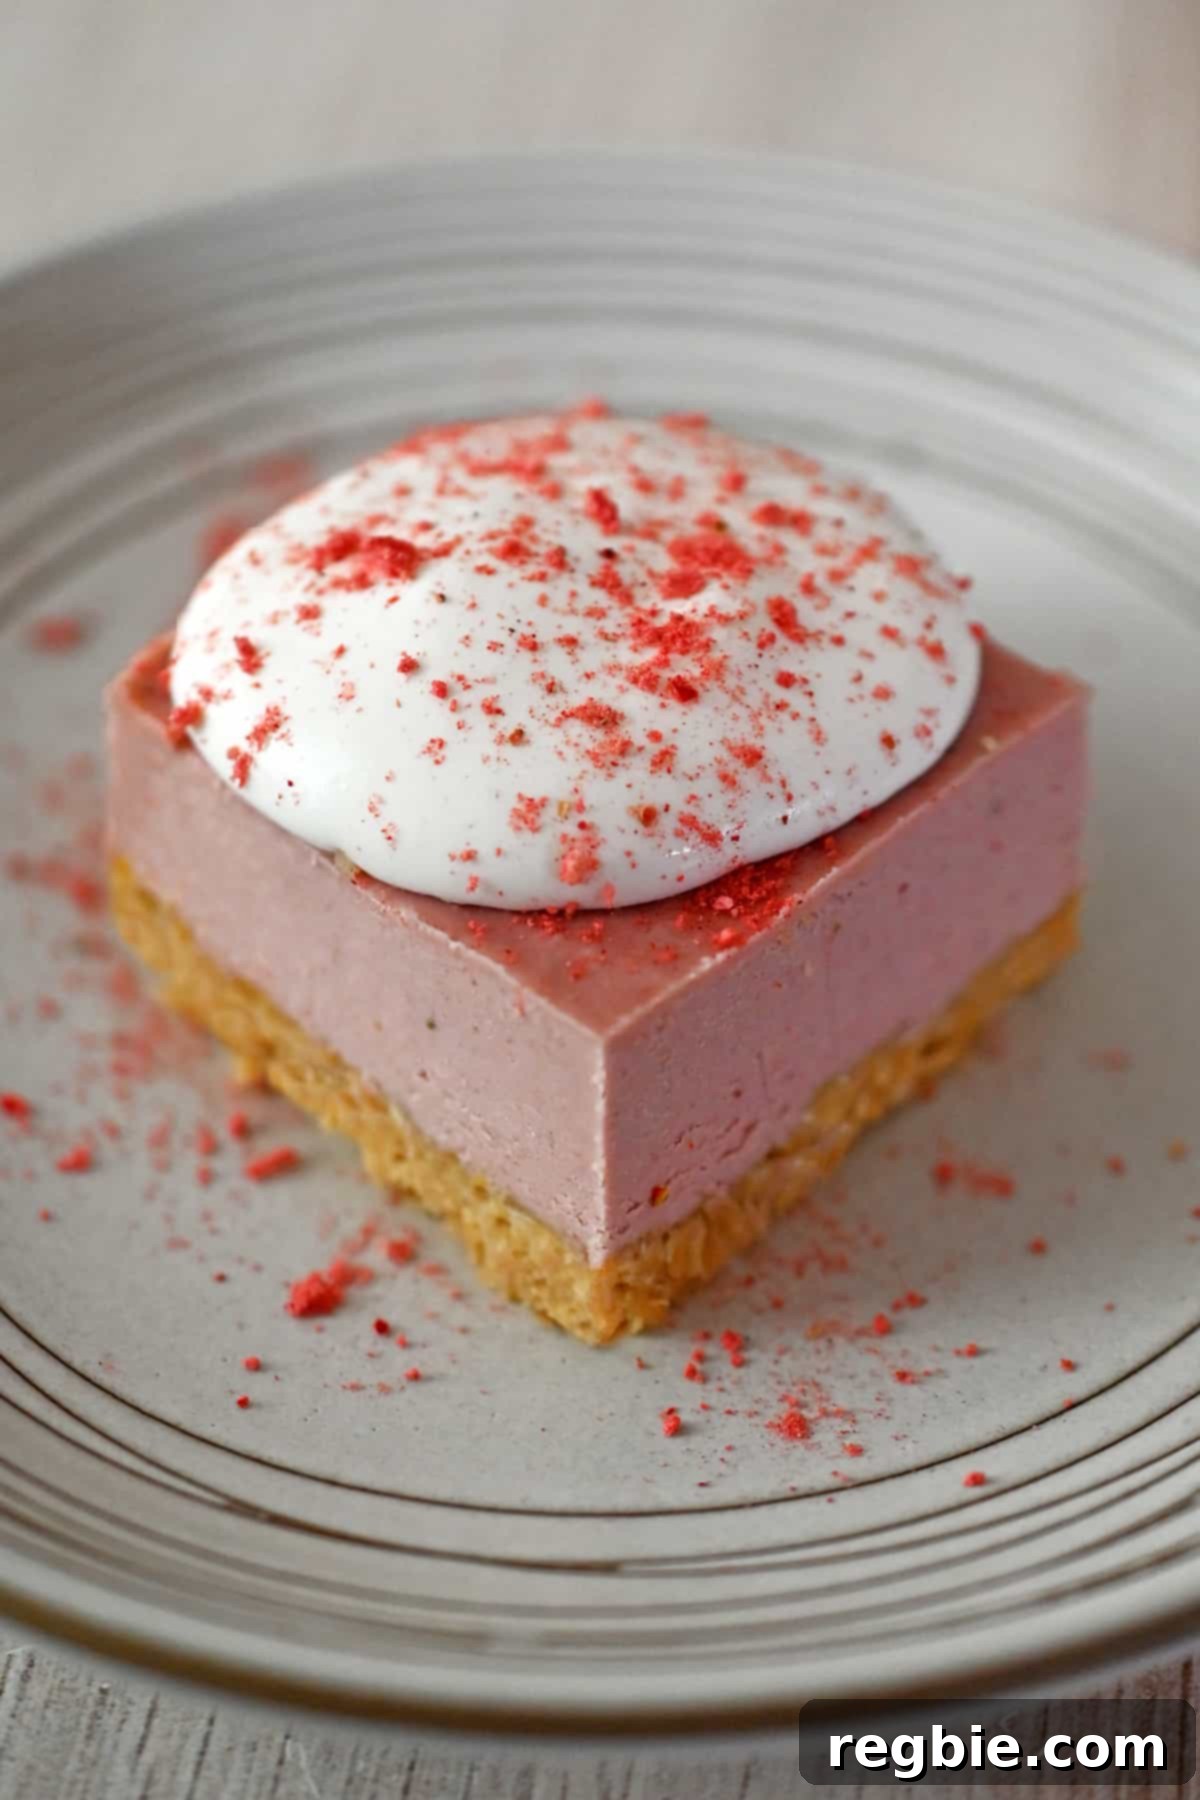
Indulge in the pure delight of these no-bake strawberry cheesecake bars – a dessert that’s not only incredibly tangy, creamy, and bursting with fresh fruit flavor but also features a wonderfully crunchy and nutty crust. Imagine whipping up a batch of these delectable treats without ever needing to turn on your oven, ready to share with all your friends, whether they’re vegan, paleo, or gluten-free! This recipe is designed to be a crowd-pleaser, proving that healthy desserts can be utterly luxurious and simple to prepare.
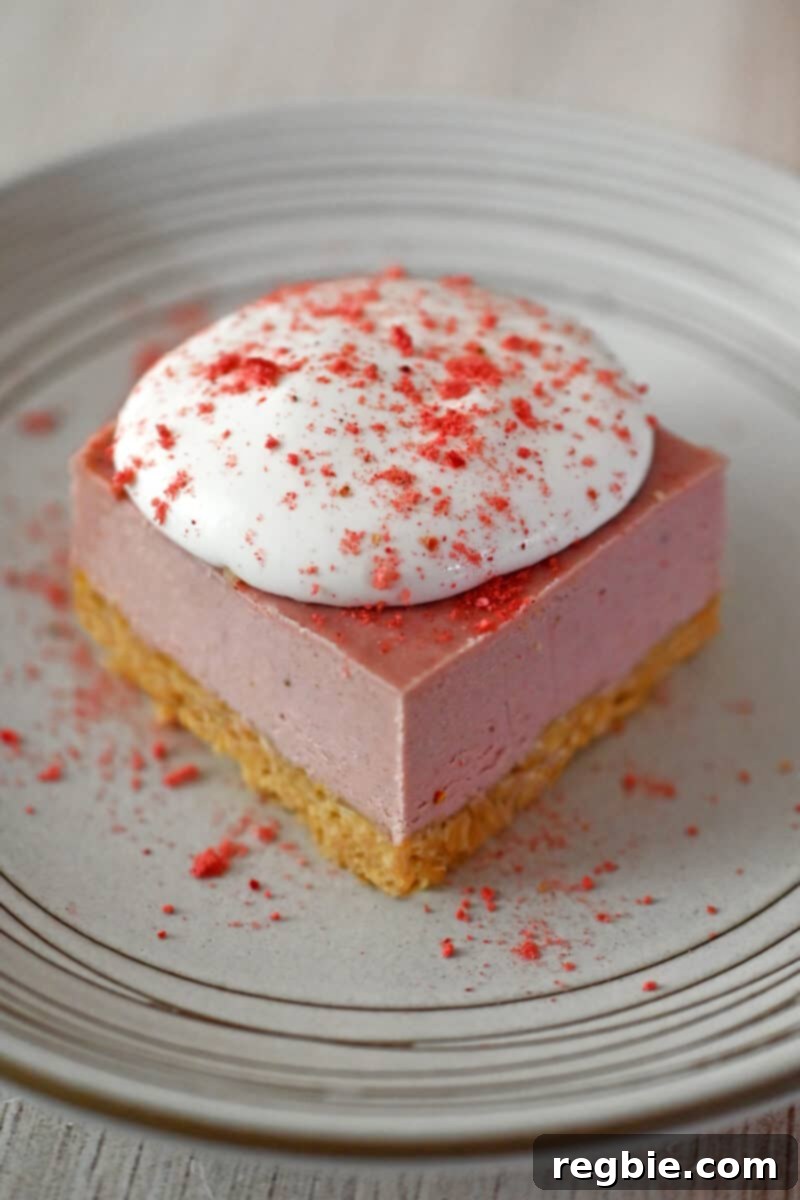
Table of Contents
- What Are Strawberry Cheesecake Bars?
- The Ultimate Healthy Strawberry Cheesecake Bars Recipe
- Tips for Making the Best No-Bake Strawberry Cheesecake Bars
- Ingredients: A Deep Dive
- The Flavorful Faux Graham Cracker Crust
- Creamy Strawberry “Cheesecake” Filling
- How to Make Paleo and Vegan Strawberry Cheesecake Bars Step-by-Step
- Step 1: Assemble the Crust
- Step 2: Craft the Creamy “Cheesecake” Filling
- Step 3: Assemble and Chill Your Cheesecake Bars
- Step 4: Slice, Garnish, and Serve
- How to Store Your No-Bake Strawberry Cheesecake Bars
- More Delightful Paleo Strawberry Dessert Recipes
- No-Bake Strawberry Cheesecake Bars Recipe Card
What Are Strawberry Cheesecake Bars?
Classic strawberry cheesecake bars are a beloved dessert, renowned for their delightful blend of textures and flavors. Typically, they feature a simple yet irresistible crust crafted from crushed graham crackers, sweetened with sugar, and bound together with melted butter. This sturdy base provides the perfect foundation for a rich and creamy cheesecake filling, often enhanced with a vibrant swirl of strawberry sauce. The result is a harmonious balance of sweet, tangy, and creamy notes, making them a refreshing and indulgent treat. These bars are usually prepared in a baking pan, then chilled and cut into convenient squares, making them an ideal make-ahead dessert for any gathering or a simple pleasure after a meal. Their portable nature and elegant appearance make them a popular choice for picnics, potlucks, and celebrations.
However, for those navigating dietary restrictions or simply seeking healthier alternatives, traditional cheesecake bars might not always be an option. This is where our innovative recipe shines, offering all the joy and deliciousness of conventional strawberry cheesecake bars, but re-imagined to be entirely vegan, paleo, and gluten-free, without compromising on taste or texture. We’ve taken the essence of this classic dessert and transformed it into a guilt-free pleasure, proving that health-conscious choices can still lead to incredibly satisfying desserts.
The Ultimate Healthy Strawberry Cheesecake Bars Recipe!
As a lover of all things creamy and strawberry-flavored, I embarked on a mission to create a version of this classic dessert that not only tastes incredible but also aligns with various dietary needs. This recipe for vegan, paleo, and gluten-free strawberry cheesecake bars is my proud answer! I’ve crafted a healthier spin on this beloved treat, making it entirely gluten-free, grain-free, refined sugar-free, and dairy-free – truly a plant-based marvel. What makes this recipe even better is its simplicity: you can effortlessly whip these bars together using common pantry staples.
Furthermore, these no-bake cheesecake bars are perfect for meal prepping. You can easily stockpile them in your freezer, ensuring you always have a delightful, wholesome treat on hand. Whether you’re hosting a party and need an impressive dessert or simply looking for a quick and easy after-school snack, these bars are versatile enough for any occasion. Their rich flavor and satisfying texture will undoubtedly leave everyone impressed, proving that healthy eating doesn’t mean sacrificing deliciousness.
My inspiration for this particular recipe stems from a fusion of my favorite raw vegan desserts, drawing elements from classic coconut cream bars and vibrant matcha cheesecakes, but with an irresistible strawberry twist. Instead of relying on traditional cream cheese or sour cream, which are dairy-based, I’ve developed a creamy, dairy-free cheesecake base by blending together perfectly soaked cashews, rich full-fat coconut milk, refined coconut oil for structure, and a splash of fresh lemon juice for that essential tangy kick. To infuse the filling with an intense and authentic strawberry flavor, I use freeze-dried strawberries. This clever trick provides a concentrated burst of fruity goodness without introducing excess moisture, and it means you don’t have to worry about finding perfectly ripe seasonal berries!
Tips for Making the Best Paleo & Vegan Strawberry Cheesecake Bars
Achieving the perfect texture and flavor in your no-bake cheesecake bars is easier than you think with these expert tips:
- Invest in a Powerful Blender for Silky Smoothness: The secret to a luxuriously creamy and silky cheesecake filling, particularly when working with soaked cashews, lies in using a high-powered blender. Tools like a Vitamix are ideal, as they can pulverize the cashews and other ingredients into an incredibly fine, uniform consistency, free of any gritty bits. This ensures your dairy-free filling mimics the smooth mouthfeel of traditional cream cheese.
- Toast Your Nuts and Coconut for Enhanced Flavor: While some ingredients may come pre-toasted, taking the extra step to toast your almond slivers and coconut flakes truly elevates the flavor of your crust. Toasting them until they turn a beautiful golden brown brings out their inherent nutty aromas and adds a depth of flavor that raw ingredients simply can’t match. Your tastebuds will definitely notice the difference in this crucial faux graham cracker crust!
- Thorough Freezing is Key for Perfect Slices: To ensure your cheesecake bars set properly and are easy to cut into clean, elegant squares, freezing them is absolutely essential. Don’t rush this step! I recommend freezing the entire batch, then slicing them into individual squares, and finally returning them to a sealed container in the freezer. This way, they remain perfectly portioned and ready to serve at a moment’s notice, making entertaining a breeze.
- Precise Ingredient Measurement Matters: Especially for no-bake recipes where consistency is critical, accurate measurement of ingredients is vital. Using measuring cups and spoons precisely will ensure the correct balance of flavors and the right texture for both the crust and the filling. Slight variations can impact how well the bars set.
Ingredients: A Deep Dive into Your No-Bake Strawberry Cheesecake Bars
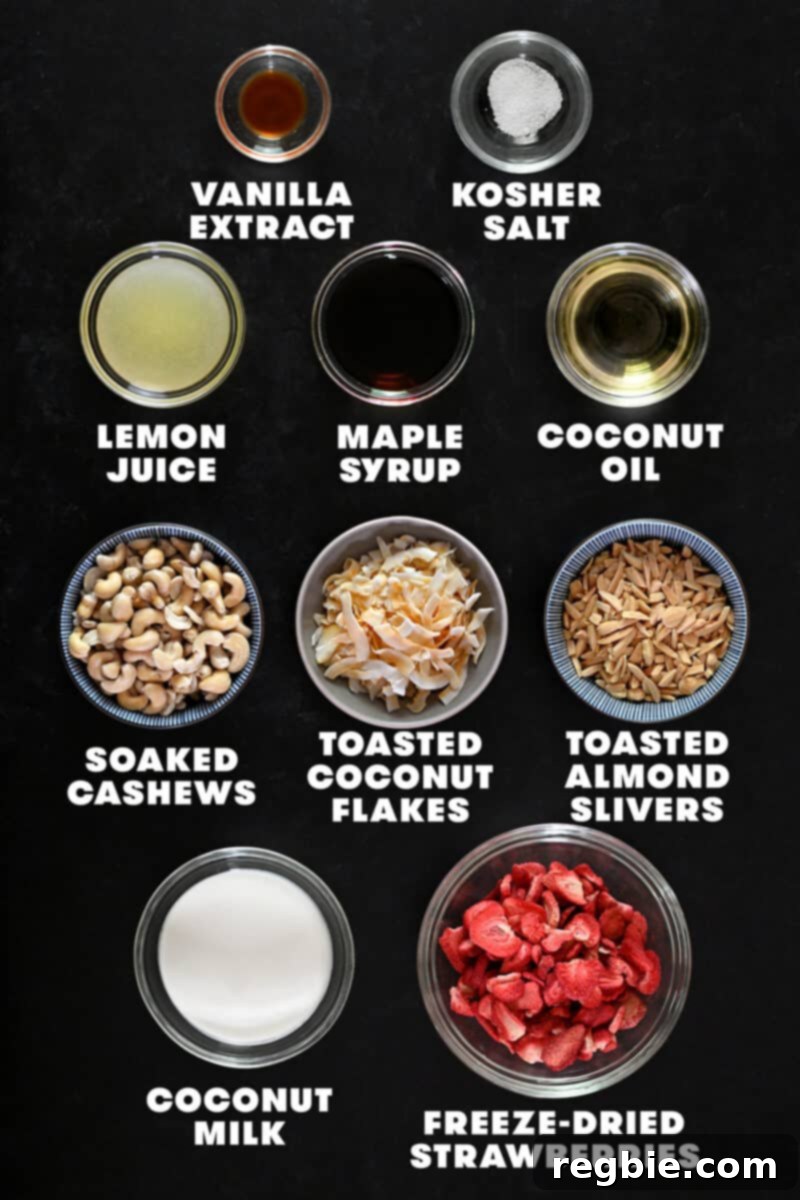
Crafting these delectable paleo and vegan strawberry cheesecake bars relies on a thoughtful selection of wholesome ingredients, each playing a crucial role in achieving the perfect balance of taste and texture. Here’s a detailed look at what you’ll need:
The Flavorful Faux Graham Cracker Crust
- Toasted Almond Slivers: These form the backbone of our crunchy, nutty crust, providing a wonderful texture and rich flavor. I often pick up pre-toasted unsalted almond slivers from Trader Joe’s for a convenient shortcut. If you have raw slivers, simply spread them on a baking sheet and toast in the oven at 300°F (150°C) for about 10 minutes, or until they turn golden brown and fragrant.
- Toasted Unsweetened Coconut Flakes: Coconut flakes add another layer of texture and a subtle tropical sweetness to the crust. For optimal flavor, toast raw, unsweetened coconut flakes in a 300°F (150°C) oven for just 3 to 5 minutes, keeping a close eye on them to prevent burning, until they are golden brown. Alternatively, look for pre-toasted options like Dang Coconut Flakes for an even quicker prep.
- Maple Syrup: This natural sweetener acts as a binder for the crust ingredients while imparting a delightful, caramel-like sweetness without any refined sugars.
- Refined Coconut Oil (Melted): Essential for binding the crust crumbs together, ensuring they hold their shape beautifully. Using *refined* coconut oil is key here, as it has a neutral flavor, avoiding any overt coconut taste that might interfere with the strawberry cheesecake notes.
- Diamond Crystal Kosher Salt: A small pinch of salt is crucial for balancing the sweetness and enhancing all the other flavors in the crust, bringing everything into perfect harmony.
Creamy Strawberry “Cheesecake” Filling
- Freeze-Dried Strawberries: This is a star ingredient for the filling! Unlike fresh or frozen strawberries, freeze-dried berries provide an intense, concentrated strawberry flavor and a beautiful pink hue without adding excess moisture that could thin out the filling. Feel free to experiment with other freeze-dried fruits like raspberries or blueberries for different flavor profiles.
- Soaked Raw Cashews: The foundation of our incredibly creamy, dairy-free “cheesecake” texture. Soaking the cashews softens them, allowing them to blend into a smooth, luscious consistency that mimics cream cheese. You can quick-soak them in boiling water for 15-30 minutes, or a longer soak in room temperature water for about 4 hours. These are absolutely essential for the filling, and I haven’t tested alternatives like other nuts or store-bought vegan cream cheese.
- Full-Fat Canned Coconut Milk: Contributes to the richness and creaminess of the filling. Using full-fat coconut milk or cream is highly recommended for the best texture. While cashew milk or almond milk might work, they may result in a less decadent filling.
- Refined Coconut Oil (Melted): This ingredient is vital for helping the cheesecake filling solidify and set firmly when chilled. Again, opt for *refined* coconut oil to avoid a strong coconut flavor. Do not substitute with MCT oil, as it does not solidify at cold temperatures and your bars won’t set.
- Freshly Squeezed Lemon Juice: Provides that essential tangy counterpoint, mimicking the subtle acidity found in traditional cheesecake and brightening the overall flavor.
- Maple Syrup: My preferred natural sweetener for the filling, offering a lovely depth of flavor. Honey can be used as a substitute, or for a keto-friendly option, liquid allulose would work well.
- Vanilla Extract: Adds a warm, aromatic depth that complements the strawberry and cashew flavors beautifully.
- Diamond Crystal Kosher Salt: Just a touch of salt is needed to enhance the sweetness and round out the complex flavors in the filling.
- Whipped Coconut Cream (Optional Topping): A light and airy topping that adds an extra layer of decadence and a beautiful presentation.
How to Make Paleo and Vegan Strawberry Cheesecake Bars Step-by-Step
Creating these delightful no-bake strawberry cheesecake bars is a straightforward process, requiring minimal effort for maximum reward. Follow these simple steps to assemble your delicious, healthy dessert.
Step 1: Assemble the Crust
Begin by preparing your flavorful crust. Place the toasted slivered almonds and the toasted unsweetened coconut flakes into the bowl of a food processor. This combination provides a fantastic depth of flavor and a satisfying crunch.
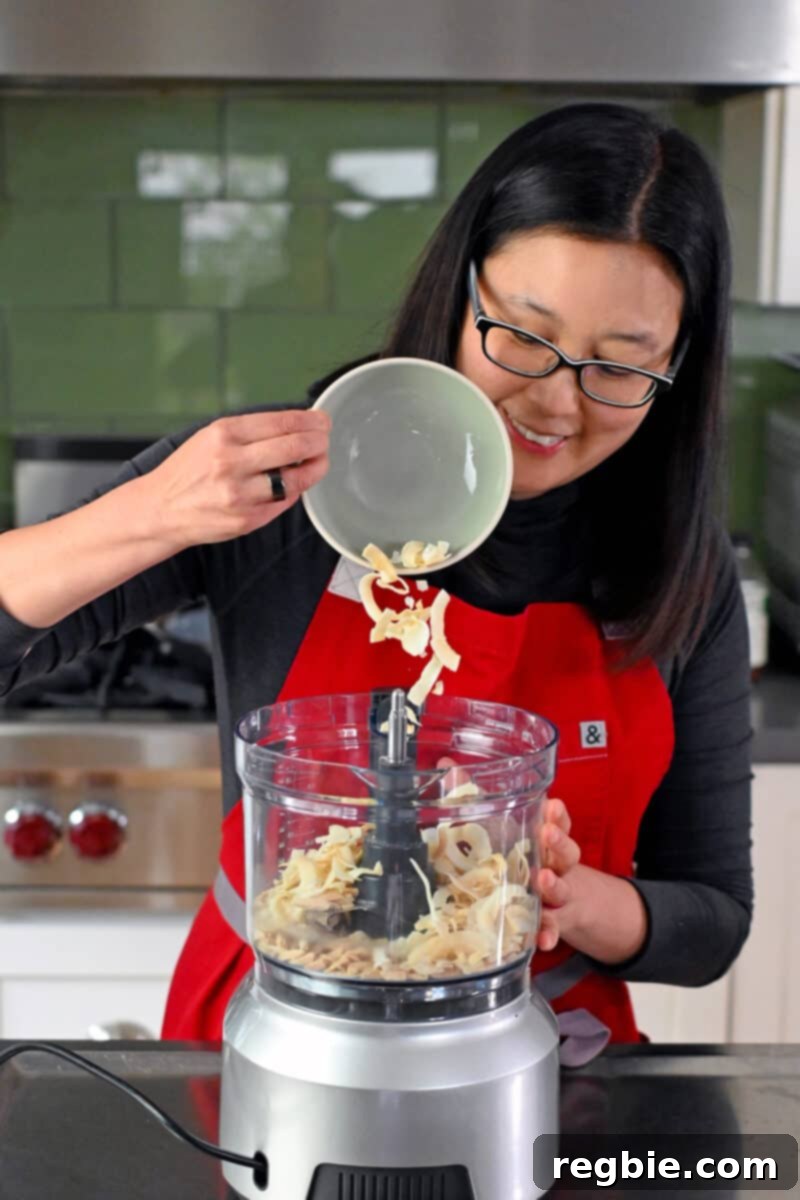
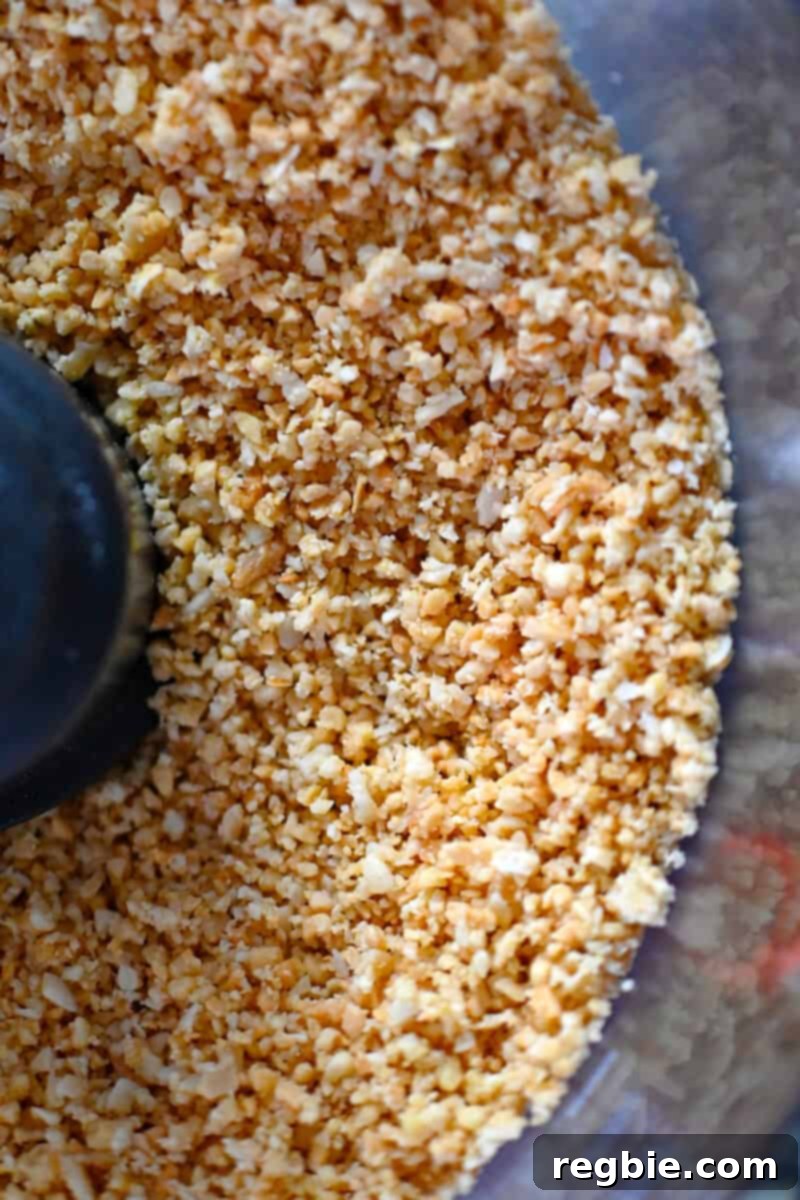
Pulse these ingredients together until they reach a texture that closely resembles coarse cornmeal or finely crushed graham cracker crumbs. Ensure there are no large chunks remaining, as a finer texture will create a more cohesive crust.
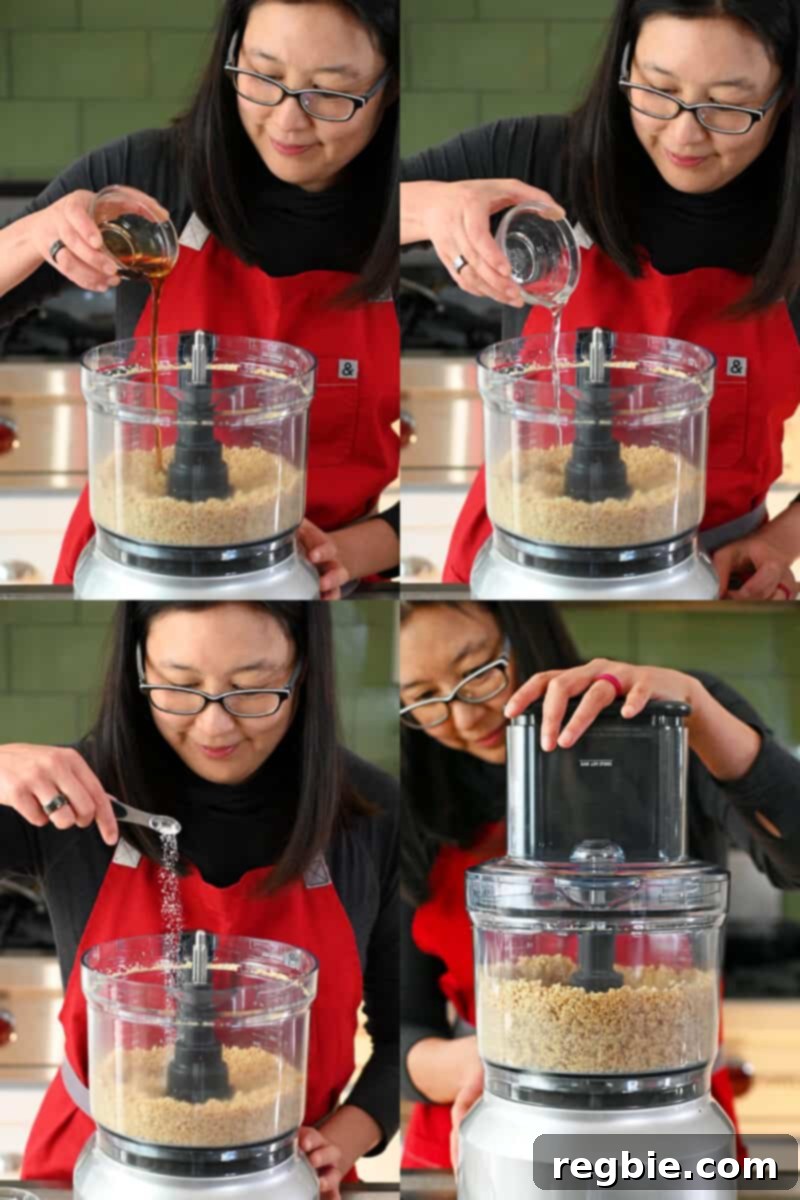
Next, add 2 tablespoons of maple syrup, 1 tablespoon of melted refined coconut oil, and ¼ teaspoon of Diamond Crystal kosher salt to the food processor. These wet ingredients and the salt will bind the dry ingredients and enhance the overall flavor profile.
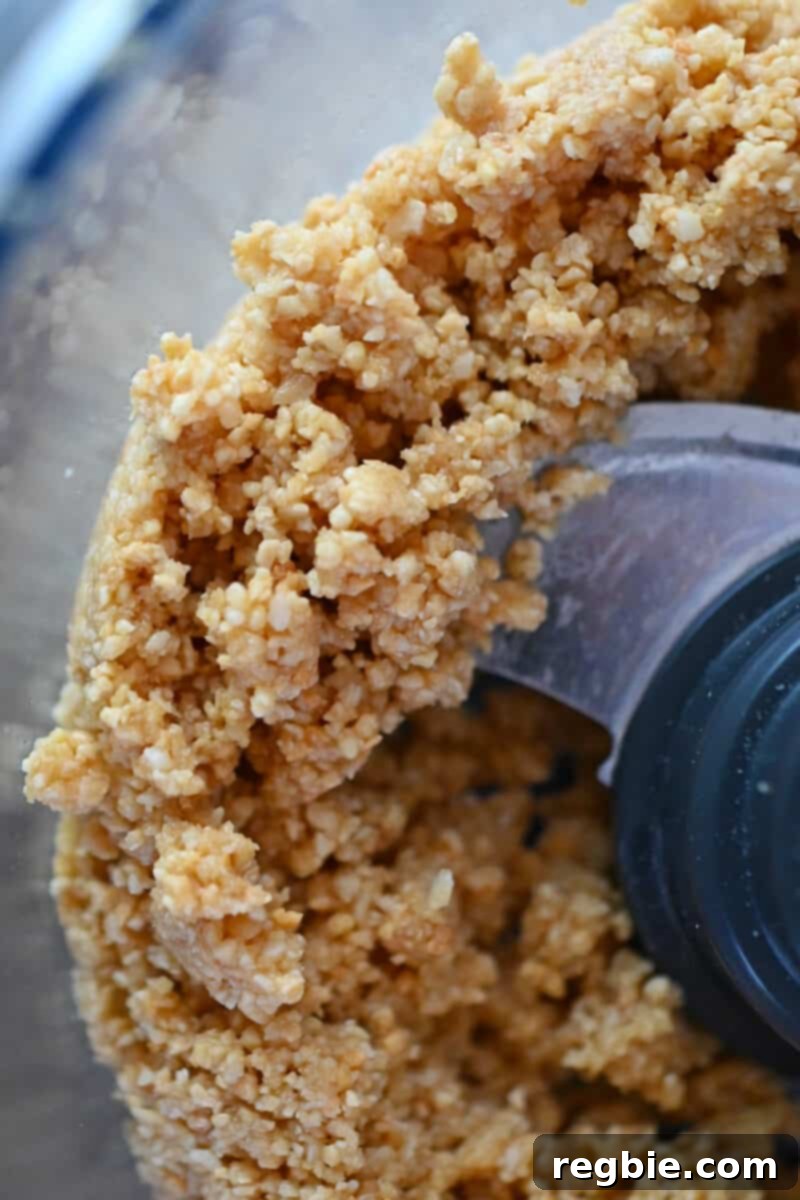
Pulse again until all the ingredients are thoroughly combined. To test the consistency, pinch a small amount of the crumbs between your fingers; they should stick together easily, indicating the perfect binding for your crust.
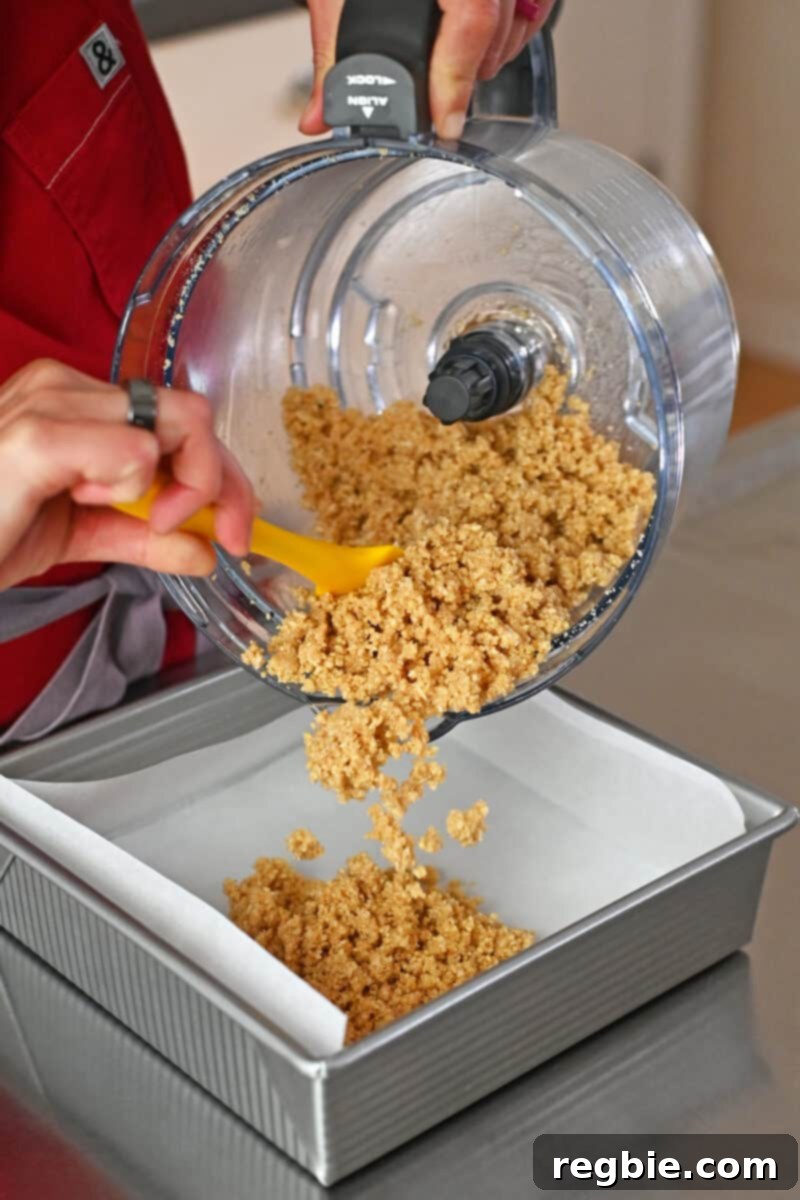
Prepare an 8-inch square baking pan by lining it with parchment paper, leaving an overhang on two sides to easily lift the bars later. Carefully transfer the prepared crust mixture into the pan. While you *can* spray the pan with cooking spray if you don’t have parchment, using parchment paper significantly simplifies the removal process, ensuring your bars come out perfectly intact.
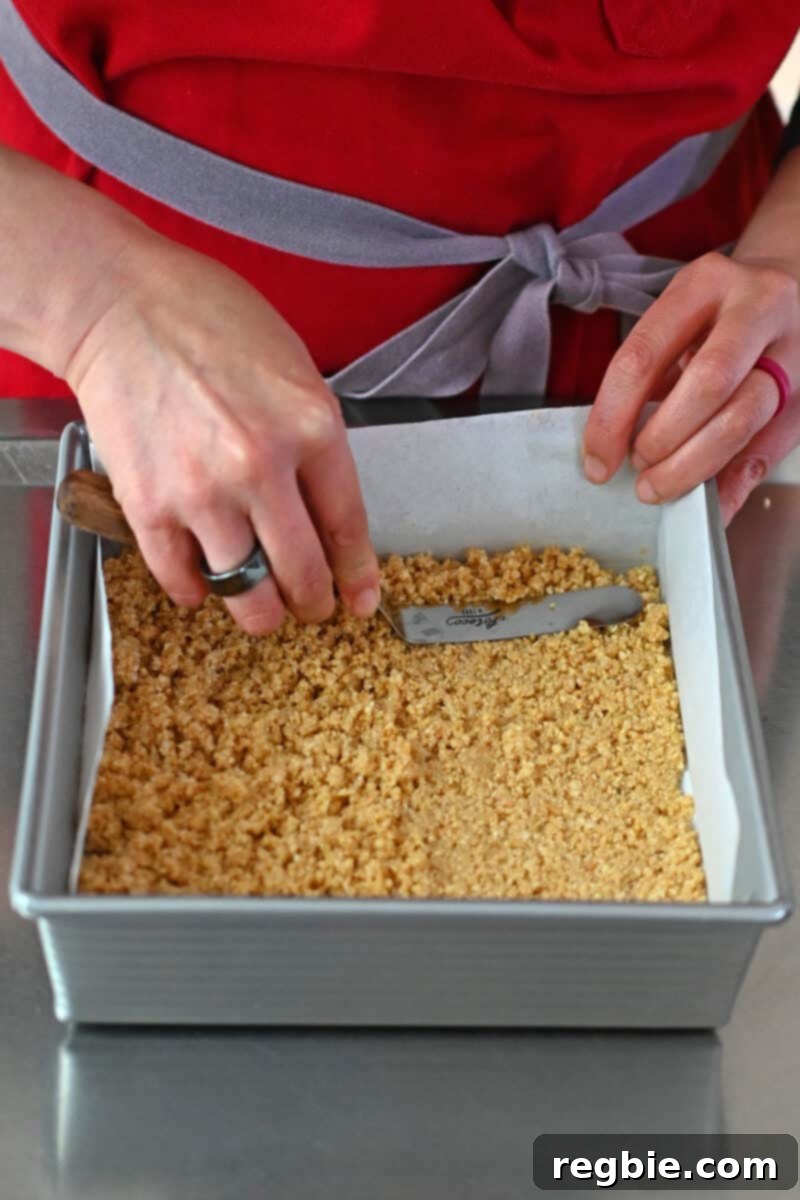
Using an offset spatula or the back of a spoon, press the crust mixture firmly and evenly into the bottom of the pan. This creates a compact and stable base for your cheesecake. Once pressed, place the pan with the crust into the freezer to chill while you prepare the luscious dairy-free cheesecake filling.
Step 2: Craft the Creamy “Cheesecake” Filling
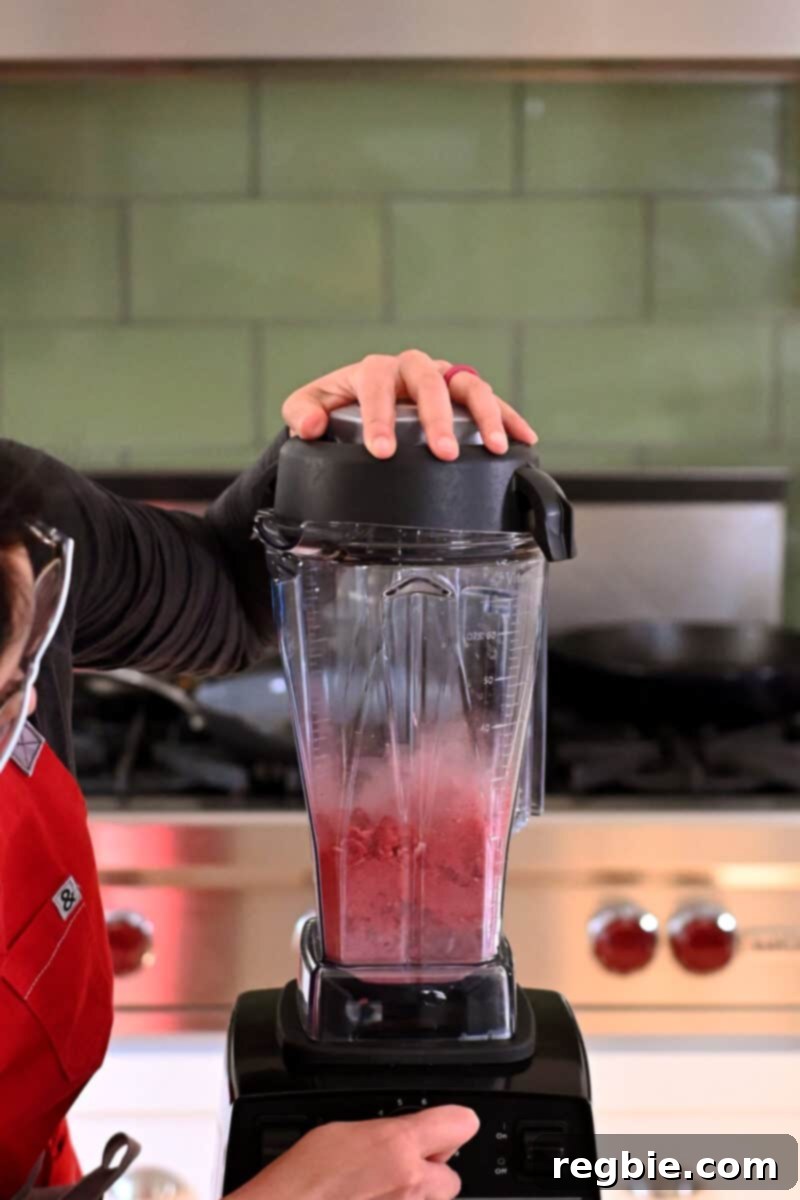
Now it’s time to create the star of the show – the creamy, fruity filling. For the smoothest texture, a powerful blender is highly recommended. Begin by placing the freeze-dried strawberries into your blender. Blitz them until they transform into a fine, vibrant powder. This concentrated strawberry powder will provide intense flavor and a beautiful natural color.
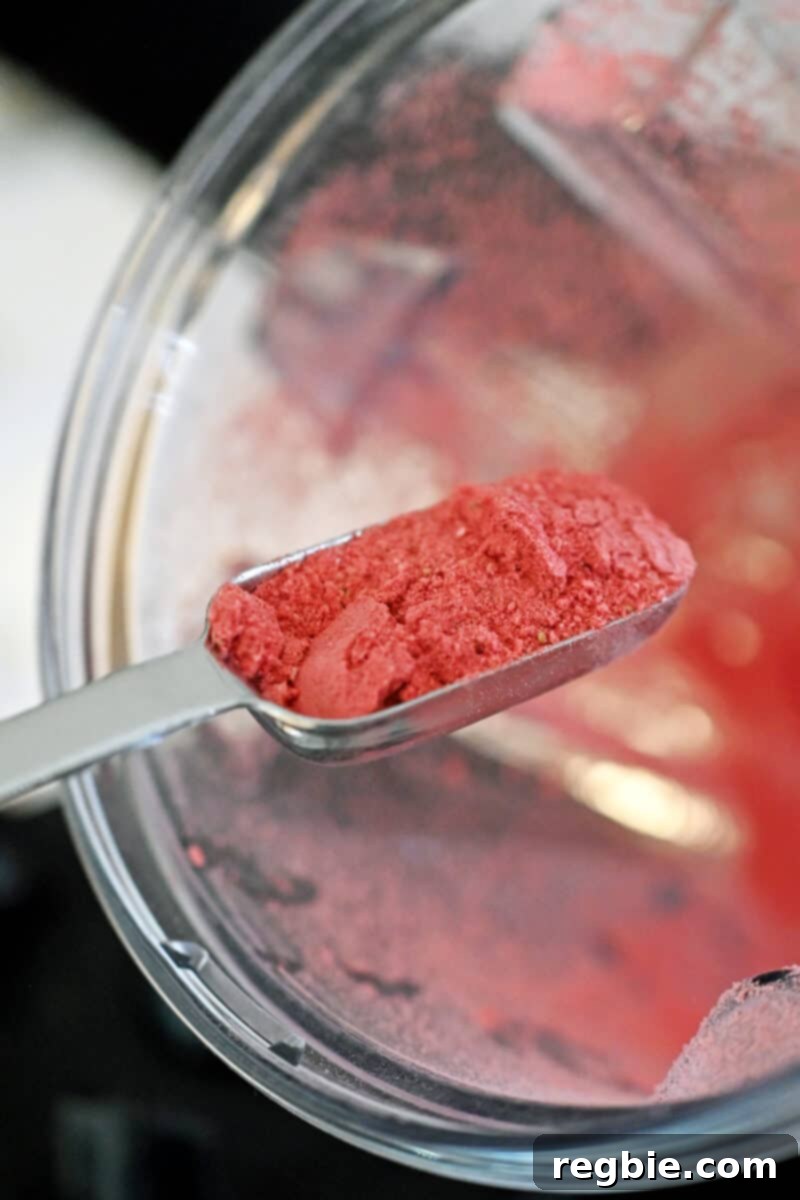
Carefully remove about 1 tablespoon of this strawberry powder and set it aside. This reserved powder will be used later as an optional, elegant dusting over your finished bars, adding both visual appeal and an extra touch of strawberry flavor.
Add the remaining ingredients for the filling to the blender: the drained soaked cashews (ensuring they are thoroughly drained for optimal consistency), the full-fat coconut milk, the liquified refined coconut oil, fresh lemon juice for tang, maple syrup for natural sweetness, a splash of vanilla extract, and a pinch of salt. These ingredients will transform into a rich and creamy dairy-free base.
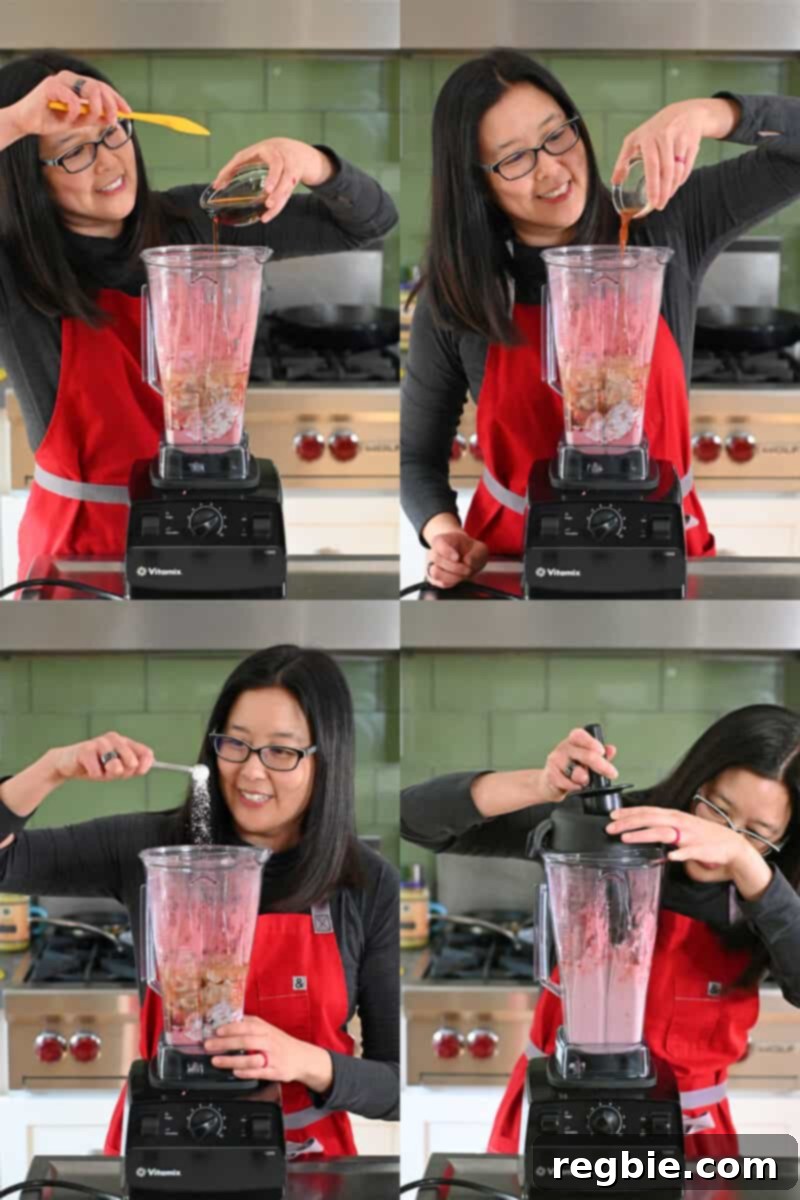
Blitz all the filling ingredients together until the mixture is exceptionally smooth and uniformly pink in color. There should be no cashew bits visible; aim for a velvety, “cream cheese”-like consistency. Taste the mixture and adjust the sweetness or tanginess as needed by adding a little more maple syrup or lemon juice, according to your preference.
Step 3: Assemble and Chill Your Cheesecake Bars
Retrieve your chilled crust from the freezer. Pour the beautifully pink and smooth strawberry “cheesecake” filling directly onto the prepared crust in the parchment-lined pan.
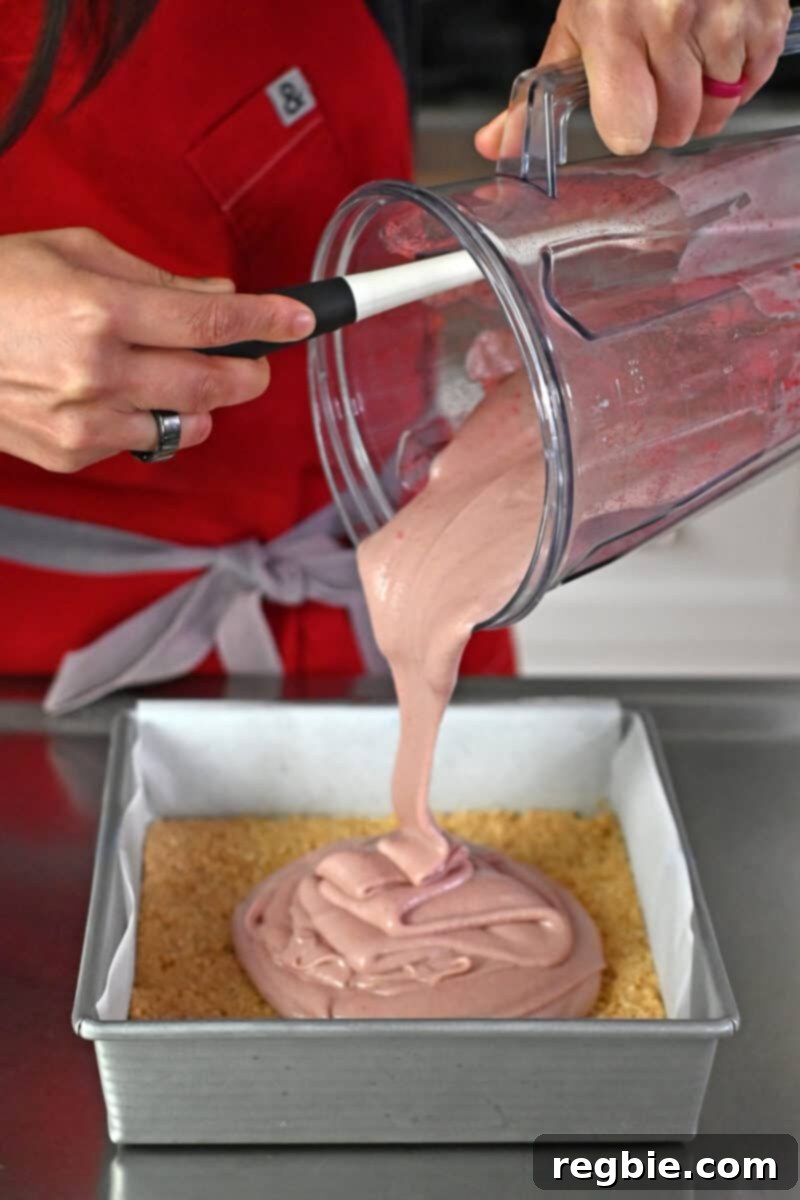
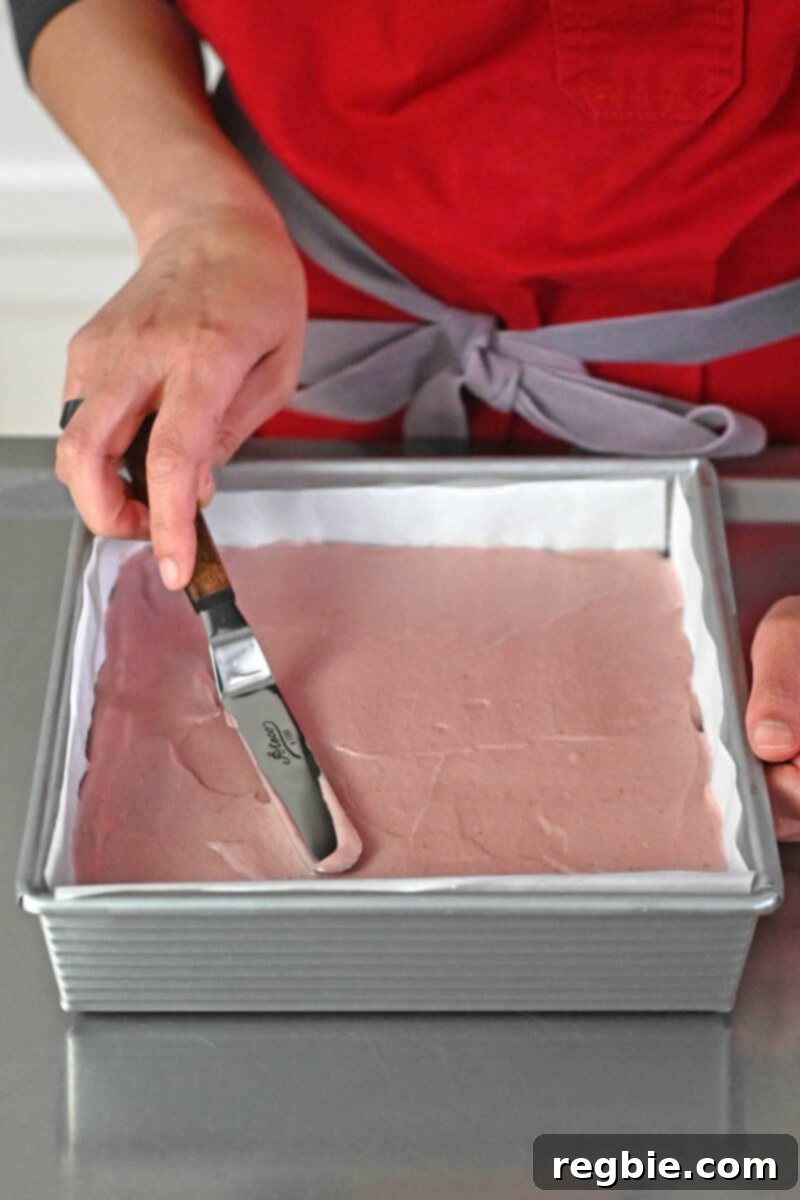
Gently smooth the top of the cheesecake filling with an offset spatula or a rubber spatula, ensuring an even layer across the entire surface. This step creates a neat and professional finish for your bars.
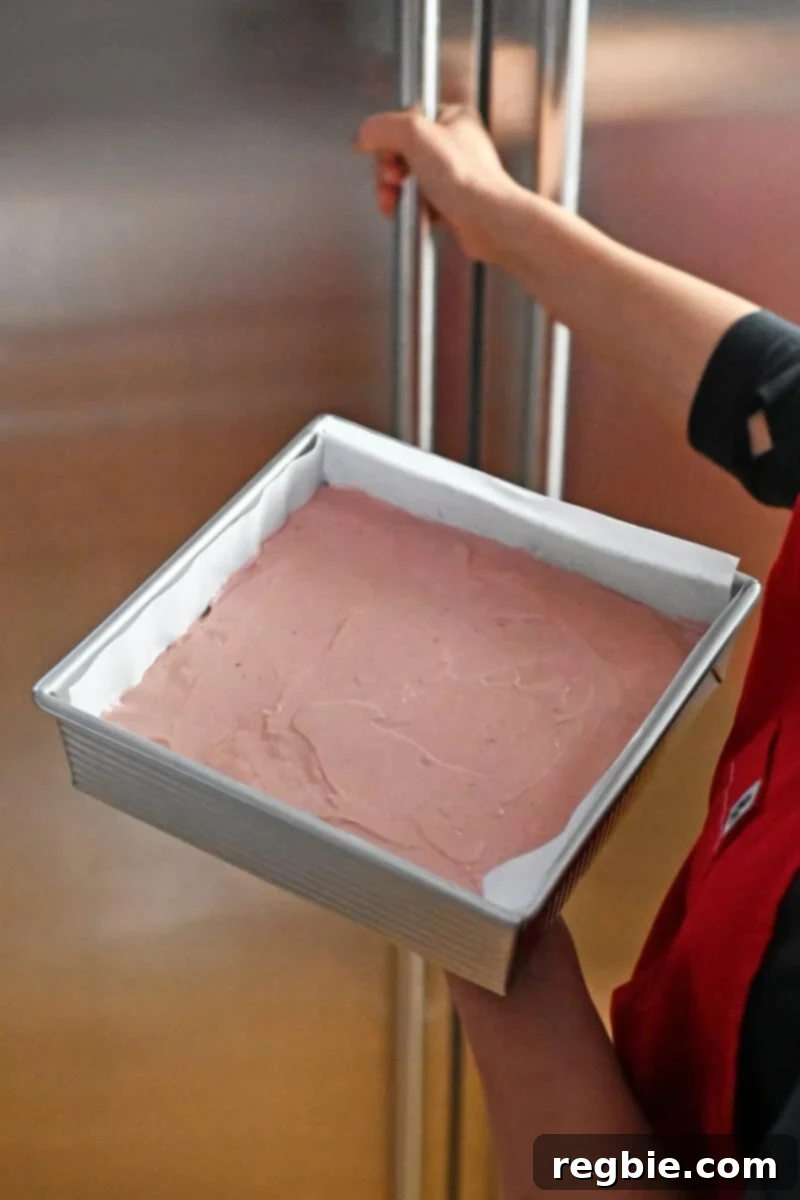
Carefully place the uncovered pan into the freezer. This initial uncovered chilling period is important. After the pan has cooled for approximately one hour, remove it and cover it tightly with aluminum foil. Then, return the pan to the freezer for a minimum of 4 hours, or until the cheesecake is completely set and firm. Avoid covering the bars immediately after pouring, as this can cause condensation to form on the underside of the foil, potentially affecting the texture of your cheesecake.
Step 4: Slice, Garnish, and Serve
When you’re ready to enjoy your delicious no-bake strawberry cheesecake bars, you have a couple of options for thawing. You can transfer the cheesecake to the refrigerator about 2 hours before serving for a slightly softer, creamier texture. Alternatively, if you prefer a firmer, almost ice-cream-like consistency, you can leave it out at room temperature for 10-15 minutes just before dessert time. To remove the bars from the pan, simply grab the overhanging parchment paper flaps and lift the entire cheesecake slab out.
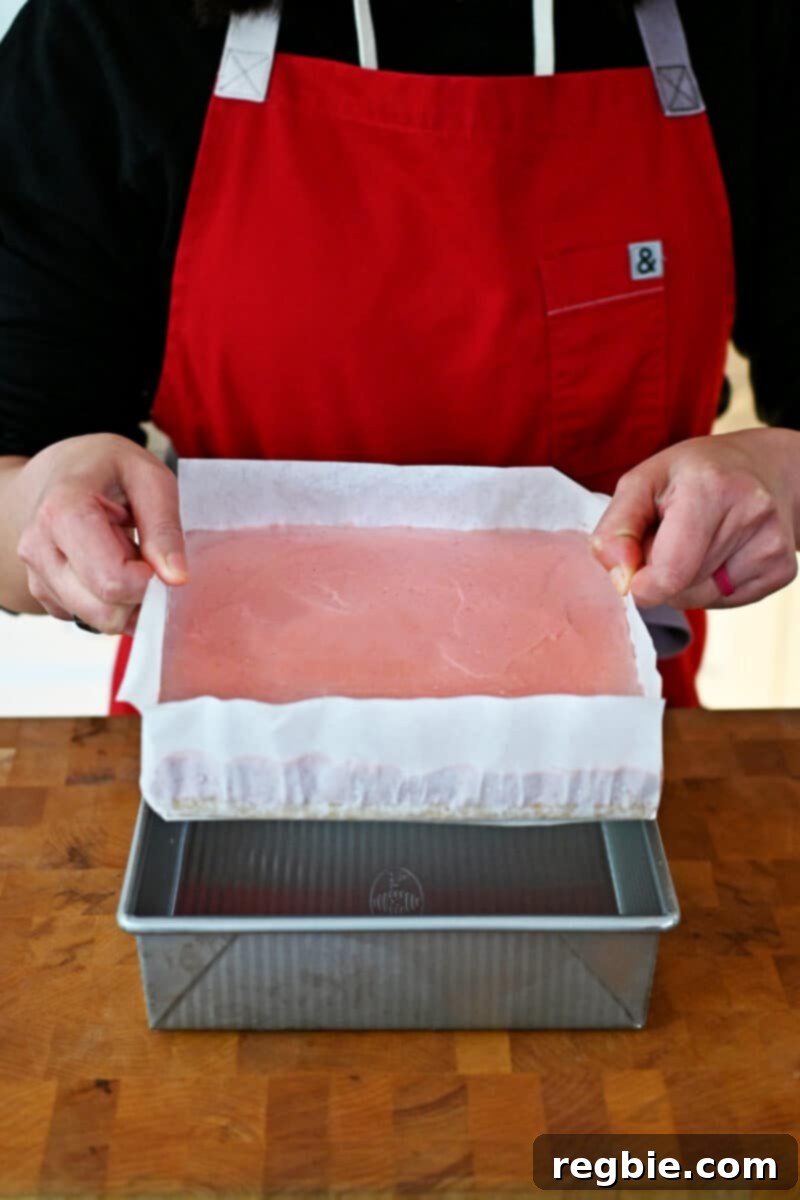
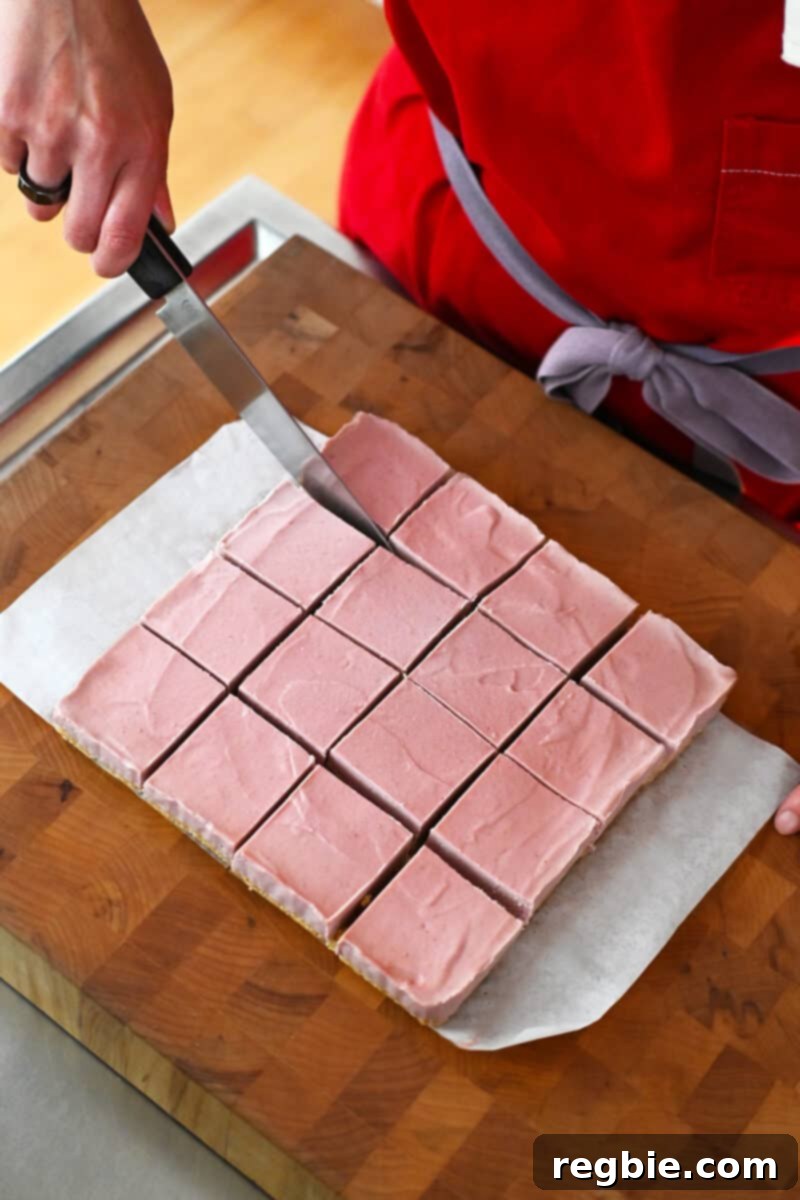
Place the cheesecake slab on a cutting board. Using a sharp, non-serrated knife, cut the large slab into 16 even squares. For cleaner cuts, you can warm your knife under hot water and wipe it clean between each slice. This creates neat and perfectly portioned bars.
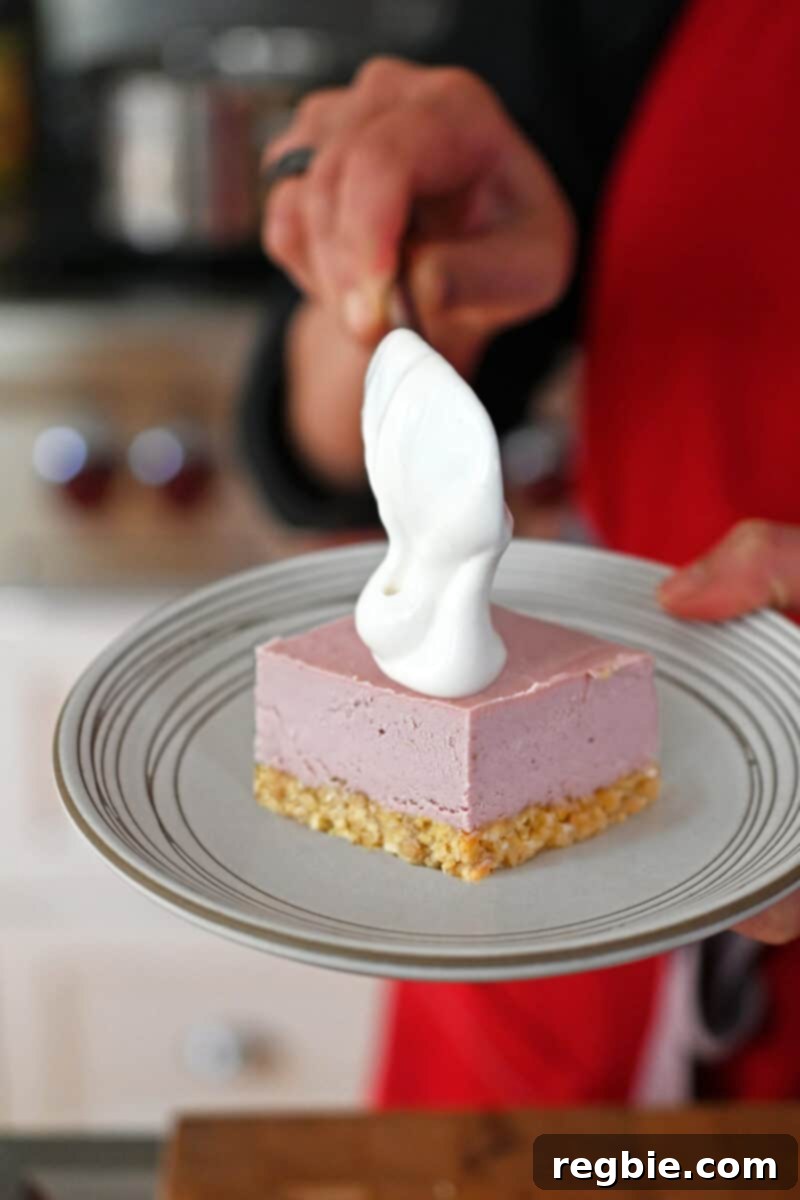
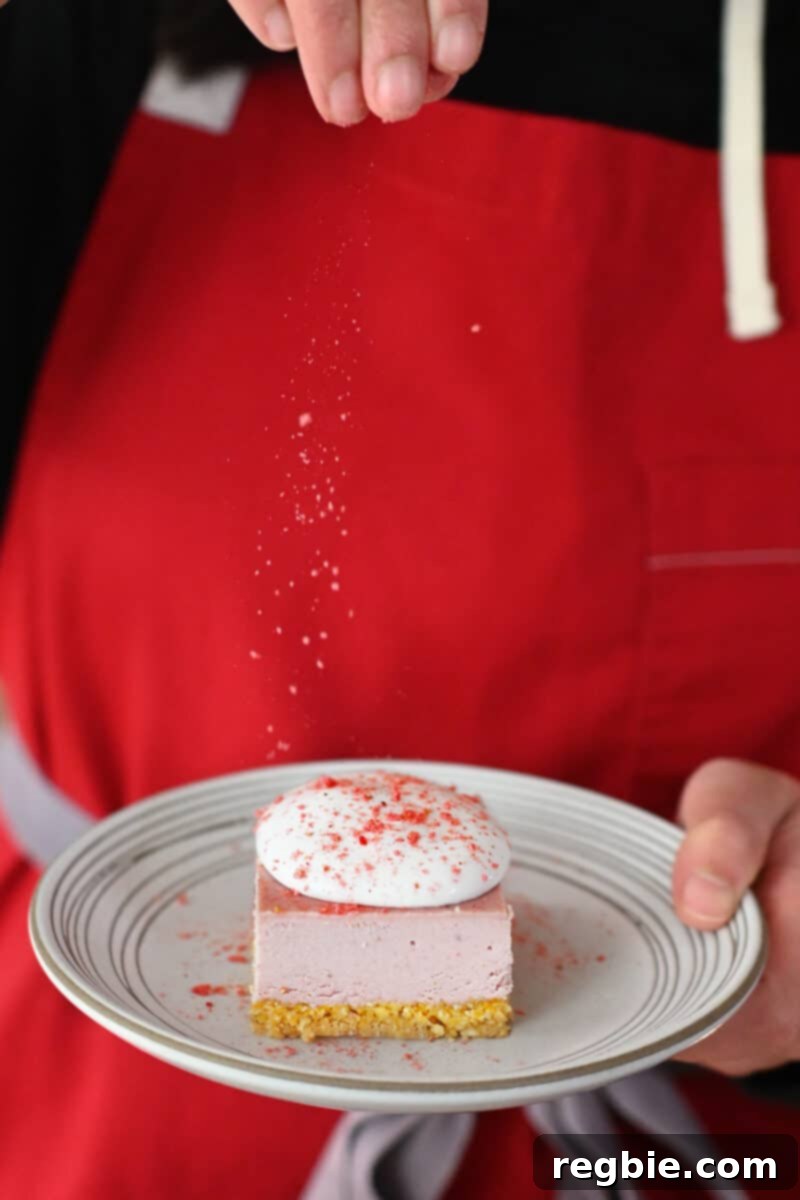
For an extra touch of elegance and flavor, top each bar with a dollop of whipped coconut cream and a light dusting of the reserved freeze-dried strawberry powder. Serve immediately to enjoy their refreshing taste and exquisite texture!
How to Store Your No-Bake Strawberry Cheesecake Bars
Proper storage is key to enjoying these delicious vegan, paleo, and gluten-free strawberry cheesecake bars for longer. For optimal freshness and convenience, store any leftover cut-up bars in an airtight container in the freezer for up to 3 months. This method keeps them perfectly preserved and ready whenever a craving strikes. Alternatively, if you plan to enjoy them within a few days, you can store the bars in a sealed container in the refrigerator for up to 4 days. These bars are truly versatile; they taste fantastic straight from the freezer, offering a firm, refreshing bite. However, if you prefer a softer, creamier, and more traditional cheesecake texture, simply thaw them in the fridge for an hour or two before serving.
More Delightful Paleo Strawberry Dessert Recipes
If you’re a fan of strawberries and exploring delicious, healthy, and diet-friendly desserts, you’ll love these other paleo-approved strawberry recipes:
- Paleo & Gluten-Free Strawberry Muffins
- Homemade Strawberry Banana Ice Cream
- Elegant Cheesecake Stuffed Strawberries
- Delicious Berry Snack Cake (Paleo & Gluten-Free)
- Comforting Berry Crisp (Paleo, Vegan & Gluten-Free)
- Panna Cotta with Strawberry Balsamic Compote
- Refreshing Lava Flow Ice Pops
Searching for more culinary inspiration? Dive into my comprehensive Recipe Index for a wide array of delicious and healthy meal ideas. You’ll also discover exclusive recipes and cooking tips within my award-winning cookbooks: Nom Nom Paleo: Food for Humans (Andrews McMeel Publishing 2013), Ready or Not! (Andrews McMeel Publishing 2017), and Nom Nom Paleo: Let’s Go! (Andrews McMeel Publishing 2022). Happy cooking!
No-Bake Strawberry Cheesecake Bars (Vegan, Paleo, Gluten-Free) Recipe Card
No-Bake Strawberry Cheesecake Bars (Vegan, Paleo, Gluten-Free)
30 mins
15 mins
4 hrs
Ingredients
Crust
- 1½ cups toasted almond slivers
- 1 cup toasted unsweetened coconut flakes
- 2 tablespoons maple syrup
- 1 tablespoon refined coconut oil melted
- ¼ teaspoon Diamond Crystal kosher salt
Strawberry Cheesecake Filling
- 2 cups freeze dried strawberries
- 2 cups raw cashews soaked (See note below on how to soak cashews.)
- ⅔ cup full-fat coconut milk
- ½ cup refined coconut oil melted
- ⅓ cup freshly squeezed lemon juice
- ⅓ cup maple syrup
- 1 teaspoon vanilla extract
- ¼ teaspoon Diamond Crystal kosher salt
- Whipped coconut cream optional topping
Instructions
Make the crust
-
Place the toasted slivered almonds and coconut flakes in the bowl of a food processor and pulse them together until the texture resembles coarse cornmeal.
-
Add 2 tablespoons maple syrup, 1 tablespoon melted coconut oil, and ¼ teaspoon Diamond Crystal kosher salt. Pulse until combined. The crumbs should stick together when you pinch some together between your fingers.
-
Line an 8-inch square pan with parchment paper and transfer the crust ingredients into the pan. Use an offset spatula to make sure the crust is evenly distributed on the bottom.
-
Place the crust in the freezer while you make the filling.
Make the filling and assemble the bars
-
Toss the freeze dried strawberries into a powerful blender and blend until a fine powder is formed. Remove 1 tablespoon of powder and set aside to dust on top of the bars later, if desired.
-
Add the drained cashews, coconut milk, melted coconut oil, lemon juice, maple syrup, vanilla extract and a pinch of salt to the blender. Blitz until very smooth and uniformly pink. Taste for sweetness and tanginess and adjust with additional maple syrup and/or lemon juice if needed.
-
Pour the filling onto the crust in the parchment-lined pan and smooth the top of the cheesecake with an offset spatula.
-
Pop the pan, uncovered, in the freezer. When the pan has cooled for an hour, cover the pan tightly with foil and freeze for at least 4 hours or until set. (I don’t cover these bars right away because there can be condensation that forms on the underside of the foil if covered immediately.)
-
Ready to eat? You can thaw the cheesecake in the fridge for about 2 hours before serving or you can leave it out at room temperature for 10-15 minutes before dessert time.
-
Remove the bars from the pan, by pulling up on the parchment paper. Using a sharp knife, cut the bars into 16 squares. If desired, top the bars with whipped coconut cream and a dusting of the reserved freeze-dried strawberry powder!
Notes
Storage Instructions:
Store the leftover cut-up strawberry cheesecake bars in the freezer in an airtight container for up to 3 months. You can also store the bars in the refrigerator in a sealed container for up to 4 days. The bars taste great straight from the freezer, but if you prefer a softer and creamier texture, thaw them in the fridge before serving.
Nutrition
Carbohydrates: 42g |
Protein: 6g |
Fat: 25g |
Saturated Fat: 13g |
Polyunsaturated Fat: 3g |
Monounsaturated Fat: 8g |
Trans Fat: 0.002g |
Sodium: 79mg |
Potassium: 651mg |
Fiber: 6g |
Sugar: 27g |
Vitamin A: 0.4IU |
Vitamin C: 364mg |
Calcium: 53mg |
Iron: 8mg
Nutrition information is automatically calculated, so should only be used as an approximation.
Like this? Leave a comment below!