
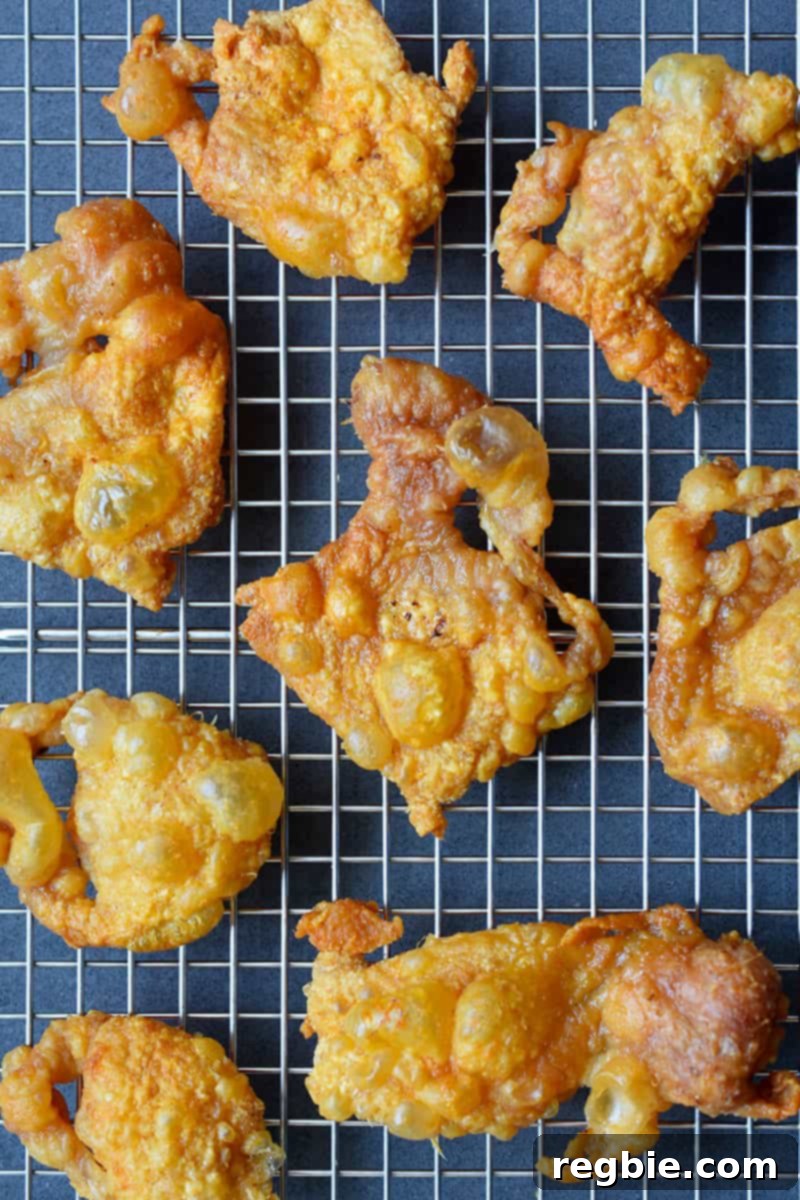
If the irresistibly crispy chicken skin is your favorite part of a perfectly cooked chicken dish, then get ready to elevate your snack game! This guide will show you how to effortlessly create light, airy, and incredibly crunchy chicken cracklings (also known as chicken skin chips) using either your air fryer or oven. Prepare for a simple, two-ingredient snack that’s packed with flavor and satisfying crunch.
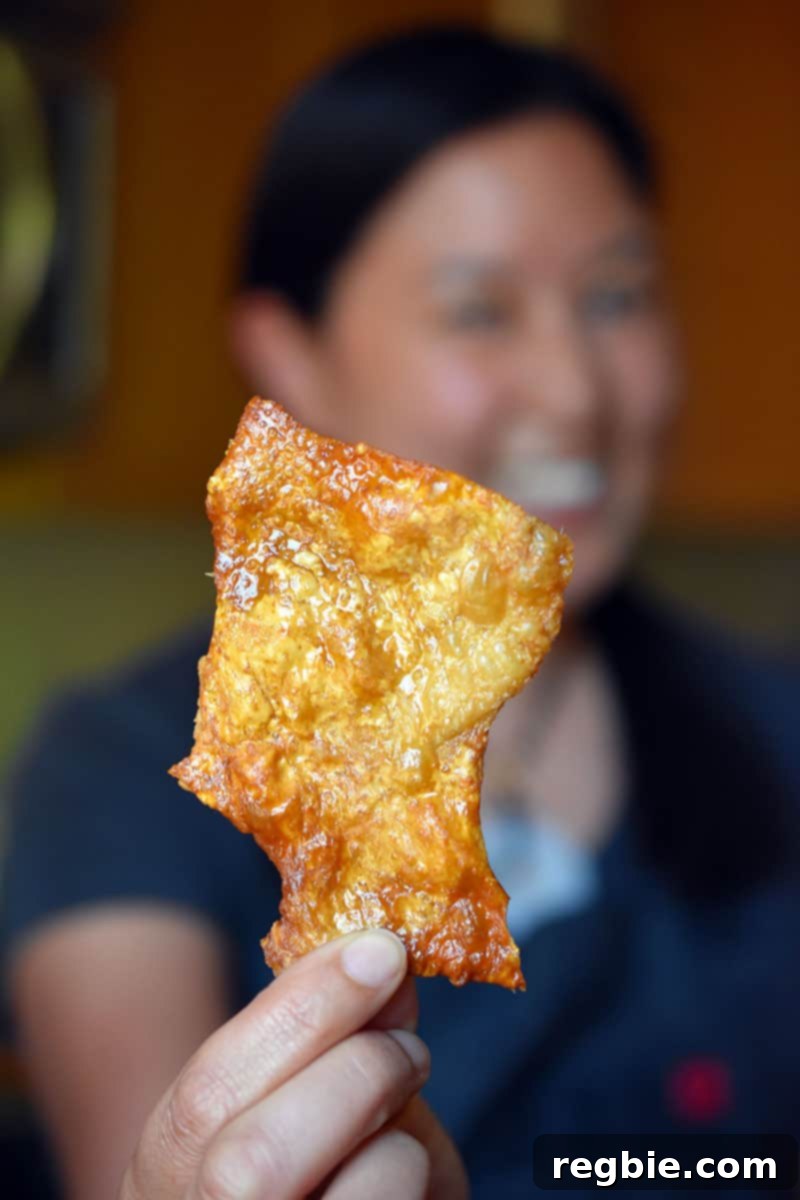
Table of Contents
- The Ultimate 2-Ingredient Homemade Chicken Chips
- Why You’ll Love Chicken Cracklings: A Healthier, Tastier Alternative
- Sourcing Your Chicken Skins: Where to Find Them and Reduce Waste
- Cooking Methods Compared: Air Fryer, Oven vs. Stovetop
- Why Stovetop Frying Isn’t Our First Choice
- Air Fryer vs. Oven: Which Method is Best for Crispy Chicken Skins?
- Tips for Effortless Clean-Up
- Exploring Seasoning Options for Your Cracklings
- Ingredients for the Perfect Chicken Cracklings
- Step-by-Step Guide: How to Make Crispy Chicken Skin Chips
- Air Fryer Method for Crispy Chicken Skins
- Oven Baking Method for Golden Cracklings
- Creative Serving Suggestions for Chicken Cracklings
- Storing Leftover Chicken Cracklings
- Recipe Card: Crispy Chicken Skin Chips (Chicken Cracklings)
The Ultimate 2-Ingredient Homemade Chicken Chips
Forget highly processed snacks and say hello to your new favorite healthy indulgence: homemade crispy chicken skin chips! This incredibly simple recipe requires just two essential ingredients, transforming humble chicken skins into an addictive, crunchy treat. Whether you follow a paleo, low-carb, gluten-free, keto, or Whole30 diet, these cracklings fit perfectly into your lifestyle. Unlike traditional potato chips, which are often high in refined carbohydrates and unhealthy oils, these chicken skins offer a satisfying crunch while being a fantastic source of protein, similar to high-quality jerky. If you’re a fan of commercial chicken chips but are wary of ingredients like soybean oil, our recipe provides a clean, wholesome alternative that’s easy to make right in your own kitchen.

Why You’ll Love Chicken Cracklings: A Healthier, Tastier Alternative
Chicken cracklings aren’t just a delicious snack; they represent a smart way to enjoy a flavorful, high-protein alternative to many carb-heavy options. In recent years, the ketogenic (keto), paleo, and Whole30 communities have embraced chicken skins for their versatility and nutritional profile. They are naturally gluten-free and contain zero carbohydrates, making them ideal for anyone monitoring their macros or seeking whole-food ingredients. Beyond their dietary benefits, the pure, unadulterated flavor of chicken fat rendered to crispy perfection is simply unmatched. It’s a primal satisfaction that speaks to our love for savory, crunchy textures without the guilt associated with highly processed junk food.
Sourcing Your Chicken Skins: Where to Find Them and Reduce Waste
While you might not find packages of chicken skins readily available on their own at most standard grocery stores, they are incredibly easy to come by with a little planning. The most common source is bone-in, skin-on chicken pieces, especially thighs and breasts. Many recipes, like Super Easy Tandoori Chicken, Instant Pot Lemongrass + Coconut Chicken, or Doro Wat, call for skinless chicken. Instead of discarding those flavorful skins, simply save them! Store them in a freezer-safe bag until you’ve collected enough for a batch of cracklings. You can also proactively ask the butcher at your local grocery store or a specialty meat market; often, they’ll have excess skins from preparing other cuts and might sell them to you at a low cost, or even give them away for free.
This practice not only provides you with a fantastic ingredient for a delicious snack but also serves as an excellent way to minimize food waste. It’s a win-win: you get to enjoy a tasty treat, and you contribute to a more sustainable kitchen by utilizing every part of the bird. Don’t limit yourself to thigh skins; skins from chicken breasts, wings, or even a whole chicken will work wonderfully.
Cooking Methods Compared: Air Fryer, Oven vs. Stovetop
Achieving perfectly crispy chicken cracklings largely depends on the cooking method. While several options exist, some stand out for their efficiency and quality of results. Let’s break down the most common approaches to help you decide which one is right for your kitchen.
Why Stovetop Frying Isn’t Our First Choice
Yes, you can fry chicken skins in a dry skillet on the stovetop over medium heat until they become crispy. This method is traditional for many, but it comes with several drawbacks. Stovetop frying often leads to considerable splatter, creating a greasy mess on your countertops and range. Furthermore, chicken skins can burn easily if you’re not constantly monitoring them, and they have a natural tendency to curl up in the pan. Keeping them flat for even crisping requires constant vigilance and pressing, which can be tedious and time-consuming. For these reasons, while feasible, the stovetop method is generally not my preferred approach for making cracklings.
Air Fryer vs. Oven: Which Method is Best for Crispy Chicken Skins?
This is a genuinely tough choice, as both the air fryer and oven produce exceptional results! Each method has distinct advantages:
- Air Fryer Advantages: Chicken skins cook much quicker in an air fryer, typically resulting in a more delicate, airy crunch. The concentrated heat and efficient air circulation mimic deep-frying without the oil, leading to incredibly light cracklings.
- Air Fryer Considerations: The main limitation is capacity. Due to the compact size of most air fryer baskets, you can usually only cook a small batch of three or four skins at a time. If you’re feeding a crowd or want to make a large batch for meal prep, this can mean multiple cooking rounds.
- Oven Advantages: When baking chicken skins in the oven, you can easily cook a significantly larger quantity on a single tray. This makes it ideal for batch cooking or when entertaining. The oven also provides a more hands-off experience once the skins are in.
- Oven Considerations: While still producing wonderful crispiness, oven-baked cracklings might take a little longer and can sometimes be slightly denser than their air-fried counterparts.
Regardless of whether you choose the air fryer or the oven, one critical factor remains constant for both: the chicken skins need to be elevated. Placing them on an air fryer basket or a wire rack set over a baking sheet allows the rendered chicken fat to drip away, preventing the skins from frying in their own grease and ensuring maximum crispiness. This elevation is key to achieving that perfect, uniform crunch.
Tips for Effortless Clean-Up
Nobody enjoys a messy kitchen after cooking a delicious meal or snack. Fortunately, there’s a simple trick to make cleaning up after making chicken cracklings much easier. Before placing your raw chicken skins onto the air fryer basket or stainless steel wire rack, line the bottom of your air fryer drawer or your rimmed baking sheet with aluminum foil or parchment paper. As the chicken fat renders, it will collect on this liner. Once your cracklings are cooked and cooled, carefully lift the foil or parchment paper and simply toss it away, taking all the rendered fat and any residue with it. This method drastically reduces scrubbing and keeps your appliances and baking sheets much cleaner.
Exploring Seasoning Options for Your Cracklings
While the natural flavor of crispy chicken skin is a delight on its own, a touch of seasoning can elevate it even further. However, it’s crucial to understand when and how to apply these seasonings for the best results. During the cooking process in either an air fryer or oven, I strongly recommend sticking to just salt. Spices and herbs have a tendency to burn at the high temperatures required to render the fat and crisp the skin, which can result in a bitter or acrid taste.
The magic happens *after* the cracklings are cooked and removed from the heat. This is the perfect time to sprinkle on your favorite seasonings. A simple dusting of freshly cracked black pepper adds a pleasant kick. For more complex flavors, consider options like nutritional yeast for a cheesy umami taste, a touch of onion powder for savory depth, smoked paprika for a smoky warmth, or even tomato powder for a tangy note. Experiment with different blends to find your ultimate chicken crackling flavor!
Ingredients for the Perfect Chicken Cracklings
You truly only need two simple ingredients to make these incredibly crispy chicken chips:
- 8 chicken skins (Skins from chicken thighs are typically larger and yield more substantial chips, but any chicken skin will do.)
- Diamond Crystal kosher salt (Its coarser grain adheres well and provides excellent flavor without being overly salty.)
That’s it! Simple, clean, and ready for transformation.
Step-by-Step Guide: How to Make Crispy Chicken Skin Chips!
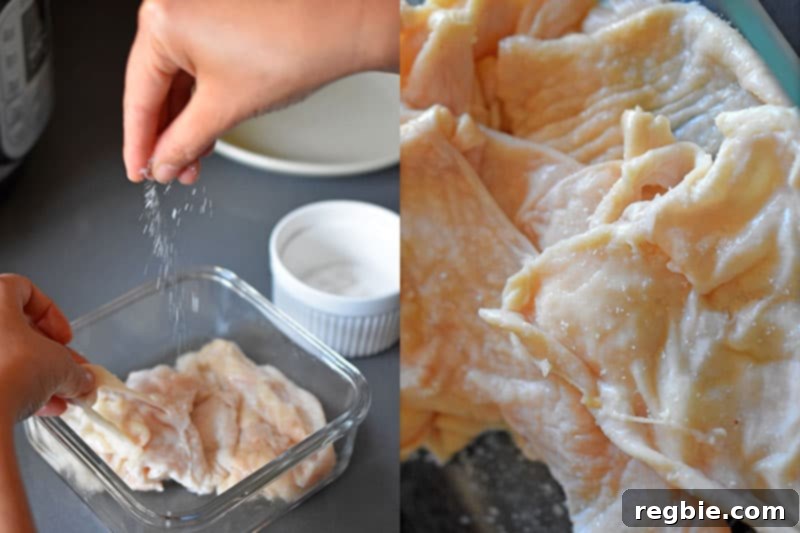
The journey to perfectly crispy chicken cracklings begins with proper preparation. First, lay your chicken skins flat and pat them thoroughly dry with paper towels. Removing as much surface moisture as possible is crucial for achieving maximum crispiness. Once dry, generously sprinkle salt on both sides, ensuring even coverage.
Air Fryer Method for Crispy Chicken Skins
The air fryer offers a speedy route to delicate, crunchy cracklings:
- Preheat & Arrange: Lay three or four seasoned chicken skins in a single layer, skin-side down, on the air fryer basket. Avoid overcrowding to ensure proper air circulation and even cooking.
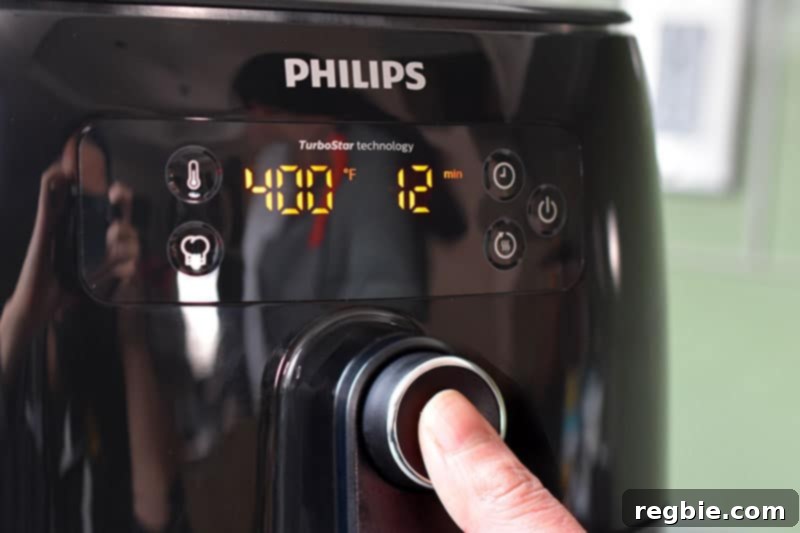
- Initial Cook: Program your air fryer to cook at 400°F (200°C) for a total of 12 minutes.
-

Setting the air fryer to the optimal temperature and time for crispy results. - Flip: At the halfway point (after 6 minutes), carefully open the air fryer and flip the chicken skins over so they are skin-side up.
-
Flipping chicken skins in the air fryer for uniform golden crispiness. - Finish Cooking: Continue air frying for the remaining 6 minutes, or until the skins are beautifully golden brown and crispy. If some parts still feel a little “flabby,” add an extra minute or two until they reach your desired crispness.
-
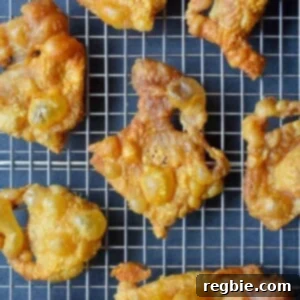
Perfectly golden and crispy chicken cracklings fresh from the air fryer. - Cool & Repeat: Remove the cooked chicken cracklings from the air fryer and place them on a wire rack to cool. As they cool, they will become even crispier. Don’t forget to carefully dump out any rendered chicken fat from the bottom of the air fryer before repeating these steps with your remaining chicken skins.
-
Carefully removing the hot, crispy cracklings from the air fryer.
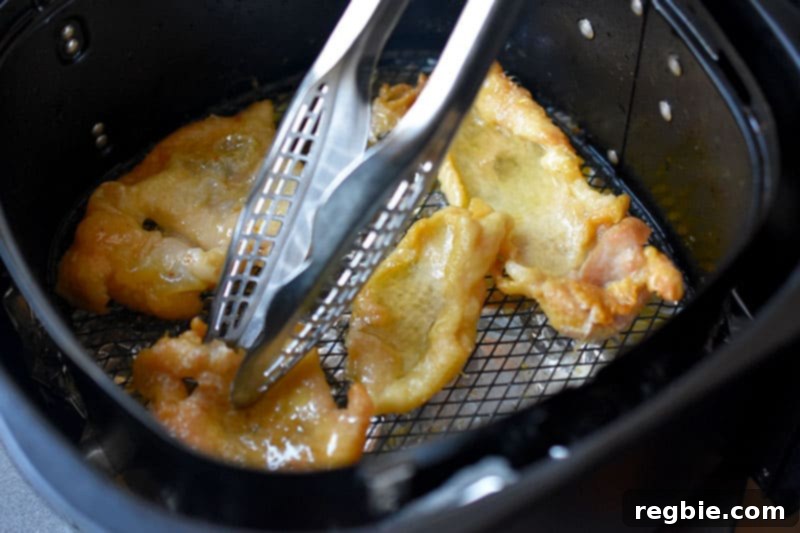
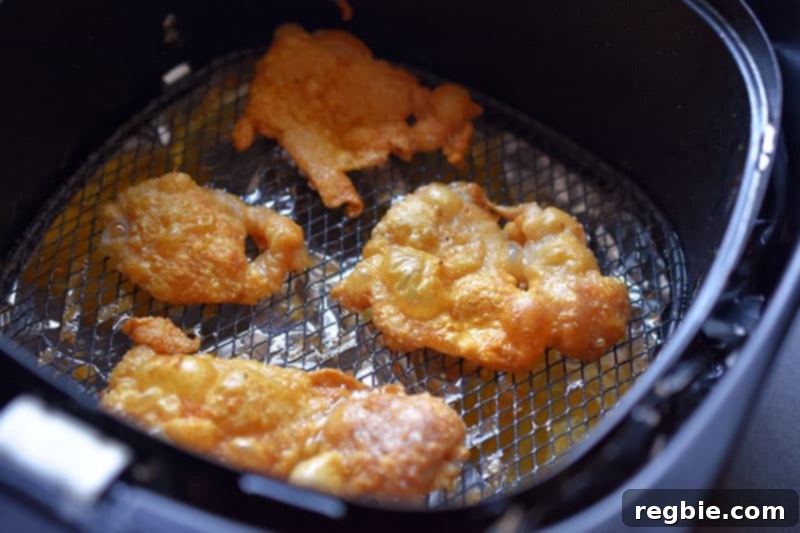
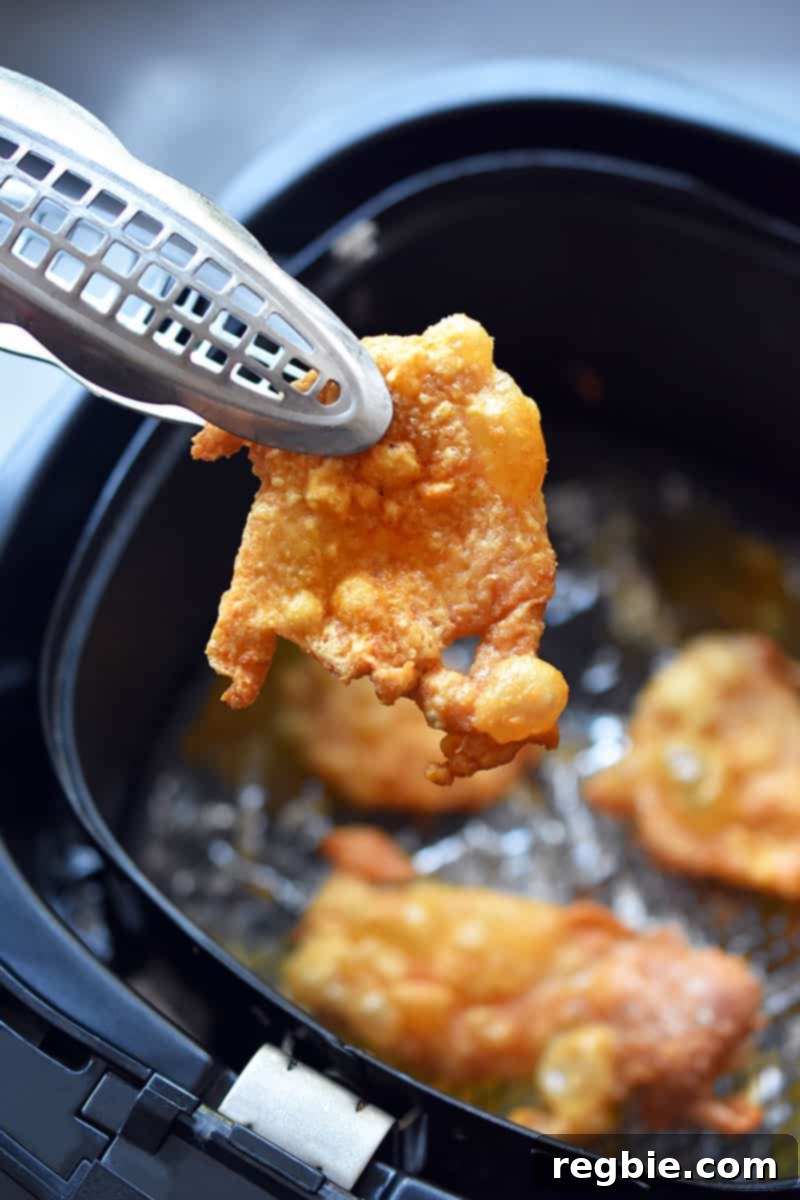
Oven Baking Method for Golden Cracklings
For larger batches or a more hands-off approach, the oven is an excellent choice:
- Preheat Oven: Preheat your oven to 400°F (200°C) if using a convection setting, or 425°F (220°C) for a conventional (non-convection) oven. Position an oven rack in the middle of the oven.
- Prepare Tray: Line a rimmed baking sheet with aluminum foil for easy cleanup. Place a stainless steel wire rack on top of the foil-lined baking sheet.
- Arrange Skins: Lay the seasoned chicken skins in a single layer, skin-side down, on the wire rack. Ensure there’s enough space between each piece for even heat distribution.
-
Arranging chicken skins on a wire rack for optimal fat rendering in the oven. - First Bake: Pop the entire tray into the preheated oven and bake for 10 minutes. During this phase, the fat will begin to render, and the skins will start to crisp.
-
The initial bake, setting the stage for perfectly rendered fat and crispiness. - Flip & Finish: After 10 minutes, carefully pull out the tray. Using tongs, flip each chicken skin over so they are skin-side up. Return the tray to the oven and continue baking for another 10 minutes, or until the cracklings are beautifully golden brown and irresistibly crispy.
-
Flipping the skins mid-bake ensures a uniform, golden finish. -
The satisfying sight of oven-baked chicken cracklings cooling to a perfect crisp.
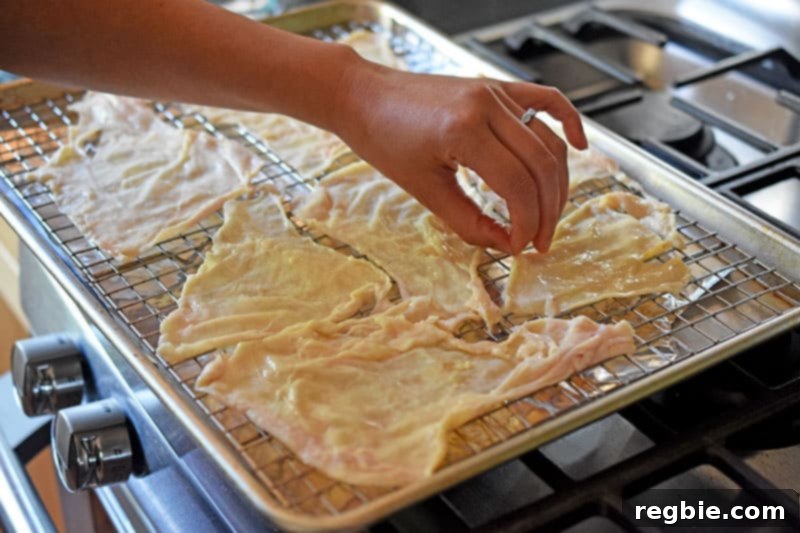
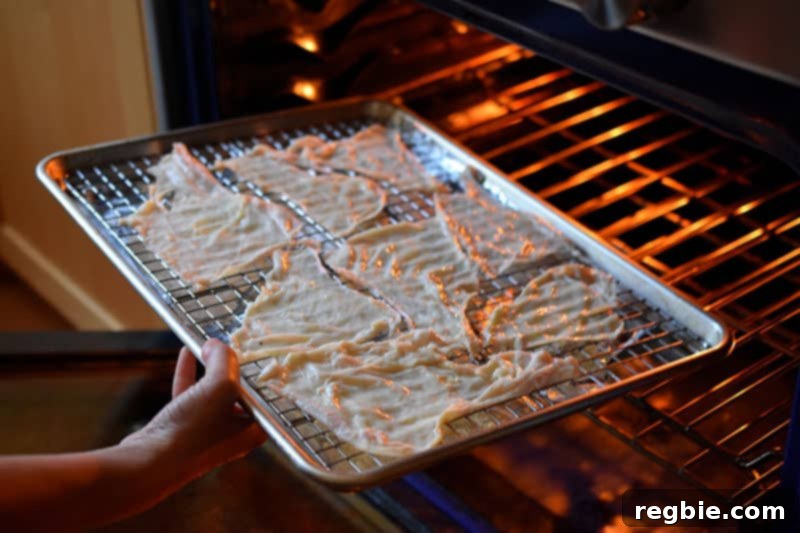
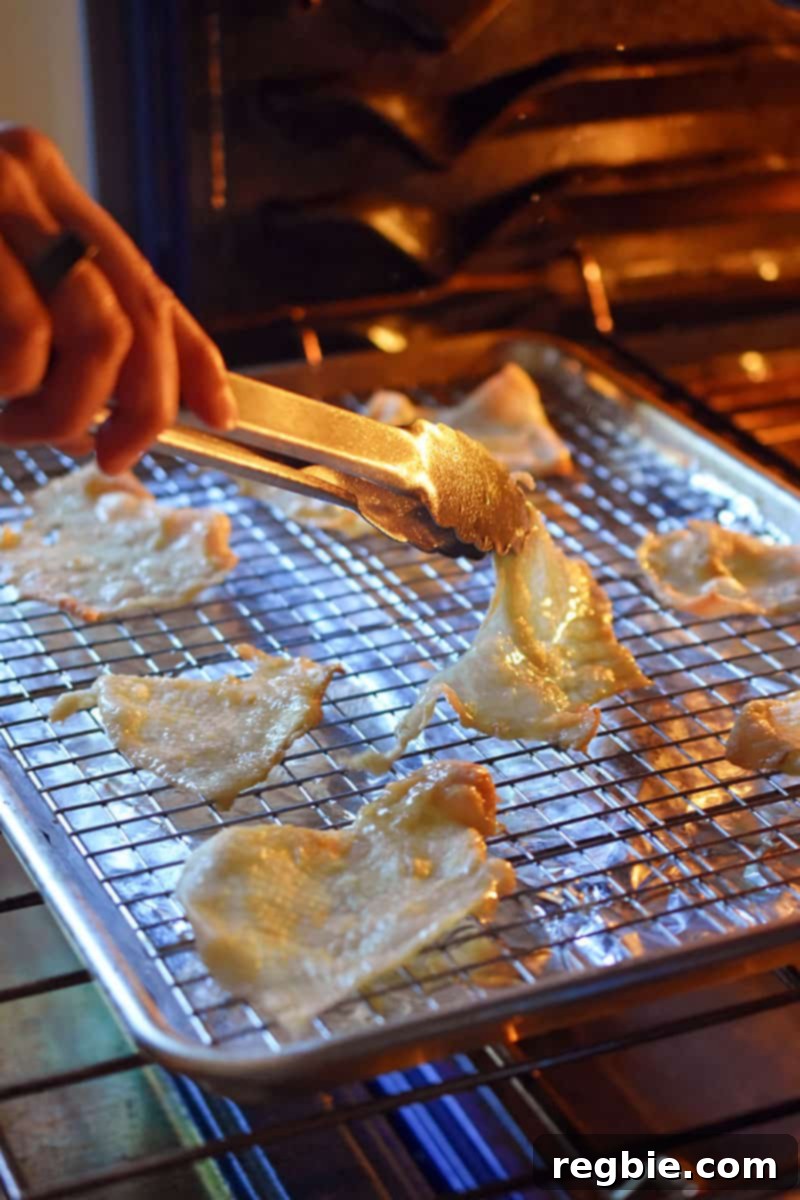
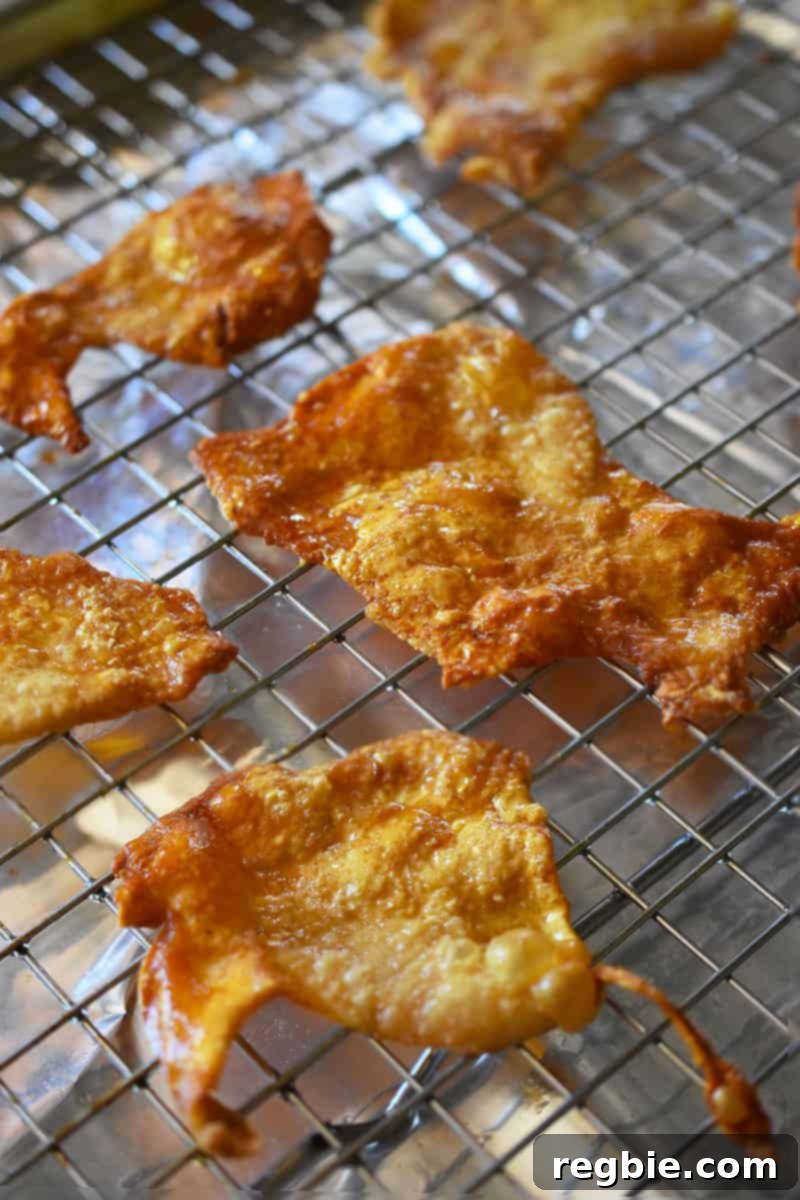
Whether you choose the quick convenience of the air fryer or the batch-cooking capacity of the oven, you’re guaranteed a delicious, crunchy snack that’s hard to resist!
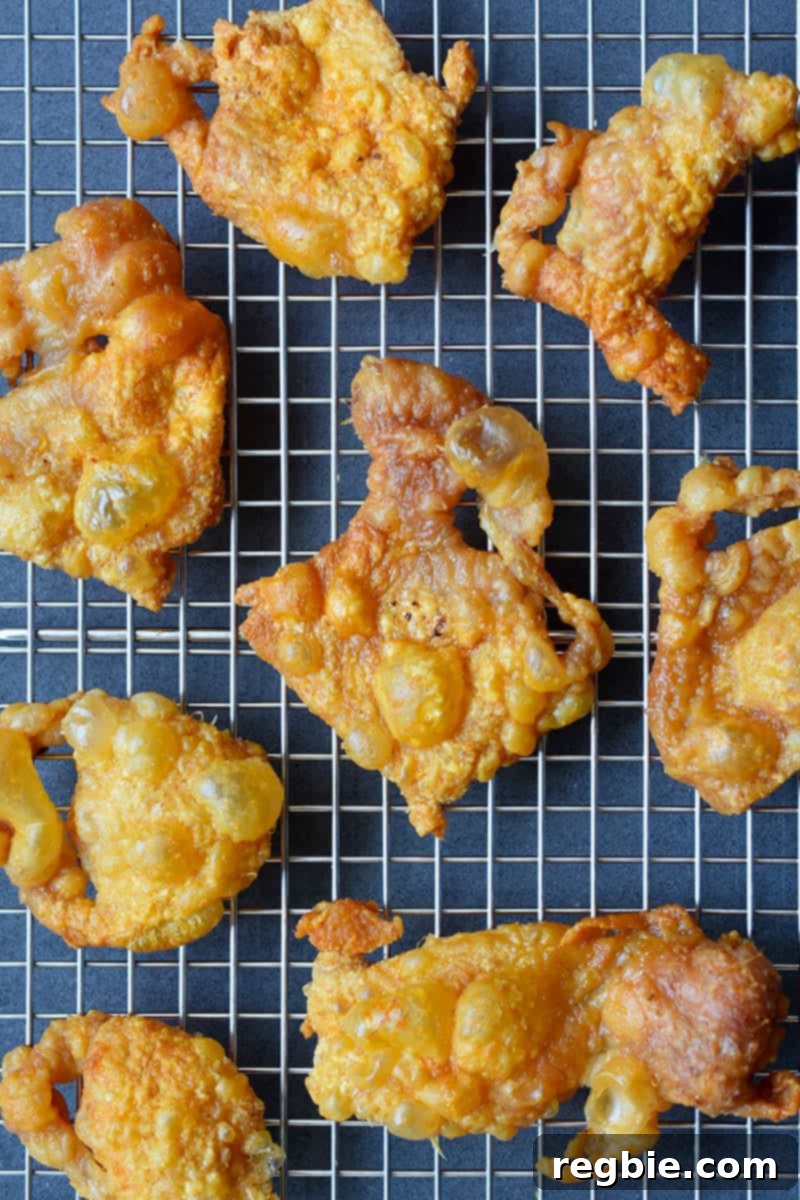
Creative Serving Suggestions for Chicken Cracklings
While these crispy cracklings are undeniably delicious eaten straight out of the oven or air fryer, their versatility truly shines when paired with other flavors. They can transform an ordinary meal into an extraordinary culinary experience.
- Dipping Delight: Serve them alongside your favorite dips! They are fantastic with creamy Guacamole, zesty Spicy Pineapple Salsa, a fiery Whole30 Sriracha, rich Caesar Dressing, or simply your preferred hot sauce. The crunch of the cracklings provides a wonderful textural contrast to creamy dips.
- Low-Carb Crouton Substitute: Elevate your salads! Crumble these savory chips over a fresh salad to add a burst of flavor and a satisfying crunch. They make an excellent low-carb and gluten-free alternative to traditional croutons, bringing a rich umami note to your greens.
- Soup Topper: Just like croutons, cracklings can be a game-changer for soups. Sprinkle them over creamy tomato soup, a hearty stew, or even a simple chicken broth for an added layer of texture and savory depth.
- Garnish for Main Dishes: Take your main courses to the next level. Crushed cracklings can serve as a crispy garnish for roasted vegetables, baked fish, or even a puréed cauliflower mash. They add a chef-like touch and an unexpected crunch.
- Alongside Eggs: Swap out bacon or sausage for a handful of cracklings next to your morning eggs. It’s a delicious and simple way to add protein and healthy fats to your breakfast.
Experiment and find your favorite way to enjoy these incredibly versatile chicken cracklings!
Storing Leftover Chicken Cracklings
The golden rule for chicken cracklings is to enjoy them fresh! They are truly at their peak crispness and flavor immediately after cooling. However, if you find yourself with leftovers (a rare occurrence for most!), they can be stored. The challenge is that cooked chicken skins can absorb moisture from the air and become somewhat rubbery or chewy the next day.
To mitigate this, store leftover cracklings in an airtight container at room temperature. For best results, include a small desiccant packet (like the silica gel packets found in jerky or electronics packaging) to absorb excess moisture. This will help them retain some of their crunch for up to 2 days. While you might be tempted to refrigerate them, the refrigerator’s humid environment can accelerate softening. If they do soften, a quick reheat in an air fryer or oven for a few minutes can often revive some of their crispiness.
Looking for more delicious and healthy recipe ideas? Head on over to my Recipe Index. You’ll also find exclusive recipes and culinary inspiration in my cookbooks: Nom Nom Paleo: Food for Humans (Andrews McMeel Publishing 2013), Ready or Not! (Andrews McMeel Publishing 2017), and Nom Nom Paleo: Let’s Go! (Andrews McMeel Publishing 2022).
Recipe Card: Crispy Chicken Skin Chips (Chicken Cracklings)
Crispy Chicken Skin Chips (Chicken Cracklings)
These two-ingredient crispy chicken skin chips can be made easily in an air fryer or oven. Prepare yourself – you might not be able to eat just one chicken crackling!
Prep Time: 5 mins
Cook Time: 20 mins
Servings: 4 people
Author: Michelle Tam
Ingredients
- 8 chicken skins (I normally use skins from chicken thighs)
- ½ teaspoon Diamond Crystal kosher salt
Instructions
- Pat the chicken skins dry with a paper towel and sprinkle salt generously on both sides.
Air Fryer Instructions
- Lay three or four chicken skins in a single layer, skin-side down, on the air fryer basket. Avoid overcrowding.
- Program the air fryer to cook at 400°F (200°C) for a total of 12 minutes.
- At the halfway point (after 6 minutes), flip the chicken skins over so they are skin-side up.
- Air fry for the remaining 6 minutes, or until golden brown and crispy. Add an additional minute or two if parts are still not fully crisp.
- Remove the chicken cracklings from the air fryer and place on a wire rack to cool.
- Dump out any rendered chicken fat from the bottom of the air fryer before repeating the steps with the remaining chicken skins.
Oven Instructions
- Preheat your oven to 400°F (200°C) convection or 425°F (220°C) (non-convection) with the rack in the middle.
- Place the chicken skins in a single layer, skin-side down, on a stainless steel wire rack set on a foil-lined rimmed baking sheet.
- Bake in the oven for 10 minutes.
- Then, flip the chicken skins skin-side up and bake for 10 more minutes or until golden and crispy.
Video
Watch how to make these crispy chicken skins:
Watch Crispy Chicken Skins Video
This video demonstrates how to achieve perfect crispy chicken skin chips (chicken cracklings).
Notes
What to serve with these chicken chips:
These crispy cracklings taste delicious on their own, but they’re even more amazing dipped in Guacamole, Spicy Pineapple Salsa, Whole30 Sriracha, Caesar Dressing, or your favorite hot sauce. The chicken cracklings also taste great crumbled on top of salads as a low-carb crouton substitute.
Nutrition
Calories: 260 kcal
Carbohydrates: 0 g
Protein: 11 g
Fat: 24 g
Nutrition information is automatically calculated, so should only be used as an approximation.