
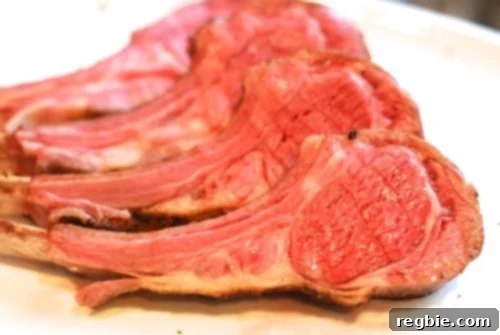
Embarking on a culinary journey often leads to discoveries that transform simple ingredients into extraordinary meals. This month, with a fantastic discount on premium lamb products from our local meat CSA, it was the perfect opportunity to stock up on that luscious, mutton-y goodness. Having previously achieved remarkable success with sous vide rack of lamb, the decision to recreate this delectable dish was an easy one. The precision and tenderness offered by the sous vide method truly elevate lamb to a gourmet level, promising a dining experience that’s both effortless and impressive.
Mastering Sous Vide Rack of Lamb: A Guide to Culinary Perfection
Sous vide cooking, a technique that involves precisely controlling the temperature of a water bath, has revolutionized how home cooks and professional chefs approach meat preparation. For cuts like a rack of lamb, which can be notoriously tricky to cook perfectly using traditional methods, sous vide offers unparalleled consistency and flavor. This guide will walk you through creating an exquisite sous vide rack of lamb, ensuring every bite is tender, juicy, and cooked to your exact preference. Forget the guesswork and embrace the precision that guarantees a restaurant-quality meal right in your own kitchen.
The Irresistible Allure of Sous Vide Lamb
Why choose sous vide for your prized rack of lamb? The answer lies in its ability to deliver consistent perfection. Unlike oven roasting or grilling, where external heat can lead to uneven cooking—overdone edges and a less-than-ideal center—sous vide ensures the lamb cooks from edge to edge at an exact temperature. This results in an incredibly tender texture and a perfectly rosy interior throughout the entire rack. Furthermore, cooking in a vacuum-sealed bag locks in all the natural juices and flavors, often intensifying them, which is a significant advantage for a flavorful cut like lamb. It also allows for greater flexibility, as the lamb can hold at its ideal temperature in the water bath for an extended period without overcooking, giving you more freedom in your meal prep timeline.
Selecting the Finest Lamb: Quality is Key
The foundation of any exceptional dish begins with high-quality ingredients. When selecting your lamb racks, seek out fresh, well-marbled cuts from a reputable butcher or supplier. Factors like the lamb’s diet (grass-fed vs. grain-fed) can influence flavor and texture; grass-fed lamb often has a richer, more pronounced “lamby” flavor, while grain-fed tends to be milder. Look for a vibrant red color in the meat and firm, white fat. If possible, opt for “frenched” racks, where the meat and fat have been removed from the ends of the rib bones, presenting a more elegant appearance. My recent acquisition from the meat CSA, for instance, boasted meatier racks than those typically found at commercial grocers like Costco or Trader Joe’s, promising a more substantial and satisfying portion.
Sous Vide Rack of Lamb Recipe
Serves: 6
Prep Time: 15 minutes
Cook Time: 6-8 hours
Total Time: Approximately 6 hours 15 minutes
Author: Michelle Tam
Ingredients:
- 2 racks of lamb (approx. 1.5-2 lbs each), frenched if desired
- 2 tablespoons Diamond Crystal kosher salt (or your preferred coarse salt)
- 1 tablespoon freshly ground black pepper
- Optional: 2-3 sprigs fresh rosemary, 3-4 cloves garlic (smashed) for aromatic infusion
- Optional: 1-2 tablespoons high-smoke-point oil (e.g., avocado oil, grapeseed oil) for searing
- Optional: A pinch of Sagemary finishing salt or other flaky sea salt for garnish
Equipment:
- Sous Vide Immersion Circulator or dedicated Sous Vide Water Bath
- Large, heat-safe container or pot (at least 12-quart capacity)
- Vacuum Sealer and vacuum seal bags (or high-quality, freezer-safe zip-top bags with air removed using the water displacement method)
- Large cast iron skillet or heavy-bottomed pan for searing
- High-powered kitchen torch (optional, but highly recommended for a superior crust)
- Tongs for handling hot lamb
- Plenty of paper towels for drying
- Sharp carving knife and cutting board
Step-by-Step Method for Perfect Sous Vide Rack of Lamb
1. Prepare the Lamb Racks with Precision
Begin by carefully patting your lamb racks thoroughly dry with paper towels. This step is crucial for achieving a beautiful crust during the searing process. If there’s any silverskin or excess fat on the racks that you wish to remove, now is the time to do so with a sharp knife. For better fat rendering and presentation, you can lightly score the fat cap in a crosshatch pattern without cutting into the meat. Next, generously season both sides of the lamb racks with Diamond Crystal kosher salt and freshly ground black pepper. Don’t be shy with the seasoning; lamb can handle it. If you’re incorporating aromatics, place the rosemary sprigs and smashed garlic cloves directly on or around the lamb at this stage.
2. Seal for Optimal Flavor and Texture
Once seasoned, place each lamb rack into a separate vacuum-sealable bag. Ensure that the aromatics (if using) are also inside the bag with the lamb. Carefully vacuum seal the bags, removing as much air as possible. A tight seal is vital for efficient heat transfer and to prevent the bags from floating in the water bath. If you don’t have a vacuum sealer, you can use high-quality zip-top bags, employing the water displacement method: slowly submerge the bag with the lamb into water, allowing the water pressure to force the air out before sealing the bag just above the waterline. Store the sealed packets in the refrigerator if you’re not cooking them immediately.
3. The Sous Vide Bath: Temperature and Time
Set up your sous vide water bath with your immersion circulator or water oven. For a perfect medium-rare doneness, ideal for lamb, set the temperature to 130°F (54.4°C). If you prefer your lamb slightly less rare, a temperature of 133°F (56.1°C) will yield a beautiful medium result with slightly better fat rendering, as I discovered in my previous attempts. Once the water bath reaches the desired temperature, carefully place the sealed lamb racks into the water. Ensure they are fully submerged; you may need to use a heavy plate or weights to keep them down. Allow the lamb to cook for 6 to 8 hours. This extended cooking time at a low temperature ensures incredible tenderness while maintaining precise doneness.
4. The Crucial Dry and Sear for a Golden Crust
Once the sous vide cooking is complete, carefully remove the lamb racks from their bags. The most critical step for achieving a fantastic crust is to thoroughly dry the lamb. Pat every surface vigorously with paper towels; any residual moisture will hinder the searing process, steaming the meat rather than creating a crispy exterior. Heat a large cast iron skillet or heavy-bottomed pan over high heat until it’s smoking slightly. Add a tablespoon or two of high-smoke-point oil. Place the lamb racks fat-side down in the hot pan and sear for 2-3 minutes until deeply golden brown and crispy, pressing down gently to ensure full contact. Flip and sear the other sides for 1-2 minutes each. For an even crust and to render the fat further, particularly in any unrendered globs, a kitchen torch is invaluable. Torch all surfaces, especially the fat cap, until a uniform, rich brown crust forms. This combined method of pan-searing and torching often yields the best results, as I plan to try in the future to resolve issues with unrendered fat and bloodier finishes.
5. Rest, Slice, and Serve Your Masterpiece
After searing, transfer the lamb racks to a cutting board and allow them to rest for 5-10 minutes. This resting period allows the juices to redistribute throughout the meat, resulting in a more succulent and flavorful experience. While lamb cooked sous vide loses very little moisture, resting is still a good practice. Finally, slice the rack into individual chops by cutting between the bones. Sprinkle with a high-quality finishing salt like Sagemary finishing salt for an extra pop of flavor and texture – yes, I truly love salt! Arrange the chops elegantly on a platter and prepare for an unforgettable meal.
Tips for Achieving Sous Vide Lamb Perfection
- Temperature Control for Doneness: While 130°F (54.4°C) is excellent for medium-rare, adjust slightly based on preference. For rare, try 125°F (51.6°C); for medium, 133°F (56.1°C); and for medium-well, 138°F (58.8°C). Keep in mind that higher temperatures will render fat more effectively.
- Rendering the Fat: If you find the fat cap isn’t rendering to your liking, score it more deeply before seasoning. During searing, spend extra time with the fat cap down in the hot pan or apply direct heat with a kitchen torch until it crisps up and renders beautifully.
- Optimal Searing Strategy: A combination of pan-searing and torching is often the secret to a perfect crust. The pan provides even, intense heat, while the torch allows you to target specific areas for extra crispiness without overcooking the interior.
- Seasoning Beyond Basics: While salt and pepper are essential, consider a dry rub with herbs like thyme, oregano, and garlic powder, or a touch of smoked paprika for added complexity. You can also add a pat of herbed butter to the bag before sealing for extra richness.
- Make-Ahead Option: Sous vide lamb is fantastic for meal prepping. After the initial sous vide bath, you can plunge the sealed bags into an ice bath to rapidly chill, then refrigerate for up to 3-4 days. When ready to serve, simply reheat in a 125°F (51.6°C) water bath for about an hour before drying and searing.
Pairing Suggestions and Variations
Sous vide rack of lamb is incredibly versatile and pairs wonderfully with a variety of side dishes. Consider classic accompaniments like roasted asparagus, garlic mashed potatoes, creamy polenta, or a fresh mint pesto. For a more adventurous pairing, try a vibrant chimichurri sauce or a rich red wine reduction. When it comes to wine, a robust Cabernet Sauvignon, a peppery Syrah, or a classic Bordeaux will complement the rich flavors of the lamb beautifully. To vary the dish, experiment with different herb crusts post-sear – a mixture of finely chopped pistachios, parsley, and breadcrumbs pressed onto the seared fat cap can add a delightful texture and flavor twist.
Conclusion: An Unforgettable Dining Experience
Creating sous vide rack of lamb is more than just cooking; it’s an art of precision and patience that yields truly spectacular results. The tender, evenly cooked meat combined with a crispy, flavorful crust elevates this dish from a simple meal to an unforgettable culinary experience. Whether you’re a seasoned sous vide enthusiast or a curious newcomer, this method promises to deliver a rack of lamb that is consistently perfect, juicy, and bursting with flavor. So, grab those lamb racks, set your circulator, and prepare to impress yourself and your guests with this exquisite dish.
For more culinary inspiration, explore our extensive Recipe Index. You can also discover exclusive recipes on our iPhone and iPad app, and in our acclaimed cookbooks: Nom Nom Paleo: Food for Humans (Andrews McMeel Publishing 2013), Ready or Not! (Andrews McMeel Publishing 2017), and Nom Nom Paleo: Let’s Go! (Andrews McMeel Publishing 2021).
PRINT-FRIENDLY RECIPE CARD
Sous Vide Rack of Lamb
Here’s our meticulously crafted recipe for Sous Vide Rack of Lamb, ensuring succulent results every time!
Prep Time: 15 mins
Cook Time: 6-8 hrs
Total Time: Approximately 6 hrs 15 mins
Servings: 6
Author: Michelle Tam
- Pin Recipe
- Print Recipe
Ingredients
- 2 racks of lamb
- Diamond Crystal kosher salt
- Freshly ground black pepper
Instructions
- Pat your two racks dry and liberally season them with salt and pepper.
- Vacuum seal the racks and store the packets in the fridge until you’re ready to sous vide them.
- Place the lamb racks in the SousVide Supreme (or equivalent immersion circulator setup) set at 130°F (54.4°C) and let them cook for 6-8 hours.
- After cooking, remove the lamb, pat it thoroughly dry, then sear vigorously with a kitchen torch or in a hot pan until a beautiful crust forms. Finish by sprinkling with Sagemary finishing salt. Enjoy!
Nutrition
Calories: 616kcal | Protein: 24g | Fat: 57g
Nutrition information is automatically calculated and should only be used as an approximation.
Like this recipe? We’d love to hear your thoughts!