
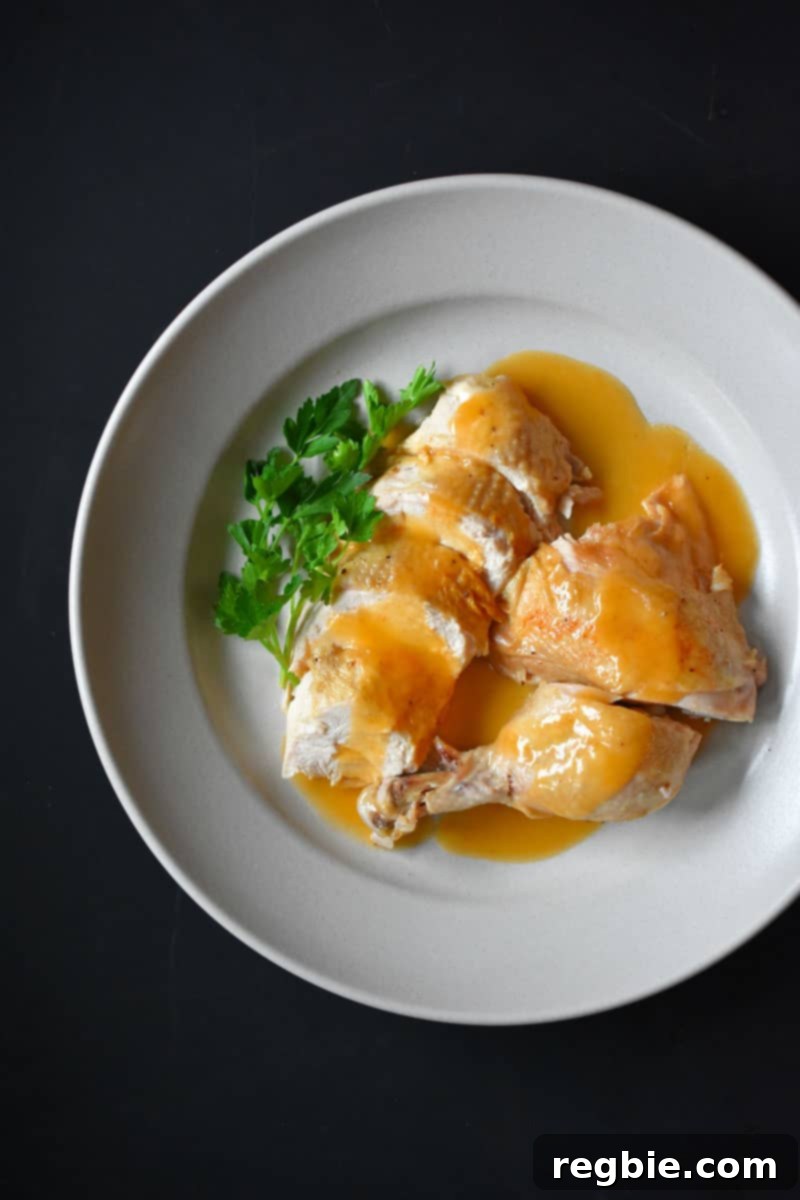
Imagine: a perfectly cooked, incredibly juicy whole chicken, enveloped in a rich, flavorful homemade gravy, all made effortlessly in your Instant Pot. This isn’t just a meal; it’s a revelation. This recipe transforms a humble whole chicken into a tender, succulent masterpiece, complete with a savory gravy that you’ll want to savor—and freeze for countless future meals! Say goodbye to dry chicken and complicated gravies; the Instant Pot makes magic happen.
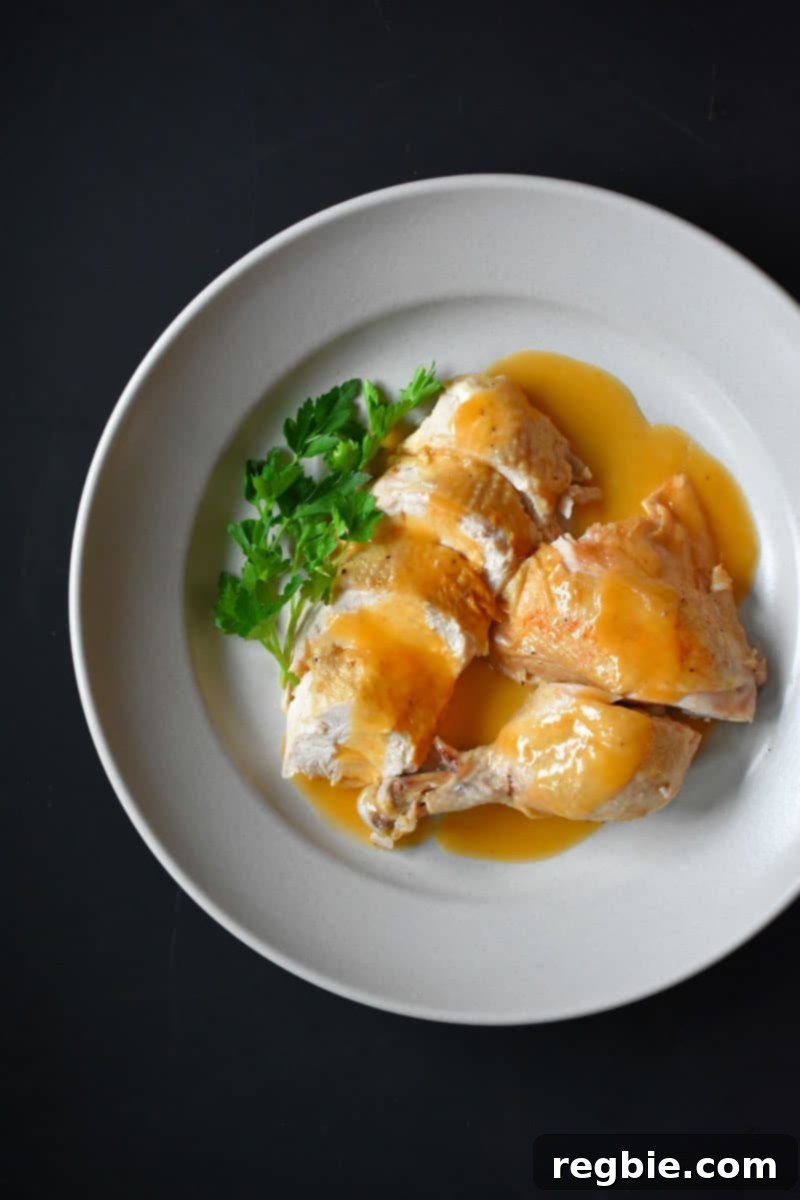
Table of Contents
- Instant Pot for the Culinary Win
- Achieving Faster, Flavorful Whole Chicken and Gravy
- The Magic of Quick Release in Pressure Cooking
- Essential Ingredients for Instant Pot Chicken & Gravy Perfection
- How to Master Instant Pot Whole Chicken and Gravy
- Perfect Pairings: What to Serve with Your Whole Chicken
- Maximizing Flavor: How to Store and Use Leftovers
- Explore More Instant Pot Chicken Recipes
- Instant Pot Whole Chicken and Gravy Recipe Card
Instant Pot for the Culinary Win
Ever since I welcomed my first Instant Pot into my kitchen in 2013, it has been a game-changer. My culinary journey quickly shifted to adapting beloved slow cooker classics and traditional recipes into lightning-fast, incredibly flavorful electric pressure cooker creations. While the Instant Pot does boast a slow cooker function, my heart—and my palate—belongs firmly to its pressure cooking capabilities.
Why this unwavering loyalty to pressure cooking? Simply put, anything you can prepare in a slow cooker can be made even more delicious and significantly quicker in a pressure cooker. Take, for instance, the legendary Instant Pot (Pressure Cooker) Kalua Pig. It’s a testament to the speed and depth of flavor achievable. While transforming conventional recipes into Instant Pot versions might require a touch of finesse and understanding of pressure cooking dynamics, that’s precisely why I’m here to guide you. This method not only saves time but also locks in moisture and infuses ingredients with robust flavors in a way traditional cooking often struggles to achieve in a similar timeframe. Get ready to elevate your home cooking with ease!
Achieving Faster, Flavorful Whole Chicken and Gravy
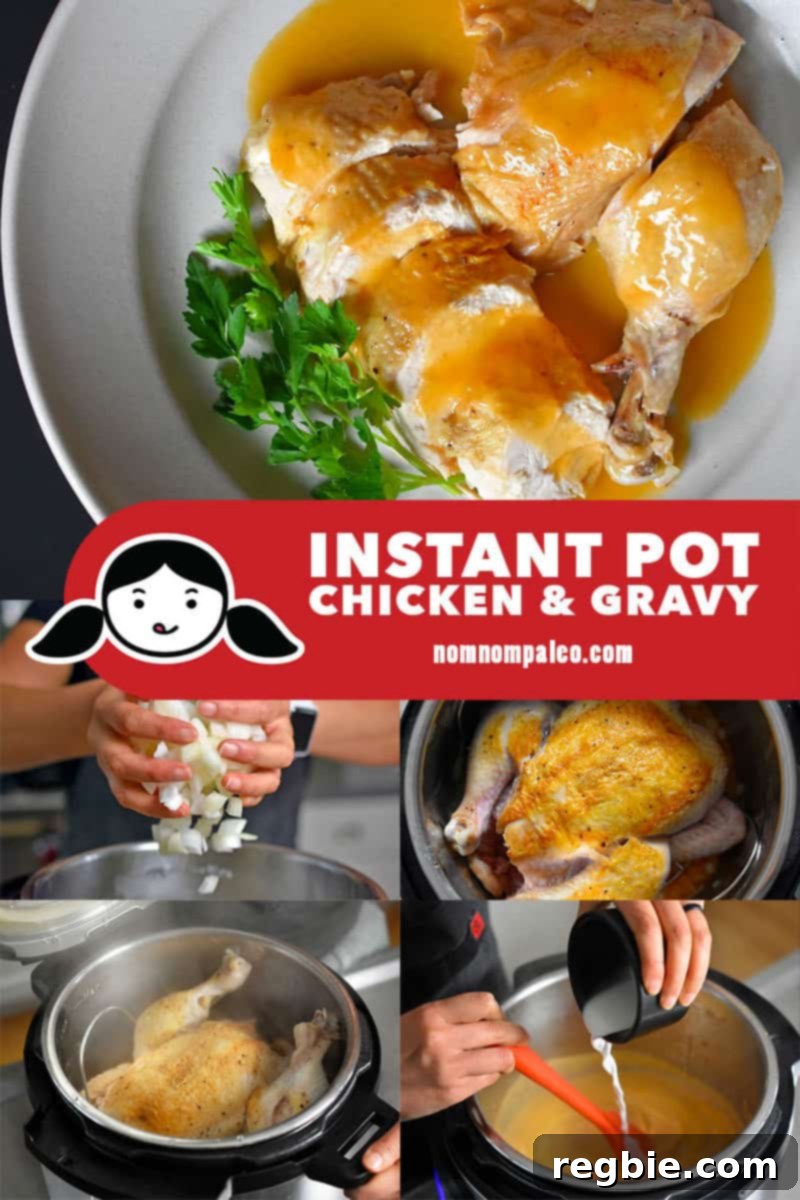
One of the most cherished recipes on my blog is the Slow Cooker Roast Chicken and Gravy. While the term “roast chicken” might be a slight misnomer given that the bird isn’t cooked in an oven or over an open fire, and thus the skin won’t achieve that coveted crispiness, this dish still brilliantly satisfies that deep craving for a hearty whole chicken dinner. It delivers all the comforting flavors without the need to fire up your oven, making it an ideal choice for busy weeknights.
The beauty of cooking a whole chicken in the Instant Pot lies in its ability to consistently yield perfectly cooked meat, ensuring both the white and dark meat are incredibly tender and juicy. This method locks in moisture that often escapes during conventional roasting, resulting in a succulent texture throughout the bird. Furthermore, the convenience is unparalleled: you only use one pot, which not only simplifies the cooking process but also drastically cuts down on cleanup time. That single pot can then go straight into the dishwasher, making this recipe a true winner for efficiency and deliciousness. This Instant Pot whole chicken and gravy recipe is designed to bring you the maximum flavor with minimum fuss, creating a truly memorable meal every time.
The Magic of Quick Release in Pressure Cooking
For this exceptional Instant Pot whole chicken recipe, employing the quick pressure release method is absolutely crucial. This means you will manually vent the Instant Pot immediately after cooking, rather than allowing a natural pressure release. Why is this so important? The quick release stops the cooking process almost instantly, preventing the chicken from becoming overcooked and dry. It’s the secret to achieving that perfectly tender and juicy texture we all crave.
If you’re new to the quick release technique, don’t be intimidated! It’s a simple process, and a quick burst of steam is all you’ll experience. Always remember to release the pressure safely by turning the valve away from your face and hands. Your reward for this quick maneuver will be a chicken that is tender, succulent, and perfectly cooked, along with an abundance of umami-packed gravy. This rich gravy is so delicious, you’ll undoubtedly want to freeze any extra portions for future meals, ensuring you always have a boost of flavor ready when you need it. This simple step truly makes all the difference in crafting an unforgettable Instant Pot whole chicken and gravy.
Essential Ingredients for Instant Pot Chicken & Gravy Perfection
Crafting the perfect Instant Pot whole chicken and gravy starts with selecting the right ingredients. Each component plays a vital role in building the robust flavor profile and achieving the ideal texture. Here’s a closer look at what you’ll need and why each ingredient is important:
- Whole chicken: It’s essential to choose a chicken that is approximately 4 pounds total. This size ensures it will fit comfortably in a 6-quart Instant Pot, allowing for even cooking. Avoid using a frozen chicken for this recipe, as it will cook unevenly, potentially leading to parts being undercooked or overcooked. A fresh, thawed bird is key for consistent results.
- Diamond Crystal kosher salt: This recipe highlights the natural flavors of the chicken and gravy, and high-quality salt is paramount. While this dish tastes phenomenal with just salt and pepper, feel free to personalize it with your favorite spice blend. My Nom Nom Paleo Spice Blends are fantastic options, or you can add classic herbs and spices like fresh thyme, rosemary, aromatic garlic powder, smoky paprika, or pungent onion powder for an extra layer of complexity.
- Freshly ground black pepper: A staple seasoning that adds a subtle warmth and a touch of spice, enhancing the overall savory notes of the chicken and gravy. Always opt for freshly ground for the best flavor.
- Ghee: I prefer using ghee in this recipe for its rich, nutty flavor and high smoke point, which is excellent for searing. If you need to keep the dish strictly dairy-free or prefer an alternative, extra virgin olive oil or avocado oil are excellent substitutes, offering a neutral flavor that won’t overpower the chicken.
- Onions: Diced onions form the aromatic foundation of our gravy, providing a sweet and savory base that deepens the overall flavor. They caramelize slightly during the sauté process, adding layers of deliciousness.
- Garlic cloves: Fresh garlic is non-negotiable for its pungent, savory notes that infuse the gravy with incredible depth. Minced or crushed, it’s a powerhouse of flavor.
- Tomato paste: This concentrated ingredient is a secret weapon for adding a profound umami boost to the gravy. Do not skip it! Just a small amount significantly enhances the richness and complexity of the sauce, giving it a more rounded and satisfying taste.
- Bone broth or chicken broth: Essential for deglazing the pot and creating the liquid base for our savory gravy. High-quality broth will contribute significantly to the depth of flavor. Homemade bone broth offers the most nutrition and rich taste, but a good quality store-bought chicken stock works well too.
- Arrowroot powder (optional): If you desire a thicker, more luxurious gravy, arrowroot powder is an excellent grain-free thickener. It creates a silky-smooth texture without the need for flour, keeping the recipe Paleo and Whole30 compliant.
- Fresh herbs (optional): A sprig of fresh rosemary, thyme, or a bay leaf added to the pot with the broth can infuse the chicken with subtle, fragrant notes, elevating the overall aroma and taste of your dish.
How to Master Instant Pot Whole Chicken and Gravy
Making a succulent whole chicken with homemade gravy in your Instant Pot is surprisingly simple. Follow these detailed steps to achieve a perfectly cooked bird and a rich, flavorful sauce:
Step 1: Prepare the Chicken for Optimal Flavor
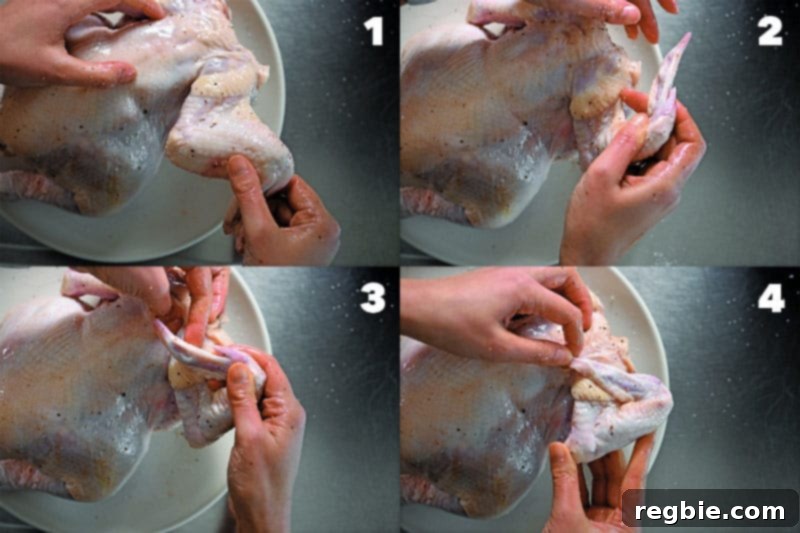
Begin by patting your whole chicken dry with paper towels. This crucial step helps ensure a better sear later. Sprinkle 2 teaspoons of Diamond Crystal kosher salt and ¼ teaspoon of freshly ground black pepper generously all over the chicken, both inside the cavity and on the exterior skin. For a personalized touch, you can substitute the salt and pepper with 2 to 3 teaspoons of your favorite Nom Nom Paleo spice blend. Once seasoned, tuck the wings behind the back of the chicken. This prevents them from burning or becoming brittle during the cooking process and helps the chicken hold a compact shape.
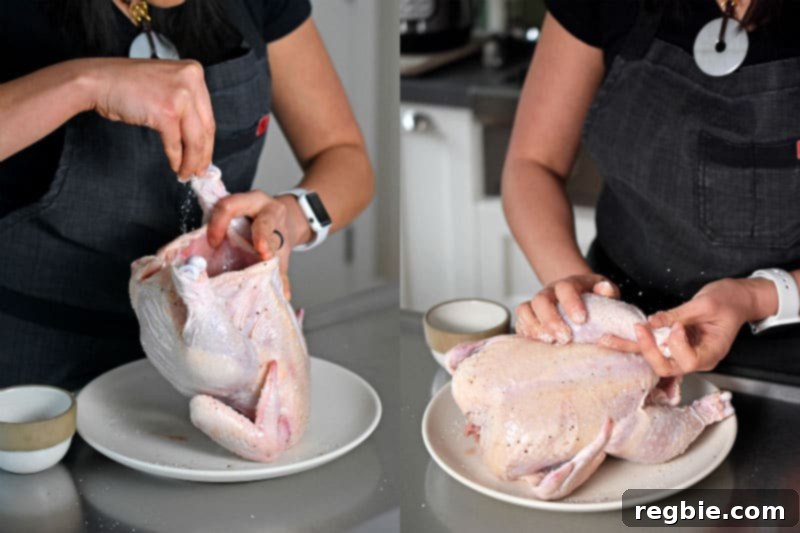
Here’s how to properly tuck those wings:
Step 2: Sauté the Aromatics and Sear the Chicken
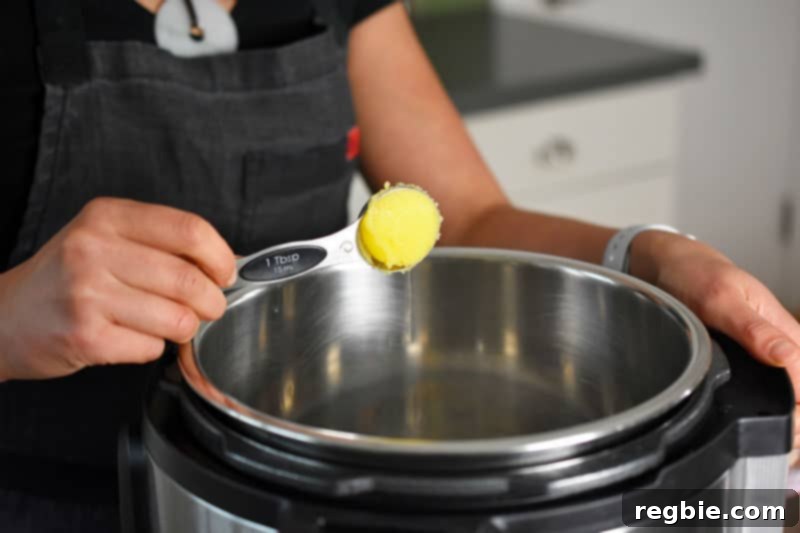
Add 1 tablespoon of ghee to the inner pot of your Instant Pot. Select the “Sauté” function (or cook over medium-high heat if using a stovetop pressure cooker). Allow the ghee to melt and become shimmering, indicating it’s hot enough for searing. If the fat pools on the sides, gently swirl the pot to distribute it evenly in the center.
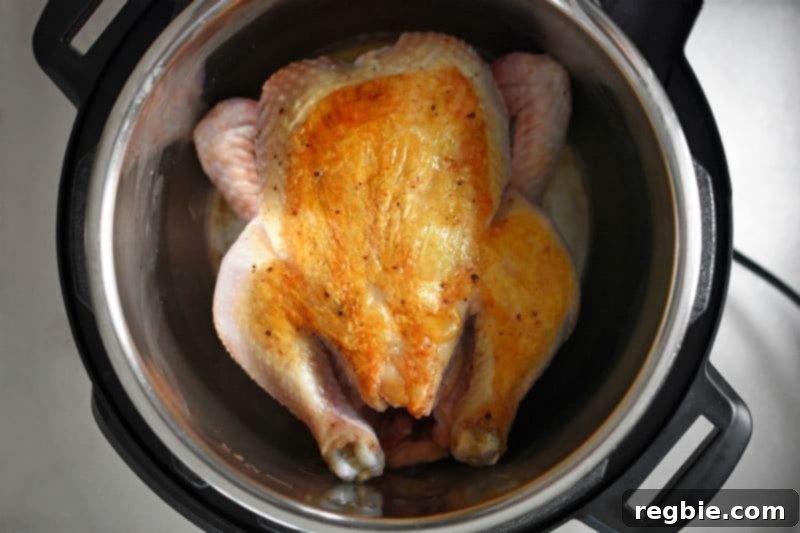
Carefully place the chicken breast-side down in the center of the pot. Sear for 5 minutes, or until the skin achieves a beautiful light golden brown color. This browning step is crucial for developing deep, rich flavors that will carry through to your gravy.
Using tongs or a sturdy spatula, carefully flip the chicken breast-side up. Continue to cook for another 5 minutes until the back is also nicely browned.
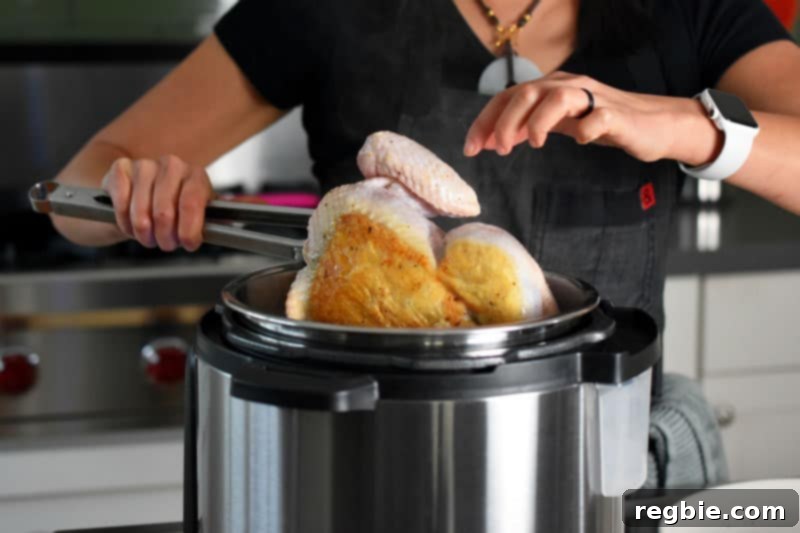
Don’t be concerned if the skin sticks a bit or tears during flipping. Since the chicken is pressure cooked, the skin won’t become crispy anyway. The primary goal of this browning step is to develop a rich, complex flavor base for your phenomenal gravy, not to achieve crispy skin.
Step 3: Build the Gravy Base
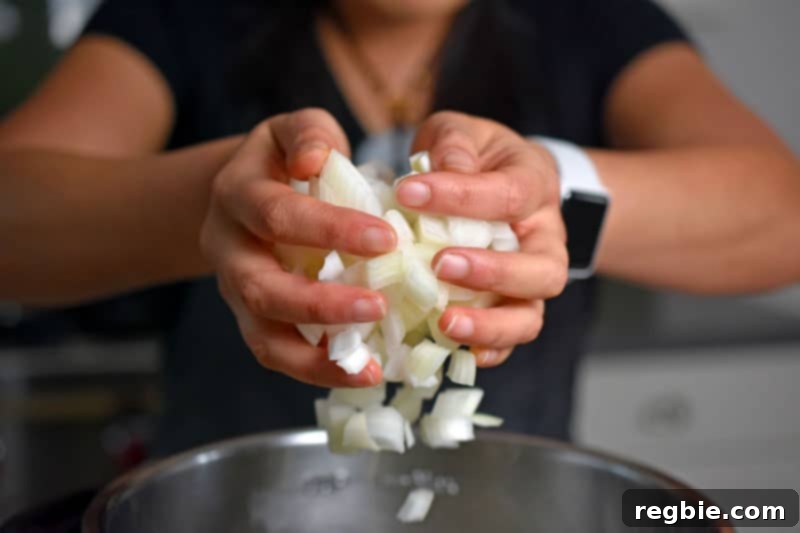
Transfer the browned chicken to a clean plate and set aside. Add the remaining tablespoon of ghee to the pot. Once it melts, toss in the chopped onions, 6 peeled garlic cloves, and a small sprinkle of salt. Sauté for 1 to 2 minutes, stirring occasionally, until the onions begin to soften and become fragrant.
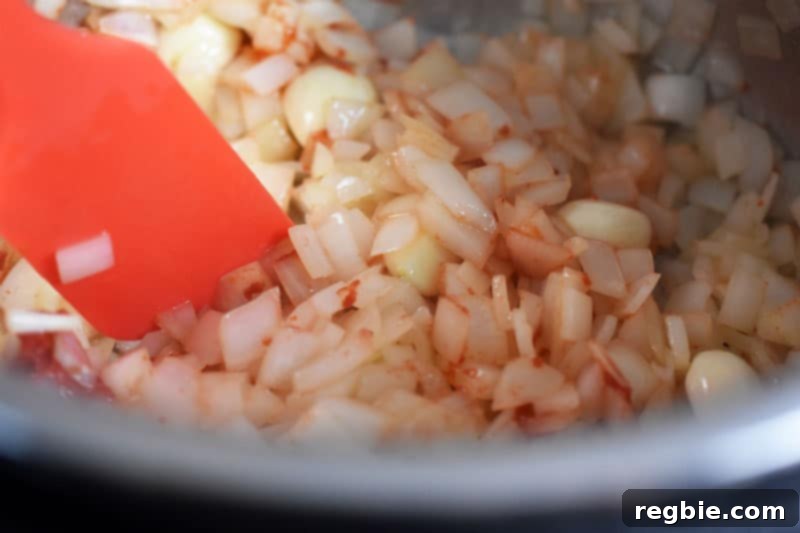
Stir in 2 teaspoons of tomato paste and continue to cook for about 30 seconds. This short cooking time helps to deepen the flavor of the tomato paste, unlocking its rich umami notes.
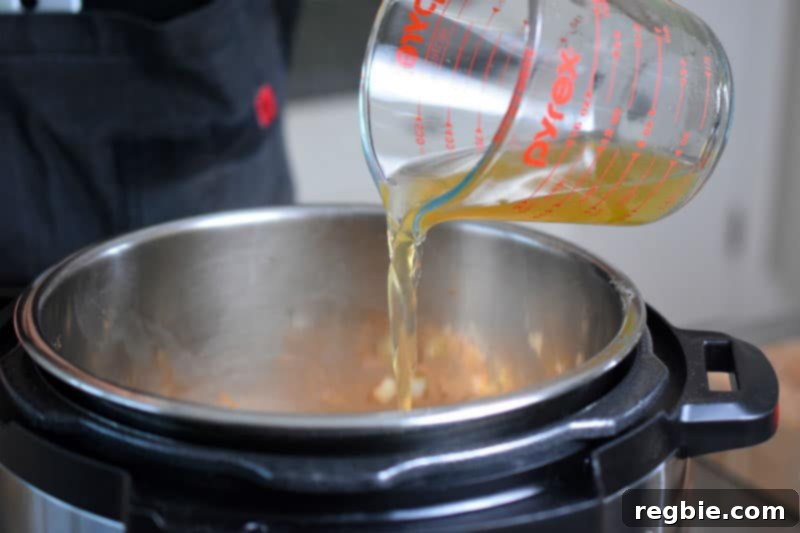
Turn off the sauté function (or remove the stovetop cooker from the heat). Pour in ½ cup of broth, then use a wooden spoon or spatula to scrape up any delicious browned bits from the bottom of the pot. This crucial step, known as deglazing, prevents the “burn” notice on Instant Pots and incorporates all those flavorful fond into your gravy.
Step 4: Pressure Cook the Chicken
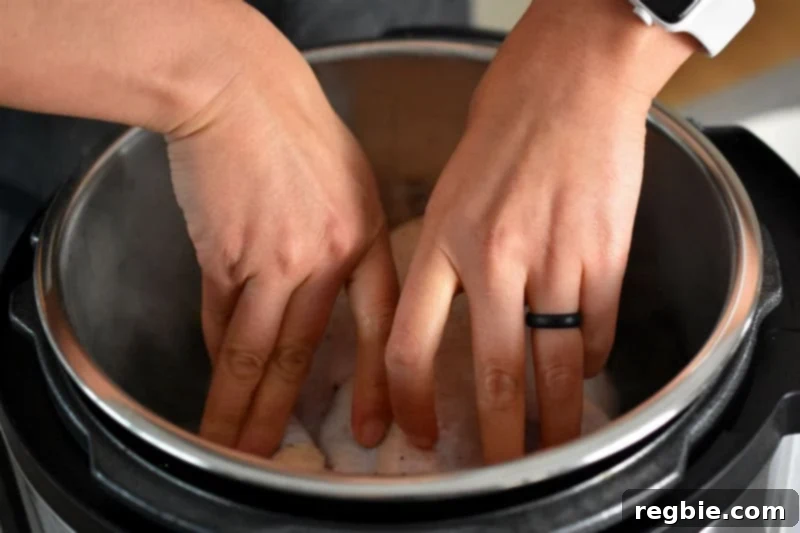
Place a steamer insert or trivet at the bottom of the pressure cooker, directly on top of the sautéed aromatics and broth. This keeps the chicken slightly elevated, allowing it to steam and cook evenly while its juices drip down into the gravy base.
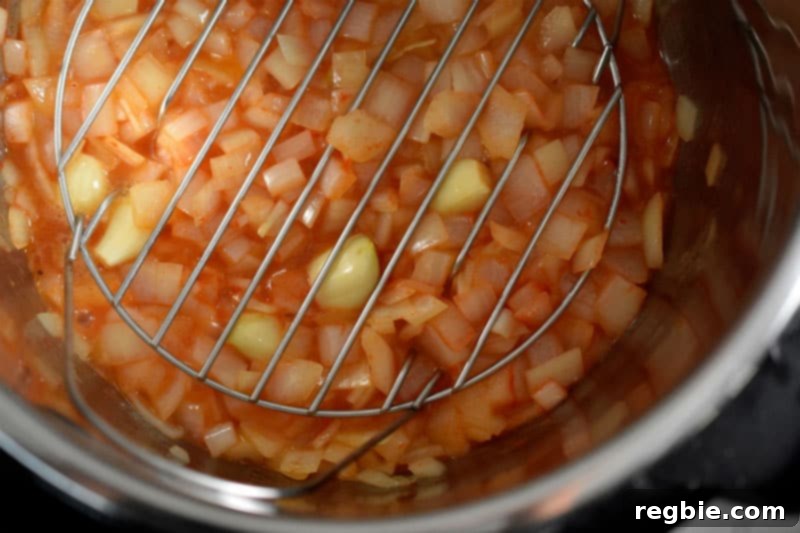
Carefully lay the browned chicken on top of the steamer insert, ensuring it is breast-side up. This position helps the breast meat stay moist during pressure cooking.
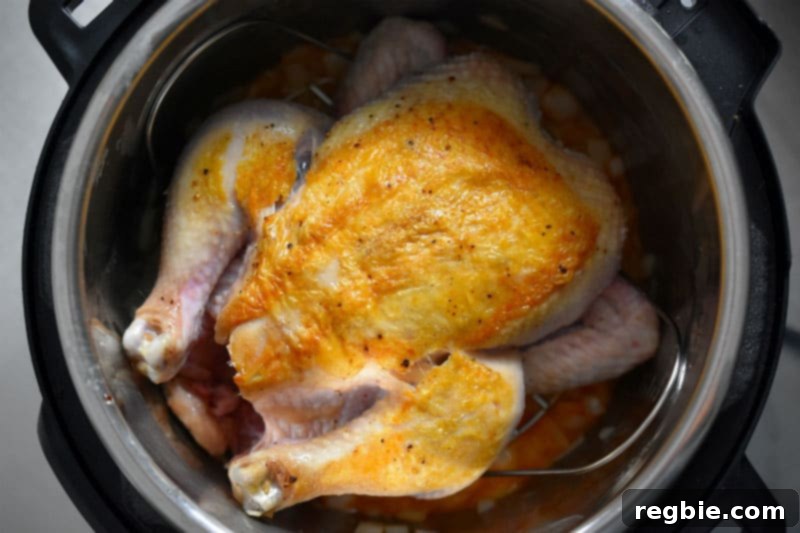
Secure the lid on your Instant Pot, ensuring the vent is sealed. Cook on high pressure for 20 minutes. If you’re using a stovetop pressure cooker, cook for 17 minutes. The precise timing is key for a tender, fully cooked chicken of approximately 4 pounds.
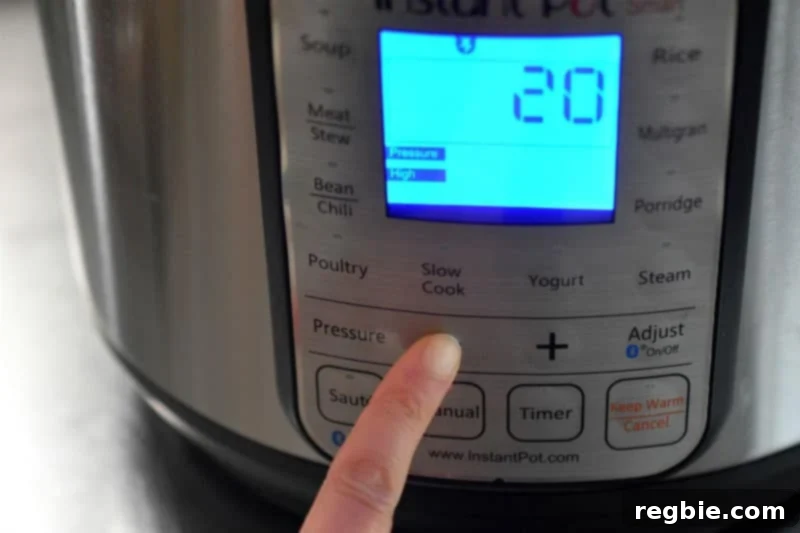
Step 5: Quick Release and Rest the Chicken
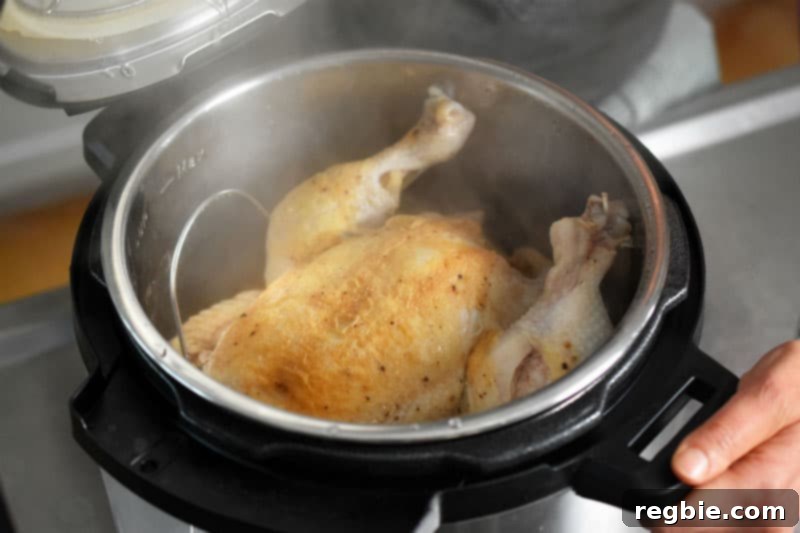
Once the cooking cycle is complete, turn off the electric pressure cooker (or remove the stovetop cooker from the heat). Immediately perform a quick pressure release by carefully turning the steam release valve to the venting position. Stand clear of the steam as it escapes.
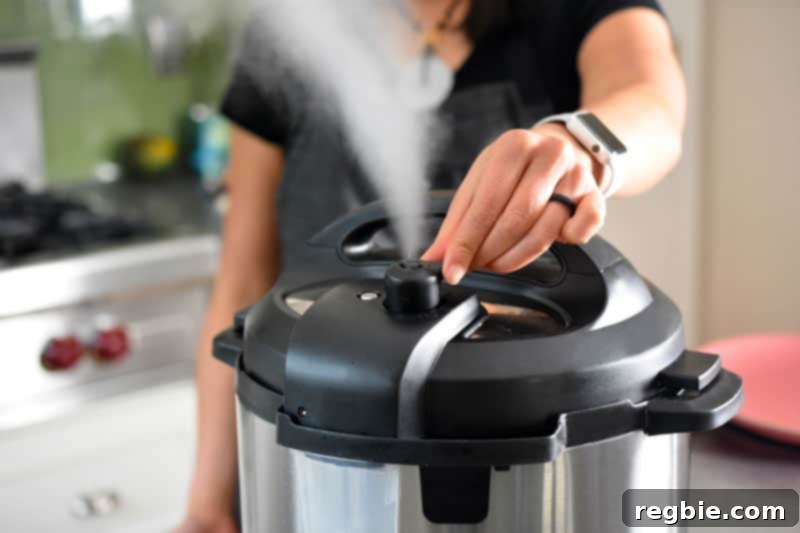
Once all pressure has been released and the float valve drops, carefully open the lid. Use a reliable meat thermometer to check the internal temperature in the thickest part of the chicken thigh, avoiding the bone. The temperature should register at least 175°F (80°C) for safe consumption. Transfer the perfectly cooked chicken to a large plate or carving board. Loosely tent the bird with foil and allow it to rest for 10 minutes. This resting period is vital, as it allows the juices to redistribute throughout the meat, ensuring an incredibly moist and flavorful chicken.
Step 6: Craft the Perfect Gravy
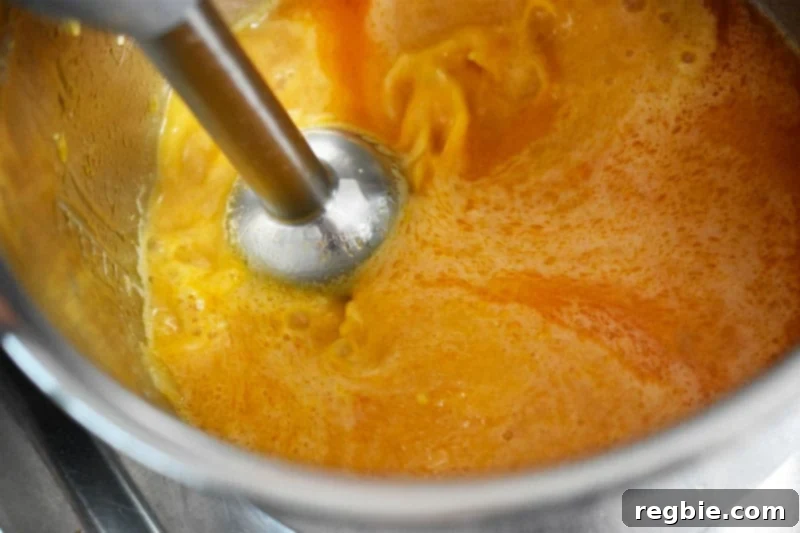
While the chicken rests, turn your attention to the incredible gravy. Carefully remove the steamer insert from the Instant Pot. Use an immersion blender to purée the contents of the inner pot directly in the pot. Blend until the mixture is completely smooth and lump-free, creating a velvety gravy. Taste and season the gravy to perfection with additional salt and pepper as needed.
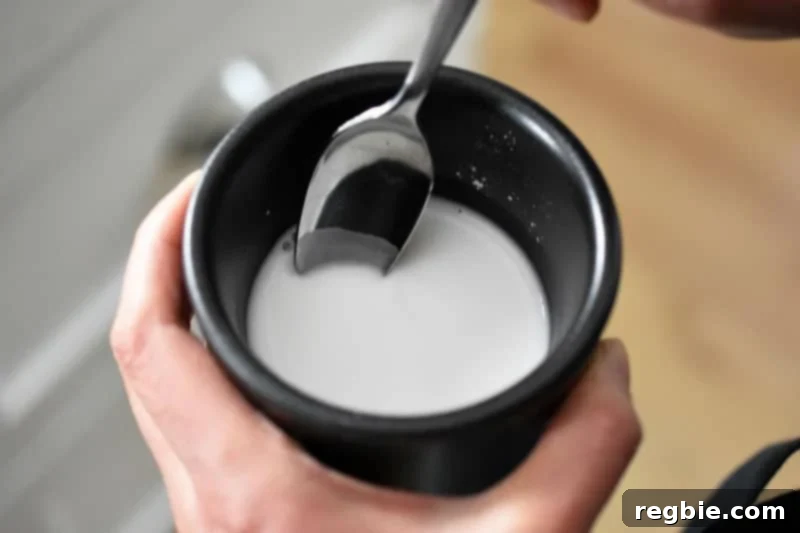
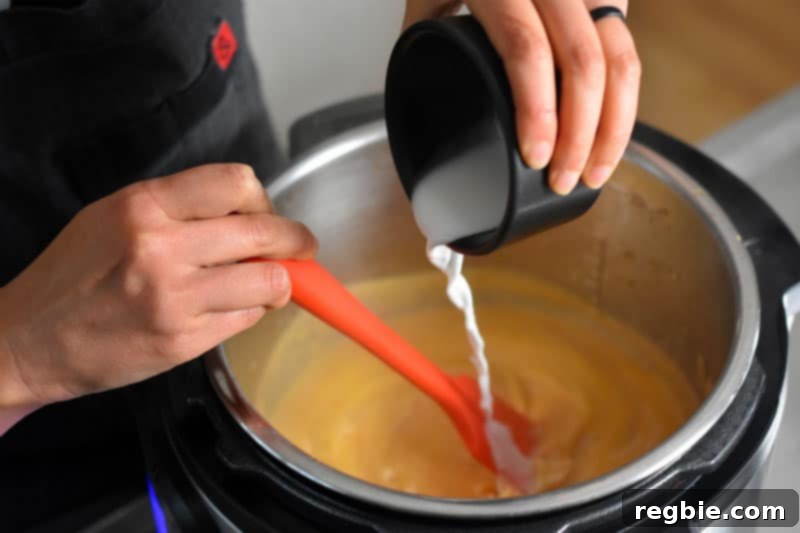
If you prefer a thicker gravy, create an arrowroot slurry: mix 2 tablespoons of arrowroot powder with 2 tablespoons of cold water until a smooth paste forms. Turn on the sauté function again and bring the gravy contents to a gentle simmer. Slowly stir in the arrowroot powder slurry, whisking continuously, and cook until the gravy thickens to your desired consistency. It will thicken considerably as it cools.
Step 7: Serve and Enjoy!
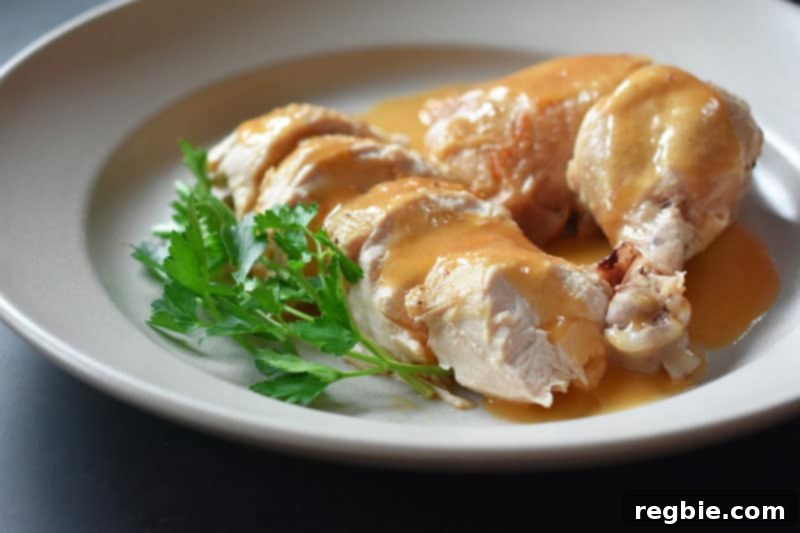
Carve the rested chicken into individual portions. Drizzle generously with copious amounts of the hot, savory gravy. This Instant Pot whole chicken and gravy is a comforting and satisfying meal, perfect for any occasion.
Perfect Pairings: What to Serve with Your Whole Chicken
This incredibly versatile Instant Pot whole chicken pairs beautifully with a variety of sides, whether you’re sticking to Paleo and Whole30 principles or simply looking for delicious accompaniments. Here are some fantastic suggestions to complete your meal:
- For a touch of crunch: Serve with crispy potatoes. The textures complement each other wonderfully, with the tender chicken and the satisfying crisp of the potatoes.
- For a creamy, comforting side: Opt for garlic cauliflower mashed “potatoes”. This low-carb alternative offers a velvety texture and rich garlic flavor that perfectly soaks up the savory gravy.
- For a sweet and earthy balance: Pair with roasted kabocha squash. Its natural sweetness and tender flesh provide a delightful contrast to the chicken’s savory notes.
- For a fresh and vibrant counterpoint: A big green salad with a light vinaigrette is always an excellent choice. It adds a refreshing element and cuts through the richness of the chicken and gravy. Consider adding seasonal vegetables for extra nutrients and color.
Maximizing Flavor: How to Store and Use Leftovers
This Instant Pot whole chicken and gravy recipe often yields generous portions, making it fantastic for meal prepping and enjoying delicious leftovers. Proper storage ensures your culinary efforts last longer and taste just as good the next day.
Storing Chicken and Gravy: Any leftover chicken and gravy should be transferred to an airtight container and stored in the refrigerator. It will remain fresh and delicious for up to four days. To reheat, gently warm in a saucepan on the stove or in the microwave, adding a splash of broth if the gravy has thickened too much.
Freezing Gravy for Future Meals: If you find yourself with an abundance of leftover gravy, don’t let a single drop go to waste! This rich, umami-packed gravy freezes exceptionally well. Pour it into a silicone ice cube mold for convenient, single-serving portions. Once frozen solid, transfer the gravy cubes to a freezer-safe bag or container. These frozen gravy cubes are a secret weapon in the kitchen—you can easily pop one or two into soups, stews, casseroles, or even when reheating other meats, instantly boosting their flavor and adding a gourmet touch to whatever you’re cooking. They’re perfect for quickly building a pan sauce or enriching a weeknight meal with minimal effort.
Creative Uses for Leftover Chicken: The tender leftover chicken is incredibly versatile. Shred it and use it for quick chicken salads, flavorful tacos or enchiladas, comforting chicken noodle soup, or even a savory chicken pot pie. The possibilities are endless, making this recipe a gift that keeps on giving!
Explore More Instant Pot Chicken Recipes
If you’ve fallen in love with the ease and deliciousness of cooking whole chicken in your Instant Pot, you’ll be thrilled to discover how versatile this appliance is for other chicken dishes. Expand your culinary repertoire with these other fantastic Instant Pot chicken recipes:
- Instant Pot Chicken Saag: A vibrant and aromatic Indian-inspired dish bursting with flavor.
- Instant Pot Summer Italian Chicken: Light, fresh, and packed with Mediterranean flavors, perfect for any season.
- Instant Pot Chicken Pho: Enjoy the rich, comforting flavors of Vietnamese pho broth and tender chicken, made in a fraction of the time.
- Instant Pot Salsa Chicken Tacos: An incredibly easy recipe for flavorful shredded chicken, perfect for quick taco nights or meal prep.
- Instant Pot Lemongrass and Coconut Chicken: An exotic and fragrant dish with tender chicken infused with bright lemongrass and creamy coconut.
Looking for even more incredible recipe ideas? Head on over to my comprehensive Recipe Index, where you’ll find a treasure trove of delicious and healthy meals. Additionally, you can discover exclusive recipes and expanded culinary insights in my bestselling cookbooks: Nom Nom Paleo: Food for Humans (Andrews McMeel Publishing 2013), Ready or Not! (Andrews McMeel Publishing 2017), and my latest release, Nom Nom Paleo: Let’s Go! (Andrews McMeel Publishing 2022). Happy cooking!
Printer-Friendly Recipe Card
Instant Pot Whole Chicken and Gravy
10 minutes
40 minutes
1 hour
6 servings
Michelle Tam
Print Recipe
Ingredients (Yields 6 servings)
- 1 organic whole chicken (about 4 pounds)
- 2 teaspoons Diamond Crystal kosher salt (or a Nom Nom Paleo spice blend)
- ¼ teaspoon freshly ground black pepper
- 2 tablespoons ghee (divided)
- 2 large onions (chopped medium)
- 6 garlic cloves (peeled)
- 2 teaspoons tomato paste
- ½ cup Instant Pot bone broth (or chicken stock)
- 2 tablespoons arrowroot powder (optional, for thickening gravy)
Instructions
-
Pat the chicken dry with paper towels. Sprinkle 2 teaspoons of salt and ¼ teaspoon of pepper (or 2 to 3 teaspoons of a Nom Nom Paleo spice blend) generously all over the chicken, both inside and out. Tuck the wings behind the back to keep them from overcooking.
-
Add 1 tablespoon of ghee to the Instant Pot. Select the “Sauté” function. Allow the ghee to melt and shimmer. If using a stovetop pressure cooker, cook over medium-high heat. Swirl the melted ghee to the center if it pools on the sides.
-
Once the fat is shimmering, carefully place the chicken breast-side down in the center of the pot. Sear for 5 minutes, or until it’s lightly browned.
-
Flip the chicken breast-side up using tongs. Cook for another 5 minutes, or until the back is browned. Don’t worry if the skin sticks or tears; it won’t be crispy after pressure cooking, and this step is purely for developing deep flavor for the gravy.
-
Transfer the browned chicken to a plate. Add the remaining tablespoon of ghee to the pot. Once melted, toss in the chopped onions, 6 garlic cloves, and a sprinkle of salt. Cook for 1 to 2 minutes, stirring, until the onions have softened.
-
Stir in 2 teaspoons of tomato paste and cook for approximately 30 seconds to enhance its flavor.
-
Turn off the Sauté function (or remove the stovetop cooker from heat). Pour in ½ cup of broth, then scrape up any browned bits from the bottom of the pot with a wooden spoon. This deglazing step adds flavor and prevents a “burn” notice.
-
Place a steamer insert or trivet at the bottom of the pressure cooker. Lay the chicken on top of it, breast-side up. Secure the lid and pressure cook on high for 20 minutes (or 17 minutes on a stovetop pressure cooker).
-
After cooking, immediately turn off the electric pressure cooker (or remove the stovetop cooker from heat) and perform a quick pressure release manually. Once the pressure is fully released, open the lid and transfer the chicken to a plate or carving board. Tent it loosely with foil and let it rest for 10 minutes to redistribute juices.
-
While the chicken rests, use an immersion blender to purée the contents of the inner pot directly in the Instant Pot to create a smooth gravy. Season the gravy to taste with salt and pepper.
-
If you desire a thicker gravy, mix 2 tablespoons of arrowroot powder with 2 tablespoons of cold water to form a slurry. Turn on the Sauté function and bring the gravy to a simmer. Stir in the arrowroot slurry and cook, whisking continually, until the gravy thickens to your desired consistency.
-
Carve the rested chicken and serve it generously topped with the rich, homemade gravy. Freeze any leftover gravy in a silicone ice cube mold for convenient future use!
Notes
- Leftover chicken and gravy can be stored in a tightly sealed container in the fridge for up to four days. For longer storage of gravy, freeze it in small portions (e.g., in a silicone ice mold) so you can easily add a cube or two to other dishes for a burst of flavor.
- To spice things up, consider using a Nom Nom Paleo spice blend instead of plain kosher salt. These blends are available for purchase on Amazon and directly from The Spice Lab!
Nutrition Information (per serving)
Calories: 266kcal
|
Carbohydrates: 8g
|
Protein: 29g
|
Fat: 13g
|
Fiber: 1g
Nutrition information is automatically calculated and should be used as an approximation. Individual results may vary based on exact ingredients and preparation.
Enjoyed this recipe? Share your thoughts below!
Your feedback helps others discover delicious meals.