
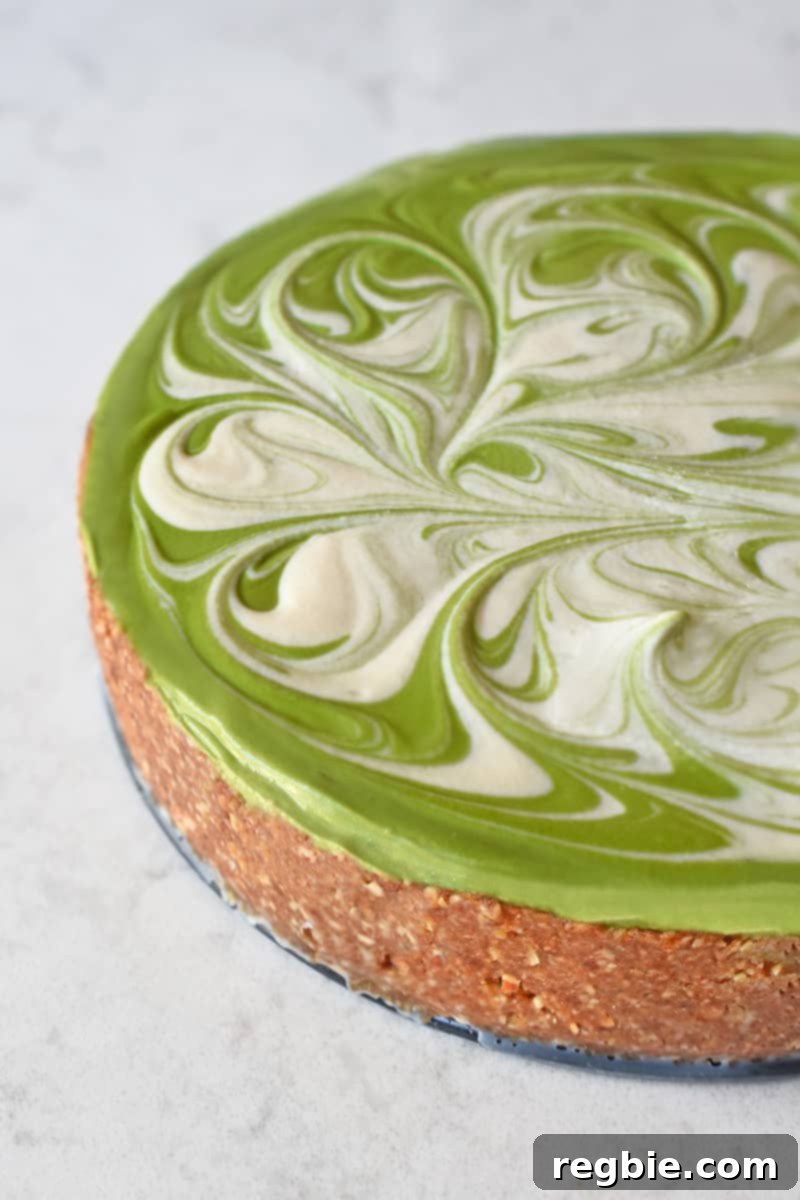
Decadent No-Bake Matcha Cheesecake: Vegan, Paleo, Gluten-Free & Dairy-Free Delight
Indulge in a truly remarkable dessert that satisfies every craving without compromising your dietary preferences. This fabulous **no-bake matcha cheesecake** is a dream come true for anyone seeking a **paleo, vegan, dairy-free, and gluten-free** treat. Beyond its impressive health credentials, it also happens to be incredibly delicious, boasting a creamy texture and a distinctive, refreshing matcha flavor that will captivate your taste buds. Get ready to impress your friends and family with this vibrant green masterpiece!
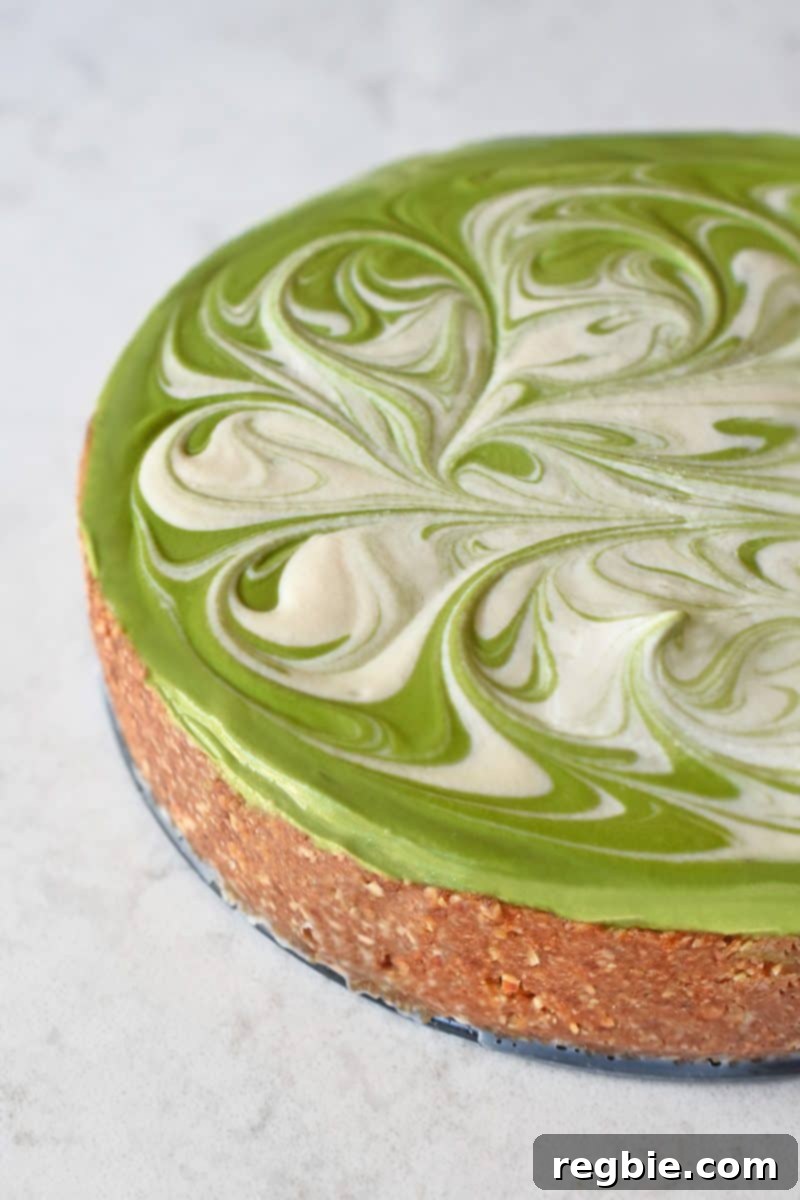
Table of Contents
- The Magic of Matcha: A Flavor Sensation
- A Revolution in Cheesecake: Vegan & Paleo Perfection
- Achieving Unrivaled Creaminess: The Secret to Paleo Cheesecake
- Effortless Indulgence: The Joy of No-Bake
- Choosing Your Matcha: Culinary vs. Ceremonial Grade
- The Exquisite Taste Profile: What Does Matcha Cheesecake Taste Like?
- Matcha Cheesecake Ingredients
- Crust
- Filling
- Essential Equipment for Your No-Bake Matcha Cheesecake
- How to Make No-Bake Matcha Cheesecake
- Serving and Storing Your Matcha Cheesecake
- More Matcha-Inspired Recipes
- Matcha Cheesecake (Vegan, Paleo, No-Bake) Recipe Card
The Magic of Matcha: A Flavor Sensation
For those who know me, two things are abundantly clear: my deep affection for matcha and my propensity to overspend on gourmet vegan cheesecakes from trendy stores. It was only natural, then, that I decided to combine these passions and embark on a mission to create the perfect **paleo, vegan, and no-bake matcha cheesecake**. It’s a labor of love, but someone has to do it, and it might as well be a matcha enthusiast like myself!
If you’re new to the world of matcha, prepare to be enchanted. This vibrant green powder is more than just a tea; it’s a finely stone-ground Japanese green tea known for its distinctive umami flavor, rich antioxidants, and gentle energy boost. Its unique profile adds a sophisticated earthiness and a beautiful hue to desserts, elevating them far beyond the ordinary. My love affair with matcha has inspired many creations, including my Matcha Mug Cake, Cold Matcha Latte, Matcha Pudding, Cold Brew Matcha, and Matcha Coconut Gummies. This no-bake cheesecake joins the ranks as a new favorite, bringing the vibrant taste of matcha to a decadent, guilt-free dessert.
A Revolution in Cheesecake: Vegan & Paleo Perfection
My journey into the world of **vegan and paleo cheesecake** began years ago with a single bite at a chic vegan eatery in New York City. Before that moment, the idea of a “cheesecake” without cheese seemed almost sacrilegious. I imagined it would be a pale imitation, a shadow of the real thing. But my skepticism vanished with the first spoonful of that incredibly creamy, sweet indulgence. It was love at first bite, and **gluten-free vegan cheesecake** quickly became one of my all-time favorite desserts.
While a **dairy-free cheesecake** might not replicate the exact taste of its traditional counterpart, it offers a distinct, equally delightful experience. The velvety texture, combined with innovative flavor combinations, truly bowled me over. As someone who struggles with lactose intolerance, discovering vegan cheesecake was a huge win. I can now enjoy a luxurious dessert without any uncomfortable side effects, making it a go-to treat whenever I crave something sweet and satisfying.
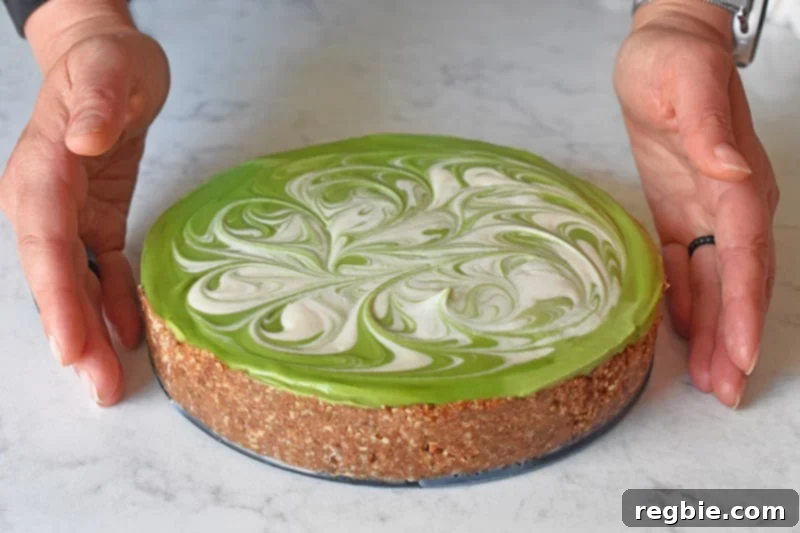
Developing my own **No-Bake Matcha Cheesecake** was an extensive process. I’m notoriously particular about my recipes, only sharing them once they meet my (often unreasonably) high standards. For a while, I feared I might never achieve a version truly worthy of sharing. However, after countless batches and persistent refinement, I finally cracked the code last week! I perfected a **homemade matcha cheesecake** that I absolutely adore, and it received enthusiastic approval from my even-pickier-than-me mother. This is a testament to its exceptional taste and texture!
Achieving Unrivaled Creaminess: The Secret to Paleo Cheesecake
The hallmark of any great cheesecake is its smooth, rich, and creamy texture. For this **paleo and vegan cheesecake**, that luxurious consistency is ingeniously achieved through a harmonious blend of carefully selected ingredients: **puréed soaked cashews, refined coconut oil, and full-fat coconut milk**. These components work together to mimic the richness of traditional dairy, creating a dessert that feels incredibly indulgent.
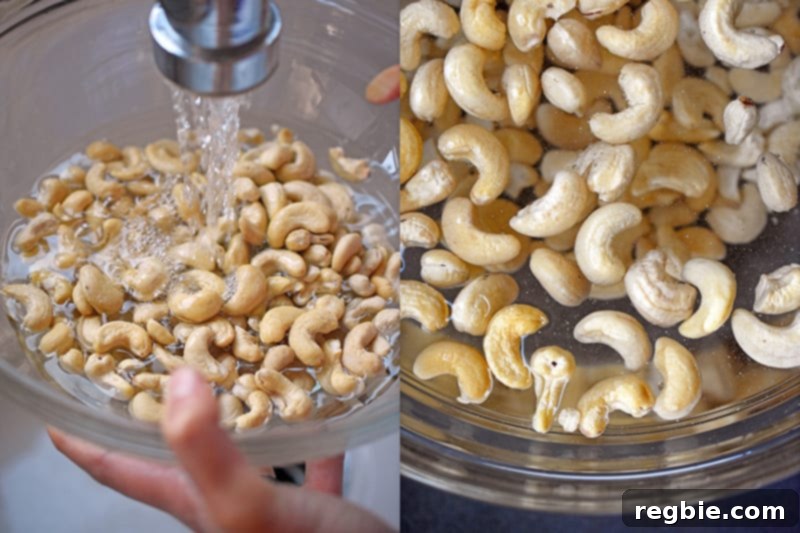
The key to maximizing the creaminess of the cashews lies in proper soaking. While soaking raw cashews in room temperature water for 2 to 4 hours is ideal, you can significantly speed up this process. Simply submerge them in 4 cups of boiling water for a quicker 10-30 minute soak. This softens the cashews, allowing them to blend into an ultra-smooth, velvety cream that forms the base of our **no-bake matcha cheesecake** filling.
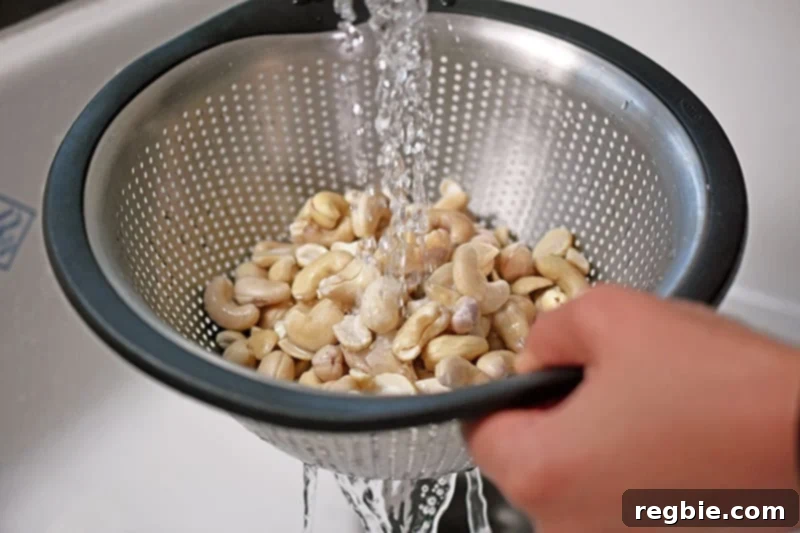
If you find yourself short on time or prefer to prepare ingredients in advance, you can easily store the soaked cashews. After rinsing and draining them thoroughly, place them in a sealed container and refrigerate for up to 4 days. This makes meal prep a breeze and ensures you always have the main ingredient ready for your next **dairy-free cheesecake** craving.
Effortless Indulgence: The Joy of No-Bake
One of the most appealing aspects of this dessert is its **no-bake** nature. This means no oven required, making it a perfect choice for warmer weather or when you simply want to minimize kitchen fuss. While it’s a **no-bake vegan cheesecake**, it’s important to note that it’s not technically “raw.” This is because I’ve chosen to use toasted almonds and coconut in the crust, which adds a wonderful depth of flavor and a delightful textural contrast that I believe significantly enhances the overall experience.
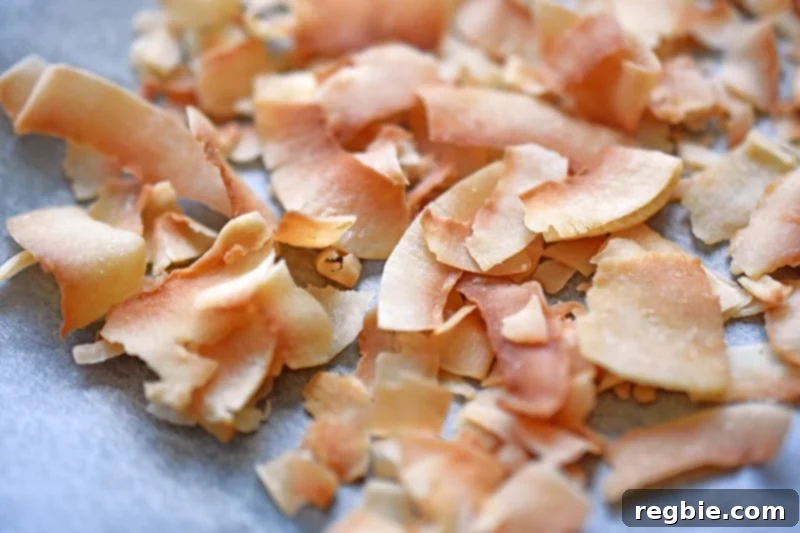
The crust for this **gluten-free matcha cheesecake** is a simple yet effective blend of Medjool dates, dry roasted and salted whole almonds, and unsweetened toasted coconut flakes. The dates provide a natural sweetness and binding power, while the toasted almonds and coconut contribute a rich, nutty aroma and satisfying crunch. A crucial tip for the crust: opt for **dry roasted and salted almonds**. The subtle saltiness perfectly balances the sticky sweetness of the dates, creating a more complex and addictive base for the creamy matcha filling.
Choosing Your Matcha: Culinary vs. Ceremonial Grade
The quality of your matcha can significantly influence the appearance and subtle flavor notes of your **matcha cheesecake**. For this particular recipe, I highly recommend using **ceremonial grade matcha**. Its vibrant, bright green color is truly captivating and will result in a visually stunning dessert, as seen in the photographs.
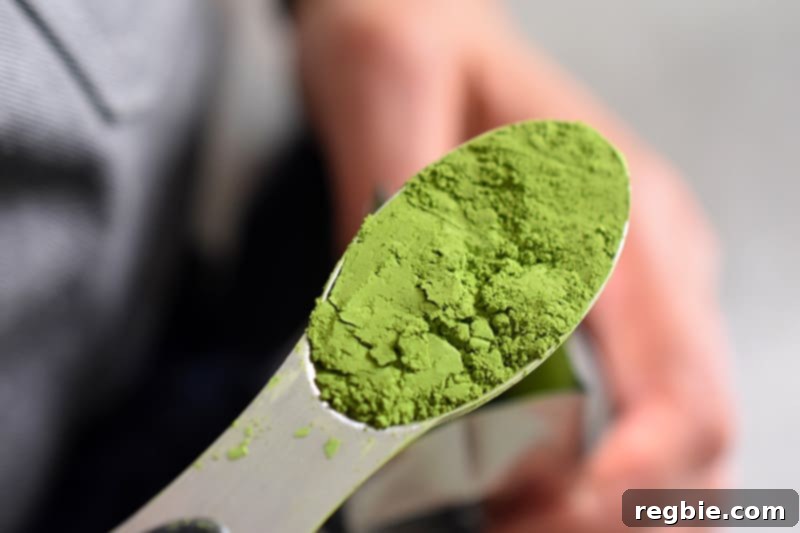
However, if your primary concern isn’t the cheesecake’s exact shade of green, and you’re looking to save a bit of money, **culinary grade matcha** is a perfectly acceptable substitute. While it may result in a slightly duller, more muted green or even a brownish hue, the cheesecake will still taste absolutely fantastic. Think of it this way: if you’re serving this delightful treat at a romantic dinner with ambient lighting, no one will be scrutinizing the precise color of your dessert! Ultimately, choose the matcha that best suits your budget and aesthetic preferences for your **no-bake matcha cheesecake**.
The Exquisite Taste Profile: What Does Matcha Cheesecake Taste Like?
Prepare for a unique flavor journey with this **matcha cheesecake**. It strikes a beautiful balance, being **mildly sweet** with a clear and refreshing **matcha-forward** profile. The earthy notes of the matcha are wonderfully complemented by a subtle tang from the lemon juice and the inherent sweetness of maple syrup, creating a harmonious and sophisticated flavor that isn’t overly sugary.
One of the best aspects of this recipe is its adaptability. If your palate isn’t as accustomed to intense matcha flavors as mine, you can easily start with just 1 tablespoon of matcha powder and gradually increase it to your desired taste. Similarly, if you prefer a sweeter dessert, feel free to add an extra splash of maple syrup until it perfectly suits your preference. This customization ensures your **vegan paleo cheesecake** is exactly how you like it.
Beyond its incredible taste, this versatile recipe offers two delightful presentation options. You can create a stunning **7-inch cheesecake** that’s perfect for slicing and serving as a grand centerpiece. Alternatively, for individual portions, divide the batter into a 12-cup muffin tin lined with parchment paper to create charming, peanut-butter-cup-sized desserts. These mini cheesecakes are ideal for portion control, parties, or simply enjoying a single, indulgent treat. No matter how you choose to present it, you’re ready to wow your friends and family with this decadent **no-bake matcha cheesecake**!
Matcha Cheesecake Ingredients
Crust
- Pitted Medjool dates, coarsely chopped: These provide natural sweetness and a sticky binder for the crust.
- Dry roasted and salted whole almonds: Adds a savory crunch and balances the sweetness of the dates.
- Unsweetened toasted coconut flakes: For a delightful texture and nutty flavor. You can toast raw coconut flakes at 300°F (150°C) for 3 to 5 minutes or until lightly browned.
- Coconut oil (optional if using a springform cake pan): Helps create a firmer crust, especially useful if you’re pressing it up the sides of the pan.
Filling
- Matcha: Use a high-quality ceremonial grade matcha for the brightest green color and best flavor. Culinary grade is acceptable if color isn’t a top priority.
- Refined coconut oil, melted: Essential for the filling’s texture and setting. Refined oil has a neutral flavor, preventing an overwhelming coconut taste.
- Full-fat canned coconut milk: Contributes to the richness and creaminess of the filling. Ensure it’s full-fat for the best results.
- Freshly squeezed lemon juice: Provides the necessary tanginess to mimic traditional cheesecake flavor and cuts through the richness.
- Maple syrup: A natural sweetener. Adjust the amount to achieve your desired sweetness level.
- Raw unsalted cashews, soaked and drained: The star of the creamy texture! Soaking is crucial. No other nut achieves quite the same velvety consistency when blended.
- Vanilla extract: Adds a classic depth of flavor that complements the matcha.
- Pinch of salt: Enhances all the other flavors, bringing balance to the sweetness and earthiness.
Essential Equipment for Your No-Bake Matcha Cheesecake
To successfully create this delicious **no-bake matcha cheesecake**, you’ll need a few key kitchen tools:
- Measuring cups
- Measuring spoons
- Kitchen scale (optional, but helpful for precision)
- Chef’s knife
- Cutting board
- Food processor (essential for the crust)
- High-powered blender (crucial for a super smooth filling)
- Offset spatula (for smoothing the filling)
- 7-inch springform cake pan or 12-cup muffin pan + parchment baking cups
- Wooden skewer (for decorative swirling)
How to Make No-Bake Matcha Cheesecake
Creating this **vegan paleo matcha cheesecake** is a straightforward process, divided into making the crust and then the creamy filling. Follow these steps for a perfect dessert every time:
Step 1: Prepare the No-Bake Crust
First, we’ll construct the delicious base for our **no-bake matcha cheesecake**.
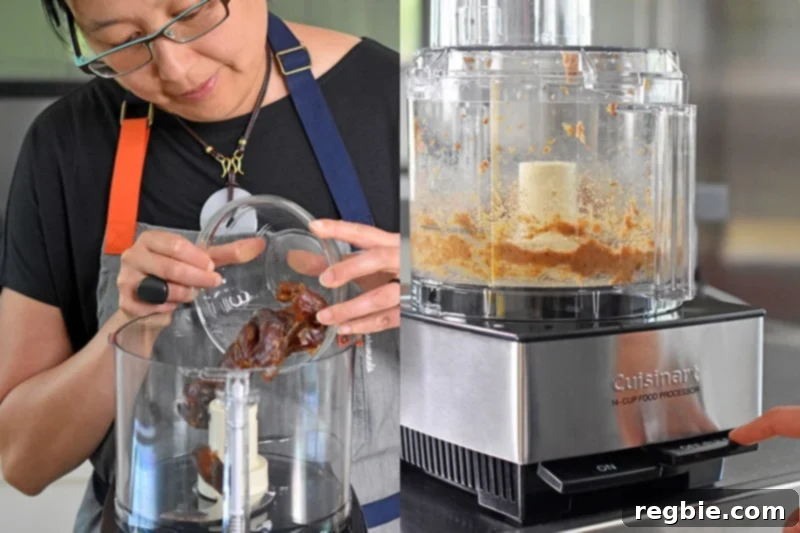
- Place the pitted Medjool dates into your food processor. Pulse a few times to roughly chop the dates into smaller pieces.
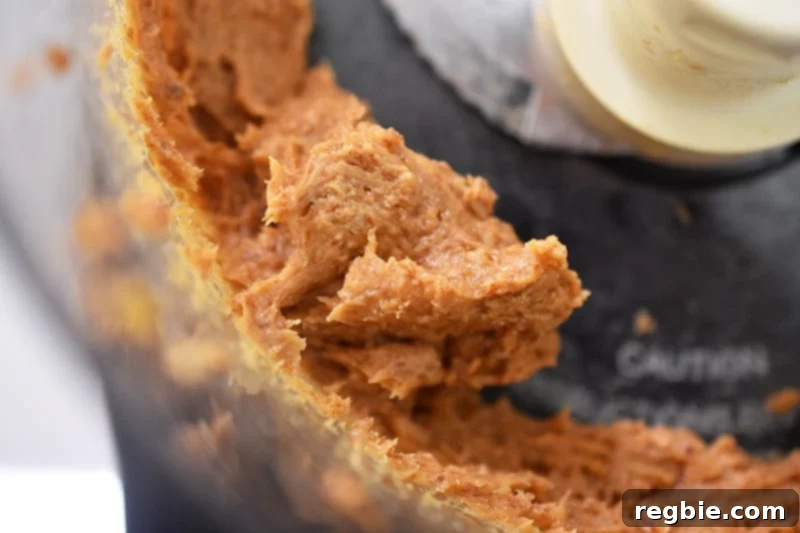
- Continue pulsing, or hold down the “On” button, until the dates are completely pulverized and form a sticky ball that collects and “thwacks” against the side of the work bowl. This ensures they are fully broken down and can bind the other crust ingredients.
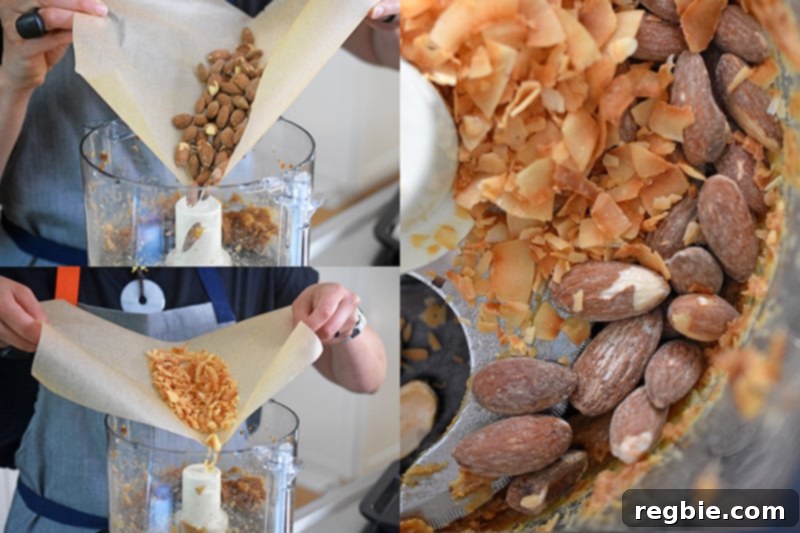
- Add the dry roasted and salted whole almonds along with the unsweetened toasted coconut flakes to the food processor with the dates.
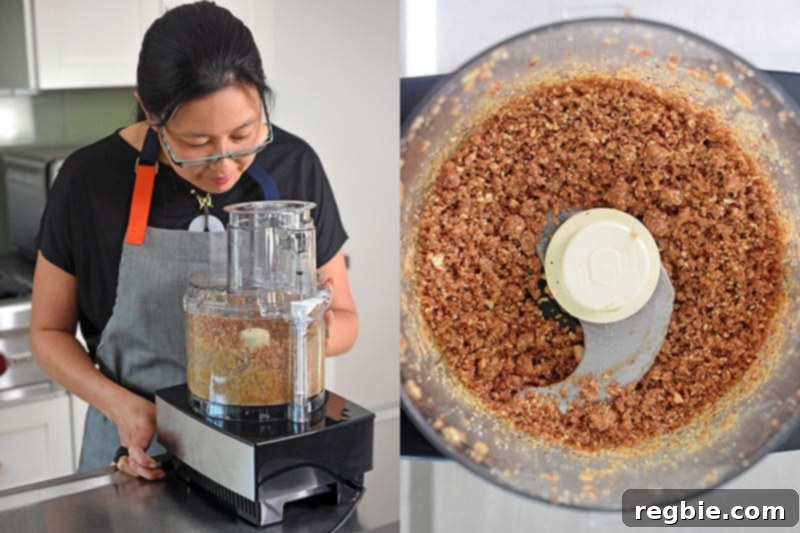
- Pulse these ingredients together until the mixture resembles coarse rice grains or cornmeal. When you press a small amount of the dough between your fingers, it should stick together. If your dates were a bit dry and the mixture isn’t holding, add a tiny amount of water (a teaspoon at a time) to help it bind.
Step 2: Form the Cheesecake Base
Now, let’s prepare your chosen pan for the crust.
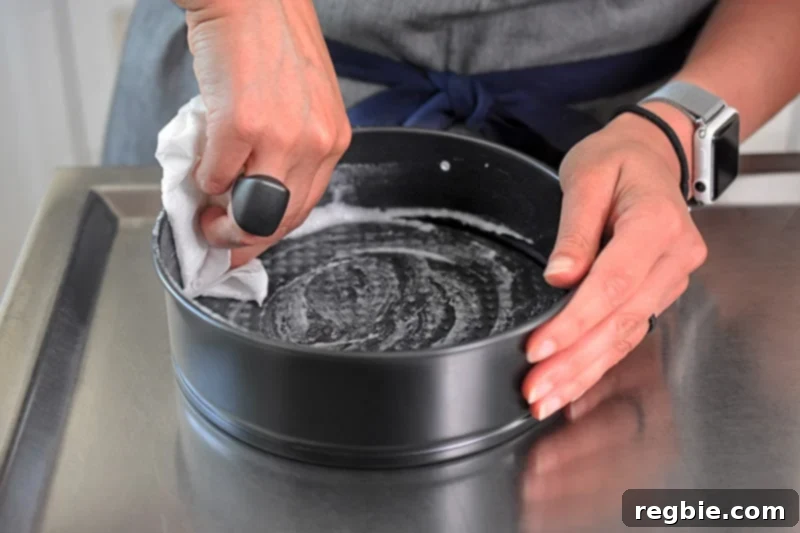
- **For a 7-inch springform pan:** Lightly grease the bottom and sides of the pan with a little coconut oil. This helps prevent sticking when you remove the cheesecake.
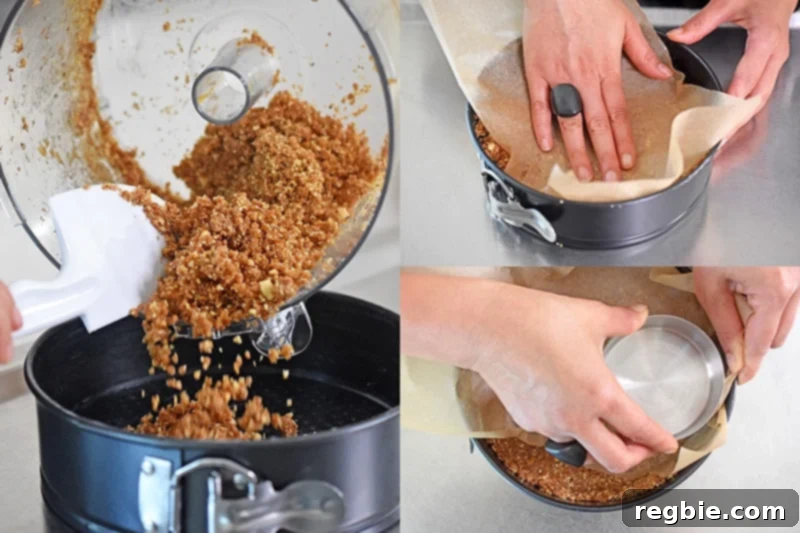
- Add the prepared crust mixture to the greased springform pan. Use a piece of parchment paper to help spread it evenly across the bottom. For a perfectly flat and compact base, I like to press the crust down firmly with the flat bottom of an empty measuring cup. A word of caution: While my photos show the crust extending up the sides, I’ve learned that this can sometimes stick to the pan upon removal. To avoid potential frustration and patching, you might consider simply forming the crust only on the bottom of the pan and leaving the sides crust-free.
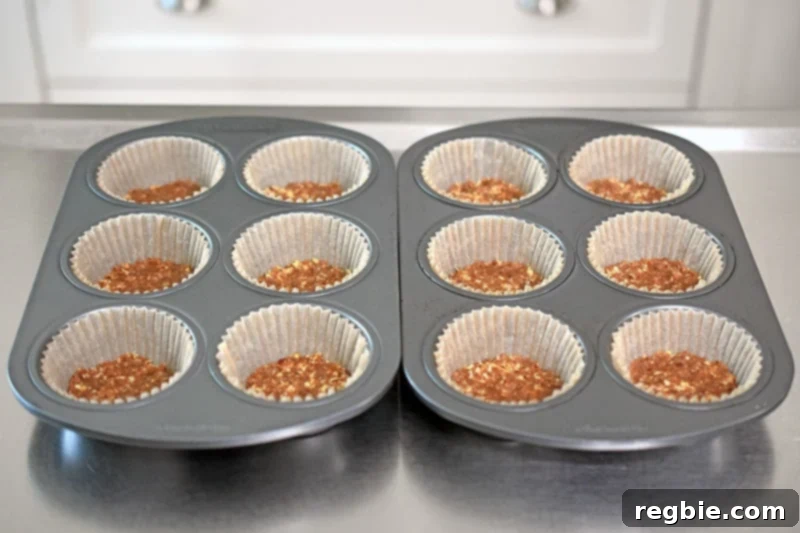
- **For individual mini cheesecakes:** Grab a 12-cup muffin pan (or two 6-cup muffin pans) and line each cavity with parchment muffin liners. Place a generous tablespoon of the crust mixture into each liner. Flatten each portion with a small piece of parchment paper or the back of a spoon to form an even crust.
Step 3: Prepare the Creamy Matcha Filling
This is where the magic happens for our luscious **paleo vegan cheesecake** filling.
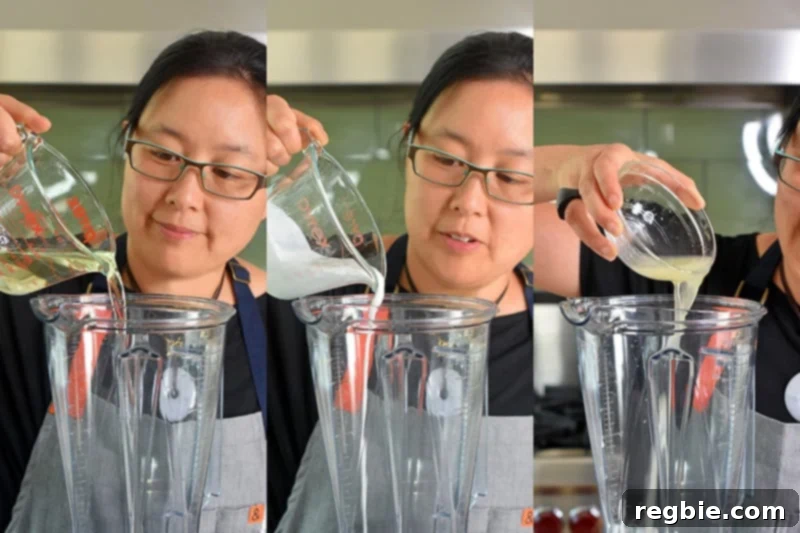
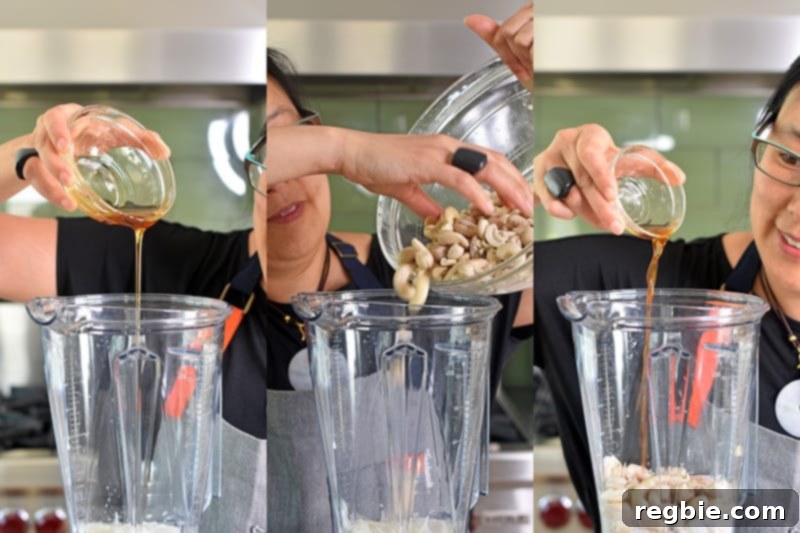
- Get your powerful blender ready. (Yes, you will dirty two different kitchen electrics for this recipe, but I promise, the results are worth it!) Add the melted refined coconut oil, full-fat coconut milk, freshly squeezed lemon juice, maple syrup, soaked and drained cashews, vanilla extract, and a pinch of salt to the blender.
- Blend on high until the mixture is exceptionally smooth and completely uniform. There should be no cashew chunks visible. Once blended, spoon out about ½ cup of this plain batter and set it aside. This will be used for decoration.
- Add the matcha powder to the remaining batter in the blender. Blend again until the matcha is perfectly incorporated and the entire filling has a uniform, vibrant green color.
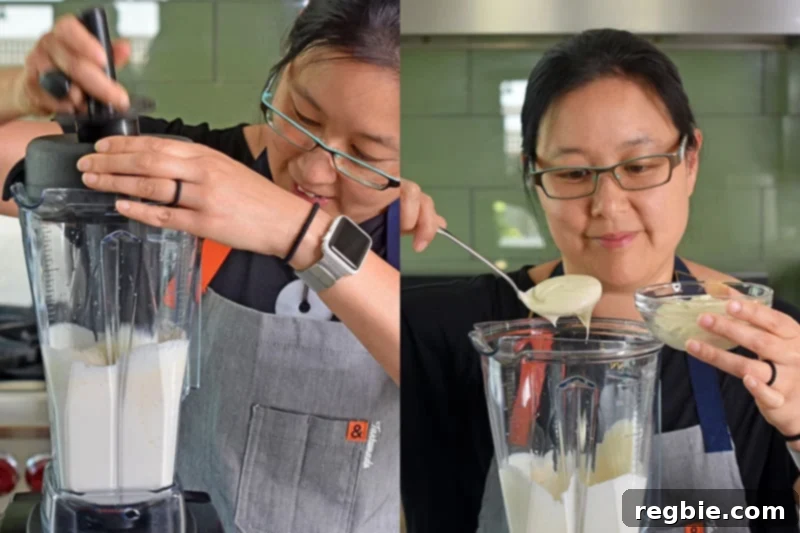
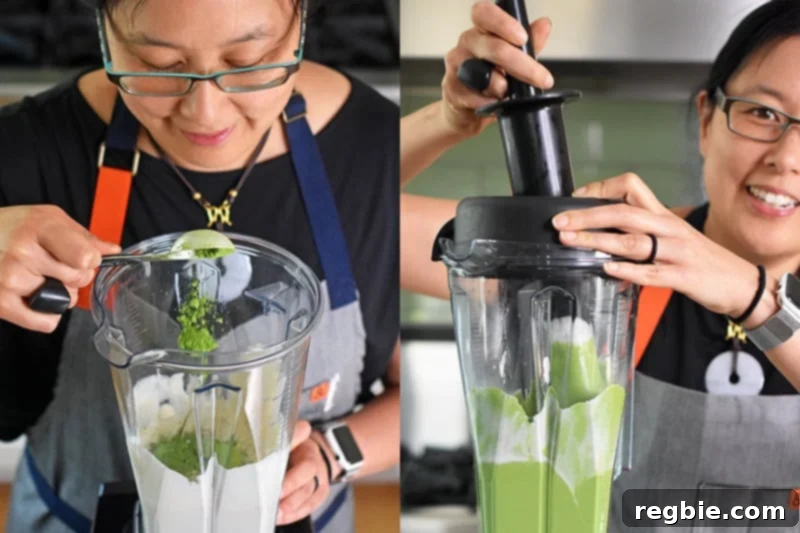
Step 4: Assemble and Decorate Your Matcha Cheesecake
Now, let’s bring it all together for a beautiful finish!
- **For a full-sized cheesecake:** Carefully pour the vibrant green matcha filling into your prepared springform pan, on top of the crust.
- Use an offset spatula to gently smooth the top surface of the **vegan and paleo No-Bake Matcha Cheesecake** filling.
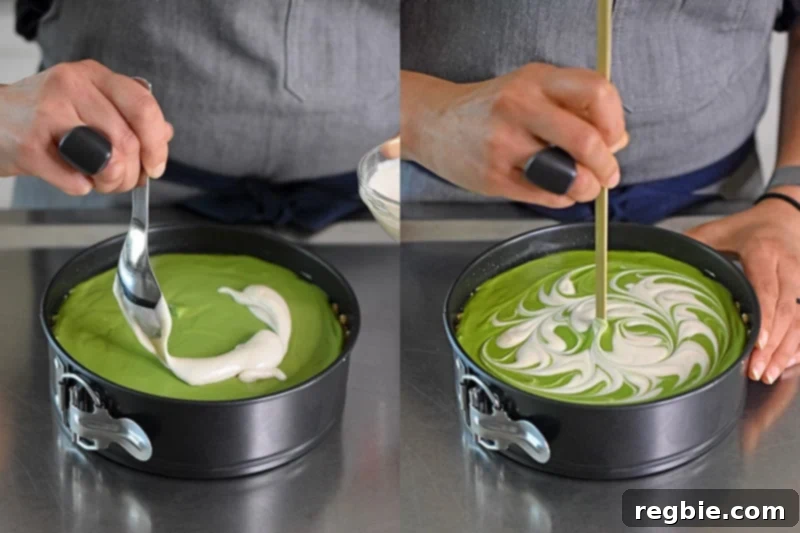
- Take the reserved matcha-less batter (the ½ cup you set aside earlier). Dollop it onto the top of the cake in a circular pattern. Then, use a wooden skewer to gently swirl the plain batter into the green matcha layer, creating a beautiful marble or decorative design. This adds an elegant touch!
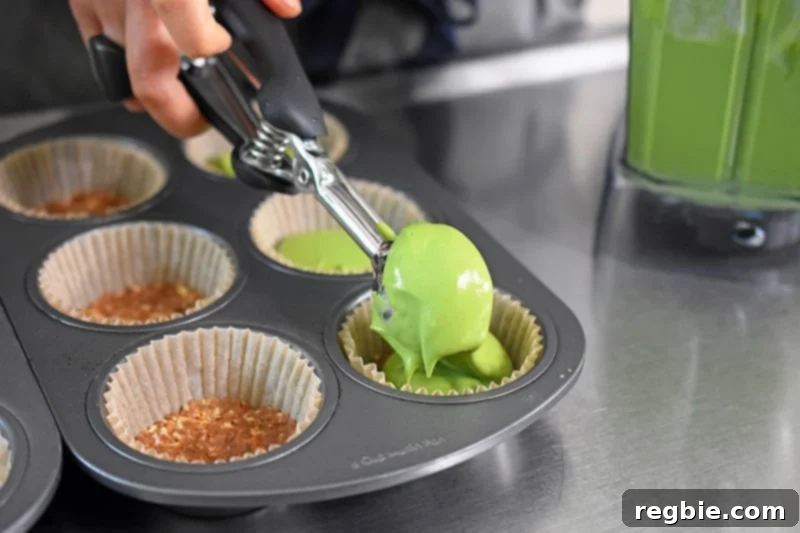
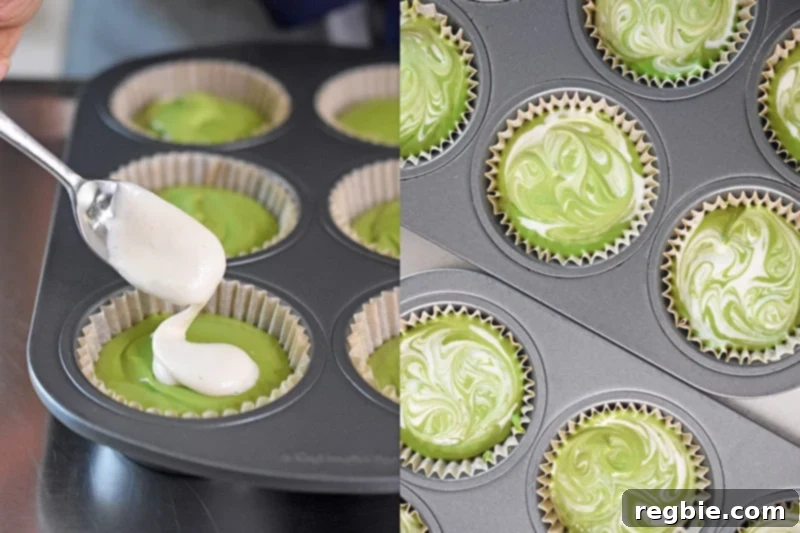
- **For mini cheesecakes:** Spoon about 2 tablespoons of the matcha filling into each muffin liner, on top of the crust. Smooth the surface of each one. Then, dollop a heaping teaspoon of the reserved plain batter onto the center of each mini cheesecake. Use a wooden skewer to gently swirl the batters together, creating a delicate marble pattern.
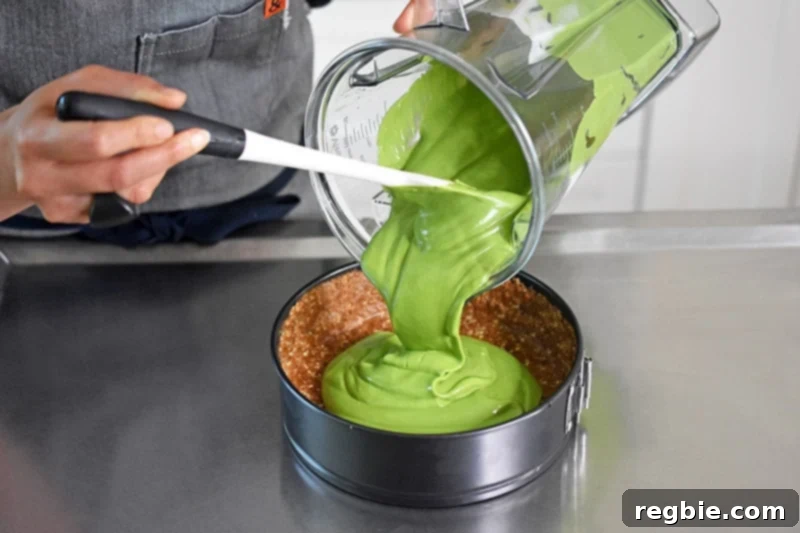
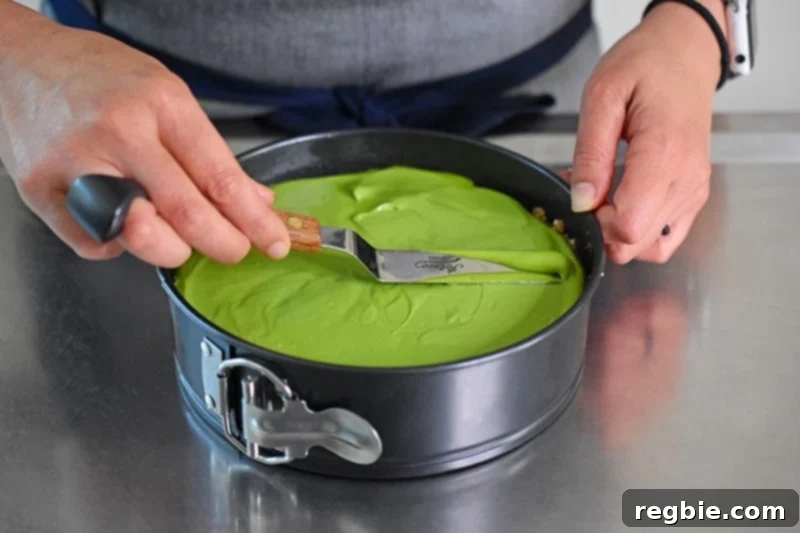
Step 5: Chill and Set
The final step before enjoying your **no-bake matcha cheesecake** is crucial for its texture.
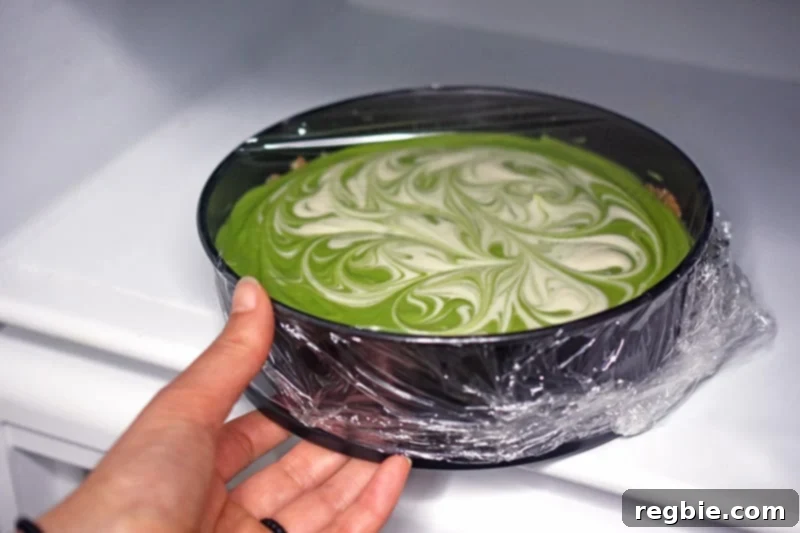
- Cover your pan(s) tightly with plastic wrap and transfer them to the freezer. Freeze for at least 4 hours, or until the cheesecake is completely firm and set. This allows the coconut oil to solidify and gives the cheesecake its firm, sliceable texture.
Serving and Storing Your Matcha Cheesecake
Your beautiful **paleo vegan matcha cheesecake** is almost ready to be enjoyed! Here’s how to serve it and keep it fresh:
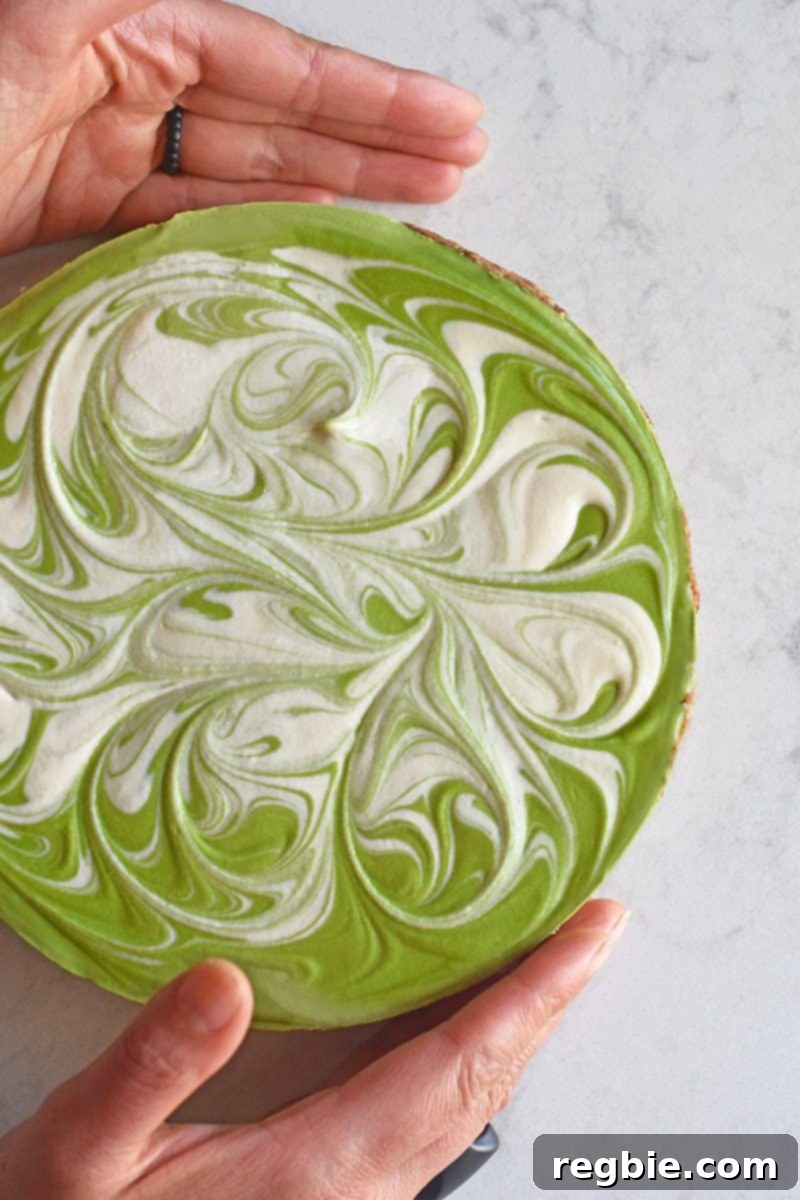
When you’re ready to indulge, you have a couple of options for thawing. You can transfer the cheesecake from the freezer to the refrigerator and let it thaw for about 2 hours. Alternatively, if you’re in a bit more of a hurry, simply leave it out on the counter for 10-15 minutes before dessert time. This will soften it just enough for perfect slicing.
Once slightly thawed, carefully pop the full-sized cheesecake out of its springform pan.
…and then slice and serve your incredible creation!
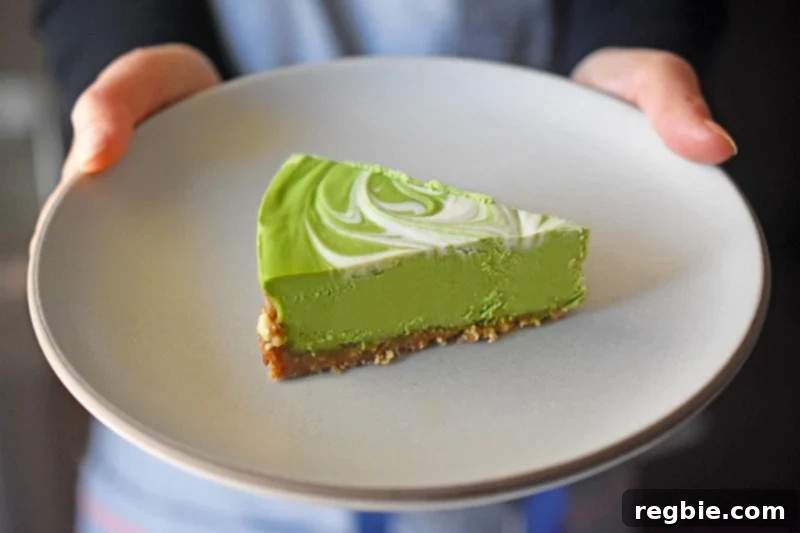
If you opted for the mini cheesecakes, simply pop out an individual **mini matcha cheesecake** for a delightful single serving!
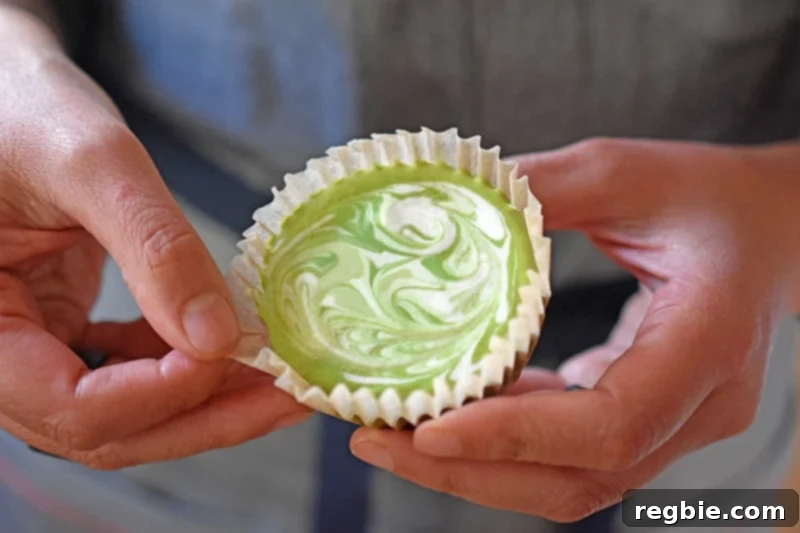
For storage, the frozen **matcha cheesecake(s)** will keep beautifully in the freezer for up to 3 months. Once thawed in the fridge, it’s best to consume the cheesecake within 4 days. However, I have a strong suspicion that this delicious **no-bake matcha cheesecake** won’t last that long!
More Matcha-Inspired Recipes
If you’ve fallen in love with the vibrant flavor of matcha after trying this cheesecake, explore more of my matcha creations:
- Matcha Coconut Gummies
- Cold Matcha Latte
- Cold Brew Matcha
- Matcha Pudding
Looking for even more healthy and delicious recipe ideas? Head on over to my Recipe Index. You’ll also discover exclusive recipes and cooking tips in my acclaimed cookbooks: Nom Nom Paleo: Food for Humans (Andrews McMeel Publishing 2013), Ready or Not! (Andrews McMeel Publishing 2017), and the latest, Nom Nom Paleo: Let’s Go! (Andrews McMeel Publishing 2022).
PRINTER-FRIENDLY RECIPE CARD
Matcha Cheesecake (Vegan, Paleo, No-Bake)
This fabulous no-bake matcha cheesecake is paleo, vegan, dairy-free, and gluten-free. It also happens to be super delicious!
Average Rating: 4.84 out of 5 stars (based on 12 votes)
Prep Time: 20 minutes
Cook Time: 20 minutes
Chill Time: 6 hours
Total Time: 6 hours 40 minutes
Yields: 12 servings
Author: Michelle Tam
Print Recipe
Ingredients
Crust
- ½ cup pitted Medjool dates, coarsely chopped
- ½ cup dry roasted and salted whole almonds
- ⅓ cup unsweetened toasted coconut flakes (you can toast raw coconut flakes at 300°F for 3 to 5 minutes or until browned)
- 1 tablespoon coconut oil (optional if using a springform cake pan)
Filling
- ½ cup refined coconut oil, melted
- ⅓ cup full-fat canned coconut milk
- ⅓ cup freshly squeezed lemon juice
- ⅓ cup maple syrup (you can add more if you want it sweeter)
- 2 cups raw unsalted cashews, soaked and drained
- 1 teaspoon vanilla extract
- Pinch sea salt
- 1½ tablespoons matcha
Instructions
- Time to make the no-bake crust! Place the dates in the food processor and pulse a few times to roughly chop up the pieces.
- Then, hold down the “On” button until the pulverized dates form a sticky ball that thwacks against the side of the work bowl.
- Add the dry roasted and salted almonds and toasted coconut flakes to the food processor, and pulse until everything is the size of rice grains. The dough should stick when smushed together with your fingers. If your dates are dry, you can add a teeny bit of water to get the crust to hold together.
- If you’re making the cheesecake in a 7-inch springform pan, grease the bottoms and sides with coconut oil. Add the crust to the greased springform pan and use a piece of parchment to spread it evenly on the bottom. I like to push the crust down with an empty measuring cup to flatten the bottom evenly. (Warning: I know my pictures have the crust coming up the sides, but the crust on the sides can stick to the pan when you try to remove it. You may want to save yourself the time and annoyance of patching the crust on the sides by simply forming the crust on the bottom of the pan and leaving the sides crust-free.)
- Alternatively, grab a 12-cup muffin pan (or two 6-cup muffin pans) and pop in parchment muffin liners. Place a heaping tablespoon of the crust mixture in each muffin liner, and flatten with a piece of parchment paper to form an even crust in each one.
- Take out a powerful blender. Add the liquified coconut oil, coconut milk, lemon juice, maple syrup, soaked and drained cashews, vanilla extract and a pinch of salt to the blender. Blitz until very smooth. Spoon out about ½ cup of batter and set aside.
- Add the matcha to the batter in the blender and blitz until everything is mixed evenly.
- Pour the filling into the springform pan and smooth the top of the cheesecake with an offset spatula. Dollop the reserved cup of matcha-less batter onto the top of the cake in a circular pattern and then use a skewer to swirl it around in tighter circles to make a pretty design.
- Making mini cheesecakes in a muffin pan? Spoon about 2 tablespoons of the matcha filling into each muffin liner, smooth the surface of each one, and then dollop a heaping teaspoon of the reserved batter on top. Use a wooden skewer to swirl the batter around to make a marble pattern.
- Cover the pan(s) with plastic wrap and freeze for at least 4 hours or until set.
- Ready to eat? You can thaw the cheesecake in the fridge for about 2 hours before serving, or you can leave it out on the counter for 10-15 minutes before dessert time. Pop it out of the springform pan and slice and serve! Or just pop out an individual mini matcha cheesecake!
Notes
- Soaking the cashews does take 2 to 4 hours with room temperature water, but you can speed up the process by soaking ’em in 4 cups of boiling water for 10-30 minutes.
- Don’t have time to use the soaked cashews right away? Rinse and drain them and then store them in a sealed container in the fridge for up to 4 days.
- This vegan cheesecake is no-bake, but it’s not technically raw because I do use toasted almonds and coconuts in the crust. I think they taste better toasted! And use dry roasted and salted almonds—the salt balances out the sticky sweetness of the dates.
- I prefer using ceremonial grade matcha for this recipe due to its bright, vibrant green color, but if you don’t care about your cheesecake ending up a duller shade of green/brown, you can definitely substitute culinary grade matcha.
- This cheesecake is mildly sweet and matcha forward. If you don’t like matcha as much as I do, you can start with only 1 tablespoon and increase to taste. You can also increase the amount of maple syrup if you want it sweeter.
Nutrition
Nutrition information is automatically calculated, so should only be used as an approximation.