
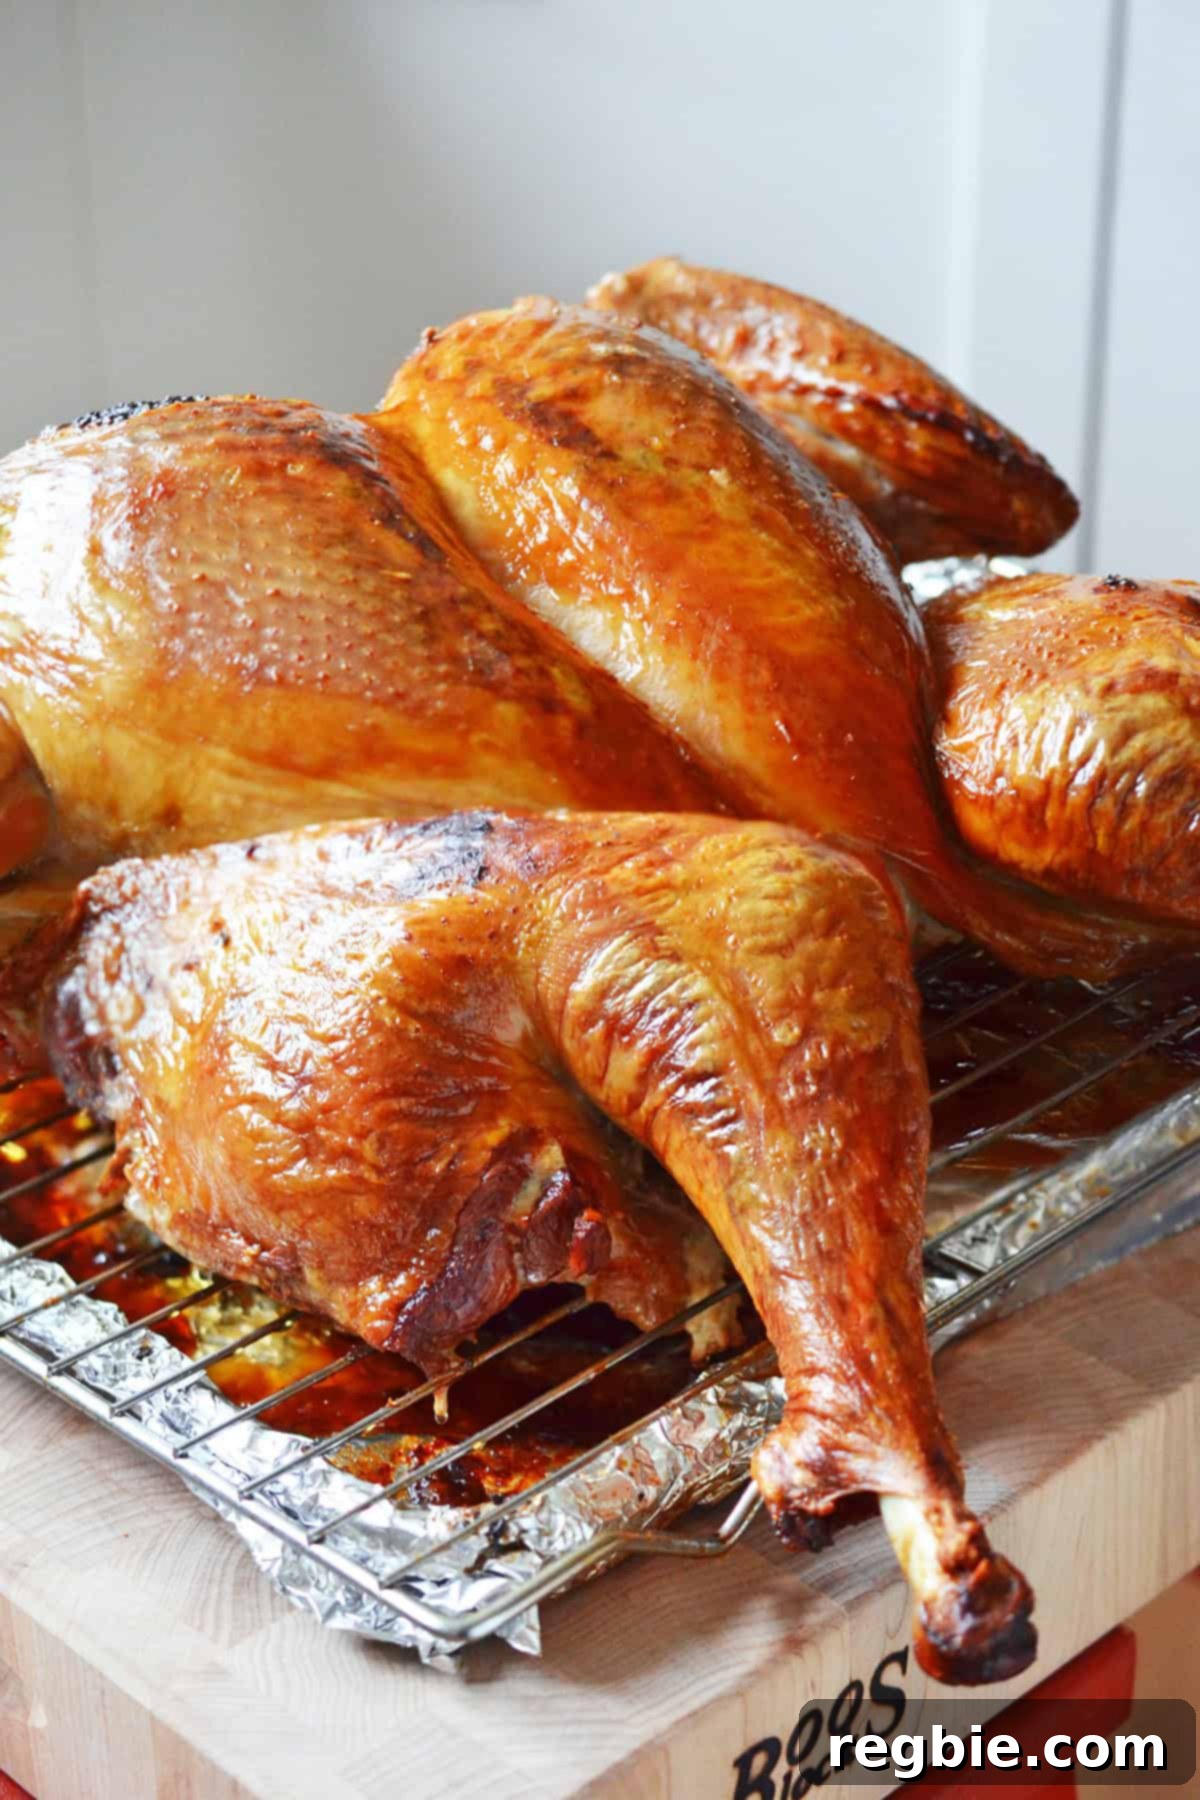
Welcome to the definitive guide for mastering the spatchcock turkey! Prepare to transform your holiday feast with this foolproof method, resulting in the juiciest meat and the crispiest skin imaginable. Say goodbye to dry, unevenly cooked birds and hello to your most delicious Thanksgiving turkey yet, often known as “Butterflied Big Bird” for its impressive flat presentation.
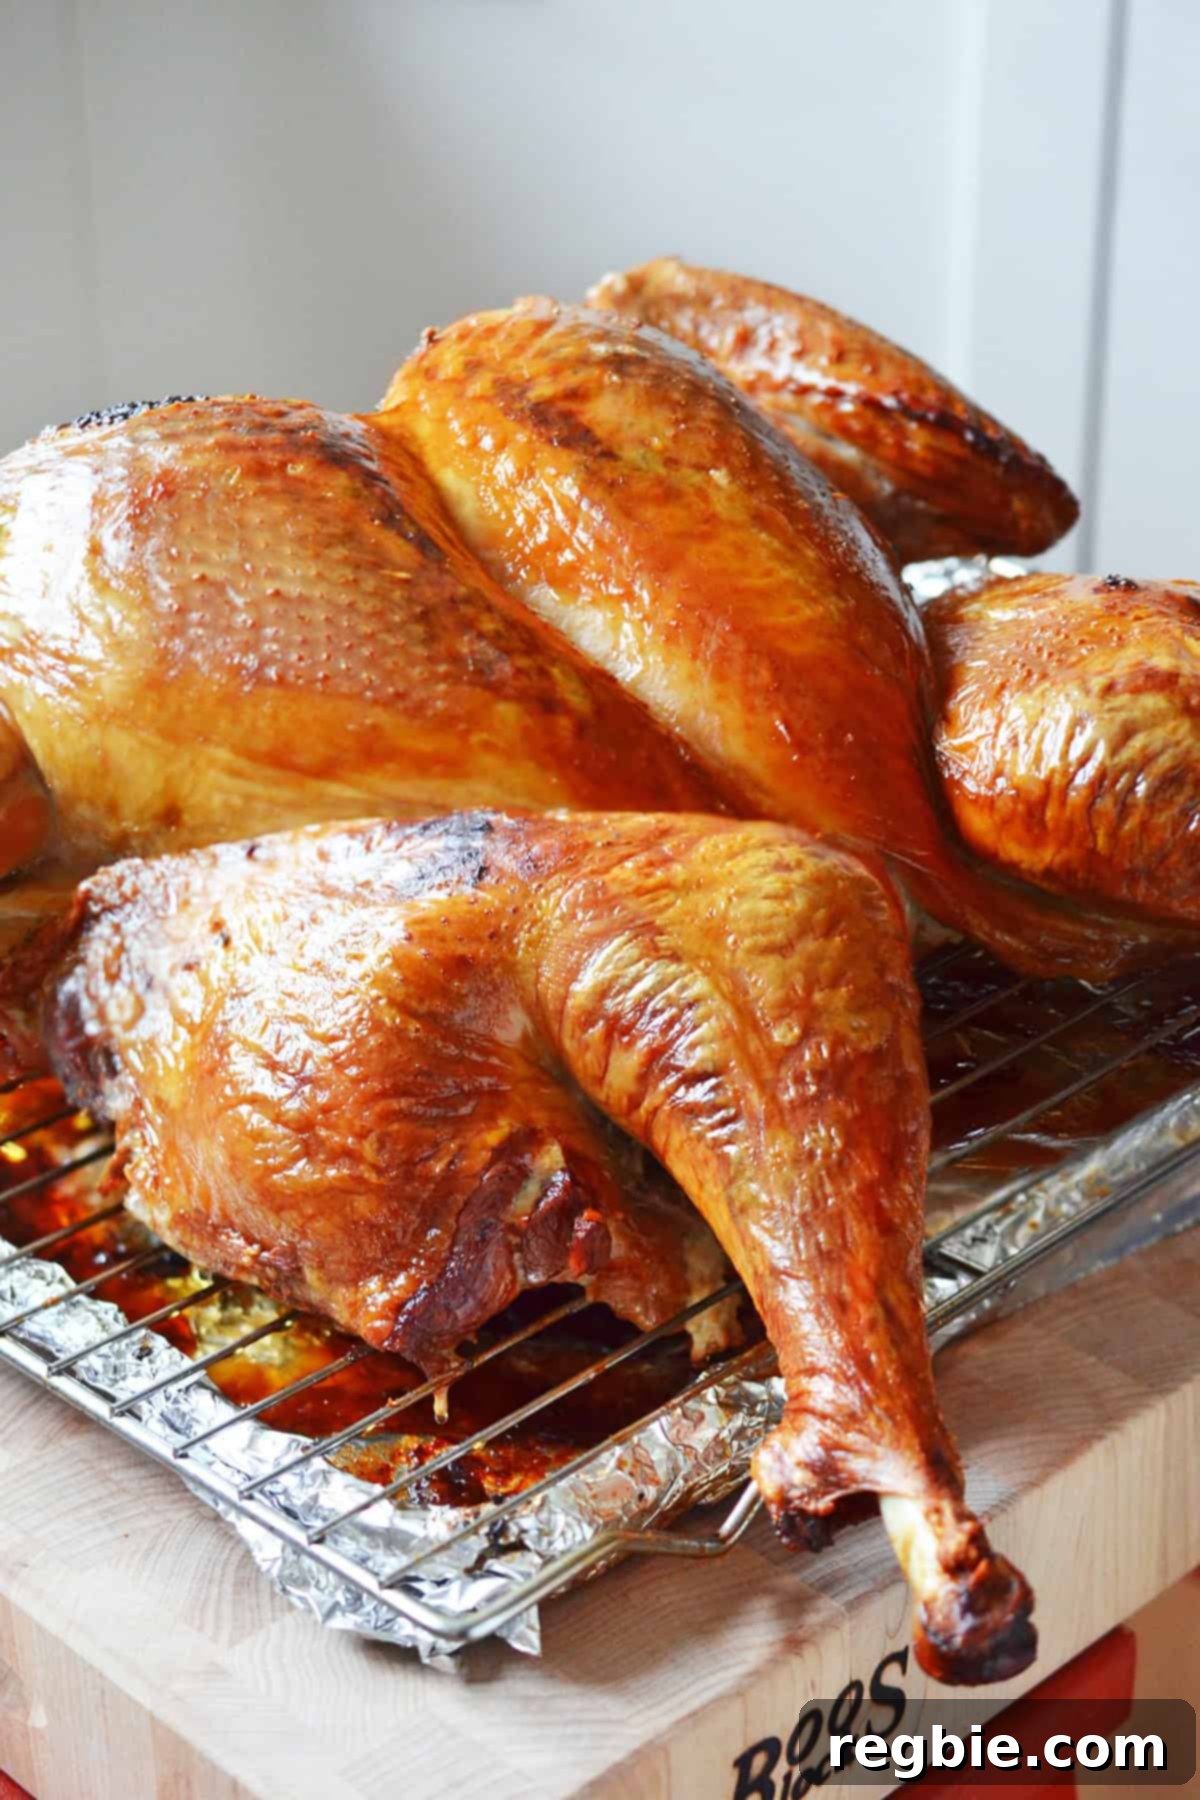
Table of Contents
- What is a Spatchcock Turkey?
- Why Spatchcock Your Thanksgiving Turkey? (Benefits)
- Don’t Be Afraid to Spatchcock!
- Essential Tools for Spatchcocking Success
- Pick the Perfect Bird
- Gear Up Your Kitchen
- Timing is Everything: Your Turkey Prep Calendar
- The Ultimate Roasting Method
- Ingredients for a Flawless Spatchcock Turkey
- How to Spatchcock a Turkey (Step-by-Step Guide)
- Serving Suggestions
- How to Save Leftovers
- More Thanksgiving Recipes
- Printer-Friendly Recipe Card
What is a Spatchcock Turkey?
A spatchcock turkey, also widely known as a butterflied turkey, is a game-changing culinary technique that involves removing the turkey’s backbone and flattening the bird. This seemingly simple alteration profoundly impacts the cooking process and the final outcome of your holiday meal. By laying the turkey flat, you achieve a more uniform thickness across the entire bird, ensuring that the delicate breast meat and the heartier thigh and leg meat cook simultaneously and perfectly. No more agonizing over dry breast meat while waiting for the thighs to reach temperature!
The term “spatchcock” itself sounds sophisticated, but the method is incredibly straightforward and accessible for home cooks of all skill levels. It’s a centuries-old technique, traditionally applied to smaller fowl, now revitalized for the modern Thanksgiving table. The result is not just a faster cooking time, but also an unparalleled golden, crispy skin over every inch of the turkey, along with unbelievably juicy and tender meat. Once you experience the magic of spatchcocking, you’ll wonder why you ever cooked a turkey any other way.
Why Spatchcock Your Thanksgiving Turkey? (Benefits)
Choosing to spatchcock your turkey for Thanksgiving offers a myriad of benefits that will elevate your holiday cooking experience and impress your guests:
- Even Cooking, Every Time: The most significant advantage is the superior, even cooking. When a turkey is roasted whole, the breast meat, being leaner, tends to cook faster and dry out before the darker, fattier thigh meat is done. Flattening the bird ensures all parts are exposed to the heat more uniformly, allowing both breast and thighs to reach their perfect doneness simultaneously.
- Remarkably Faster Roasting: Spatchcocking significantly reduces cooking time, often by 30-50% compared to a traditional whole bird. This means less time in the kitchen and more time enjoying your family and friends. A 12-14 pound turkey can be perfectly roasted in as little as 80-90 minutes.
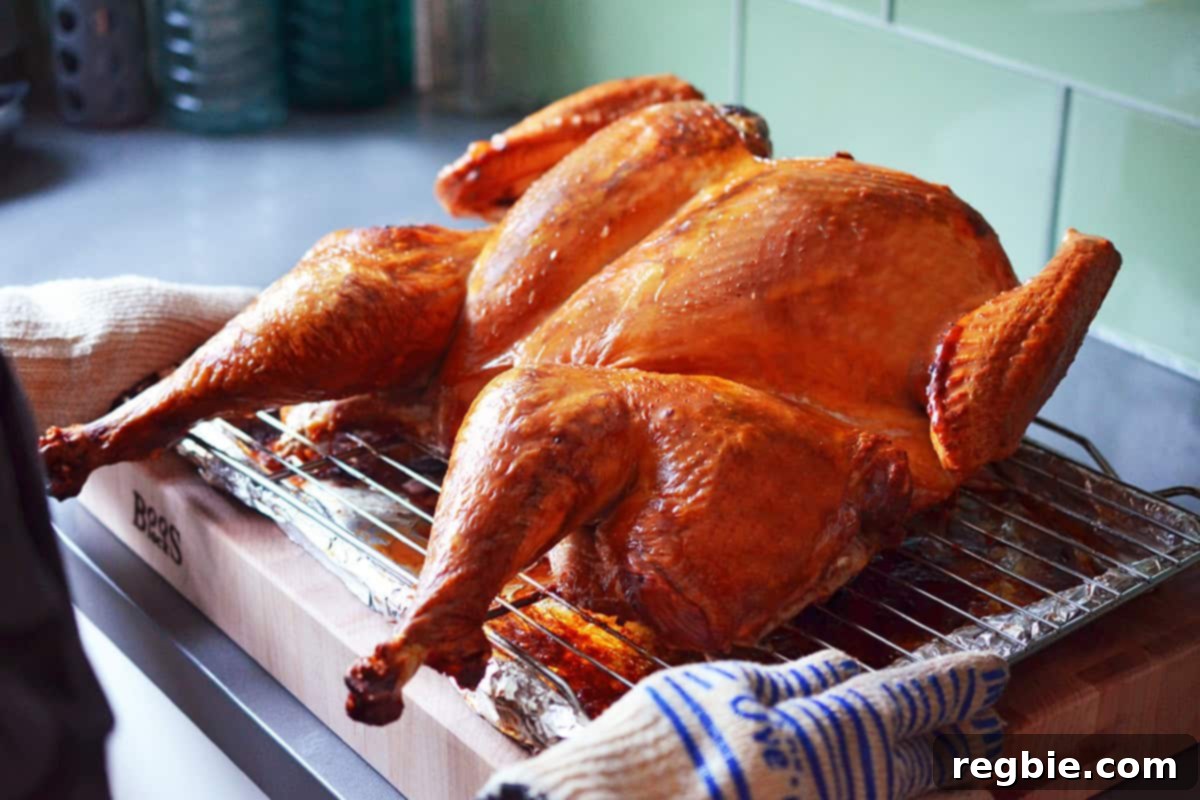
- Irresistibly Crispy Skin: With the turkey laid flat, its entire skin surface is exposed directly to the oven’s radiant heat. This maximizes browning and crisping, creating that coveted, golden-brown, crackling skin that everyone fights over. Paired with our herb butter, it’s truly a delight.
- Juicier, More Flavorful Meat: Even cooking prevents overcooked, dry spots, leading to consistently moist and tender meat throughout. The dry-brining process, combined with the herb butter, infuses every fiber with incredible flavor.
- Easier Carving: A flattened turkey is much simpler to carve. The breast is easily separated from the rib cage, and the legs and thighs detach with minimal effort, making for a less stressful presentation at the dinner table.
Don’t Be Afraid to Spatchcock!
Every year, the thought of roasting a whole turkey can induce anxiety, even in seasoned home cooks. The pressure to deliver a perfectly cooked, succulent bird for a holiday gathering is immense, and the fear of a dry, unappetizing turkey is real. Nobody wants to face critical in-laws or disappointed guests because of a kitchen mishap.
But here’s the secret: spatchcocking is your ultimate weapon against turkey troubles. This method is incredibly forgiving and surprisingly easy. While the idea of cutting out a turkey’s backbone might sound intimidating, it simply requires the right tools and a little confidence. Once you’ve done it, you’ll realize it’s far less daunting than trussing or wrestling with a conventional roast. This foolproof approach will ensure your turkey is the star of the show, earning you rave reviews and keeping even the toughest critics in your good graces.
Essential Tools for Spatchcocking Success
To ensure a smooth and successful spatchcocking experience, having the right equipment on hand is key. These tools will make the process not only easier but also more efficient, leading to a perfectly roasted turkey.
Step One: Pick the Perfect Bird
Selecting the right turkey is the foundation of a delicious meal. For comprehensive advice on choosing your bird, consider resources like Serious Eats’ guide to buying turkey, which covers everything from fresh vs. frozen to organic options.
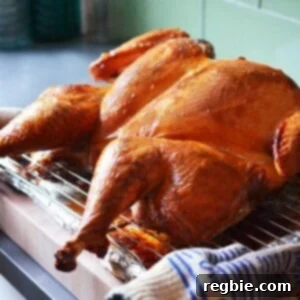
A crucial lesson learned from experience: don’t get overly ambitious with size. My first test turkey for this recipe was a massive 18-pounder. While it roasted beautifully and was incredibly flavorful (it’s the one featured in many photos for this post!), it barely squeezed into my oven. For most home ovens and standard roasting pans, a much more manageable 12-14 pound turkey is ideal. This size typically fits comfortably on a roasting tray and cooks efficiently.
Step Two: Gear Up Your Kitchen
Precision and safety are paramount when preparing your turkey. Here are the essential tools you’ll need:
- Sharp, Sturdy Poultry Shears: These are non-negotiable. Forget trying to use a knife; quality poultry shears are designed to cut through thin bones and cartilage with ease, making backbone removal quick and effortless, almost like a skilled surgeon. We recommend this sturdy pair.
- Oven-Proof Wire Rack and Baking Sheet/Broiling Pan: A sturdy wire rack placed over a large baking sheet or broiling pan is essential. This setup allows air to circulate around the entire turkey, promoting even cooking and ensuring that crispy skin develops on both the top and bottom. The pan underneath catches all the delicious drippings for gravy.
- Accurate Meat Thermometer: This is arguably the most critical tool for turkey success. To avoid overcooking or undercooking your expensive holiday bird and disappointing your guests, an accurate thermometer is indispensable. An instant-read thermometer is great for quick checks, but for ultimate convenience, an in-oven probe thermometer allows you to monitor the temperature without repeatedly opening the oven door, maintaining a consistent cooking environment.
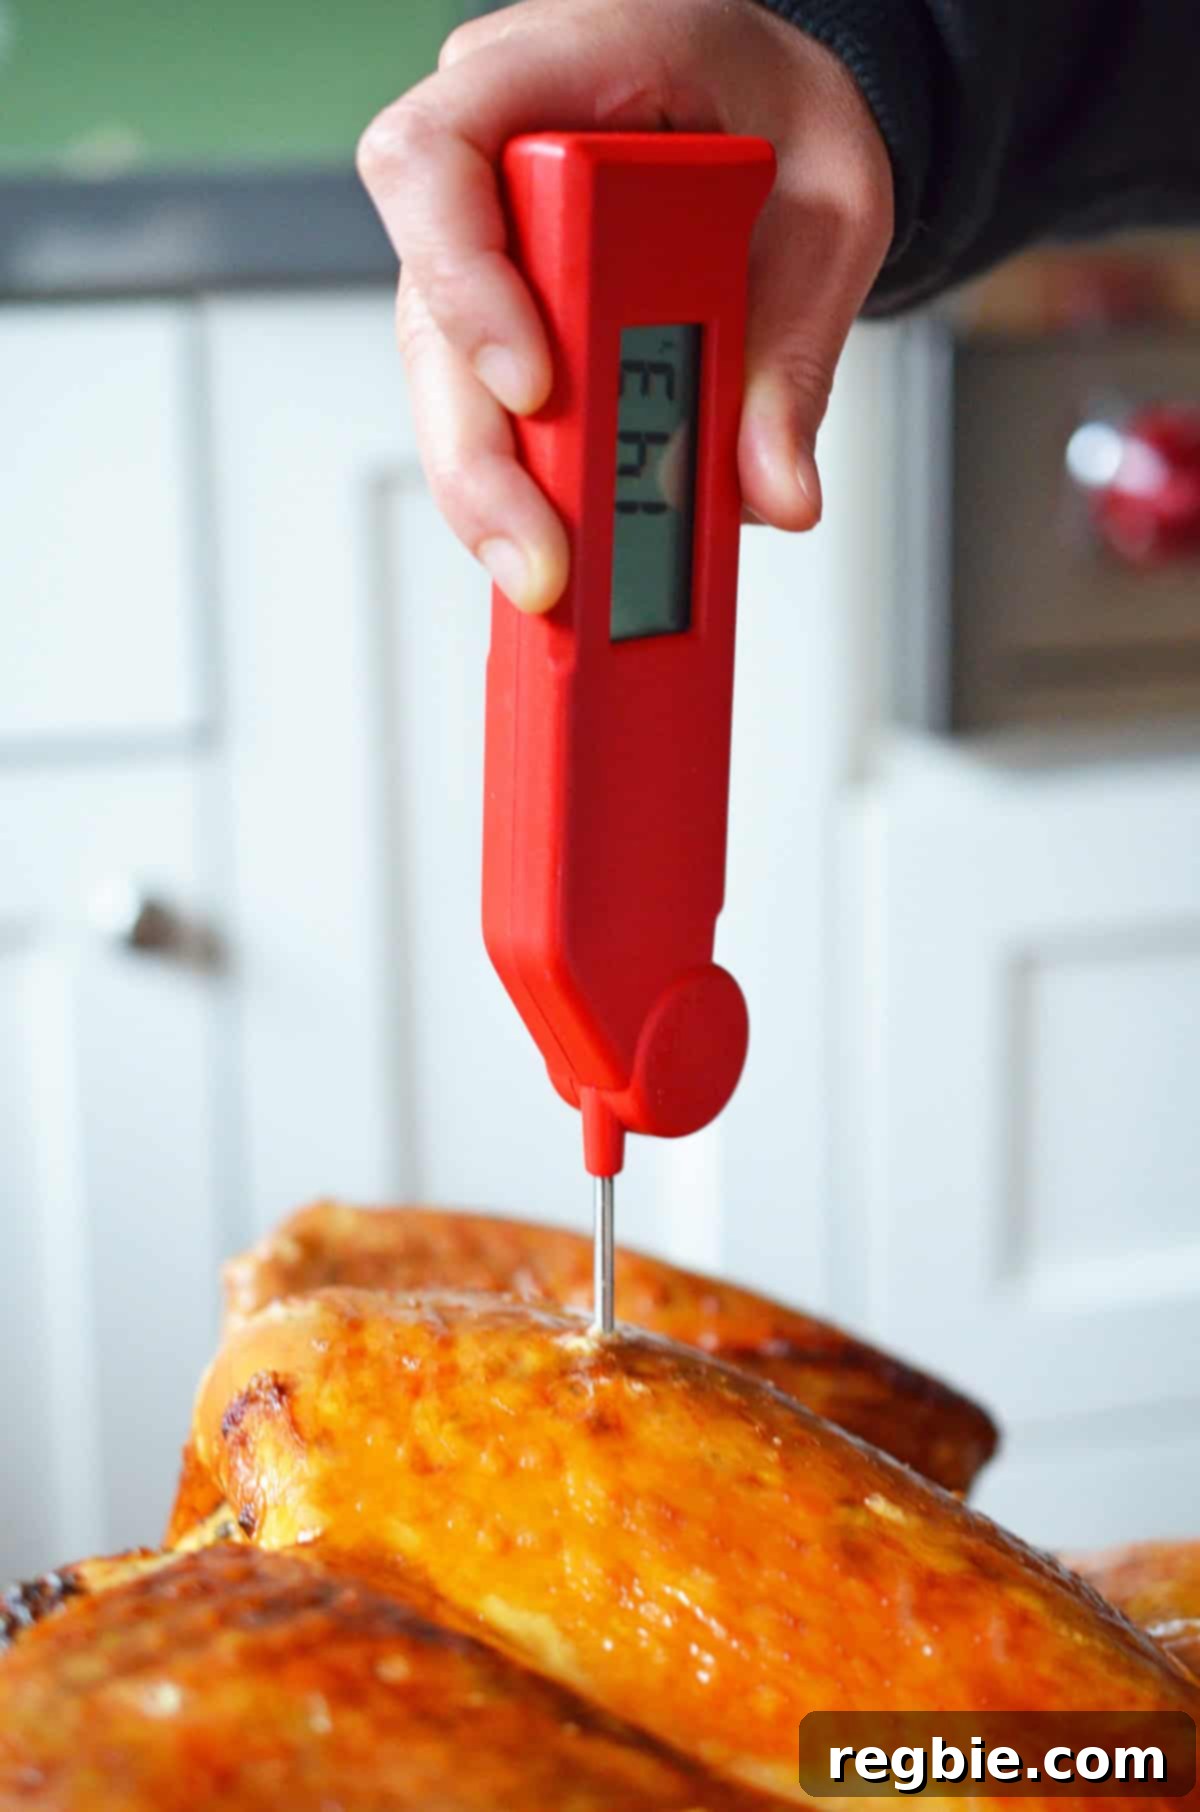
Seriously, do not skip the meat thermometer. It’s the only reliable way to ensure your turkey is perfectly cooked to a safe temperature without becoming dry.
Step Three: Timing is Everything: Your Turkey Prep Calendar
Successful Thanksgiving turkey preparation starts days in advance. A well-planned schedule ensures everything is ready when it needs to be, reducing stress on the big day.
- Thawing (3-4 Days Prior): If you’re using a frozen turkey, begin thawing it in the refrigerator on the Friday or Saturday before Thanksgiving. Allow approximately 24 hours for every 4-5 pounds of turkey. A slowly thawed turkey retains more moisture and cooks more evenly. Never thaw at room temperature.
- Dry Brining (1-2 Days Prior): After thawing, it’s time for the dry brine. This essential step involves liberally seasoning the turkey with salt and letting it rest in the refrigerator, uncovered or loosely covered, for 24 to 48 hours. Dry brining draws moisture out of the skin, making it extra crispy, and allows the salt to penetrate the meat, seasoning it from within and ensuring juiciness. This is a game-changer for flavor and texture.
- Resting Before Roasting (Thanksgiving Morning): On Thanksgiving Day, remove the dry-brined turkey from the refrigerator at least 30 minutes, or up to an hour, before roasting. Allowing it to come closer to room temperature helps it cook more evenly and efficiently.
- Post-Roast Resting (30 Minutes After Cooking): Once your turkey is out of the oven, it must rest. This critical step allows the juices to redistribute throughout the meat, preventing them from escaping when you carve. Aim for at least 30 minutes of resting time before you begin carving. This means if you want to serve by early afternoon, you’ll need to get the turkey in the oven in the morning.
Step Four: The Ultimate Roasting Method
This “Butterflied Big Bird” recipe seamlessly blends time-honored techniques with modern culinary science to deliver an unforgettable turkey. It draws inspiration from Judy Rodgers’ renowned dry-brining methods and J. Kenji López-Alt’s brilliant Crisp-Skinned Butterflied Roast Turkey, enhanced with my own aromatic herb butter blend.
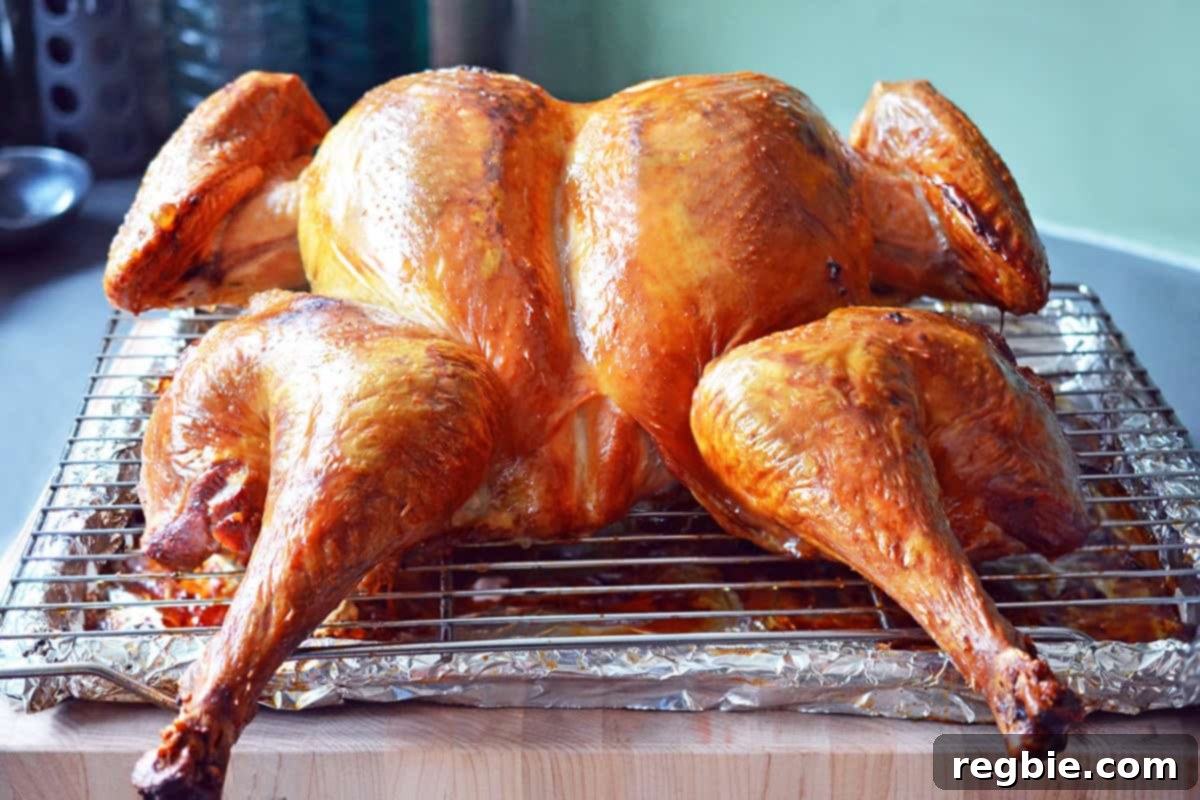
The turkey undergoes a thorough spatchcocking process, followed by a generous dry brine with kosher salt. It then rests in the refrigerator, loosely covered, for 24 to 48 hours to fully absorb the seasoning. Just before roasting, a luscious, herb-infused compound butter (or ghee, duck fat, or schmaltz for a different flavor profile) is meticulously applied both under and over the skin, ensuring every bite is moist, tender, and bursting with herby goodness. This meticulous preparation guarantees crispy skin and tender, flavorful meat.
Ingredients for a Flawless Spatchcock Turkey
- 1 (12-14 pound) Turkey: Opt for a fresh or fully thawed turkey. This size is ideal for fitting comfortably in most home ovens and roasting pans, ensuring even cooking. Avoid turkeys much larger than this to prevent overcrowding and uneven roasting.
- ¼ cup Diamond Crystal Kosher Salt: This specific brand of kosher salt is crucial for dry brining due to its lighter, flakier crystal structure compared to other salts. Its unique texture allows for liberal and even application without making the turkey overly salty. Dry-brining early and generously is the foundational step for achieving a truly flavorful and juicy turkey.
- ½ cup Softened Butter (or ghee, duck fat, or schmaltz): Softened unsalted butter forms the base of our herb compound butter, adding richness and promoting golden-brown, crispy skin. For those with dietary restrictions or seeking alternative flavors, ghee (clarified butter), duck fat, or schmaltz (rendered chicken fat) are excellent substitutes, each lending its own unique depth of flavor.
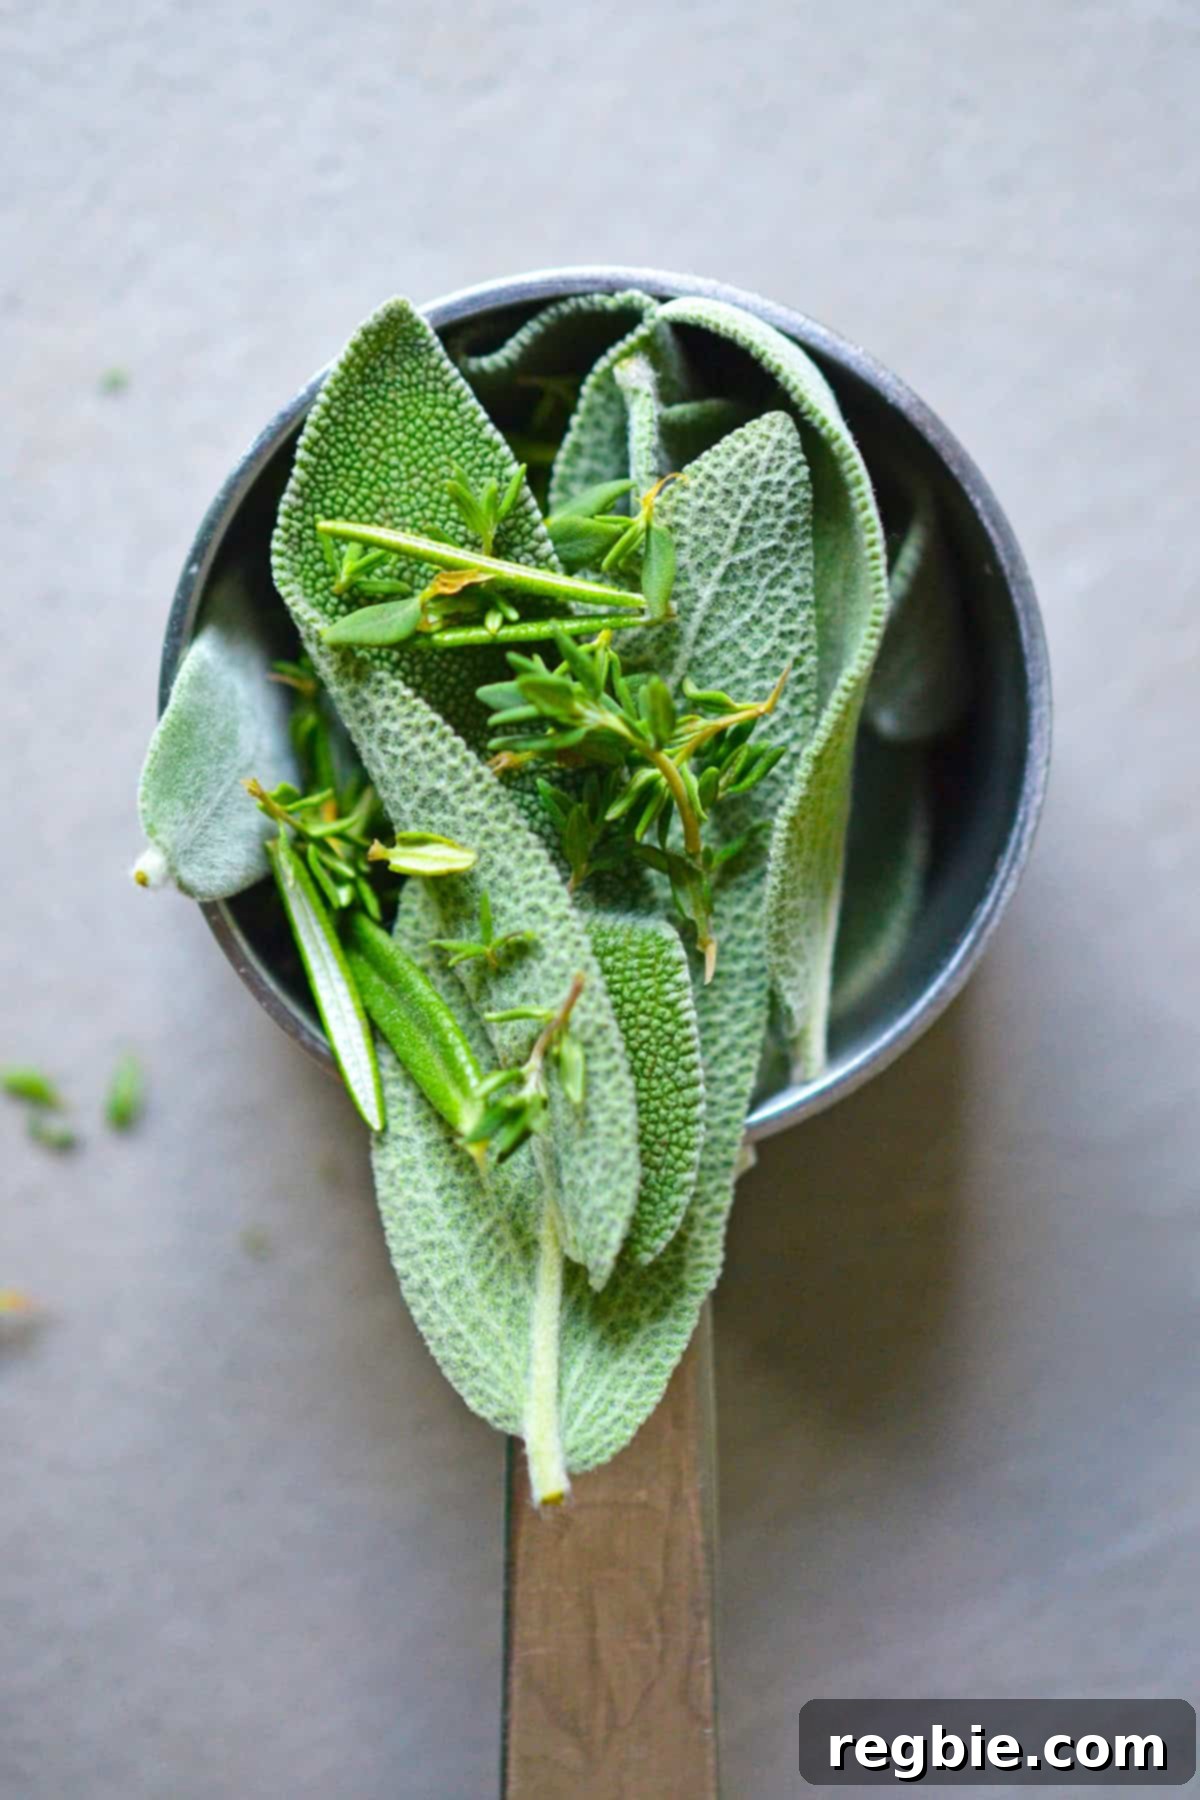
- ¼ cup Blend of Fresh Sage, Thyme, and Rosemary Leaves, minced: These classic Thanksgiving herbs create an aromatic and savory compound butter. Mincing them finely allows their essential oils to infuse evenly into the butter, which then permeates the turkey meat, delivering fragrant, complex flavors that define the holiday season. The exact ratio can be adjusted to personal preference, though a slightly heavier hand with sage and thyme often yields a less “medicinal” flavor than an excess of rosemary.
How to Spatchcock a Turkey (Step-by-Step Guide)
Follow these detailed instructions to expertly spatchcock and roast your turkey, ensuring a succulent and visually stunning centerpiece for your holiday table.
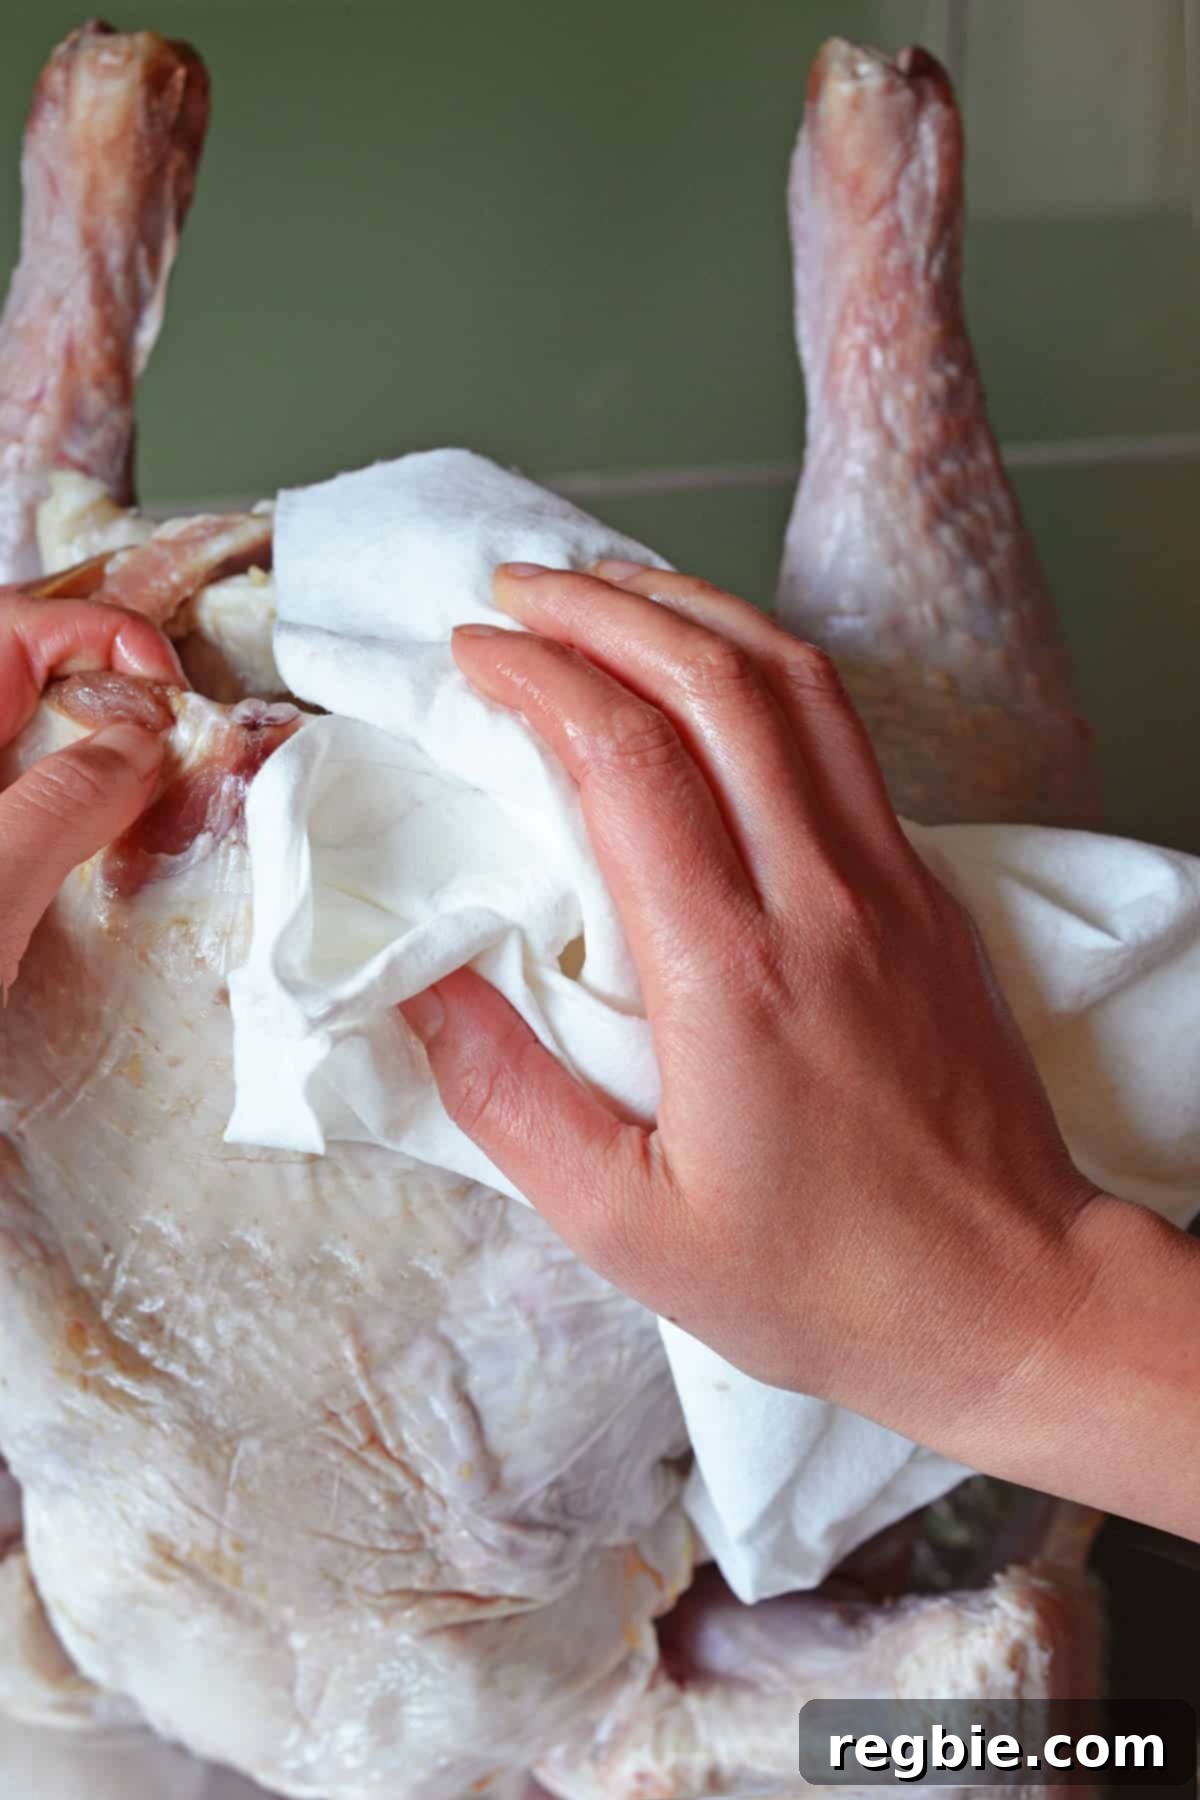
- Prepare the Turkey: Begin by removing the turkey’s giblets and neck from the cavity. Set these aside to use for making a rich gravy or a nourishing bone broth. Thoroughly pat the entire turkey, inside and out, with paper towels until it is completely dry. This step is critical for achieving crispy skin.

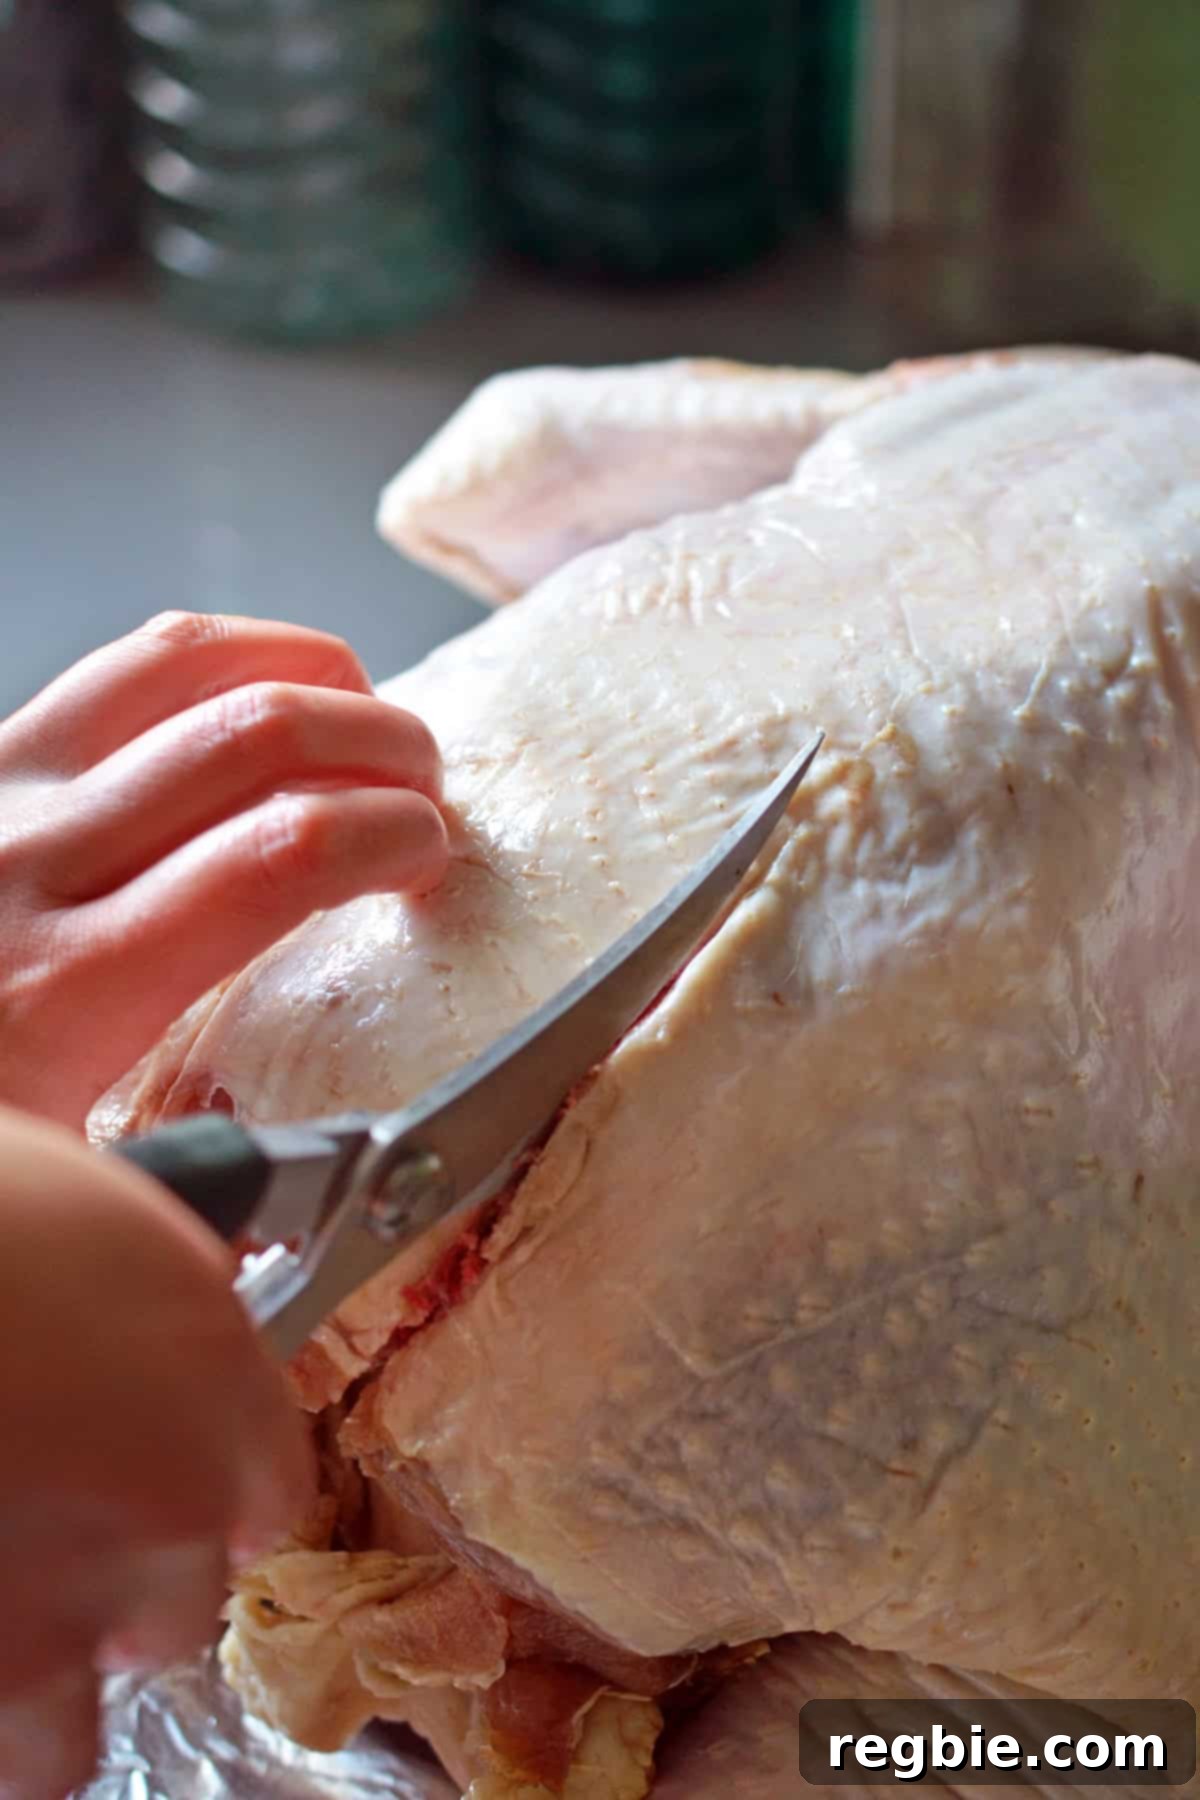
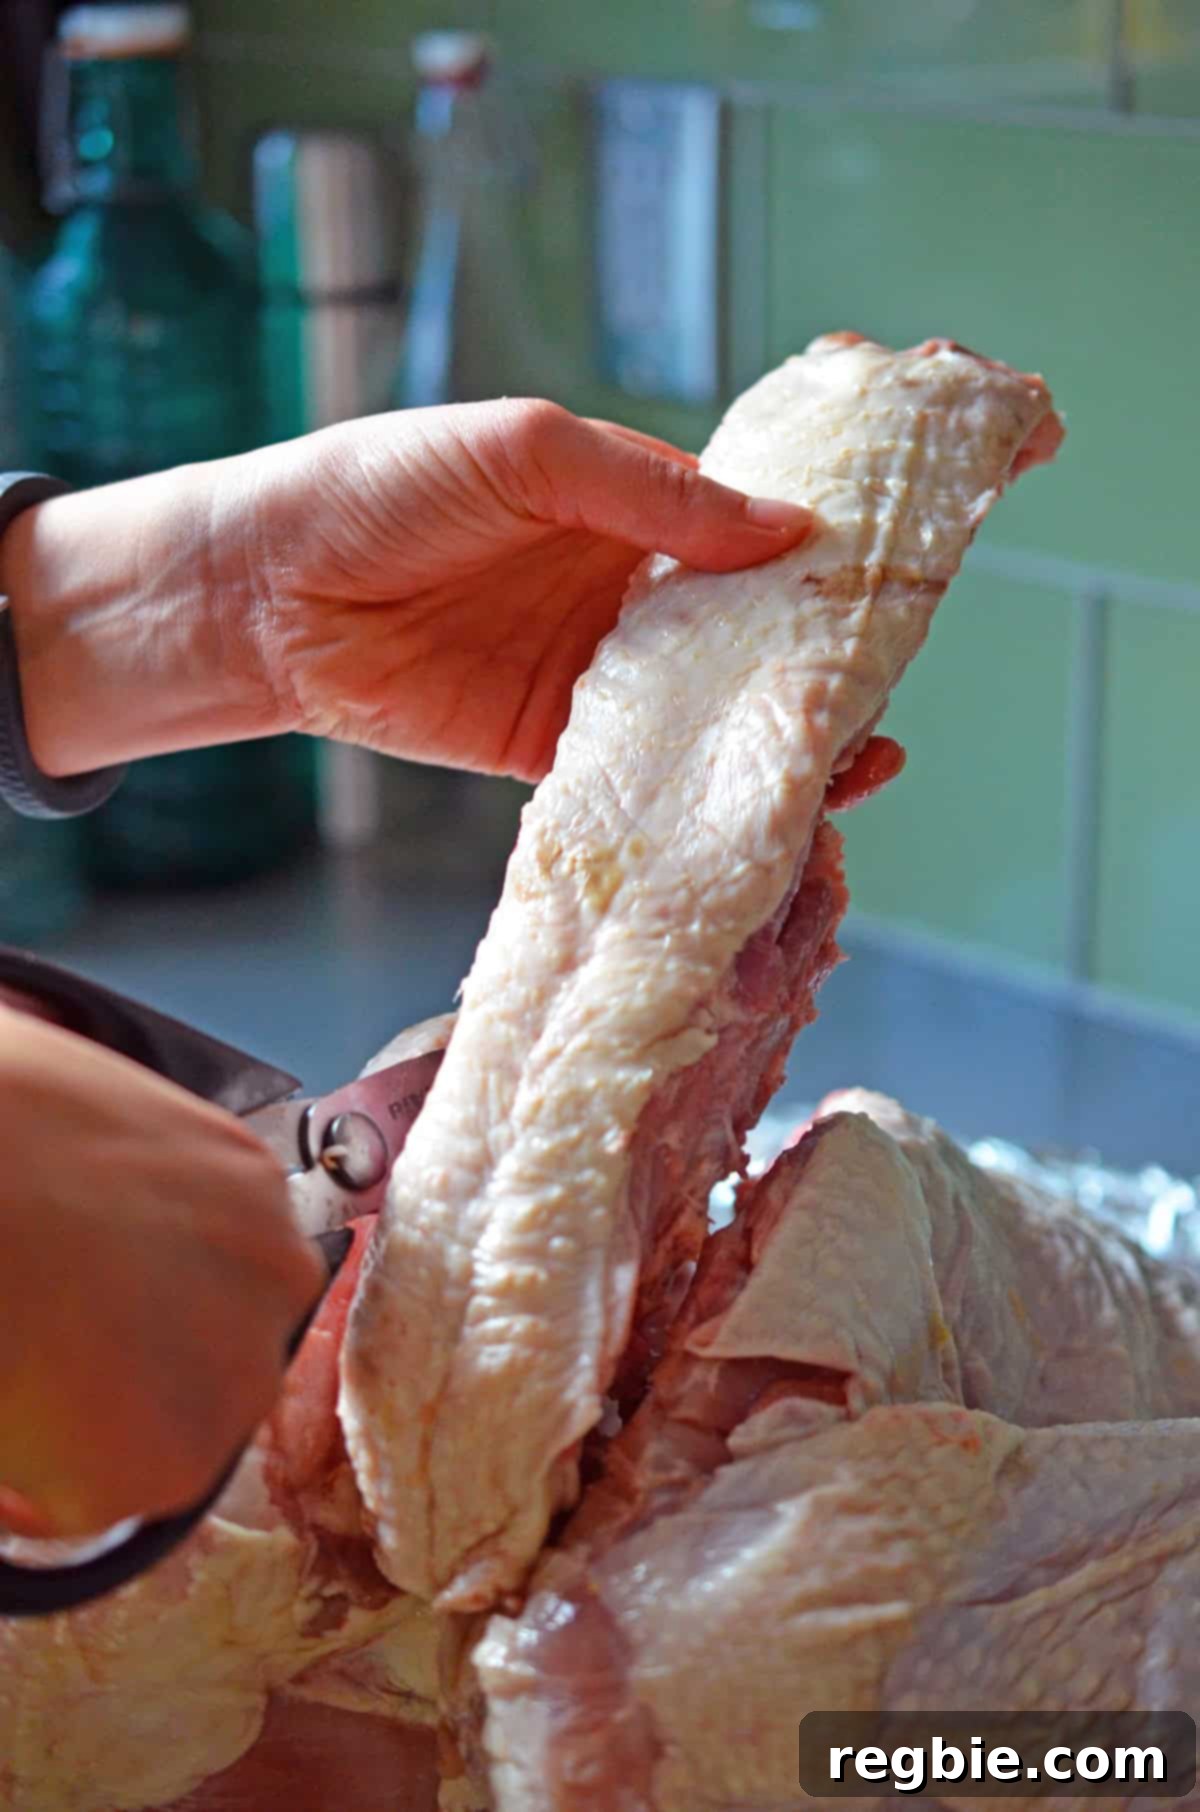
- Remove the Backbone: Place the turkey breast-side down on a large cutting board. Take your sharp, sturdy kitchen shears and begin cutting along one side of the backbone, starting from the tail-end open cavity and continuing all the way to the neck opening.
- Completely Remove the Spine: Once you’ve cut through one side, repeat the process on the other side of the backbone. Remove the entire spine and add it to your reserved neck and giblets for gravy or broth.
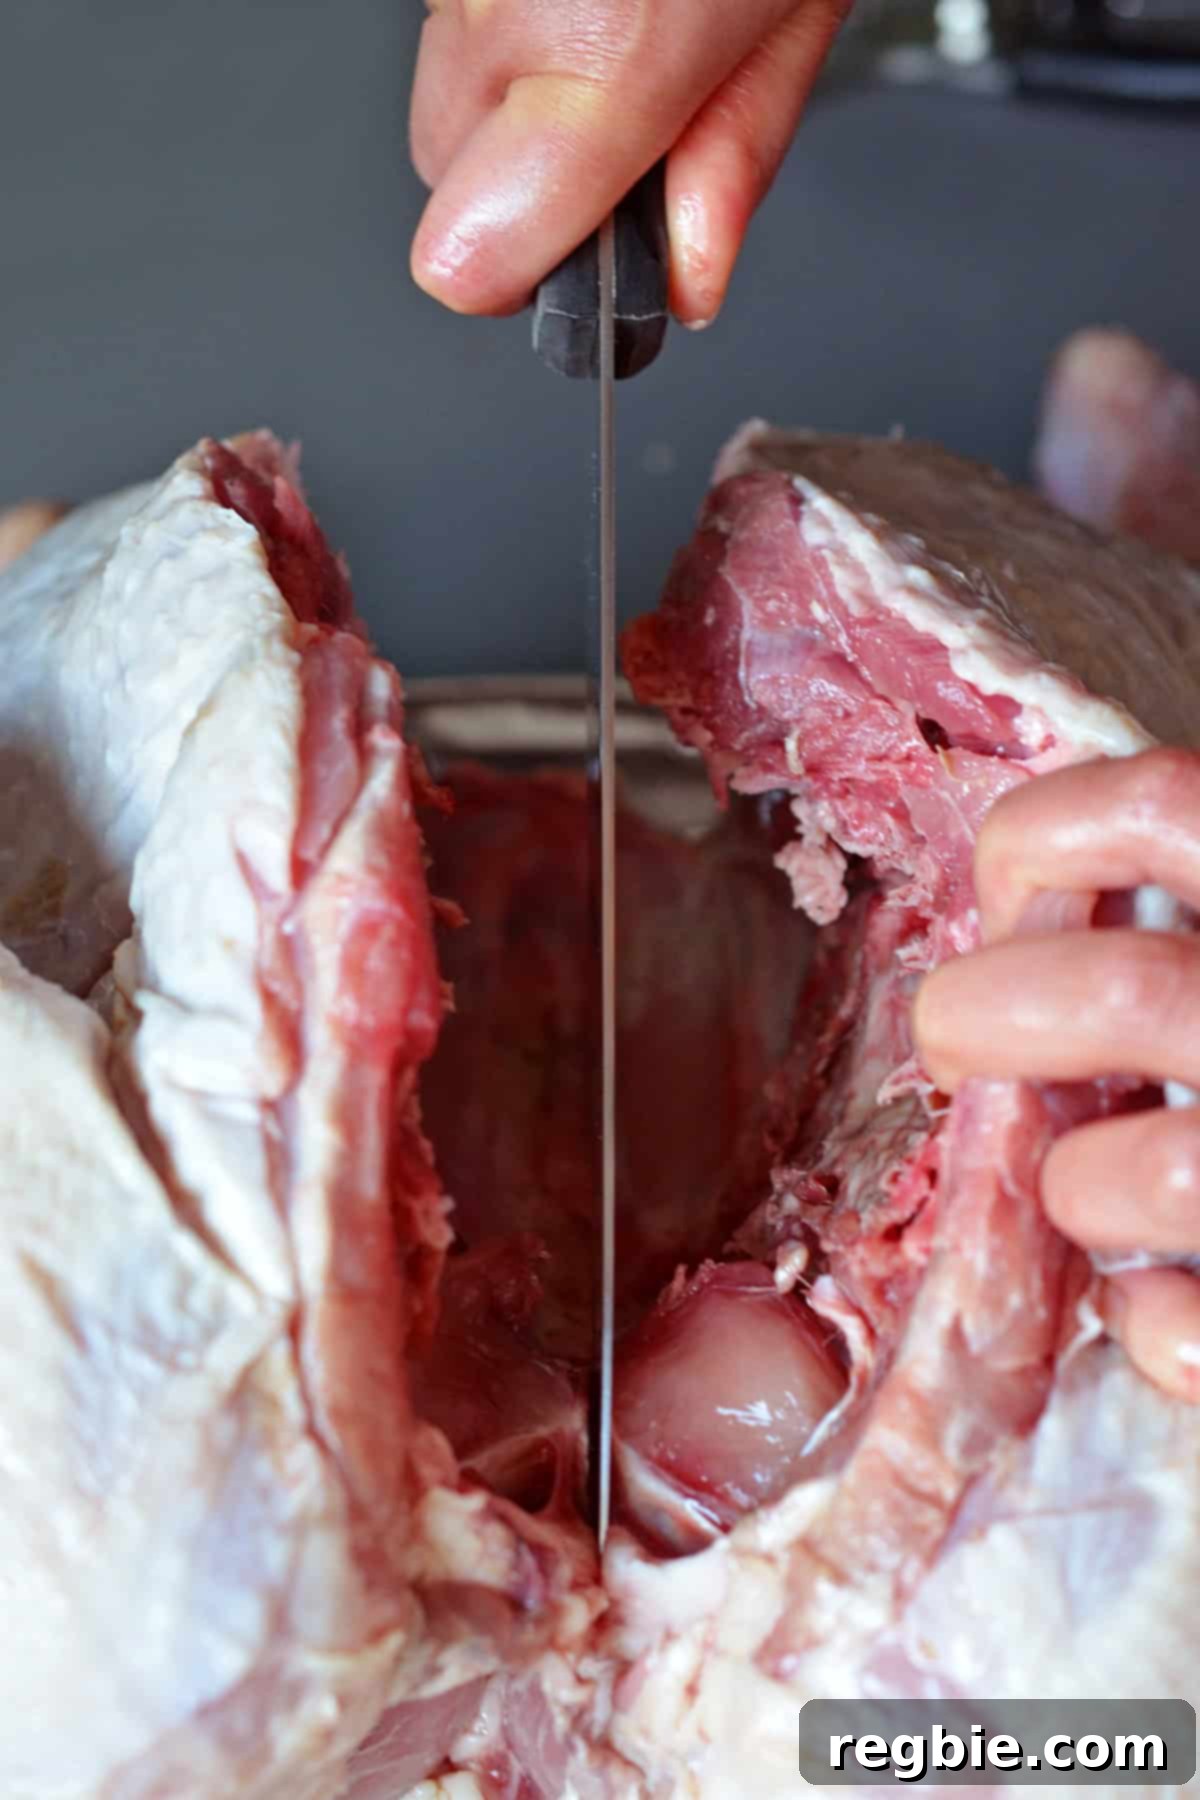
- Flatten the Bird: Flip the turkey over so it’s breast-side up. Using a sharp knife, make a shallow incision through the cartilage that runs along the underside of the breastbone. This small cut will help the turkey lie perfectly flat.
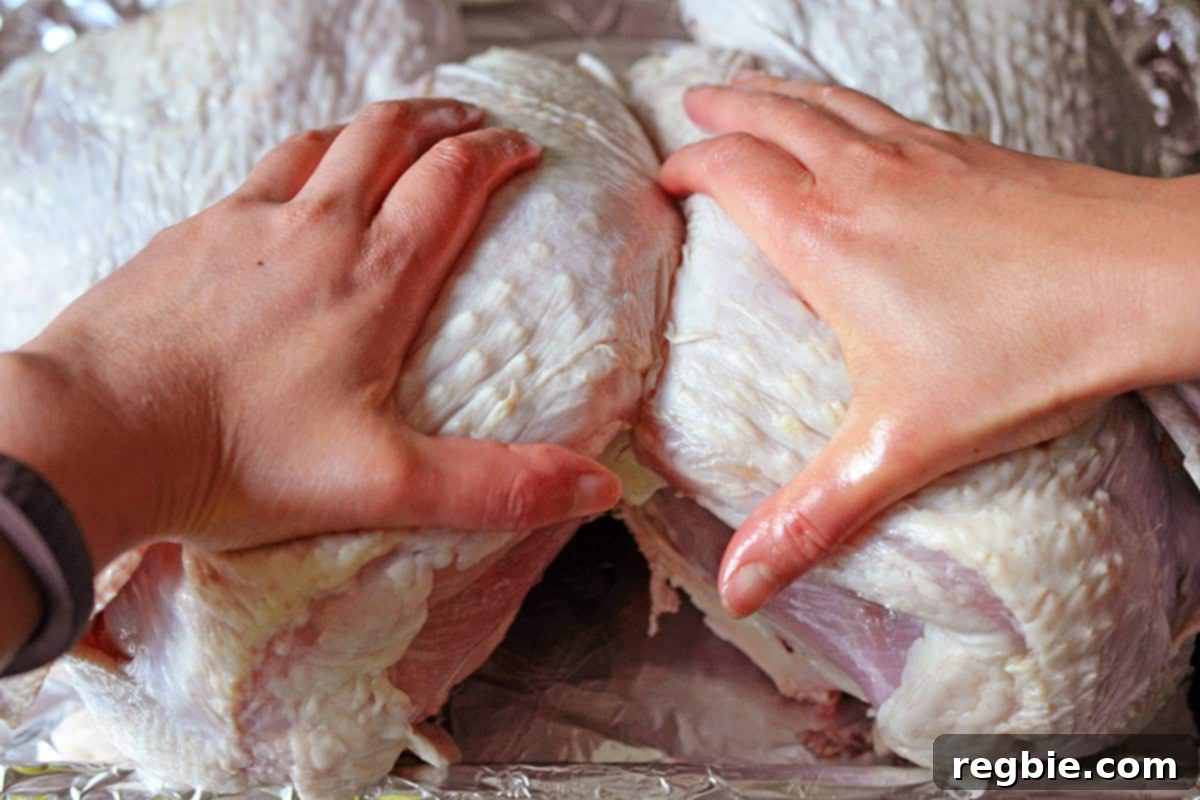
- Press Flat: Now, with firm pressure, use the heels of your hands to push down on the breast area, spreading the turkey flat like an open book. You should hear a satisfying crack as the breastbone flattens.
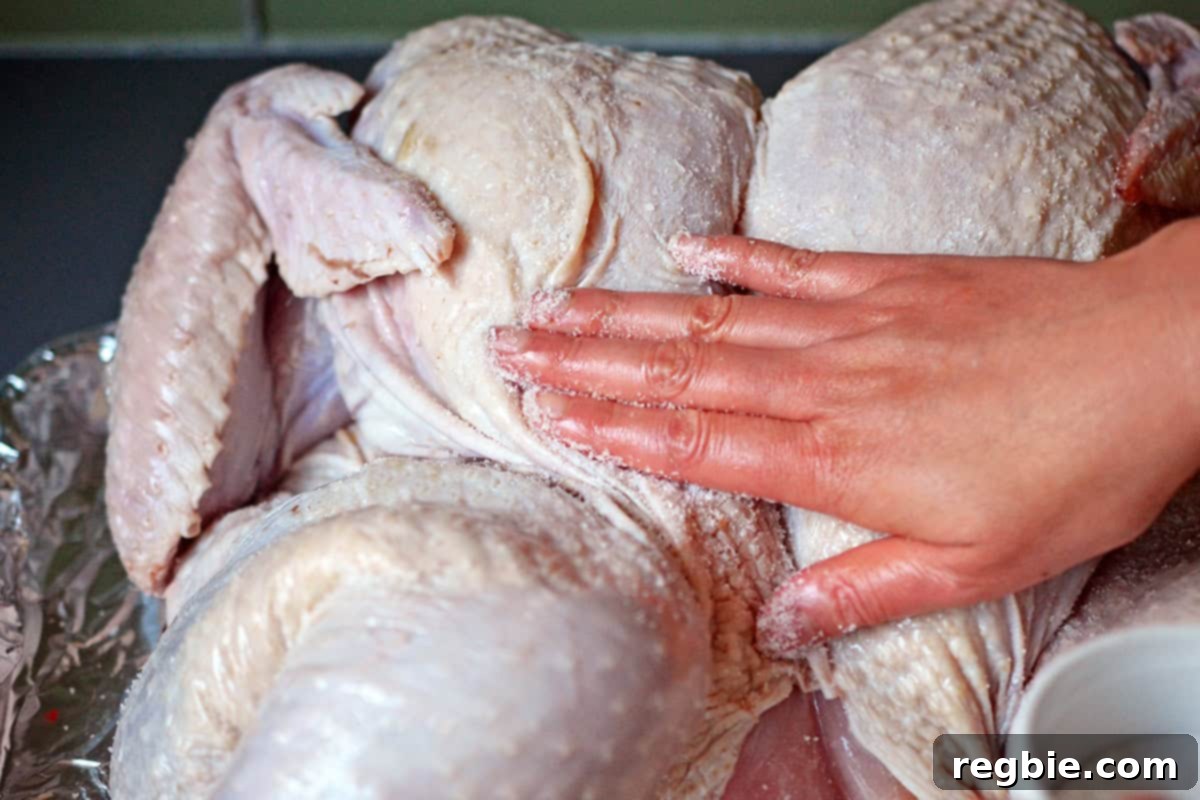
- Dry Brine the Turkey: It’s time to salt! Generously season the entire surface of the turkey with Diamond Crystal kosher salt.
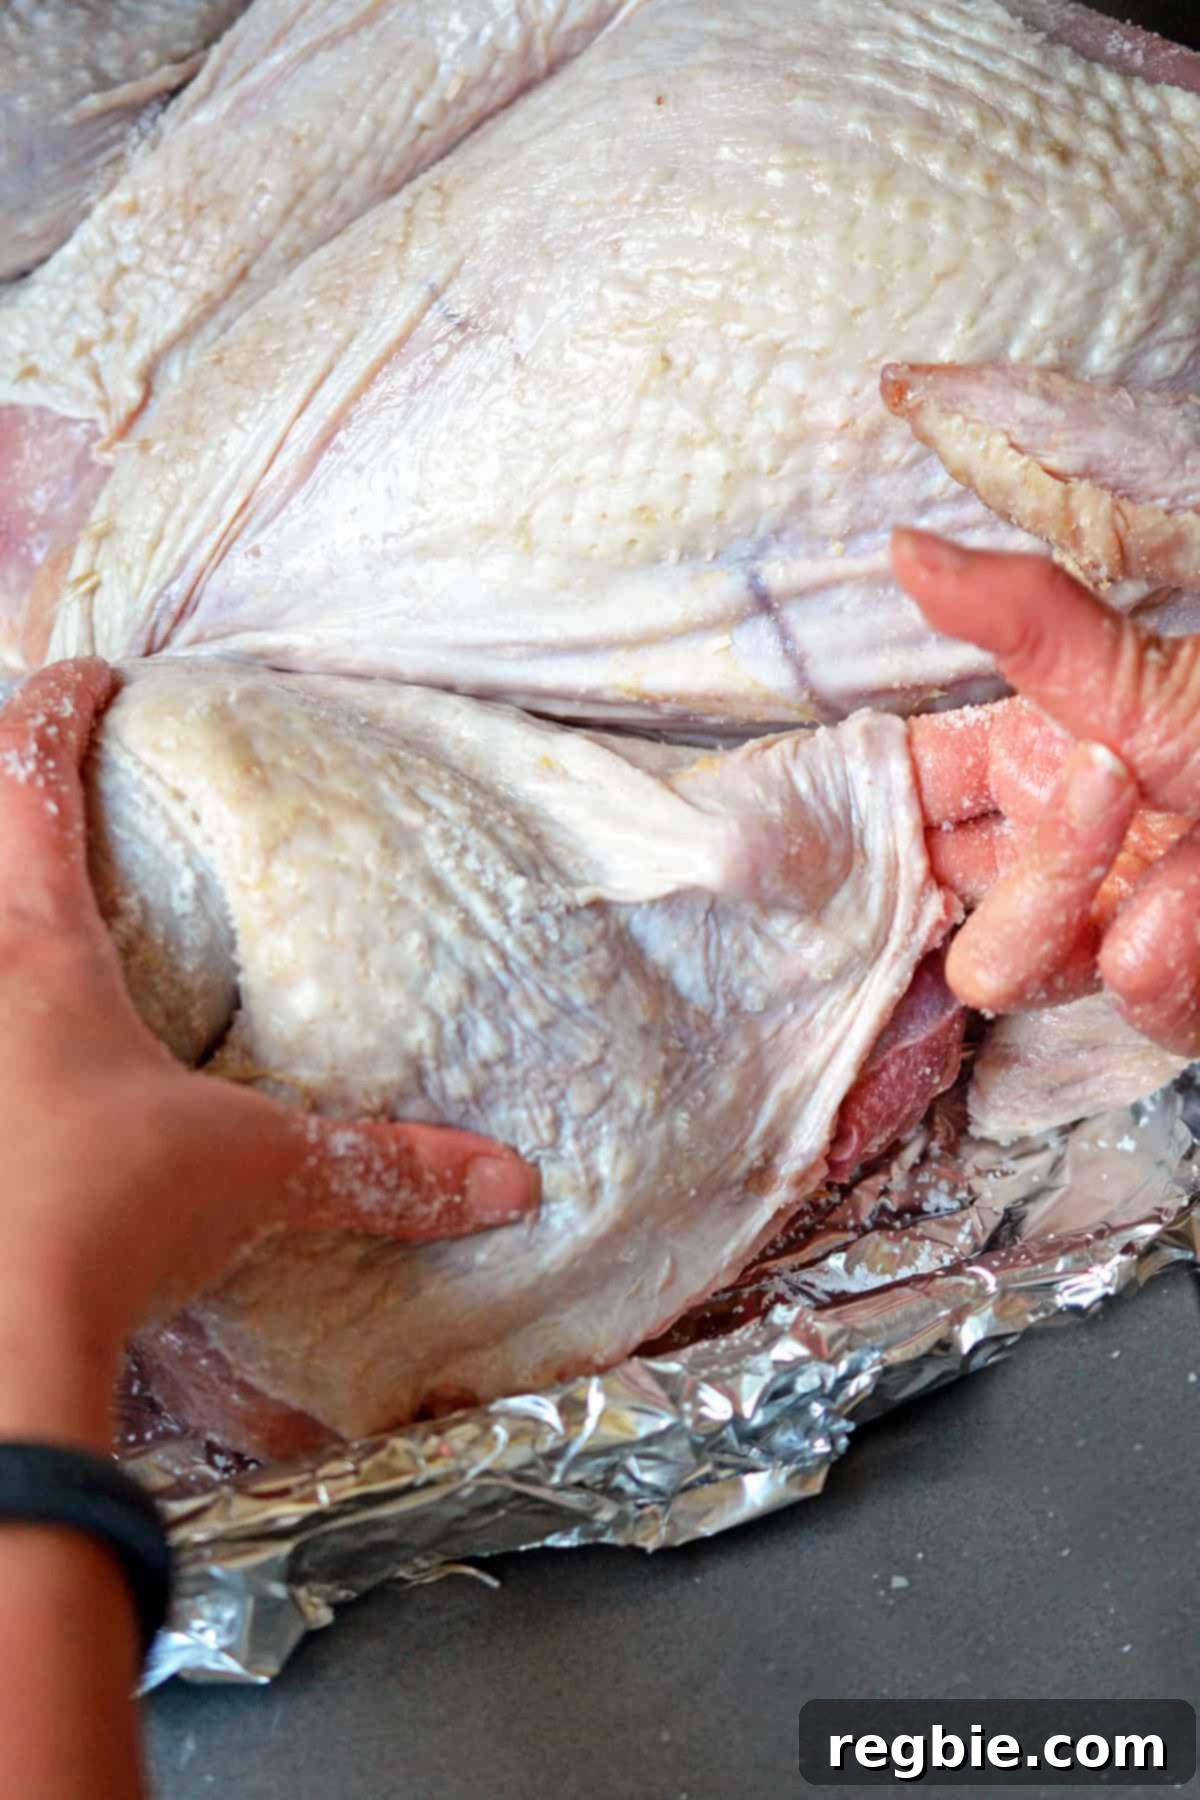
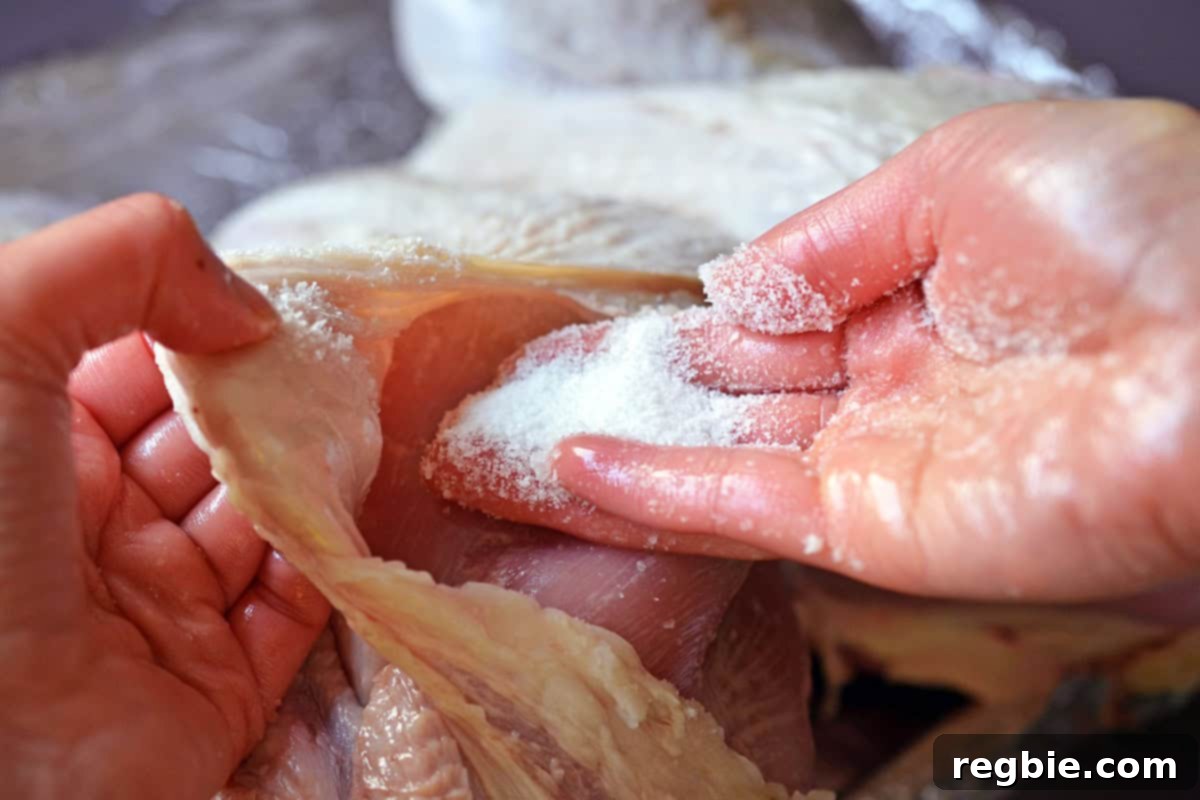
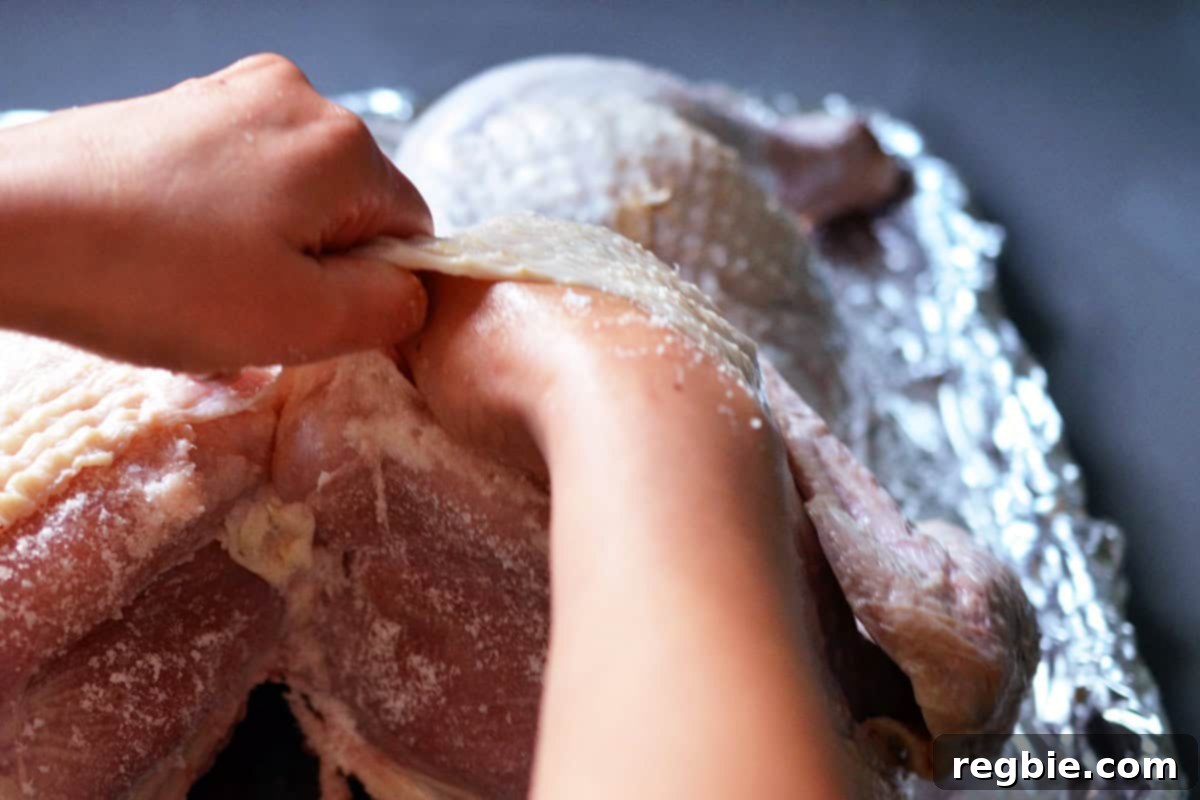
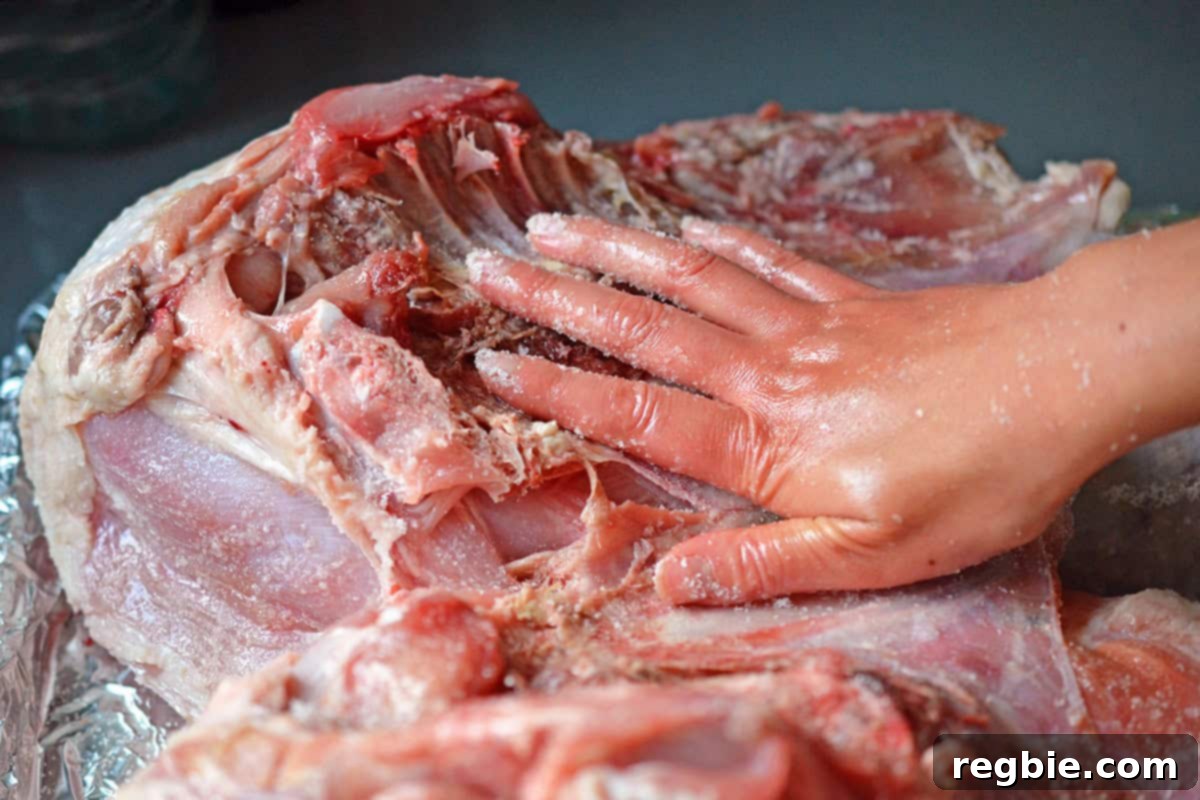
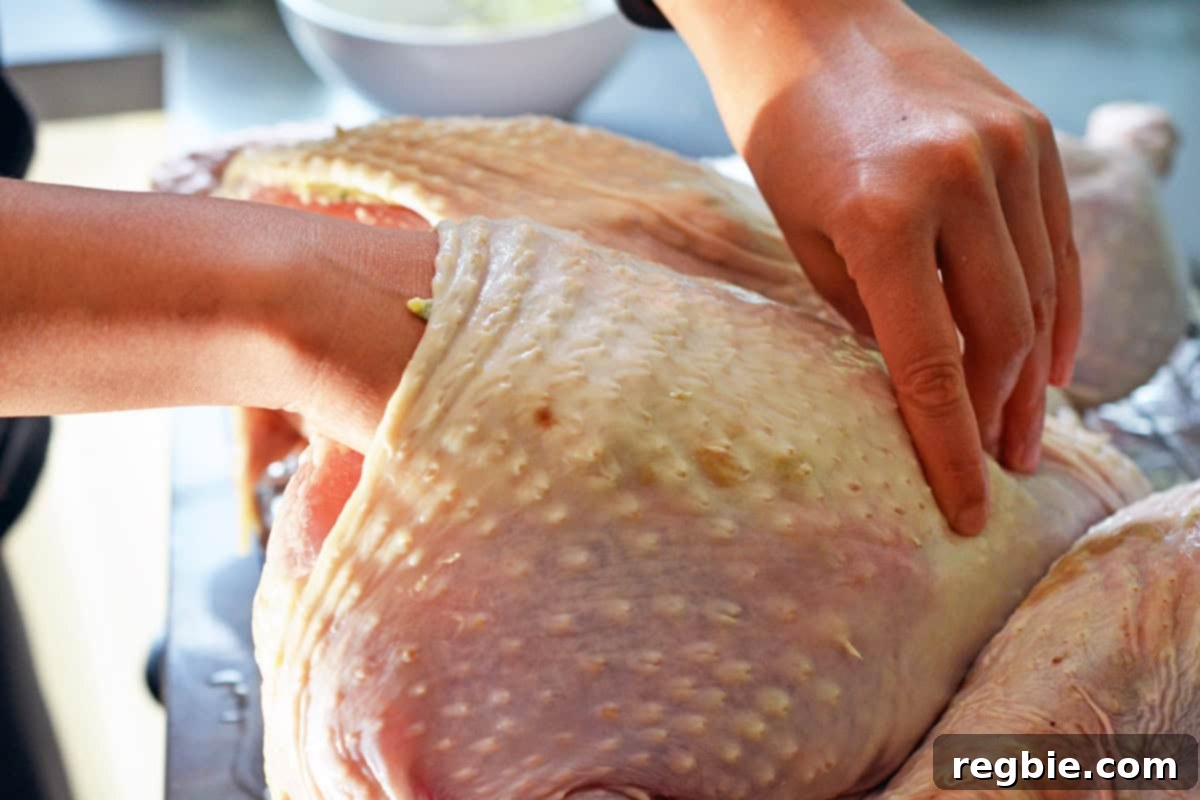
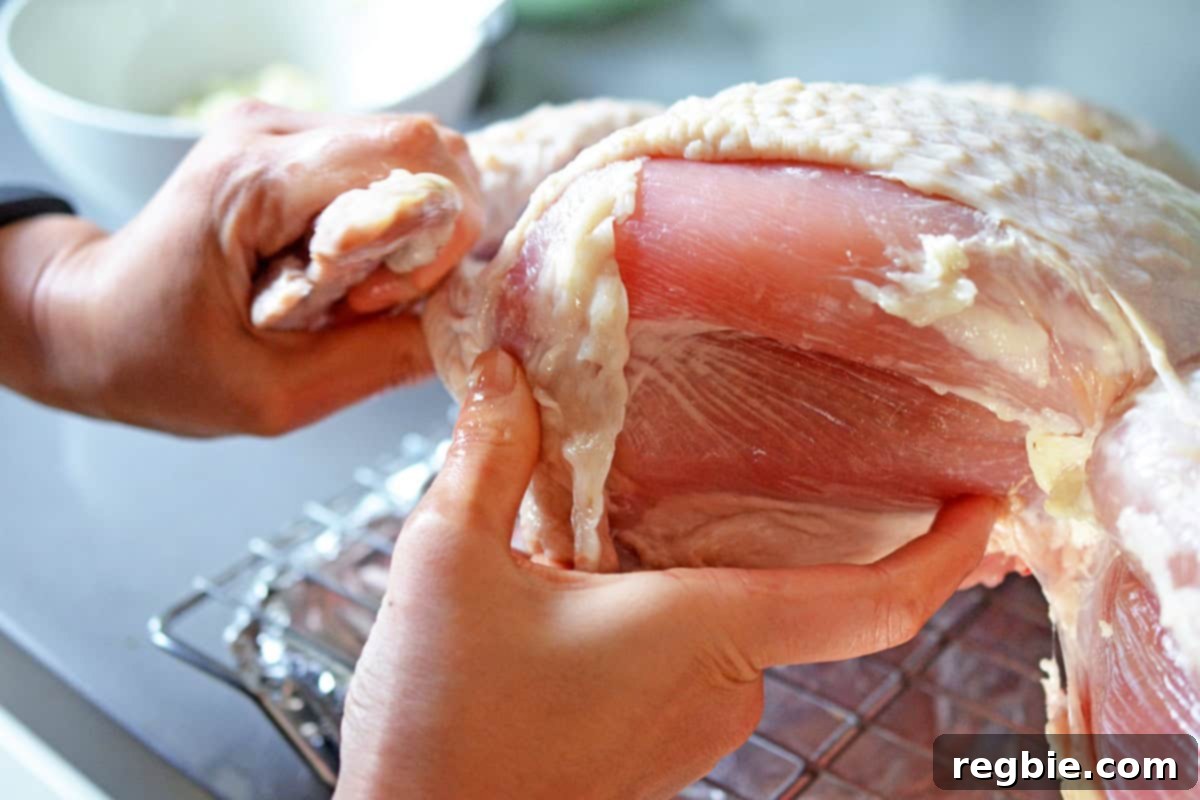
- Season Under the Skin: Gently work your fingers under the turkey skin to separate it from the breast and thigh meat. Be careful but confident; turkey skin is quite elastic. Rub a generous amount of salt directly onto the meat under the skin, ensuring deep seasoning. Also, apply salt to the outside skin and the underside of the turkey.
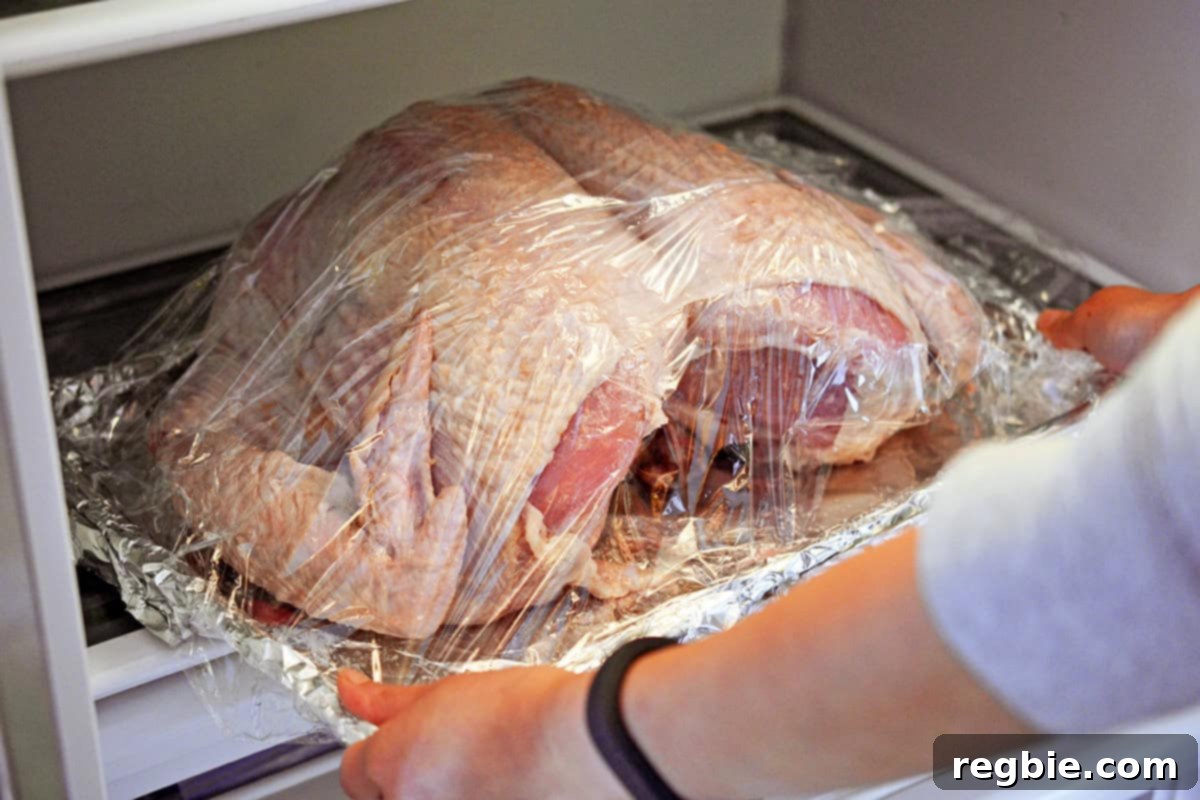
- Refrigerate for Dry Brining: Loosely cover the salted turkey with plastic wrap and place it in the refrigerator for 1 to 2 days. This dry-brining period is essential for seasoning the meat deeply and drawing moisture from the skin for ultimate crispiness.
- Preheat Oven & Prepare Pan: On Thanksgiving Day, preheat your oven to a high temperature of 450°F (232°C) with an oven rack positioned in the lower-middle. Take the dry-brined turkey out of the refrigerator. Line a large baking sheet or broiling pan with aluminum foil and place an oven-safe wire rack on top.
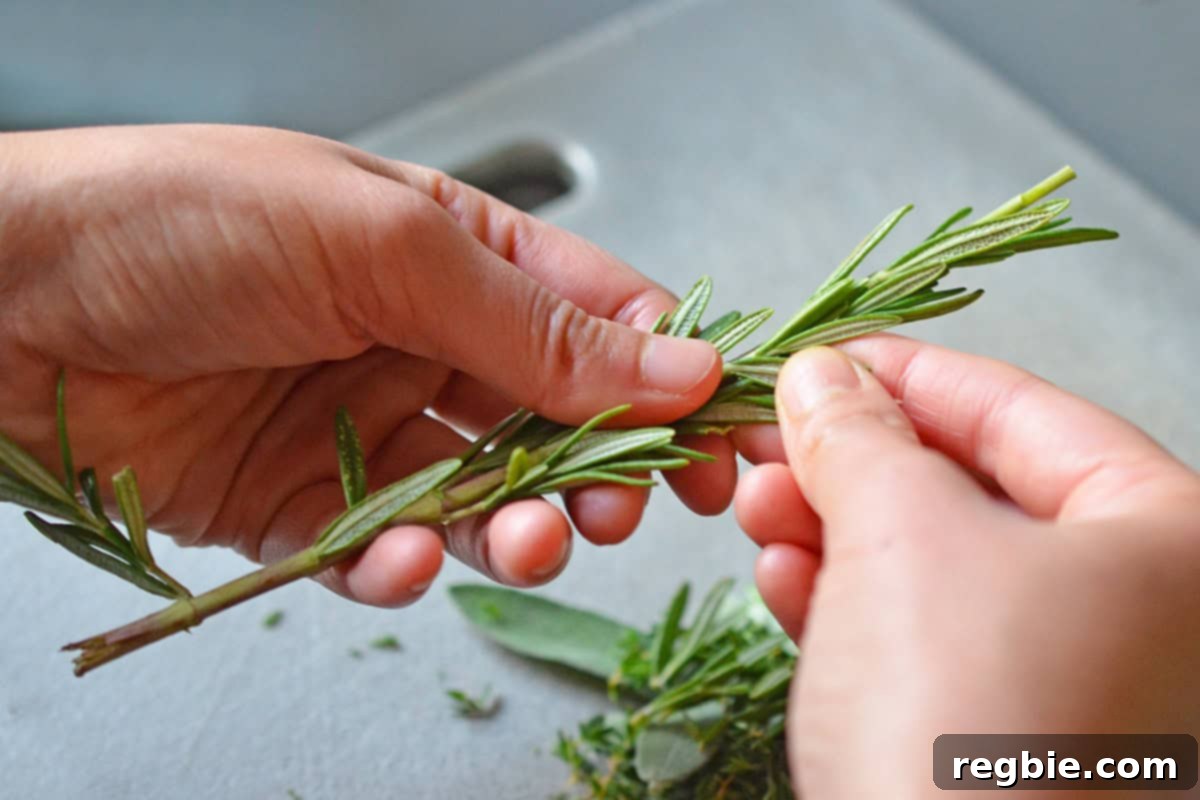
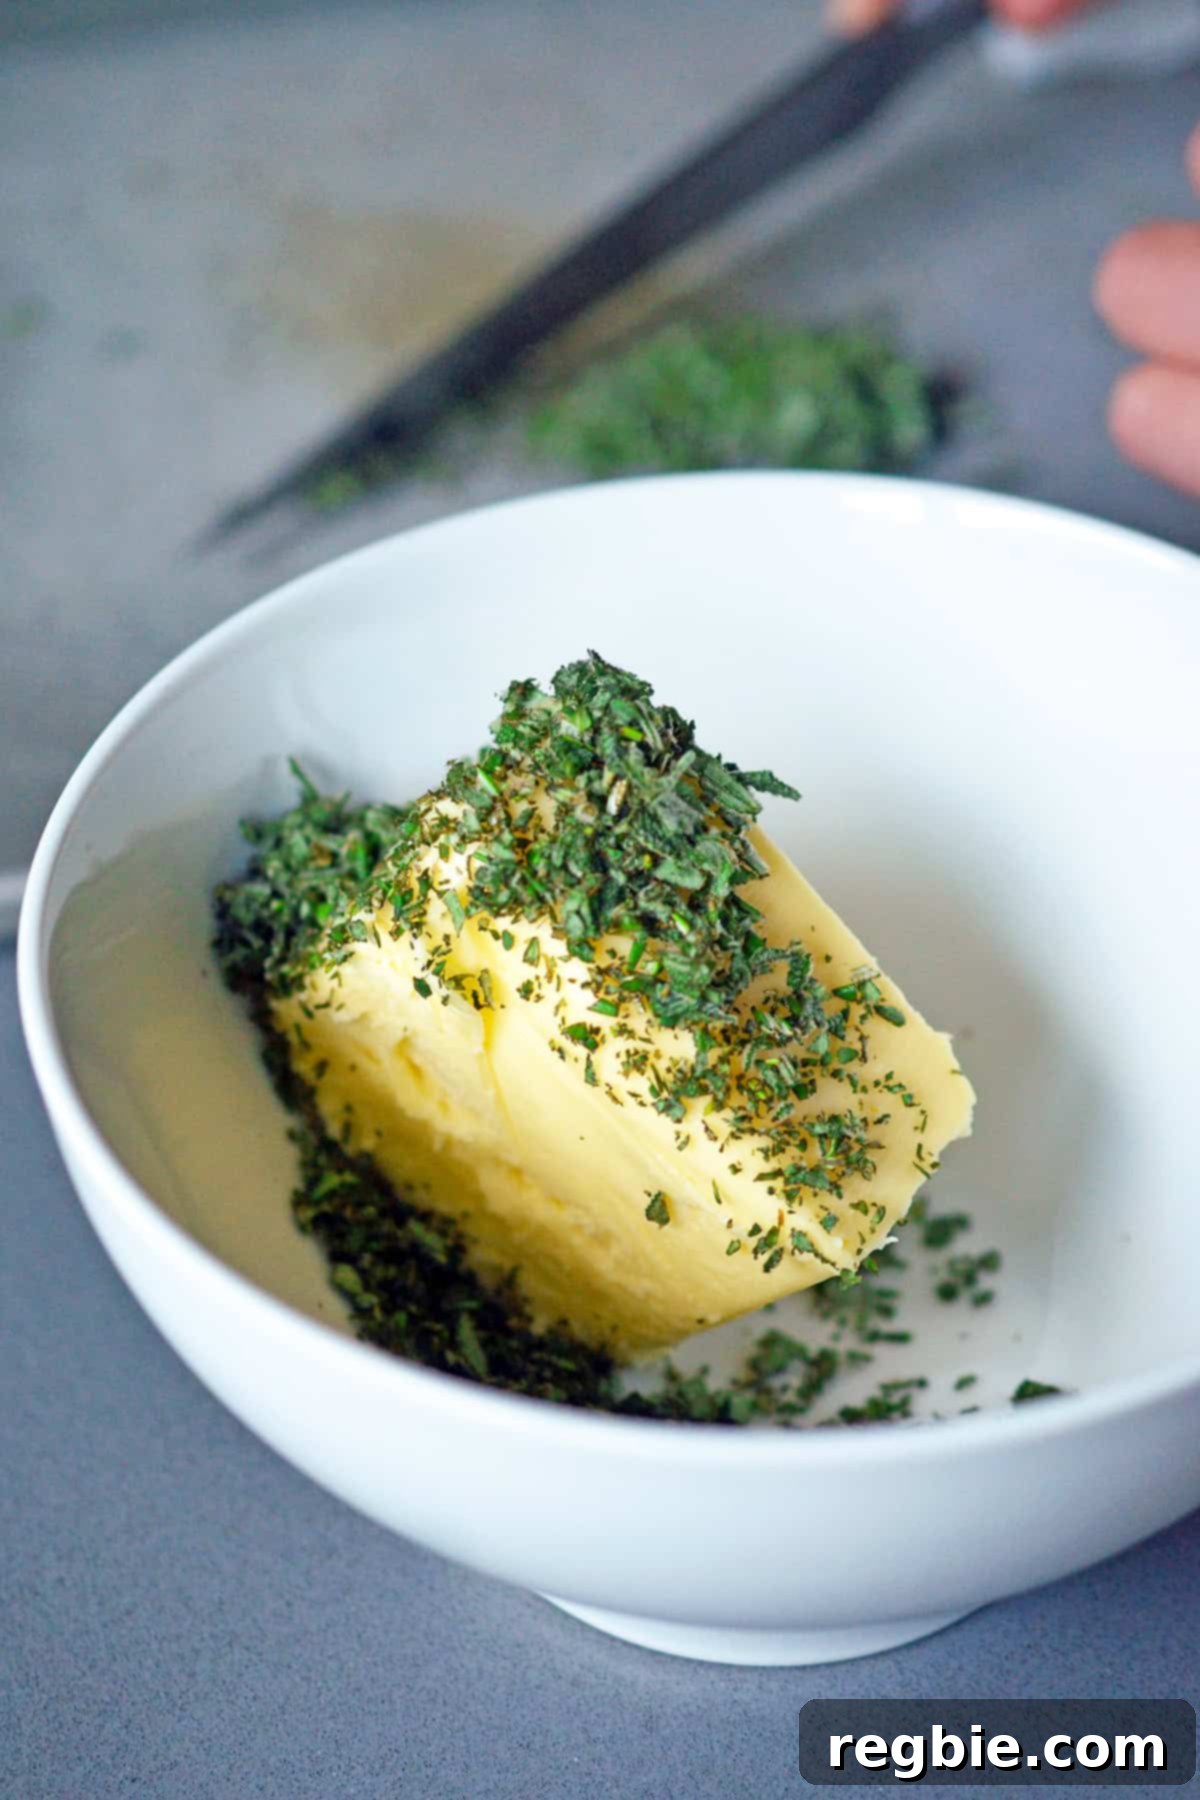
- Prepare Herb Butter: Gather your softened butter and fresh herbs. Gently strip the leaves from the sage, thyme, and rosemary sprigs.
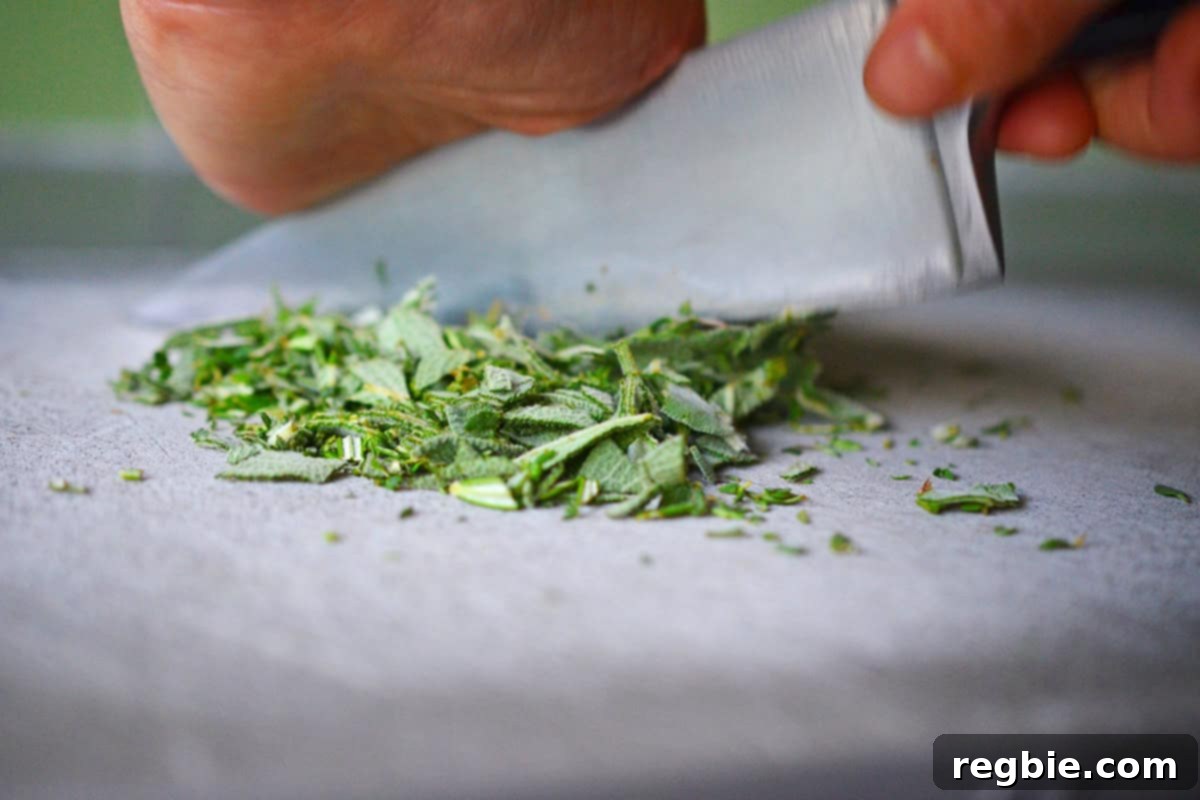
- Mince Herbs: Measure out about ¼ cup of the herb blend. A good ratio tends to lean slightly more towards sage and thyme, as rosemary can be quite potent; adjust to your personal preference. Mince the herbs finely.
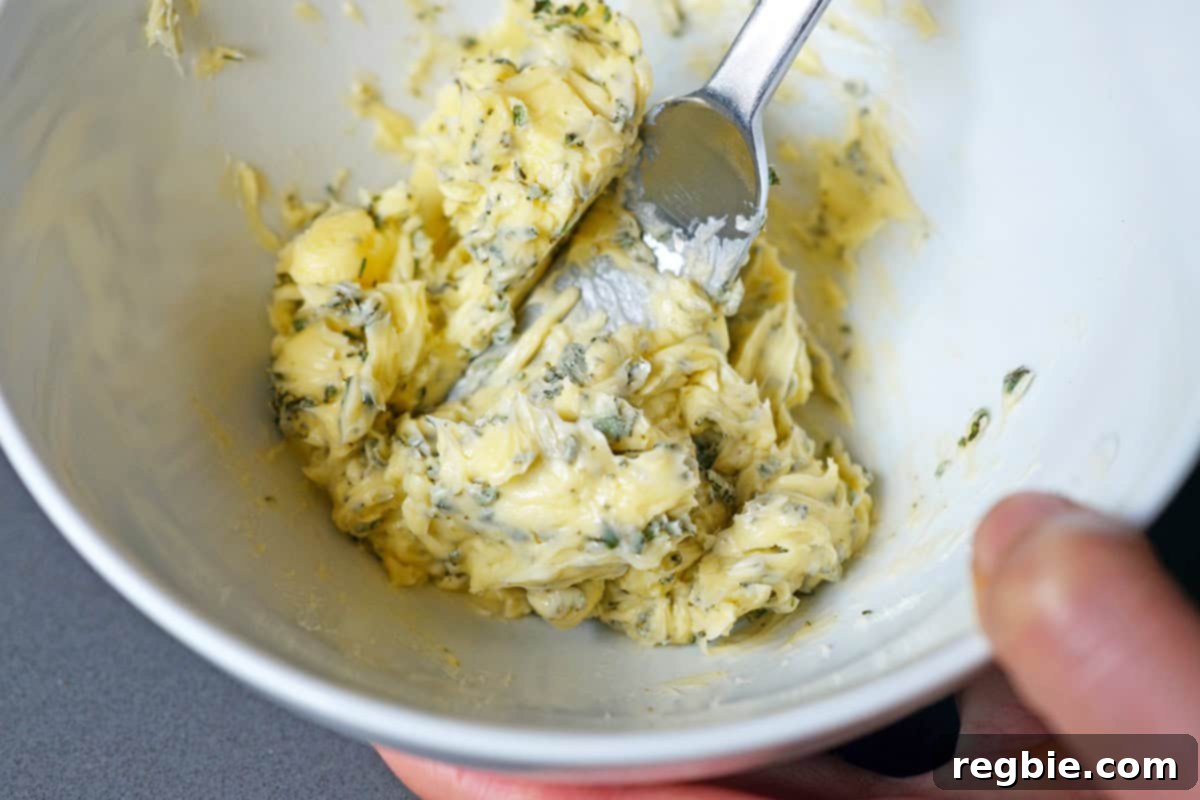
- Create Compound Butter: In a small bowl, combine the finely minced herbs with the softened butter (or ghee). Mix thoroughly until well combined, forming an aromatic herb butter.
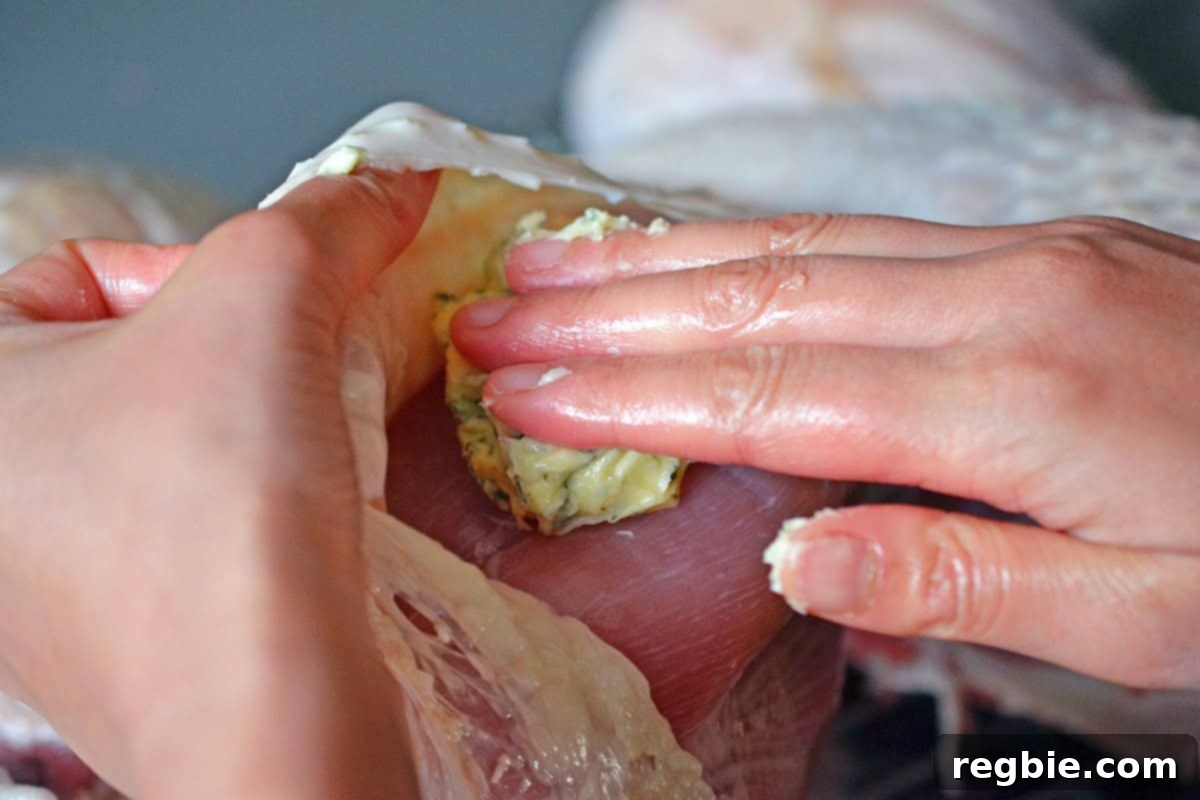
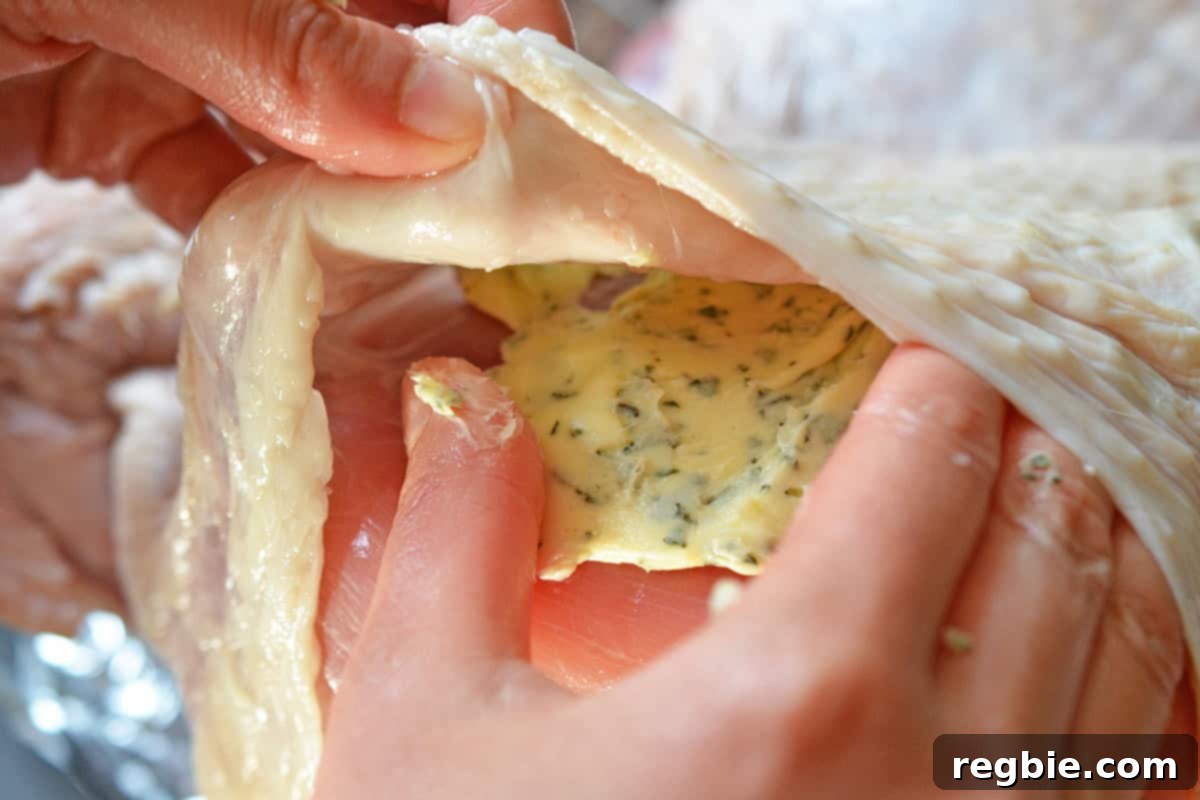
- Apply Herb Butter (Under Skin): Take about two-thirds of the herb butter. Carefully work your fingers under the skin of the turkey breasts and thighs, creating pockets. Spread the butter evenly over the meat beneath the skin. Alternatively, you can place dollops of butter and gently press the skin to spread it.
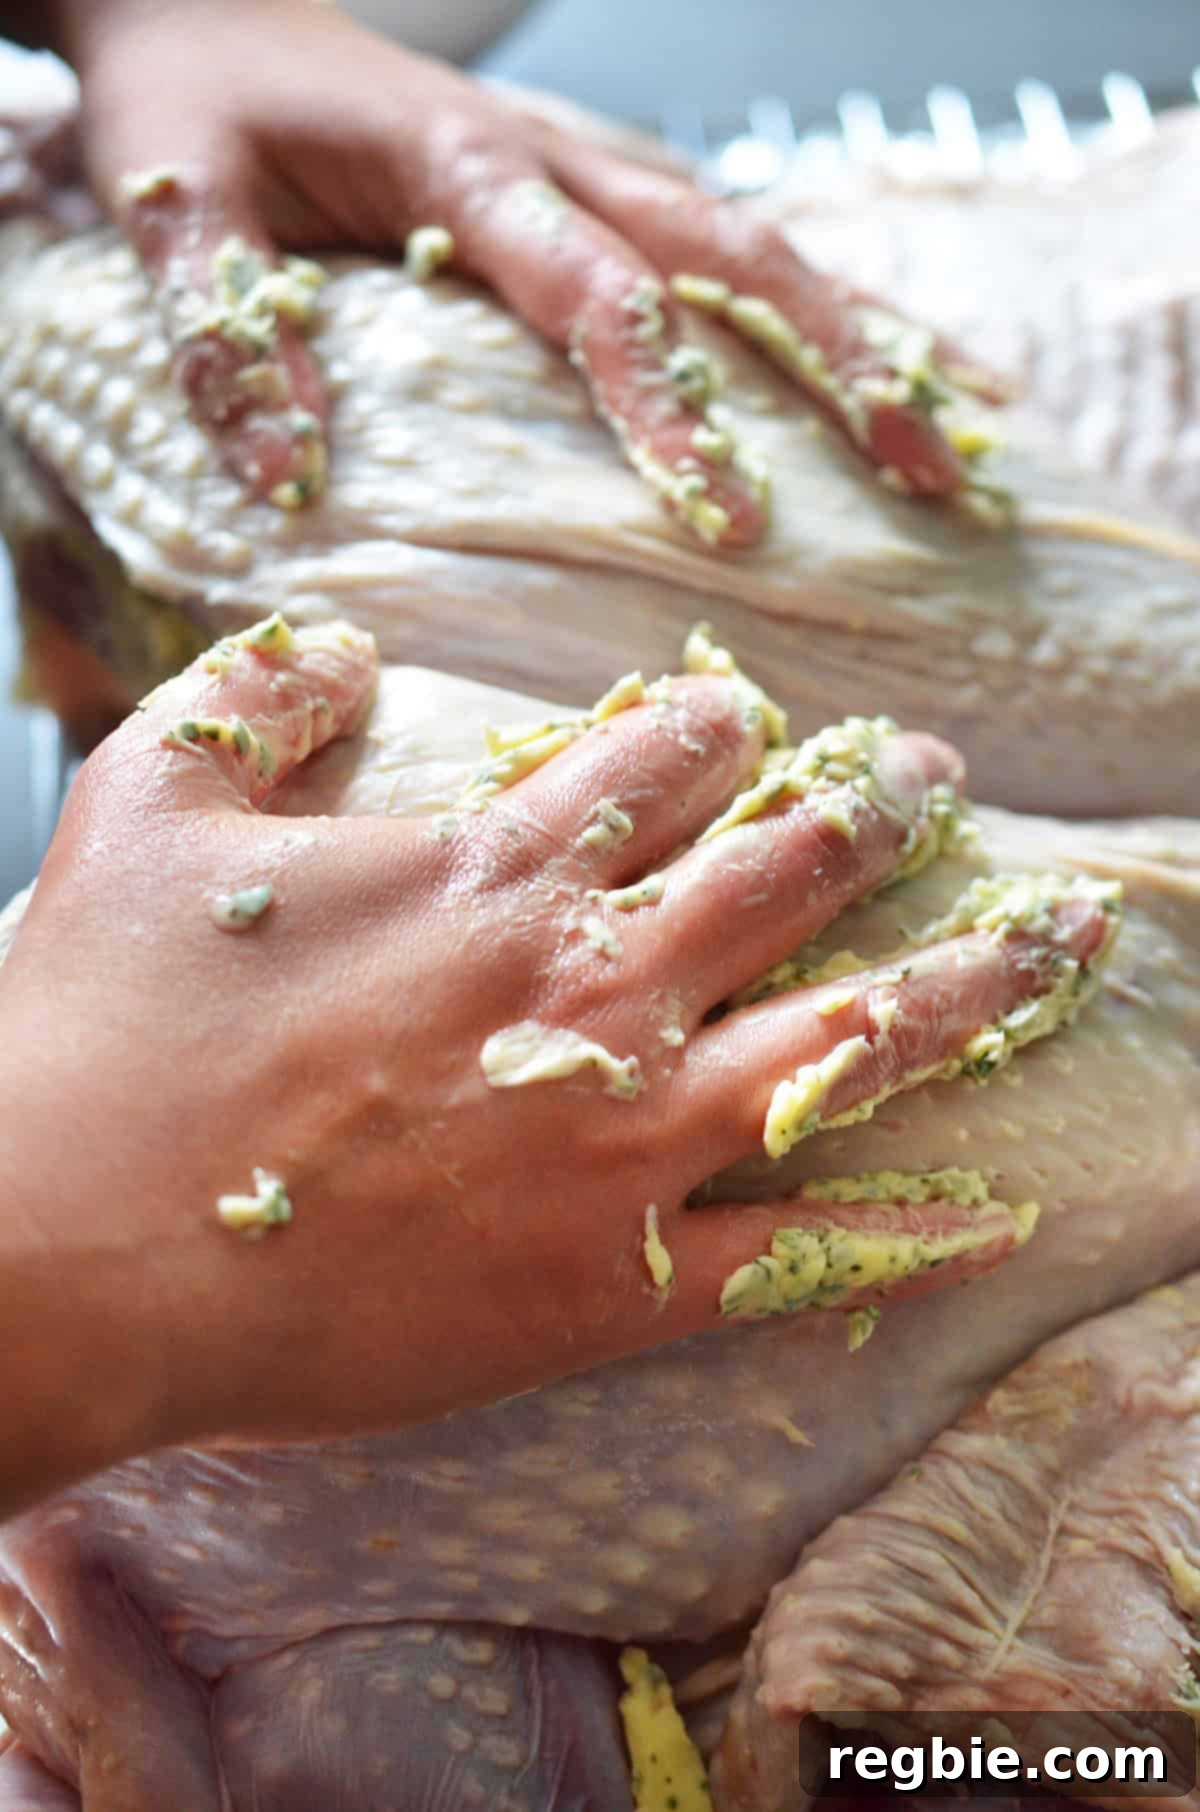
- Apply Herb Butter (Outside): Spread the remaining herb butter evenly over the top, exposed skin of the turkey.
- Position for Roasting: Place the butterflied turkey flat on the wire rack, ensuring its skin side is up. Tuck the wing tips underneath the turkey body to prevent them from burning during roasting. Pour ½ cup of water into the bottom of the baking sheet or pan. This helps prevent the delicious drippings from scorching and smoking.
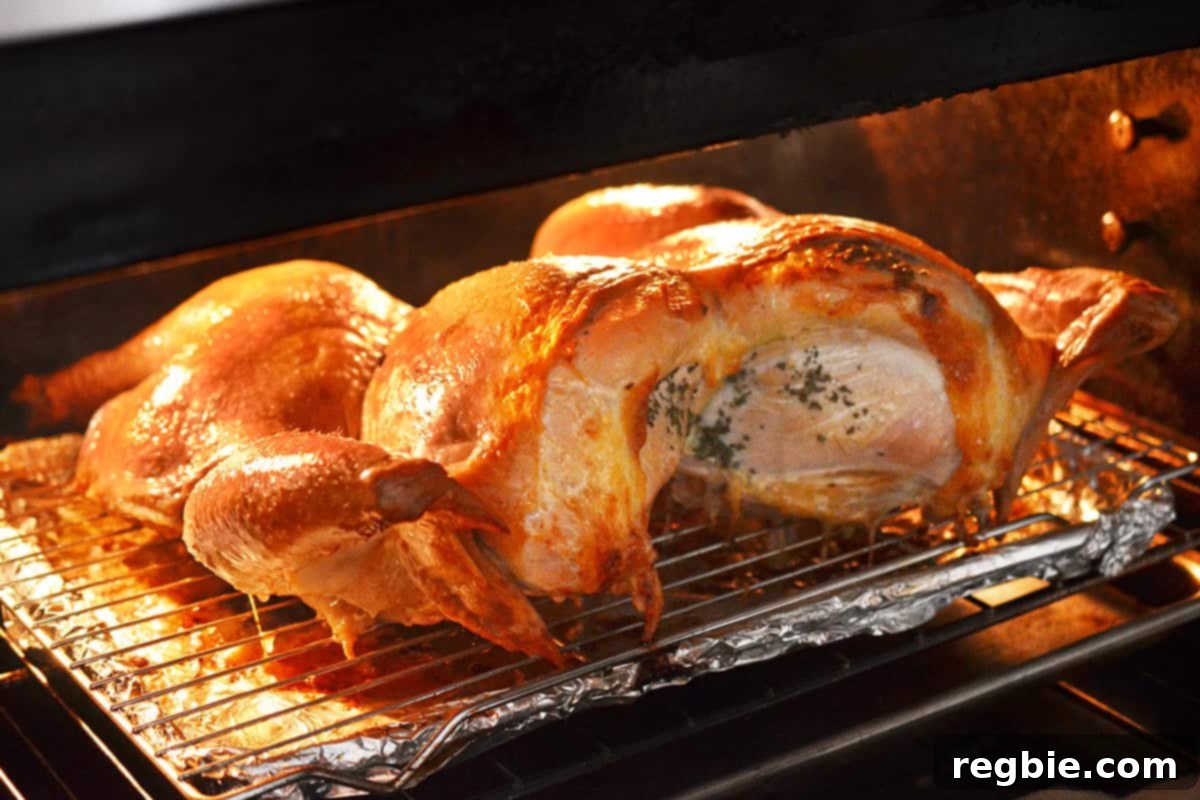
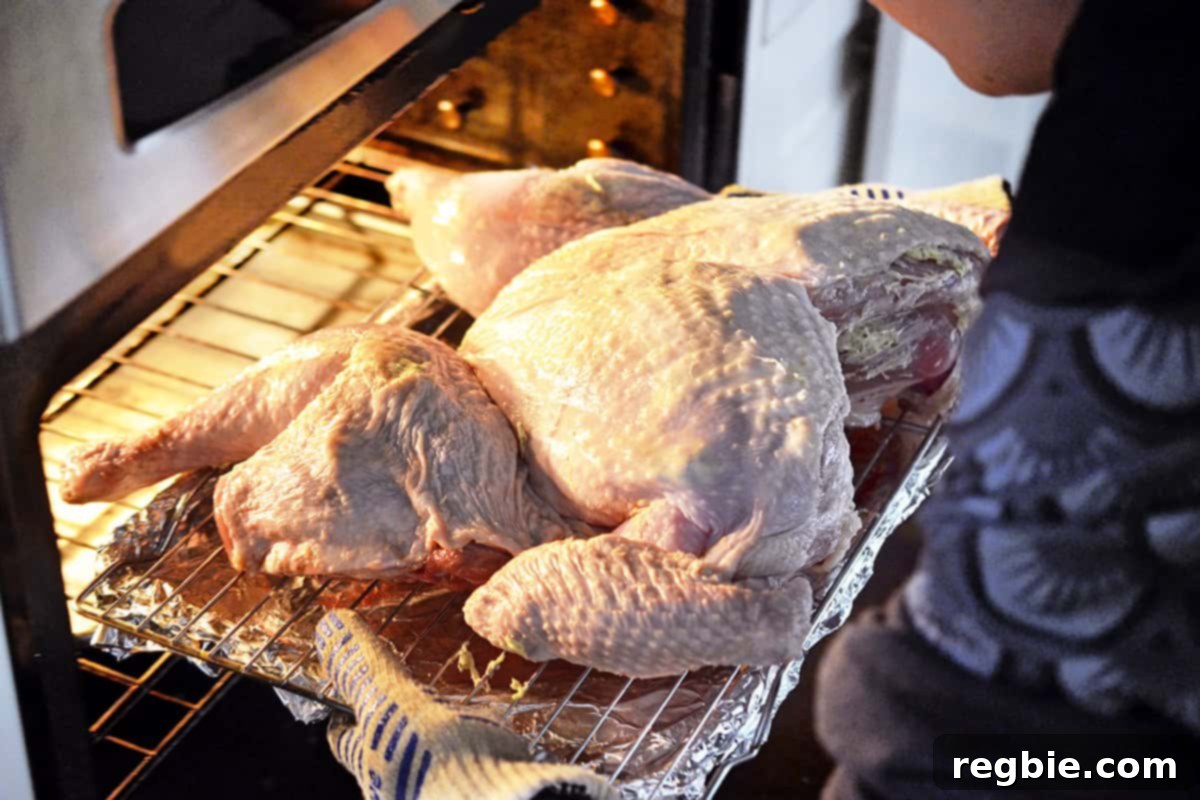
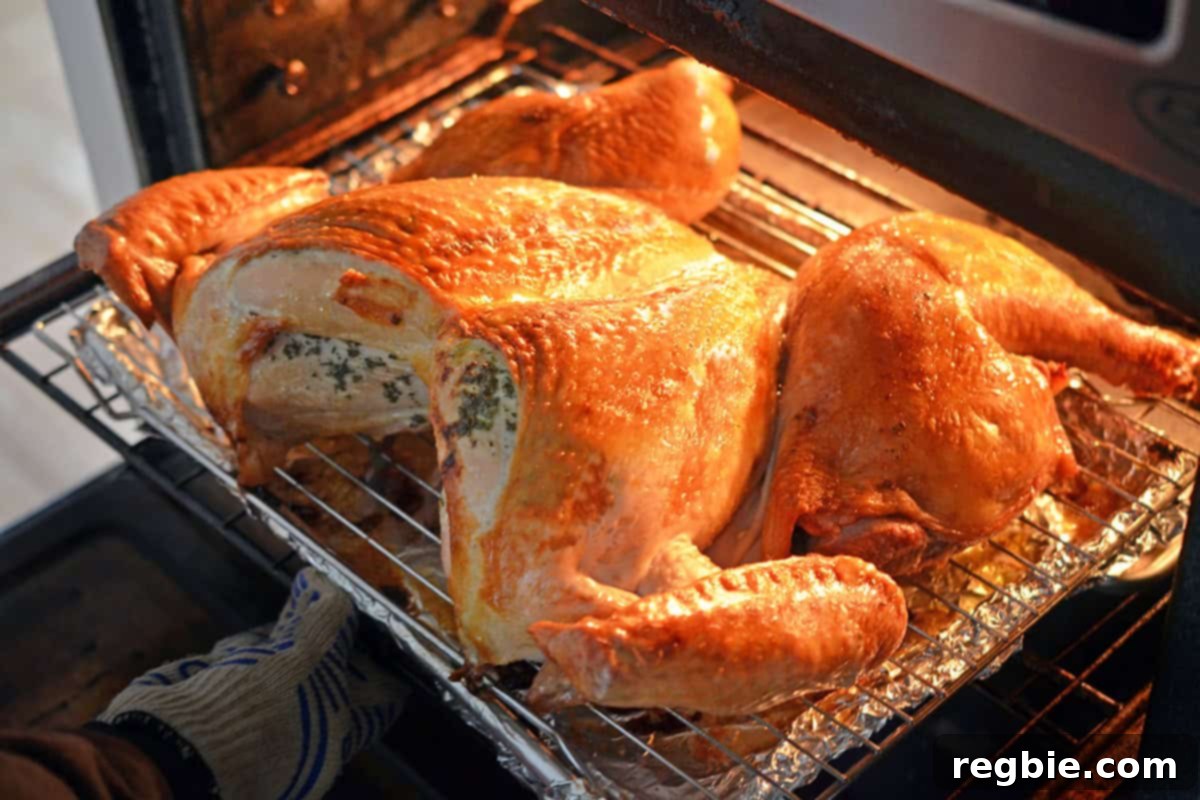
- Roast the Turkey: Carefully place the prepared turkey in the preheated oven. If using an in-oven probe thermometer, insert it into the thickest part of the breast, avoiding bone. Roast for approximately 80-90 minutes.
- Monitor Temperature: The turkey is perfectly cooked when the breast meat reaches an internal temperature of 145°-150°F (63°-66°C), and the thigh meat registers 165°F (74°C). The total cooking time for a 12-14 pound turkey is typically around 80-90 minutes, but always rely on your thermometer, not just the clock.
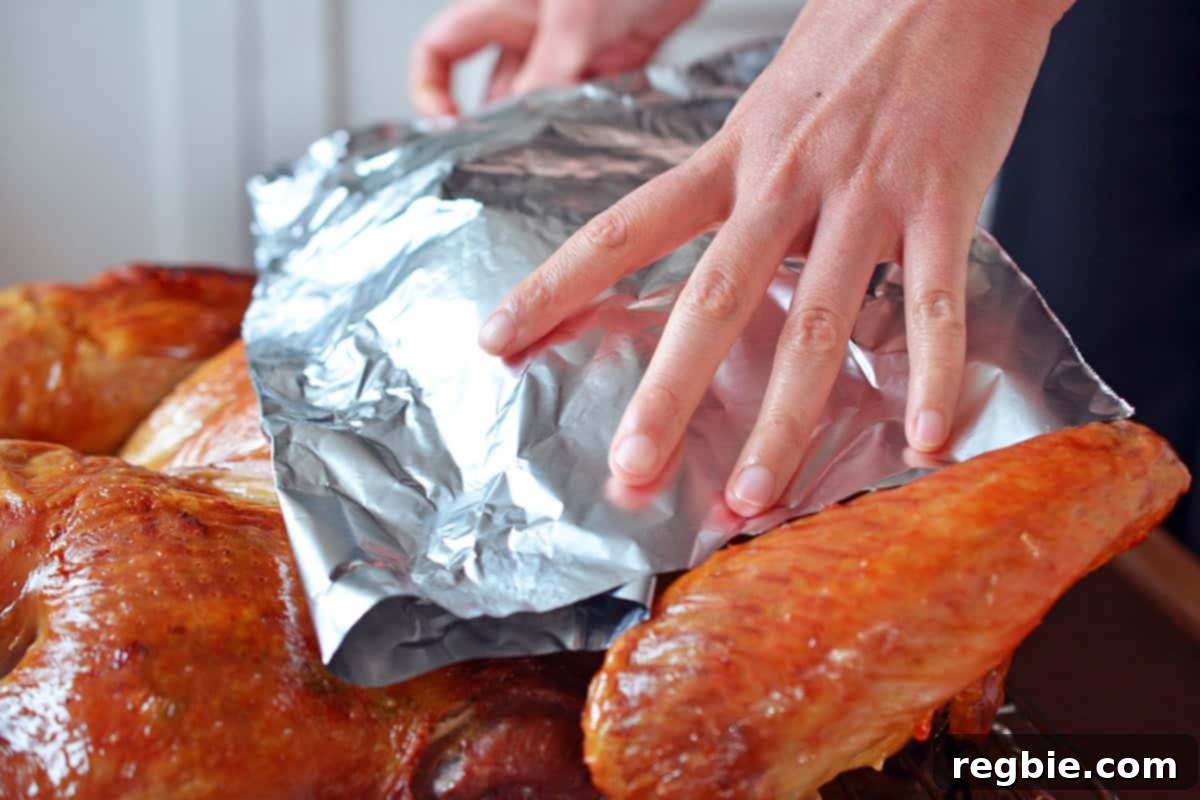
- Prevent Burning (if needed): If you notice the skin is beautifully bronzed and crispy well before the internal temperature reaches its target, simply loosely tent the breast area with a piece of aluminum foil. This “foil bra” will protect the skin from over-browning while the rest of the turkey finishes cooking.
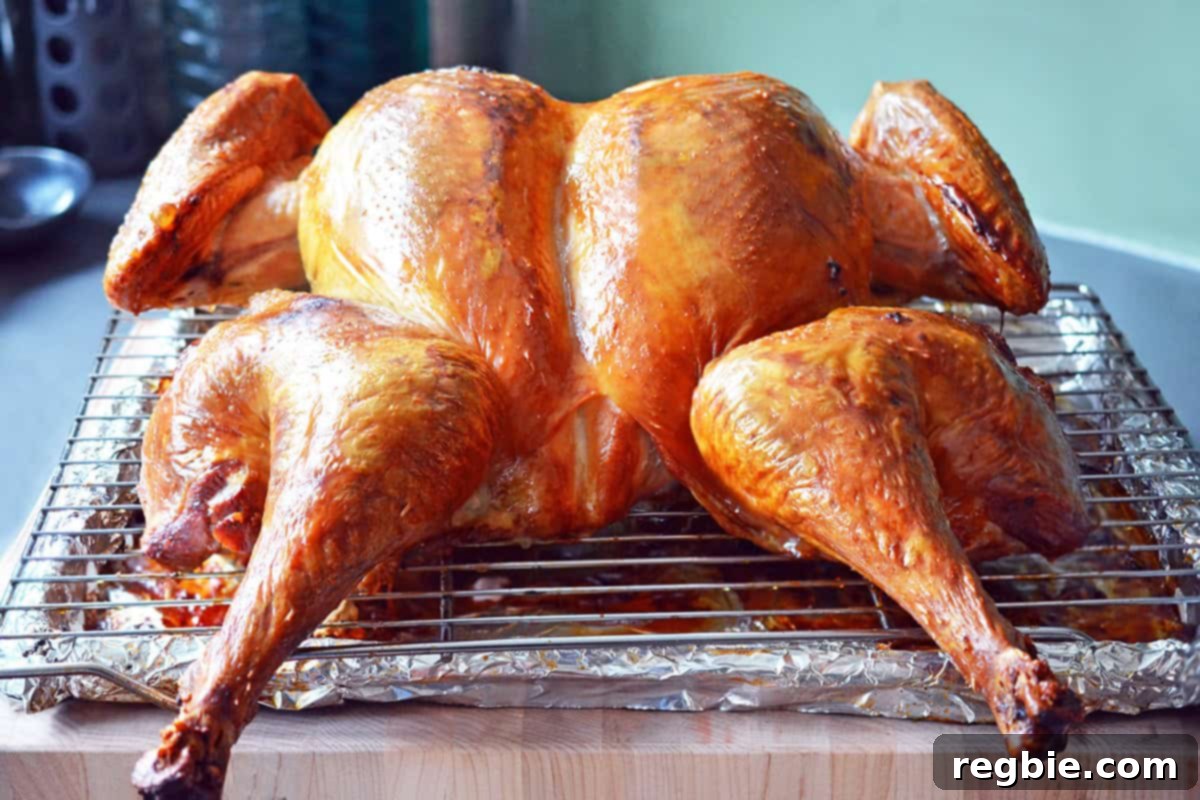
- Final Temperature Check & Rest: Once the turkey is done, remove the tray from the oven and perform a final temperature check in both breast and thigh. Allow the turkey to rest on the wire rack for at least 30 minutes before carving. This crucial resting period allows the juices to redistribute, ensuring maximum moisture and tenderness in every slice.
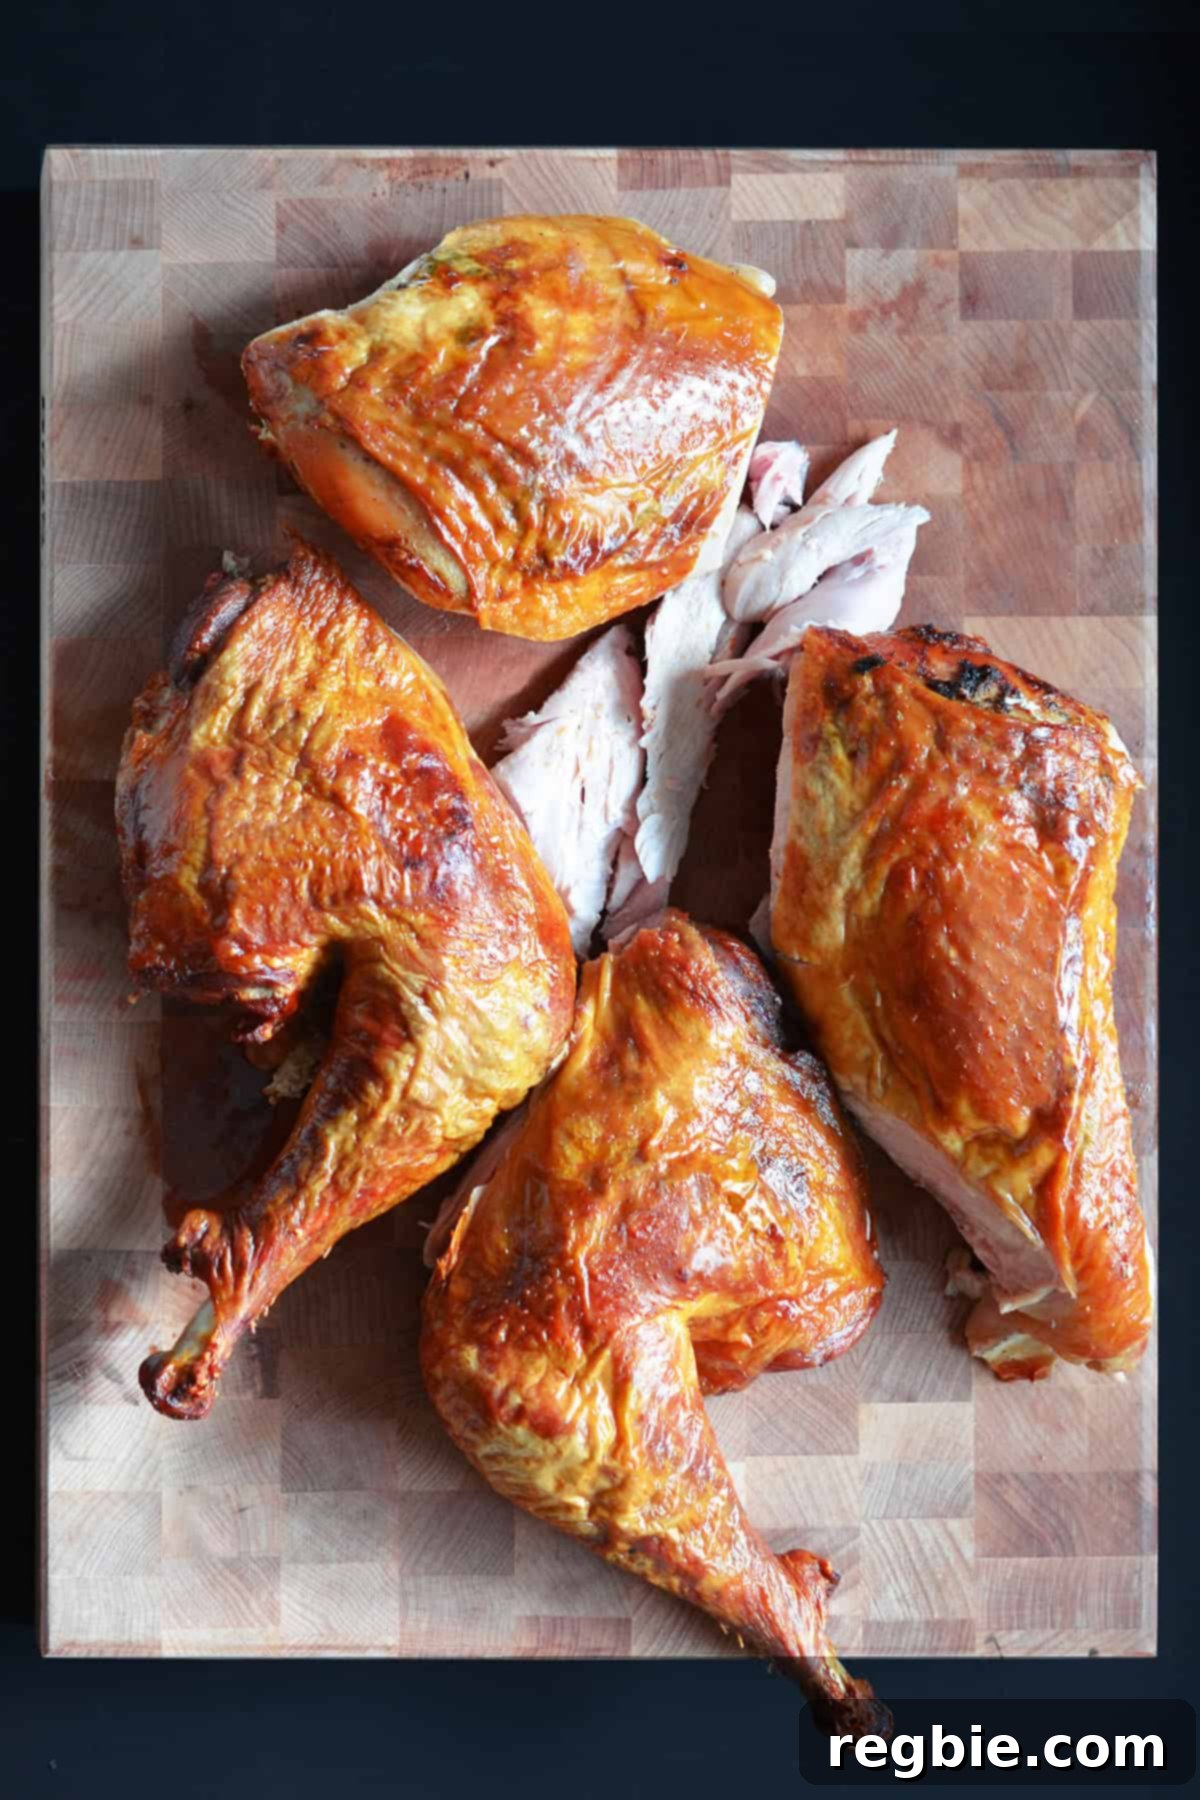
- Carve and Serve: Carve your beautifully roasted turkey at the table for a traditional presentation, or, for a more rustic and efficient approach, “hack it up” with a cleaver, Chinese-style, into large, manageable pieces for serving.
Serving Suggestions
A perfectly roasted spatchcock turkey is the undeniable star of any Thanksgiving spread. Complement its rich flavors and succulent texture with an array of classic holiday side dishes. Think fluffy mashed potatoes, savory stuffing, sweet potato casserole, and vibrant green bean almondine. Don’t forget to use those delicious pan drippings to make an incredible gravy! A fresh cranberry sauce adds a bright, tart counterpoint that perfectly balances the turkey’s richness.
How to Save Leftovers
Leftover spatchcock turkey is a gift that keeps on giving! To maximize its freshness and flavor, store any remaining turkey meat in an airtight container in the refrigerator for up to four days. For longer storage, portion the cooked turkey into freezer-safe bags or containers and freeze for up to four months. Thaw overnight in the refrigerator before reheating gently to maintain moisture.
More Thanksgiving Recipes
Looking to complete your holiday meal with equally delicious and foolproof side dishes? Explore these complementary Thanksgiving recipes:
- Paleo Cranberry Sauce
- Umami Gravy
- Instant Pot Autumn Mash
- Easy Asian Roasted Brussels Sprouts Salad with Citrus & Ginger Dressing
- Pumpkin Custard Cups
For an exclusive downloadable PDF e-book containing everything you need to wow your family and friends this holiday season – including a comprehensive countdown planner, all these foolproof Thanksgiving recipes, and step-by-step photos – join our email list!
Looking for more recipe ideas? Head on over to our Recipe Index. You’ll also find exclusive recipes in our cookbooks, Nom Nom Paleo: Food for Humans (Andrews McMeel Publishing 2013), Ready or Not! (Andrews McMeel Publishing 2017), and Nom Nom Paleo: Let’s Go! (Andrews McMeel Publishing 2022).
Printer-Friendly Recipe Card
Spatchcock Turkey (Butterflied Big Bird)
20 minutes
2 hours
3 days 2 hours 20 minutes
12 servings
Michelle Tam
Ingredients
- 1 12-14 pound turkey
- ¼ cup Diamond Crystal kosher salt because not all kosher salts are the same!
- ½ cup softened butter or ½ cup ghee, duck fat, or schmaltz
- ¼ cup blend of fresh sage, thyme, and rosemary leaves minced
Instructions
-
Remove the innards from the turkey and reserve the neck and giblets for gravy or bone broth. Dry the turkey well with paper towels.
-
Grab a sharp pair of kitchen shears and start cutting from the tail-end open cavity along one side of the backbone until you reach the neck hole.
-
Once you’ve cut all the way through, cut along the other side of the backbone, and remove the spine. Add the backbone to the neck and giblets you’re saving for gravy or broth.
-
Use a knife to make a shallow cut in the cartilage on the underside of the breastbone, and use your hands to firmly push the breasts flat like an open book.
-
Now, it’s time to salt the bird. Use your fingers to loosen the skin away from the flesh. (Be careful but forceful; the skin is fairly elastic, and shouldn’t tear unless you pierce it with sharp acrylic nails.) Rub salt directly onto the meat under the skin, as well on the outside and underside of the turkey. Loosely cover the bird with plastic wrap, and dry-brine it in the fridge for 1 to 3 days.
-
On Thanksgiving Day, preheat the oven to 450°F with the rack in the lower middle position. Take the brined turkey out the refrigerator. Line a baking sheet with aluminum foil and place a wire rack on top.
-
Grab your softened butter and fresh herbs. I tend to pack more sage and thyme in my quarter-cup than rosemary; it’s a matter of personal preference, but I find rosemary a bit too medicinal-tasting in large amounts. Once the herbs are measured out, mince ’em, and mix with the softened butter/ghee to form an herb butter.
-
Take two-thirds of the herb butter and use it to spread under the skin of the breast and thigh meat. (Another method: you can just place a dollop between the skin and meat, and smush down the skin to spread the butter evenly.) Spread the remaining herb butter on the outside of the bird.
-
Lay the bird flat on the wire rack and tuck the wing tips under the turkey so they don’t burn. Pour ½ cup of water into the tray. This’ll keep the drippings from burning and smoking.
-
Place the turkey in the oven and stab an in-oven thermometer (if you have one) into the thick part of the breast. The turkey’s done when the breast meat reaches 145°-150°F, and the thigh meat is 165°F, about 80-90 minutes.
-
If you see that the skin is already nice and bronzed before the meat is even close to the correct temperature, don’t fret. Just place an aluminum foil bra loosely over the bird boobs before returning the turkey to the oven so they don’t burn.
-
When the turkey is done, take the tray out of the oven and check the temperature one last time.
-
Let the turkey rest for at least 30 minutes before carving it at the table.
Notes
Nutrition
Carbohydrates: 1g |
Protein: 58g |
Fat: 25g |
Saturated Fat: 10g
Nutrition information is automatically calculated, so should only be used as an approximation.
Like this? Leave a comment below!