
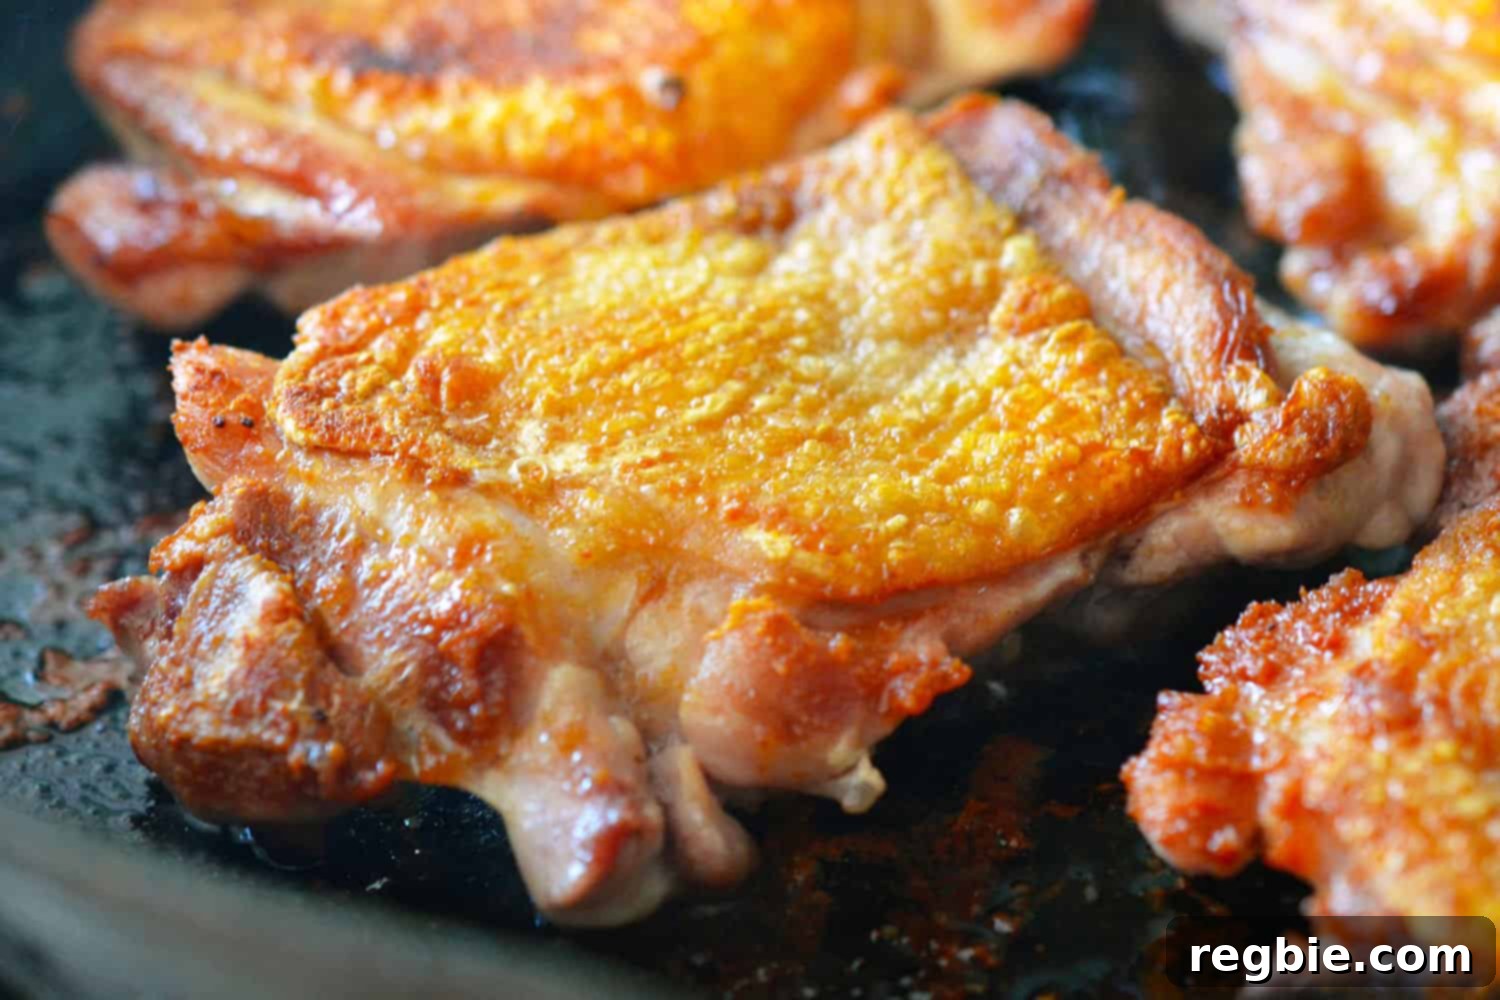
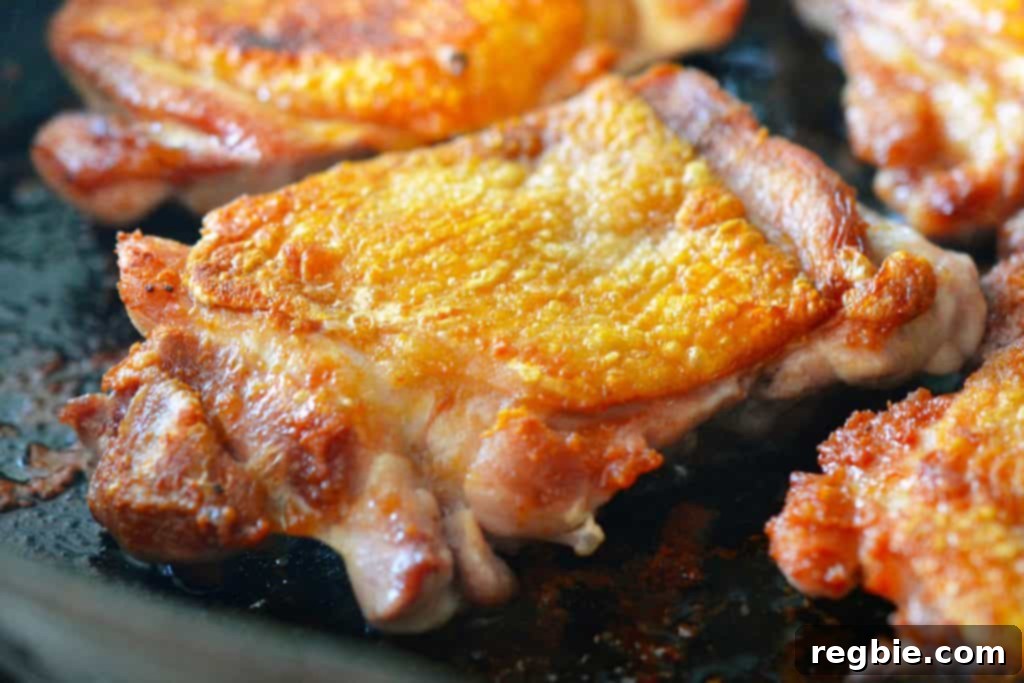
Mastering Sous Vide Crispy Chicken Thighs: Achieve Restaurant-Quality Perfection at Home
Imagine the ultimate chicken thigh: exquisitely tender and juicy meat, bursting with savory flavor, encased in a shell of irresistibly golden, shatteringly crispy skin. This culinary dream, once seemingly exclusive to high-end restaurants, is now within your reach in your own kitchen. Thanks to the revolutionary sous vide cooking method, combined with a brilliant finishing technique popularized by acclaimed chef Michael Voltaggio, you can consistently achieve unparalleled results. If you’ve ever yearned for that perfect balance of moist chicken and truly crackling skin without the guesswork, this comprehensive guide will transform your cooking.
For many home cooks, perfecting chicken thighs has often involved a frustrating compromise: either sacrificing crispy skin for a juicy interior or drying out the meat in pursuit of that sought-after crunch. Sous vide technology elegantly resolves this dilemma. By precisely cooking chicken thighs in a temperature-controlled water bath, you guarantee an evenly cooked, incredibly tender, and succulent interior every single time. The real magic, and the secret to its “mad skillz” reputation, then unfolds in the final moments: a strategic high-heat sear that transforms the perfectly rendered skin into a delightful, flavorful crisp. This method not only delivers a dish of exceptional quality but also makes you look like a seasoned culinary expert with surprisingly minimal hands-on effort.
Beyond its incredible taste and impressive presentation, this sous vide crispy chicken thigh recipe is also perfectly suited for those following Paleo or Whole30 dietary guidelines. It champions whole, unprocessed ingredients, emphasizes healthy fats, and utilizes a cooking process that locks in natural flavors and vital nutrients. Forget dry, uninspiring poultry; prepare to discover chicken thighs elevated to their absolute peak potential. This guide will walk you through every step, ensuring your journey to crispy chicken perfection is both enjoyable and rewarding.
The Unbeatable Advantage of Sous Vide for Perfectly Cooked Chicken Thighs
Sous vide, a French term meaning “under vacuum,” is a cooking technique that involves sealing food in a vacuum-sealed bag and immersing it in a water bath maintained at a precise, constant temperature. This method offers a multitude of benefits, particularly when preparing chicken thighs:
- Unparalleled Tenderness and Juiciness: Chicken thighs, with their inherent rich fat content, are ideally suited for sous vide cooking. The gentle, consistent heat prevents overcooking, ensuring the meat remains incredibly tender, moist, and flavorful from edge to edge – a level of perfection rarely achieved with conventional cooking methods.
- Deep Flavor Infusion: By sealing the chicken with seasonings and fat, the sous vide process allows these flavors to deeply penetrate the meat over the cooking duration. This results in a much more intensely flavored and aromatic final product compared to quick searing or baking.
- Foolproof Consistency: With sous vide, precise temperature control eliminates the risk of overcooking. Once your chicken reaches its target internal temperature, it will hold there without further cooking, offering you a flexible window of time before you need to finish the dish. This consistent result means culinary success every single time.
- Effortless Meal Preparation: Sous vide cooked chicken thighs can be prepared well in advance. After cooking, they can be rapidly chilled and stored in the refrigerator for several days. When you’re ready to serve, simply retrieve them and proceed directly to the quick searing step. This makes it an ideal solution for busy weeknights, meal prepping, or entertaining guests without last-minute stress.
This specific recipe ingeniously leverages the precision of sous vide to set the perfect foundation for what comes next: the spectacularly crispy skin. By flattening and meticulously drying the pre-cooked thighs before a swift, high-heat sear, we unlock an unparalleled level of crispiness that truly transforms the dish from great to extraordinary.
Sous Vide Crispy Chicken Thighs: The Ultimate Recipe
This recipe is perfectly portioned to serve 4 individuals, making it an excellent choice for a family dinner or a small gathering. While the sous vide bath does take time, the actual hands-on preparation is minimal, allowing you to enjoy a gourmet meal without hours spent in the kitchen.
Ingredients for 4 Servings:
- 6 skin-on, boneless chicken thighs: The skin is non-negotiable for this recipe; it’s the star for crispiness! While you can debone thighs yourself, pre-boned, skin-on thighs are a time-saver. If you opt for bone-in, allow an additional 30 minutes to 1 hour in the sous vide bath.
- Diamond Crystal Kosher salt: Valued by chefs for its fine, flaky texture and ability to season food evenly without making it overly salty. Alternatively, use fine sea salt or table salt, adjusting quantities as needed.
- Freshly ground black pepper: Adds a foundational layer of aromatic heat and complexity to the chicken.
- Your favorite seasoning blend: Personalize your chicken! A classic and highly recommended combination is garlic powder and dried thyme for a deeply savory and aromatic profile. Other excellent choices include smoked paprika, onion powder, a pinch of cayenne for heat, or finely chopped fresh rosemary.
- 6 tablespoons unsalted butter, ghee, or duck fat: One tablespoon per chicken thigh. This fat, sealed in the bag with the chicken, acts as an internal baste, enhancing richness and moisture during sous vide cooking. For Whole30 or dairy-free diets, ghee (clarified butter) or high-quality duck fat are perfect, offering similar flavor and benefits.
- 2 tablespoons lard: Absolutely crucial for achieving the perfect crispy skin during the final searing stage. Lard boasts a high smoke point, which allows for intense heat necessary to crisp the skin without burning, while also contributing a subtle, desirable flavor. Alternatives like high-quality beef tallow or even avocado oil (for a neutral flavor) can be used, but lard yields superior results.
- Fleur de sel (or a flaky sea salt): This is your finishing touch. A sprinkle of delicate, flaky sea salt over the hot, crispy skin enhances both flavor and texture, providing a delightful pop of salinity with every bite.
Essential Equipment for Sous Vide Chicken Thighs:
Having the right tools makes all the difference in achieving culinary excellence with sous vide.
- Sous Vide Immersion Circulator or Water Bath: This is the heart of the operation, providing precise and consistent temperature control. Popular brands include Anova, Joule, or the dedicated SousVide Supreme water oven.
- Vacuum Sealer and Bags: Essential for removing air and creating an airtight seal around your chicken, which is critical for efficient heat transfer and flavor infusion in the sous vide bath. If a vacuum sealer isn’t available, high-quality, heavy-duty freezer bags can be effectively used with the water displacement method (submerge the bag, allowing water pressure to force out air before sealing).
- Large Pot or Food-Grade Container: Any large pot or heat-safe container capable of holding enough water for your sous vide bath will work.
- Cast Iron Skillet: Indispensable for the final crisping stage. Cast iron skillets excel at retaining and distributing heat evenly, which is paramount for developing that deep, golden, and uniform crispy skin. A heavy-bottomed stainless steel pan can be a substitute, but cast iron truly shines here.
- Baking Sheets and Heavy Objects: Needed for the pressing step after sous vide. You can use two baking sheets with heavy items like other cast iron skillets, heavy cans, or even weighty cookbooks placed on top to gently flatten the cooked chicken thighs.
- Wire Rack: Crucial for resting the seared chicken. Placing the hot chicken on a wire rack allows air to circulate around all sides, preventing the crispy skin from becoming soggy due to trapped steam.
- Ice Bath (Optional, for Meal Prep): A large bowl filled with ice and water is recommended if you plan to cook the chicken ahead of time. Rapidly chilling the chicken is vital for food safety and quality preservation.
- Plenty of Paper Towels: You’ll need these at multiple stages to thoroughly dry the chicken, a non-negotiable step for achieving superior crispy skin.
Step-by-Step Instructions: Creating Your Sous Vide Crispy Chicken Thighs
Follow these detailed instructions meticulously to achieve chicken thighs that are a true triumph of texture and flavor.
-
Prepare and Season the Chicken Thighs:
Start by taking your skin-on, boneless chicken thighs and patting them exceptionally dry on all sides using paper towels. This initial drying step is absolutely critical, as excess surface moisture will hinder the skin from crisping later. Once thoroughly dry, generously season the flesh side of each thigh with Diamond Crystal Kosher salt, freshly ground black pepper, and your chosen seasoning blend (such as garlic powder and dried thyme). For maximum flavor, you may gently lift the skin and lightly season the meat underneath, being careful not to detach the skin.
-
Vacuum Seal with Flavor-Enhancing Fat:
Place one tablespoon of unsalted butter, ghee, or duck fat directly on the seasoned flesh side of each chicken thigh. This fat will melt during the sous vide process, essentially basting the chicken from within its sealed environment and infusing it with incredible richness and moisture. Carefully transfer each seasoned thigh, along with its pat of fat, into individual vacuum-sealable bags. Using your vacuum sealer, remove all air and seal the bags tightly. If employing the water displacement method with freezer bags, ensure you submerge the bag almost completely in water to force out as much air as possible before sealing the ziplock.
-
Sous Vide Cook to Optimal Tenderness:
Preheat your sous vide water bath to a precise 150°F (65.5°C). Maintaining this exact temperature is key to achieving the desired texture. Once the water bath reaches the target temperature, carefully submerge all six vacuum-sealed chicken thighs. Ensure they are fully immersed and arranged in a single layer to allow for even heat circulation. Let the chicken thighs cook undisturbed in the water bath for 1½ hours. This specific temperature and duration will yield chicken that is incredibly tender, juicy, and perfectly cooked through.
-
Post-Sous Vide Treatment: Chilling and Pressing for Crispness:
After the 1½-hour sous vide cooking time, remove the chicken thighs from the water bath. At this stage, you have two options depending on your serving timeline:
- For Immediate Finishing and Serving: If you intend to crisp and serve the chicken right away, proceed directly to the pressing step. While still in their sealed bags, lay the cooked thighs flat between two sturdy baking sheets. Place heavy objects (such as additional cast iron skillets, heavy canned goods, or dense cookbooks) on the top baking sheet to apply gentle, even pressure. Allow the chicken to press for approximately 30 minutes. This crucial step flattens the thighs, creating a uniform surface that is essential for achieving an evenly crispy skin later.
- For Make-Ahead Meal Preparation: If you are preparing the chicken in advance, immediately transfer the sealed chicken thighs from the hot water bath into a large ice bath (a bowl filled with equal parts ice and water). Rapidly chilling the chicken is vital for food safety, quickly bringing down its internal temperature. Once thoroughly chilled, the sealed thighs can be stored safely in your refrigerator for up to 3-4 days. When you’re ready to cook, simply remove them from the fridge, allow them to come closer to room temperature for about 15-20 minutes, and then proceed with the pressing and searing steps as described for immediate consumption.
-
Meticulous Drying for the Ultimate Crisp:
Once the chicken thighs have been pressed (or chilled and brought to temperature), carefully remove them from their plastic bags. This next step is paramount: thoroughly dry each chicken thigh, especially the skin side, with multiple layers of paper towels. Absolutely no moisture should remain on the surface. Any residual water will cause the skin to steam rather than crisp, preventing you from achieving that coveted crackling texture. A truly dry surface is the undisputed secret to perfectly golden and crispy skin.
-
The High-Heat Crisping Stage:
Heat 2 tablespoons of lard (or your preferred high smoke point fat) in a cast iron skillet over medium to medium-high heat. Allow the lard to get very hot – it should shimmer noticeably and just begin to emit wisps of smoke. This intense heat is fundamental for rapidly crisping the skin. Carefully place two chicken thighs, skin-side down, into the hot skillet. It’s crucial not to overcrowd the pan, as this will drastically lower the temperature and lead to steaming rather than crisping; cook in batches if necessary. Leave the chicken completely undisturbed for a full 5 minutes. Resist the urge to peek, poke, or move them during this time! This allows a deep, even, and beautifully golden-brown crust to form.
-
Finishing the Sear for Doneness and Flavor:
After 5 minutes, the skin should have developed an incredibly appetizing golden-brown color and a satisfying crispness. Using tongs, carefully flip the chicken thighs over and cook them for an additional 1 minute on the flesh side. This brief sear accomplishes two things: it ensures the meat is perfectly warmed through and adds a touch of extra flavor to the underside without compromising the skin’s texture.
-
Rest and Serve with a Flourish:
Immediately remove the finished chicken thighs from the skillet and transfer them to a wire rack that’s set over a plate or baking sheet. Resting the chicken on a wire rack is essential; it allows air to circulate around the crispy skin, preventing any steam from accumulating and making it soggy. As soon as they are on the rack, generously sprinkle some delicate fleur de sel over the perfectly crisped skin. This finishing salt adds a delightful texture and burst of briny flavor. Serve these magnificent sous vide crispy chicken thighs immediately with your favorite complement of vegetable sides, such as roasted asparagus, sautéed garlic greens, or a vibrant fresh salad. Prepare to savor every juicy bite and crackling piece of skin!
Expert Tips for Achieving the Ultimate Crispy Skin and Juicy Meat
While the sous vide method simplifies cooking, a few key practices will ensure your crispy chicken thighs are consistently perfect:
- Prioritize Drying the Skin: This is arguably the most critical step. Moisture on the skin prevents crisping. Pat your chicken aggressively dry with paper towels before seasoning, and again after the sous vide bath and before searing. Think “bone dry” for “crispy perfection.”
- Embrace the Pressing Step: Do not skip flattening the chicken thighs after sous vide. This creates an even surface, allowing all parts of the skin to make contact with the hot pan, resulting in uniform, edge-to-edge crispiness.
- Choose the Right Fat for Searing: Lard is highly recommended for its high smoke point and flavor. Other excellent choices include beef tallow, duck fat, or avocado oil. Butter, with its lower smoke point, will burn before the skin can fully crisp.
- Avoid Overcrowding Your Skillet: Cook in small batches if necessary. Placing too many thighs in the pan at once will drop the skillet’s temperature significantly, causing the chicken to steam rather than sear, leading to rubbery, rather than crispy, skin.
- Exercise Patience During the Searing: Once the chicken hits the hot pan, resist the temptation to move it or check on it for the full 5 minutes. This undisturbed cooking time is essential for the Maillard reaction to work its magic, developing that deep, golden-brown crust.
- Always Rest on a Wire Rack: Never place your freshly crisped chicken directly onto a flat plate. Doing so will trap steam underneath, quickly turning your hard-earned crispy skin soggy. A wire rack maintains air circulation, preserving the crunch.
- Season Boldly: Sous vide excels at locking in flavors. Don’t be shy with your initial seasoning of salt, pepper, and herbs before vacuum sealing. The chicken will absorb these flavors beautifully.
Why This Recipe Is a Must-Try for Paleo and Whole30 Enthusiasts
This sous vide crispy chicken thigh recipe is not just delicious; it’s a perfect fit for those committed to Paleo and Whole30 dietary principles, making clean eating both easy and exceptionally satisfying:
- Whole, Unprocessed Ingredients: The recipe centers on natural, whole foods: chicken thighs, high-quality fats (like butter, ghee, or duck fat), and simple, natural seasonings. There are no hidden additives or artificial ingredients.
- Free from Common Allergens and Grains: It is naturally free from grains, legumes, dairy (if using ghee or duck fat), added sugars, and inflammatory oils, adhering strictly to the guidelines of both diets.
- Rich in Healthy Fats: The strategic use of approved fats such as ghee, duck fat, or lard provides sustained energy and promotes satiety, which is crucial for maintaining dietary compliance and overall well-being.
- Nutrient-Dense Protein Source: Chicken thighs are an excellent source of high-quality protein and essential vitamins and minerals. The gentle sous vide cooking method helps preserve these valuable nutrients, offering a wholesome meal.
- Delicious and Satisfying: The incredible flavor and satisfying textures make this recipe a joy to eat, proving that healthy eating doesn’t have to be bland or restrictive. It helps make adherence to dietary goals much more enjoyable.
Conclusion: Your New Favorite Way to Cook Chicken Thighs
Once you’ve experienced the unparalleled perfection of sous vide crispy chicken thighs, there truly is no going back. The harmonious blend of unbelievably juicy, deeply flavorful meat with a spectacularly crispy, golden-brown skin is nothing short of a culinary revelation. This sophisticated yet straightforward technique, made famous by visionary chefs like Michael Voltaggio, effectively demystifies gourmet cooking, empowering you to achieve restaurant-quality results right in the comfort of your home kitchen.
What makes this dish even more appealing is its incredible versatility and ease of preparation. Being able to sous vide the chicken thighs ahead of time means you can tackle the bulk of the cooking whenever it’s convenient, leaving only a quick, high-heat sear for the very last minute. This flexibility makes it an absolute dream for entertaining guests, allowing you to focus on enjoying their company rather than being tied to the stove, or simply for savoring a luxurious weeknight meal without any added stress.
So, gather your ingredients, set up your sous vide apparatus, and prepare to embark on a truly delightful cooking adventure. This dish is far more than just a meal; it’s an experience that will undoubtedly redefine your expectations for chicken. Get ready to impress yourself, your family, and your guests with your newfound mastery in the kitchen. Savor every single crispy, succulent bite!
Looking for more inspiring recipe ideas that align with your healthy lifestyle? Dive into our extensive Recipe Index, a treasure trove of delicious and health-conscious meals. Explore exclusive culinary creations designed to delight your palate and perfectly complement modern, wholesome kitchens.
PRINTER-FRIENDLY RECIPE CARD
Sous Vide Crispy Chicken Thighs
1
1
30
2
30
4
Michelle Tam
Ingredients
- 6 skin-on boneless chicken thighs
- Diamond Crystal kosher salt
- Freshly ground black pepper
- Your favorite seasoning (e.g., garlic powder and dried thyme)
- 6 tablespoons unsalted butter, ghee, duck fat, or your fat of choice
- 2 tablespoons lard
- Fleur de sel
Instructions
-
Pat the thighs dry and season the flesh side with salt, pepper, and your choice of seasoning (e.g., garlic powder and dried thyme).
-
Vacuum seal each thigh with a pat of butter (or ghee for Whole30) on top of the flesh side.
-
Submerge all chicken thighs in your SousVide Supreme (or other sous vide device) set at 150°F (65.5°C) for 1½ hours. If prepping ahead, transfer thighs to an ice bath, then refrigerate. Otherwise, place cooked thighs between two baking sheets and weigh down with heavy objects (like cast iron skillets) for 30 minutes to flatten.
-
Remove the flattened thighs from their bags and dry them thoroughly with paper towels. Heat 2 tablespoons of lard in a cast iron skillet over medium to medium-high heat until shimmering and just smoking. Add two thighs, skin-side down, and cook undisturbed for 5 minutes until deeply golden and crispy.
-
Flip the chicken thighs and cook for an additional minute on the flesh side. Remove from the pan and place on a wire rack. Sprinkle with fleur de sel. Serve immediately with your favorite vegetable sides!
Nutrition
Carbohydrates: 1g |
Protein: 28g |
Fat: 45g |
Fiber: 1g |
Sugar: 1g
Nutrition information is automatically calculated, so should only be used as an approximation.
Enjoyed this recipe? Share your thoughts below!