
Mastering Sous Vide Grass-Fed Brisket: Thomas Keller’s Secret to Perfection
For many home cooks and professional chefs alike, achieving consistently tender results with sous vide grass-fed beef can feel like a culinary tightrope walk. Grass-fed cuts, while celebrated for their flavor and nutritional profile, are notoriously lean and can become tough if not cooked with precision. This often leads to frustrating trial-and-error, especially given the premium cost of quality grass-fed meat. The quest for the perfect time and temperature often feels like an endless experiment, but what if there was a proven method to guarantee success?
After numerous attempts and a deep dive into the culinary wisdom available online, I believe I’ve pinpointed the ultimate sous vide approach for grass-fed beef brisket. My journey led me to the revered techniques of chef-extraordinaire Thomas Keller, whose recommendation of 147°F (64°C) for a remarkable 48 hours promised an unparalleled transformation. Skepticism quickly gave way to excitement, and I’m thrilled to report that the results were nothing short of spectacular.
Why Sous Vide for Grass-Fed Brisket?
Sous vide cooking, which involves cooking food in a precisely temperature-controlled water bath, is particularly well-suited for challenging cuts like grass-fed brisket. Unlike conventional cooking methods that expose meat to fluctuating temperatures and can easily overcook the exterior before the interior reaches doneness, sous vide ensures that your brisket cooks evenly from edge to edge. This precise control is crucial for grass-fed beef, which benefits immensely from a long, slow cook at a consistent low temperature.
The extended cooking time at 147°F allows the tough connective tissues in the brisket to slowly break down into gelatin without drying out the lean meat. This process, known as collagen denaturing, is what transforms an otherwise chewy cut into a succulent, fork-tender experience. For grass-fed beef, which typically has less intramuscular fat than grain-fed varieties, this method prevents moisture loss and enhances tenderness in a way that traditional roasting or braising often struggles to achieve.
The Thomas Keller Method: 147°F for 48 Hours Explained
Thomas Keller’s recommendation of 147°F (64°C) for 48 hours is not arbitrary; it’s a meticulously calculated approach designed to yield optimal texture and flavor for beef brisket. This specific temperature falls within the range that effectively breaks down collagen while keeping the muscle fibers incredibly moist and tender. Going much higher might risk a drier texture, while significantly lower temperatures could prolong the cooking process unnecessarily or fail to render the fat adequately.
The 48-hour duration is key to allowing sufficient time for these enzymatic and chemical reactions to occur thoroughly throughout the entire thickness of the brisket. This long bath ensures that even the toughest fibers succumb to the gentle heat, resulting in a brisket that is unbelievably tender, yet still holds its shape and offers a satisfying chew. It’s a testament to patience and precision in cooking, promising a truly remarkable culinary outcome that makes the wait entirely worthwhile.
Your Step-by-Step Guide to Perfect Sous Vide Grass-Fed Brisket
1. Gather Your Essentials
Before you begin, ensure you have all necessary equipment and ingredients:
- A reliable sous vide immersion circulator or water oven (I used my SousVide Supreme, but any quality circulator will work).
- A large pot or container for your water bath.
- A vacuum sealer and appropriate bags.
- A 2.5-pound (or similar size) grass-fed beef brisket.
- Seasonings: Kosher salt, freshly ground black pepper, and your preferred spice blend (I recommend a Fajita and Taco seasoning for a delightful kick).
- Lard or another high-smoke-point fat for searing (e.g., avocado oil, ghee).
- A cast iron skillet for searing.
- An ice bath setup (large bowl with ice and water).
2. Precision Water Bath Setup
Fill your sous vide container or water oven with water and set your immersion circulator to 147°F (64°C). Allow ample time for the water to reach and stabilize at this precise temperature. Temperature stability is paramount in sous vide cooking, as it directly impacts the final texture of the brisket. While the water heats, prepare your brisket.
3. Expert Brisket Preparation
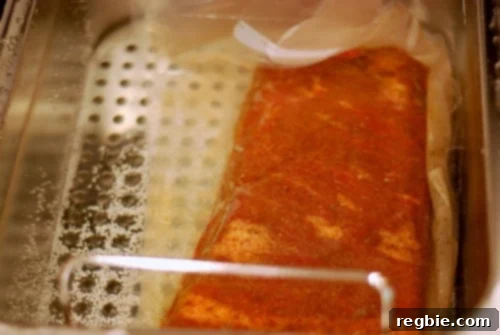
Take your 2.5-pound grass-fed beef brisket and pat it thoroughly dry with paper towels. A dry surface helps seasonings adhere better. Generously season all sides of the brisket with a good quality kosher salt, freshly ground black pepper, and your chosen spice blend. The Fajita and Taco seasoning adds a wonderful depth of flavor that complements the richness of the beef. Once seasoned, carefully place the brisket into a vacuum-sealable bag. Ensure all air is removed during the sealing process; air pockets can lead to uneven cooking and can also cause the bag to float, requiring weights to keep it submerged.
4. The 48-Hour Sous Vide Immersion
Once your water bath has reached and maintained 147°F, gently lower the vacuum-sealed brisket into the water. Ensure the entire packet is fully submerged. If it floats, you can use a plate, clips, or specific sous vide weights to keep it underwater. Now, the waiting begins! Let the brisket cook undisturbed for the full 48 hours. During this long cooking period, the magic happens: the tough collagen in the brisket breaks down, transforming it into an incredibly tender and moist piece of meat. It’s important to maintain the water level throughout the cook, topping it off with warm water if evaporation occurs.
5. The Critical Ice Bath & Storage
After the 48-hour cooking period is complete, carefully remove the brisket from the water bath. If you plan to serve it immediately, you can proceed to the searing step. However, if you intend to reheat and serve the brisket in a few days, an immediate ice bath is crucial. Submerge the vacuum-sealed brisket packet into an ice bath (a large bowl filled with ice and water) for at least one hour. This rapid chilling stops the cooking process and quickly brings the meat through the temperature danger zone, ensuring food safety and preserving the brisket’s tender texture. Once uniformly chilled, store the sealed brisket packet in your refrigerator until you’re ready to serve.
6. Reheating for Optimal Flavor and Texture
When you’re ready to enjoy your perfectly cooked brisket (if it was chilled), it’s time to reheat it gently. Place the sealed packet back into your sous vide water bath, set to 140°F (60°C), for about 30 minutes. This temperature is ideal for bringing the brisket back to a warm, ready-to-serve state without further cooking it. Avoid higher temperatures that might dry out the meat or alter its carefully achieved tenderness.
7. The Perfect Sear: Achieving a Flavorful Crust
The final, essential step is searing. This creates a delicious, savory crust that adds a vital layer of flavor and texture, contrasting beautifully with the tender interior. Heat 2 tablespoons of lard (or your preferred high-smoke-point fat) in a large cast iron skillet over high heat until it’s shimmering and just beginning to smoke. Carefully remove the brisket from its vacuum bag and pat it thoroughly dry with paper towels – moisture is the enemy of a good sear. Place the brisket in the hot skillet and sear all sides, about 1-2 minutes per side, until a deep golden-brown crust forms. Work quickly to avoid overcooking the interior.
Once seared, transfer the brisket to a cutting board and let it rest for a few minutes before slicing it against the grain. This allows the juices to redistribute, ensuring every slice is incredibly moist and flavorful.
Tasting the Success: A Culinary Revelation
The moment of truth arrived, and the results were truly impressive. The meat was wonderfully tender, practically melting in the mouth, and bursting with delicious flavor. While I appreciated the texture and taste, my only minor critique was that the substantial blob of fat on the corner, though flavorful, could have been more rendered. This is a common characteristic of some grass-fed briskets and can vary, but it’s a small trade-off for the overall magnificent tenderness and taste.
Despite that minor note, this method has definitively proven itself. When I make grass-fed brisket again, I am absolutely sticking to the 147°F for 48 hours. Why tamper with a formula that yields such exceptional results? This technique truly elevates grass-fed brisket from a potentially challenging cut to a star dish in your culinary repertoire.
Tips for Consistently Excellent Sous Vide Grass-Fed Beef
- Choose Quality Meat: Start with the best grass-fed brisket you can find. Quality matters for flavor and texture.
- Proper Seasoning: Don’t be shy with salt and pepper. They are crucial for flavor development. Experiment with different rub blends to find your favorite.
- Ensure a Tight Seal: Any air pockets in your vacuum bag can hinder heat transfer and lead to uneven cooking. Double-check your seal.
- Submersion is Key: Make sure the entire piece of meat is submerged in the water bath for consistent cooking.
- Don’t Skip the Ice Bath: If storing, the ice bath is vital for food safety and maintaining texture.
- High Heat Sear: A blazing hot pan is essential for a quick, effective sear without overcooking the interior of your perfectly sous vided brisket.
- Rest the Meat: Even after sous vide and searing, a short rest allows juices to redistribute, ensuring maximum juiciness.
Elevate Your Cooking with Sous Vide
Embracing sous vide cooking opens up a world of precision and consistency, especially when tackling cuts like grass-fed brisket. This method empowers you to achieve professional-level results in your home kitchen, transforming potentially tricky ingredients into culinary masterpieces. Give this Thomas Keller-inspired technique a try, and prepare to be amazed by the tender, flavorful grass-fed brisket you can create.
Looking for more recipe ideas to inspire your next meal? Head on over to my Recipe Index for a vast collection of delicious and healthy options. You’ll also find exclusive recipes, handy cooking tips, and much more on my iPhone and iPad app, designed to make healthy eating accessible and enjoyable. For even more culinary adventures and proven recipes, explore my cookbooks: Nom Nom Paleo: Food for Humans (Andrews McMeel Publishing 2013), a foundational guide to paleo cooking; Ready or Not! (Andrews McMeel Publishing 2017), perfect for busy lifestyles; and the latest installment, Nom Nom Paleo: Let’s Go! (Andrews McMeel Publishing 2021), offering fresh perspectives and exciting dishes. Happy cooking!