
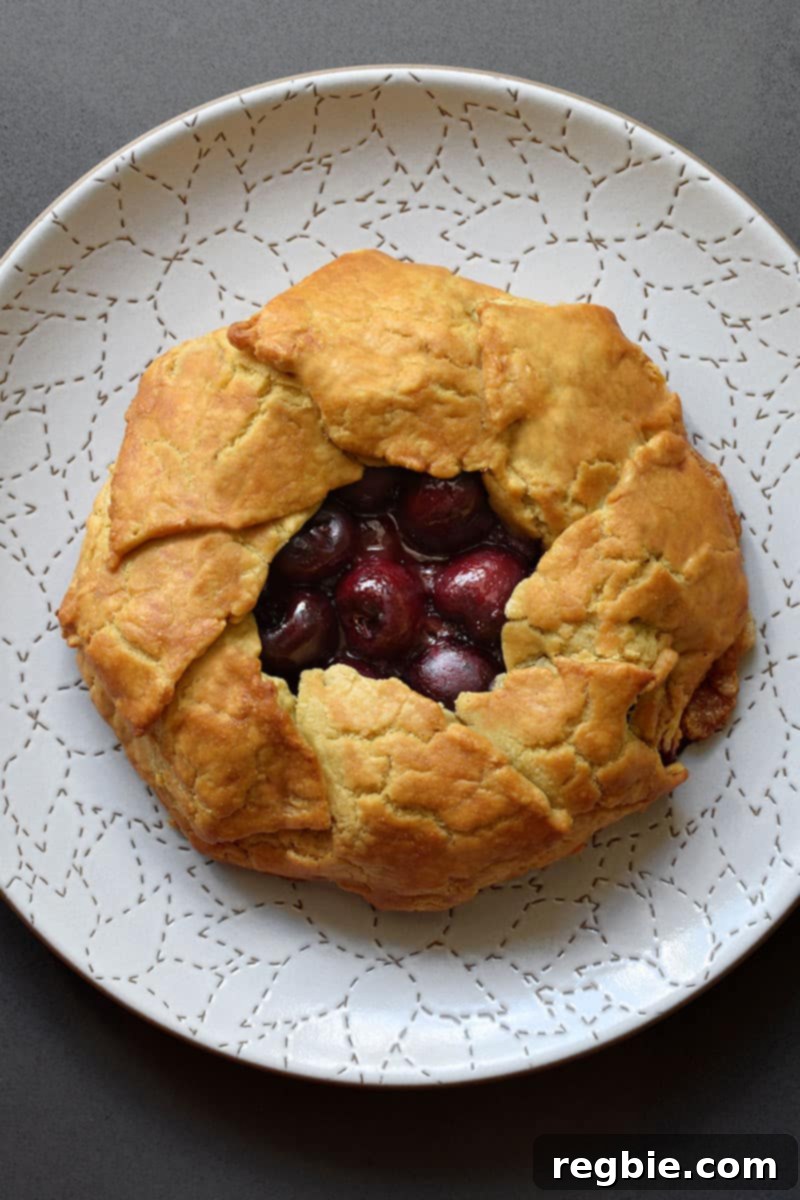
This delightful cherry galette, often referred to as a free-form cherry pie, is a true testament to simple baking at its best. It boasts a perfectly buttery and crisp crust that encases a filling with an exquisite balance of sweet and tart flavors. The best part? No one will ever guess that this fabulous fruit dessert is entirely Paleo, gluten-free, and completely nut-free, making it an ideal treat for a wide range of dietary needs. Prepare to impress your family and friends with this seemingly indulgent yet secretly healthy galette!
Table of Contents
- The Perfect Dessert for Cherry Season!
- Tips for a Successful Paleo Galette
- Don’t Change the Ingredients for the Crust
- Keep Things Cold!
- Don’t Get Frustrated if the Dough Cracks!
- Can You Use Other Fruit for the Filling?
- Can You Make the Dough Ahead of Time?
- Ingredients for Your Paleo Cherry Galette
- Dough
- Filling
- How to Make a Paleo and Gluten-Free Cherry Galette
- Make the Paleo Pie Dough
- Roll Out the Dough
- Make the Cherry Filling
- Assemble the Cherry Galette
- Bake the Cherry Galette
- Looking for Other Paleo Baked Goods?
- Cherry Galette (Paleo, Gluten Free, Nut Free) Recipe
The Perfect Dessert for Cherry Season!
As the days lengthen and summer approaches, I eagerly anticipate the return of fresh, plump cherries to farmers’ markets, especially here in Northern California. Late May and early June mark the peak of cherry season, and for good reason – they are, without a doubt, my absolute favorite fruit. Among the many varieties, the sweet, firm, and juicy Bing cherry stands out as a personal favorite. There’s something truly special about biting into a perfectly ripe cherry, bursting with natural sweetness.
It’s a common scenario: I head to the market with the best intentions, but my love for cherries often leads me to buy far more than I can possibly eat fresh. This isn’t just greed; it’s a deep appreciation for the fleeting nature of cherry season. When I’ve enjoyed my fill of them straight from the bag, I turn to baking, and a galette is always my go-to choice. A galette, or its Italian cousin, the crostata, is a rustic, free-form pie that offers all the best elements of a traditional pie without any of the fuss. You get that irresistible buttery crust and a luscious, sticky fruit filling, all without the intricate work of weaving a lattice top or the extra step of blind-baking. It’s truly a celebration of seasonal fruit, made simple.
Tips for a Successful Paleo Galette
Crafting a delicious paleo, nut-free, and gluten-free pie dough can sometimes be a bit tricky, but don’t let that deter you! With careful attention to these instructions and a few key tips, you’ll achieve a spectacular galette every time. Imagine a sweet, jammy filling enveloped by a fantastic, buttery crust that stays perfectly crisp and never falls apart or gets soggy. While practice certainly helps, these pointers are designed to guide even novice paleo bakers toward galette glory!
Don’t Change the Ingredients for the Crust
It might be tempting to swap out one of the flours in this specialized dough with another gluten-free alternative you have on hand, like coconut flour or almond flour. However, these substitutions will significantly alter the dough’s texture and behavior, and the results will likely not be the same. This particular recipe relies on the unique properties of cassava flour and tapioca starch to achieve its desirable texture and pliability, especially since it’s designed to be nut-free. If a successful substitution exists, it will be explicitly listed within the recipe details. Otherwise, proceed with ingredient changes at your own risk. If you do experiment and discover a working alternative, please share your findings in the comments section so the entire baking community can benefit from your efforts!
Keep Things Cold!
The secret to a flaky, tender crust lies in keeping all your ingredients, especially the fat, as cold as possible. Chilled ghee is essential here; make sure it’s firm before you begin. When pulsing it with the dry ingredients and egg in your food processor, work quickly to minimize any melting. Furthermore, use ice-cold water – adding a few ice cubes to your water before measuring it helps ensure it’s sufficiently chilled. If the ghee softens too much and incorporates completely into the flour, your dough will become dense and crumbly, losing that wonderful buttery texture we’re aiming for. Cold ingredients prevent the fat from fully emulsifying with the flour, creating pockets that, when baked, turn into steam and produce a light, flaky crust.
Don’t Get Frustrated if the Dough Cracks!
Remember, the beauty of baking a galette is its inherent rustic charm. The goal isn’t to create a flawless, geometrically perfect pie with crimped edges or an elaborate lattice top. Embrace the handmade aesthetic! While it can be a little frustrating if the galette dough cracks as you’re carefully folding the edges over the fruit, there’s no need to panic. This is a common occurrence with gluten-free, paleo doughs. If the dough seems too stiff and cracks, simply dab a tiny bit of water onto the affected area and gently press it back together to seal the edges. Conversely, if your dough feels too warm and overly pliable, pop the entire baking sheet into the refrigerator for 10-15 minutes to allow it to firm up again. It will all come together beautifully in the end, achieving that charming “rustic” look that makes galettes so appealing.
Can You Use Other Fruit for the Filling?
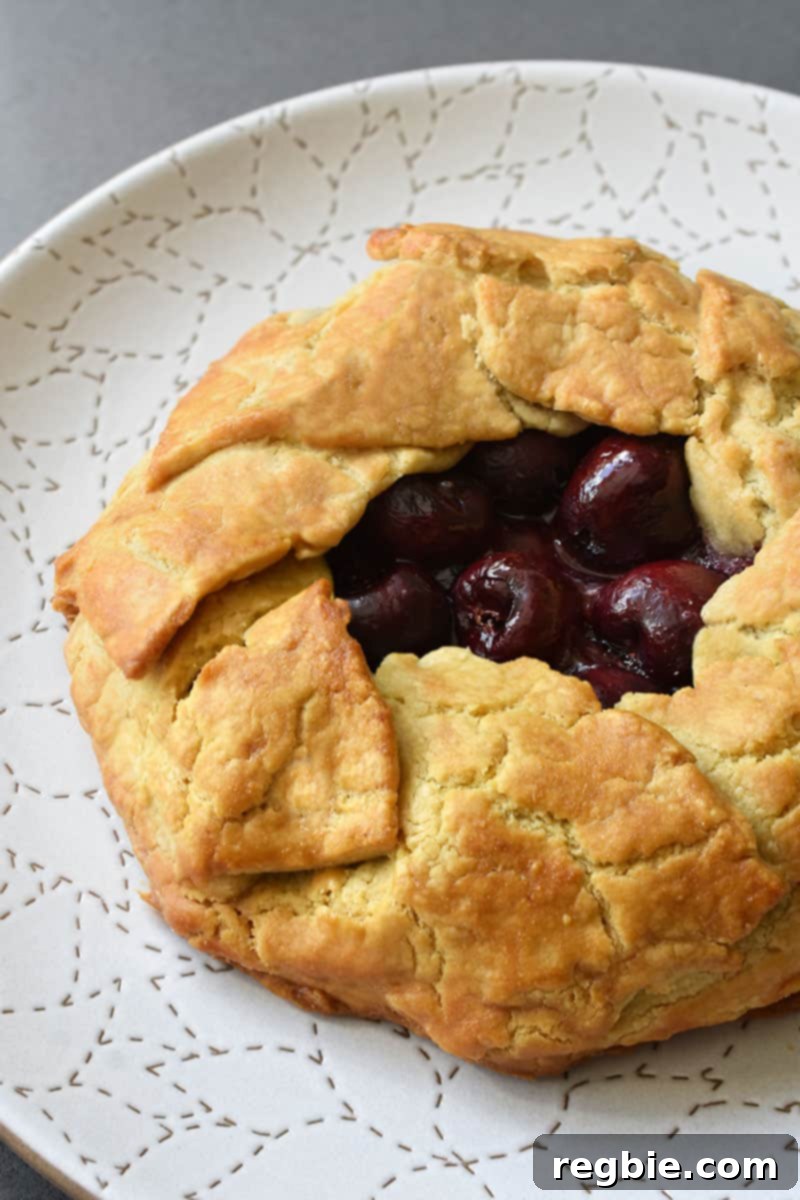
Absolutely! The versatility of a galette means you’re not limited to just cherries. This recipe works wonderfully with a variety of fruits, allowing you to adapt it to whatever is in season or what you have on hand. I’ve personally had excellent results making galettes with vibrant blueberries, sweet blackberries, juicy strawberries, tender sliced peaches, and even classic apples. Each fruit brings its own unique flavor profile and texture to the dessert.
A quick note on fruit choice: softer fruits like berries or sliced fruits such as peaches and strawberries tend to release more juice during baking. This might result in a slightly runnier filling, but rest assured, it will still be incredibly flavorful and delicious! If you prefer a thicker filling with juicier fruits, you might consider adding an extra half-tablespoon of tapioca starch to the fruit mixture to absorb more moisture. For apples, you might need to pre-cook them slightly or slice them very thinly to ensure they soften adequately during the baking time. Don’t be afraid to experiment with your favorite seasonal produce!
Can You Make the Dough Ahead of Time?
While the convenience of preparing dough in advance is often appealing, this specific paleo galette dough doesn’t lend itself well to extended chilling or freezing. If left to chill for too long, or if frozen and thawed, the dough tends to become excessively stiff and crumbly, making it difficult to roll out without extensive cracking. This is due to the unique composition of gluten-free, nut-free flours.
Instead of making the dough ahead, my recommendation for planning is to bake the entire galette early in the day. Like most baked goods, this galette truly shines when enjoyed on the same day it’s baked, offering the best texture and flavor at room temperature. If you happen to have any leftovers, they can be stored in an airtight container in the refrigerator for up to four days. Reheat gently in a warm oven for a few minutes to crisp up the crust if desired, though it’s also quite pleasant cold!
Ingredients for Your Paleo Cherry Galette
Dough
- Cassava flour: The primary flour for structure. You’ll need 1 cup, plus more for dusting your work surface.
- Tapioca starch: Adds chewiness and helps with binding, ¼ cup (or arrowroot powder as a substitute).
- Maple sugar or coconut sugar: For a touch of sweetness in the crust, 1½ teaspoons.
- Diamond Crystal kosher salt: Enhances flavor, ¼ teaspoon.
- Large eggs: Two eggs, divided – one for the dough, one for the egg wash.
- Chilled ghee: ½ cup, coarsely chopped. This is crucial for a flaky crust. Palm shortening or coconut oil can be used as alternatives for a similar texture.
- Cold water: ¼ cup of ice water, to bring the dough together.
Filling
- Fresh cherries: ½ pound, pitted. Sweet varieties like Bing work best.
- Lemon juice: 1½ teaspoons, brightens the cherry flavor.
- Maple sugar or coconut sugar: ¼ cup, to sweeten the filling.
- Tapioca starch: 1 tablespoon, thickens the filling (or arrowroot powder; note that arrowroot may result in a slightly looser gel).
- Diamond Crystal kosher salt: ⅛ teaspoon, balances the sweetness.
How to Make a Paleo and Gluten-Free Cherry Galette
Make the Paleo Pie Dough
Begin by combining the dry ingredients with the fat and egg for the crust. In the work bowl of a food processor, add the cassava flour, tapioca starch, maple sugar (or coconut sugar), salt, one large egg, and the chilled, coarsely chopped ghee.
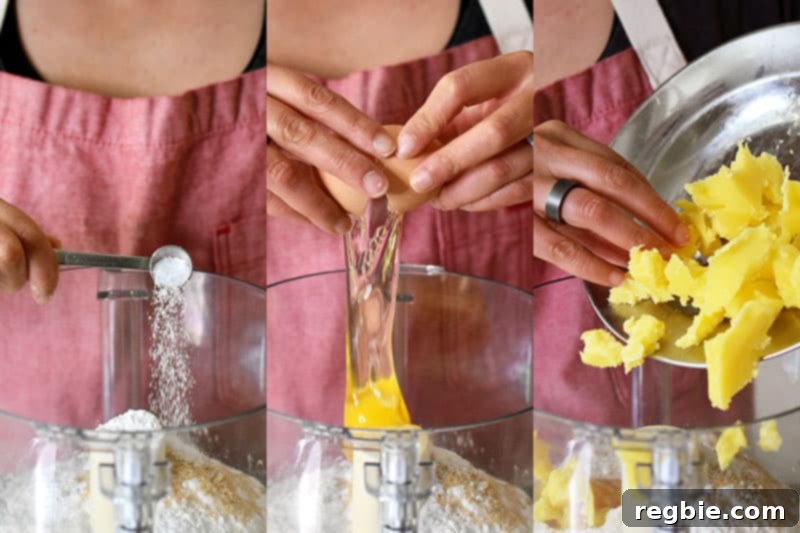
Pulse the ingredients until they form coarse crumbs. You’re looking for a texture similar to coarse meal, with no lumps larger than a small pea. This ensures the fat is evenly distributed but still distinct, which is key for a flaky crust. If you don’t have a food processor, don’t worry! You can whisk the dry ingredients together in a large bowl, then add the egg and cut in the chilled ghee using a pastry cutter or two forks until the mixture resembles coarse crumbs.
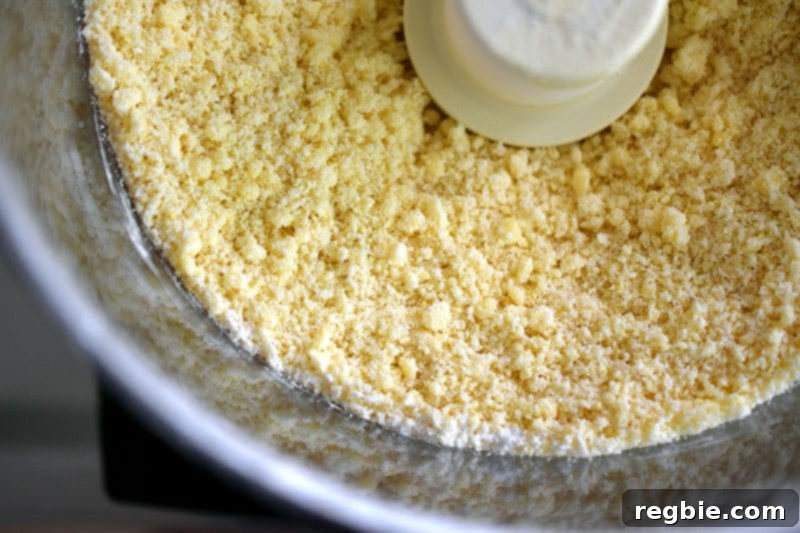
Once the coarse crumbs are formed, transfer the mixture from the food processor to a large mixing bowl. Gradually drizzle in the cold water, adding a little at a time.
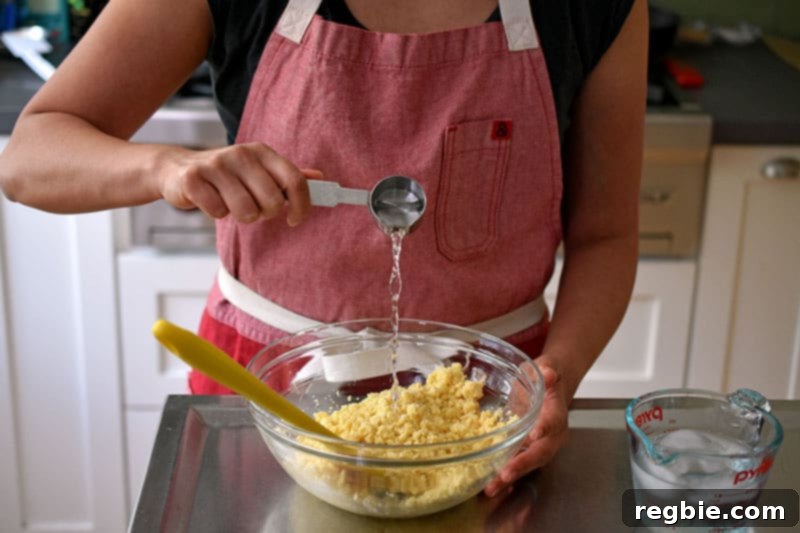
Fold the mixture gently with a rubber spatula until a non-sticky, cohesive dough begins to form. Be careful not to overmix, as this can develop the starches too much.
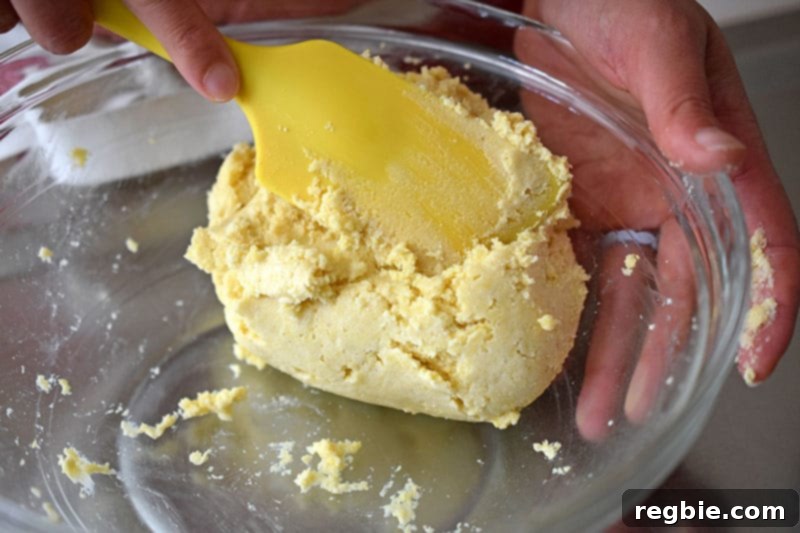
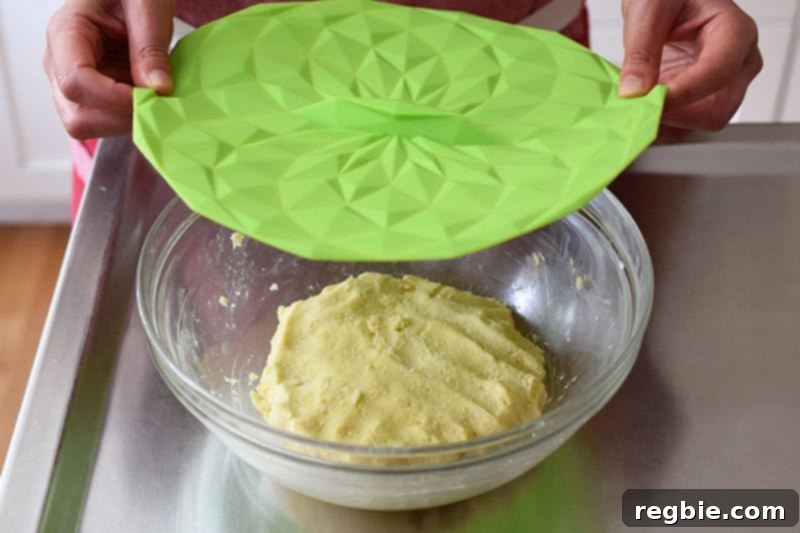
Gather the dough and gently shape it into a flat disk or puck. This shape will make it easier to roll out later. Cover the bowl (a silicone lid or plastic wrap works well) and refrigerate the dough for approximately 30 minutes to allow it to chill thoroughly. This resting period is crucial as it helps the flours hydrate and the ghee to firm up, making the dough more manageable. While the dough is chilling, preheat your oven to 400°F (200°C) with an oven rack positioned in the middle.
Roll Out the Dough
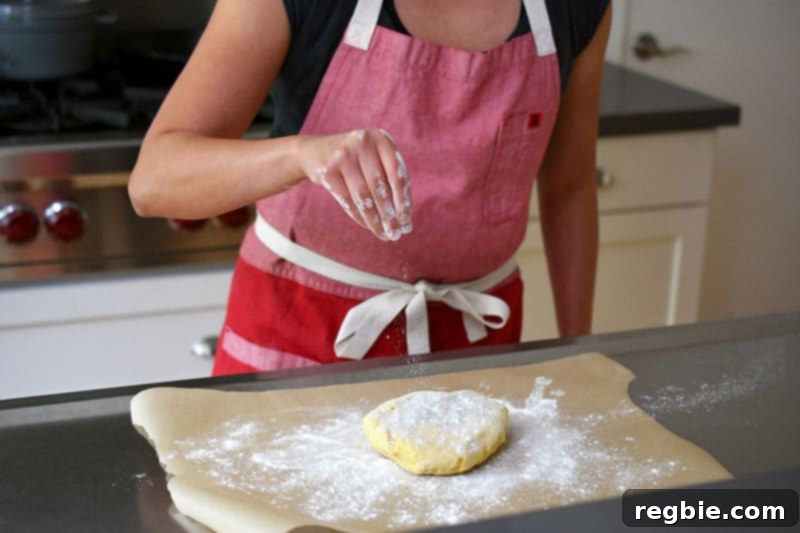
Prepare your work surface by laying down a large piece of parchment paper. Lightly sprinkle cassava flour all over the parchment paper to prevent sticking. Place your chilled dough puck on top and sprinkle a bit more cassava flour over the dough itself.
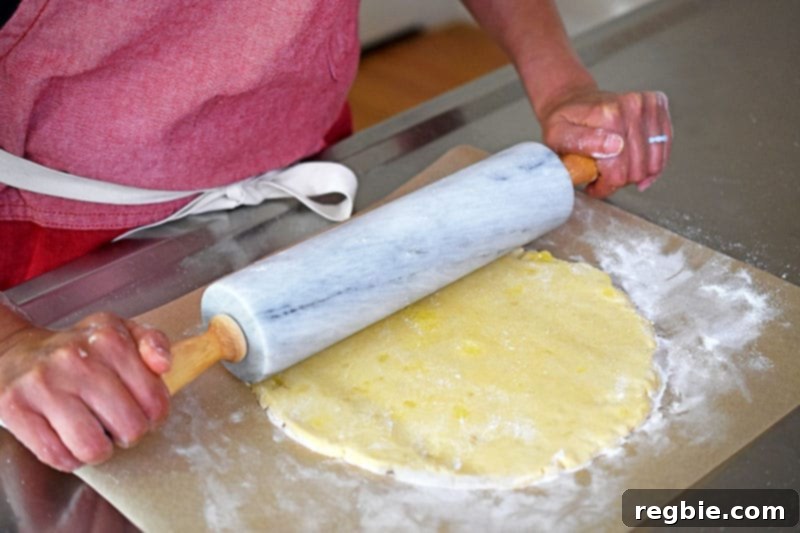
Using a rolling pin, carefully roll the dough into a uniform circle, aiming for about ¼-inch thickness and a diameter of approximately 12 inches. If the dough cracks as you roll it out – which can happen with gluten-free dough – don’t worry! Simply use your fingers to gently smush the cracked sections back together. If it feels too dry, dab a tiny bit of water onto the dough to help it reconnect.
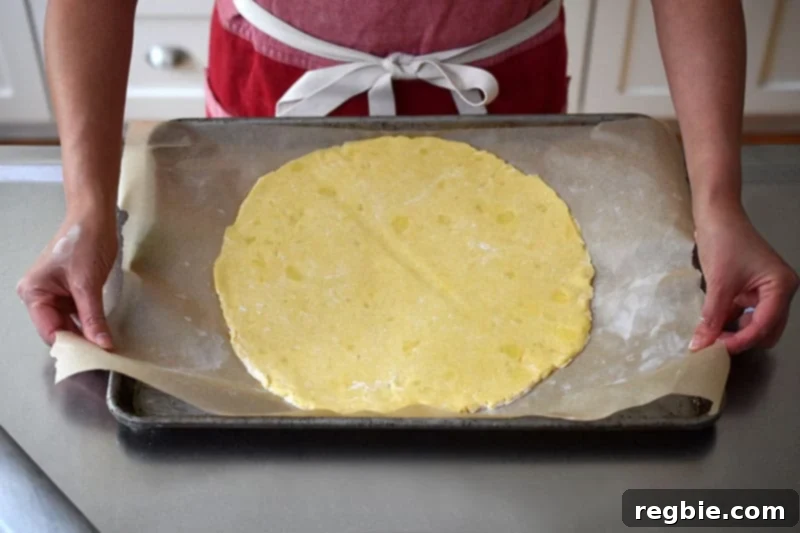
Once rolled, carefully transfer the parchment paper with the rolled dough onto a rimmed baking sheet. This makes it easy to handle and contains any potential spills during baking. If the dough feels overly pliable or soft after rolling, pop the baking sheet into the fridge for a few minutes to allow the dough to firm up again before proceeding.
Make the Cherry Filling
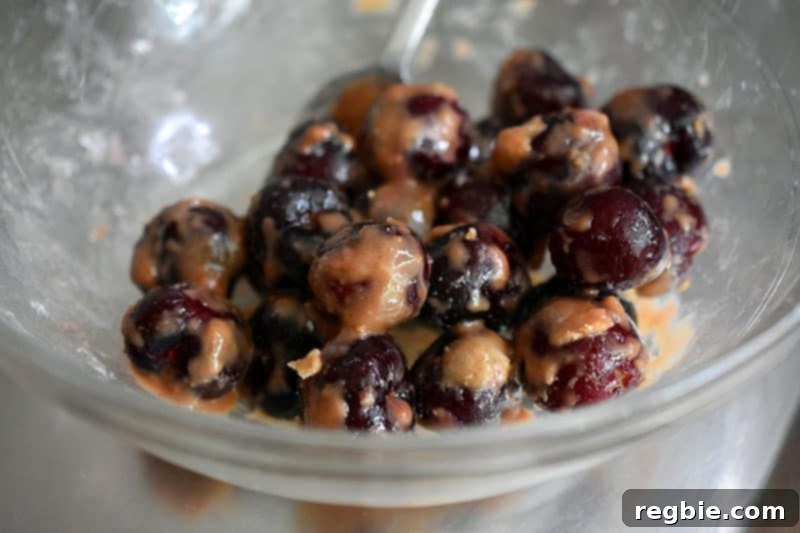
In a large bowl, combine the pitted fresh cherries, lemon juice, maple sugar (or coconut sugar), tapioca starch, and a pinch of salt.
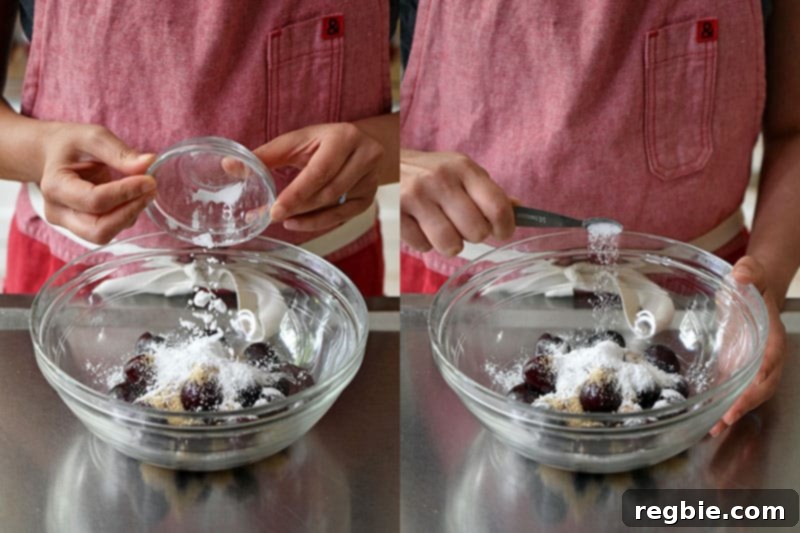
Gently toss all the ingredients together until the cherries are evenly coated with the sugar and tapioca starch. The starch is vital for thickening the cherry juices during baking, creating that wonderfully jammy consistency.
Assemble the Cherry Galette
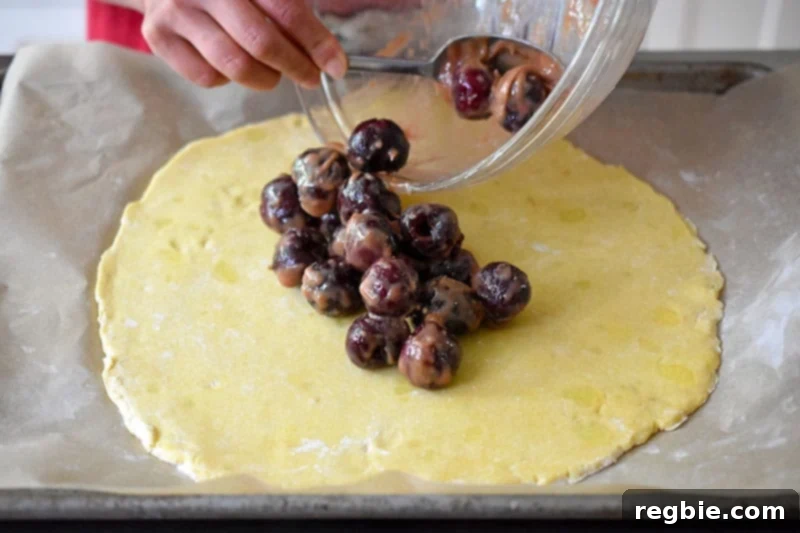
Arrange the prepared cherry filling in a single layer in the center of the rolled-out dough. Be sure to leave a generous 2-inch border of plain dough around the edge; this will be folded over to form the rustic crust.
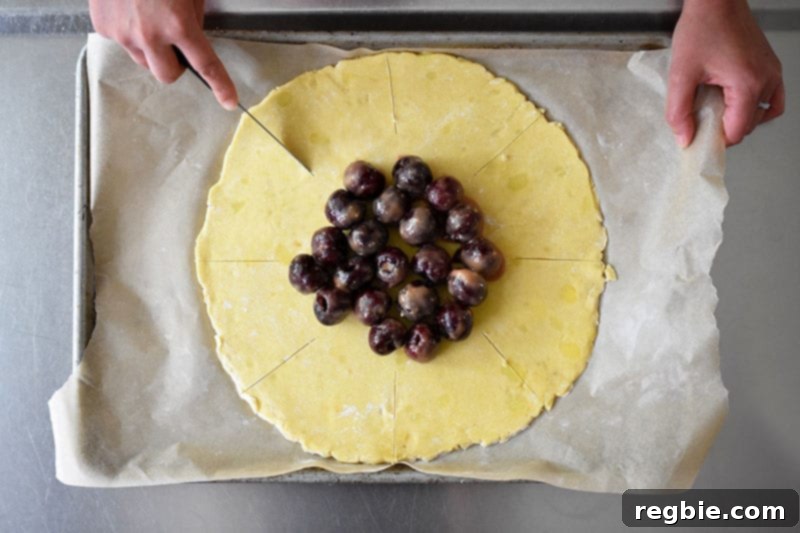
Using a paring knife, make eight evenly spaced slits from the edge of the dough inward, stopping just before you reach the cherry filling. These slits will create the “flaps” that you’ll fold over the fruit.
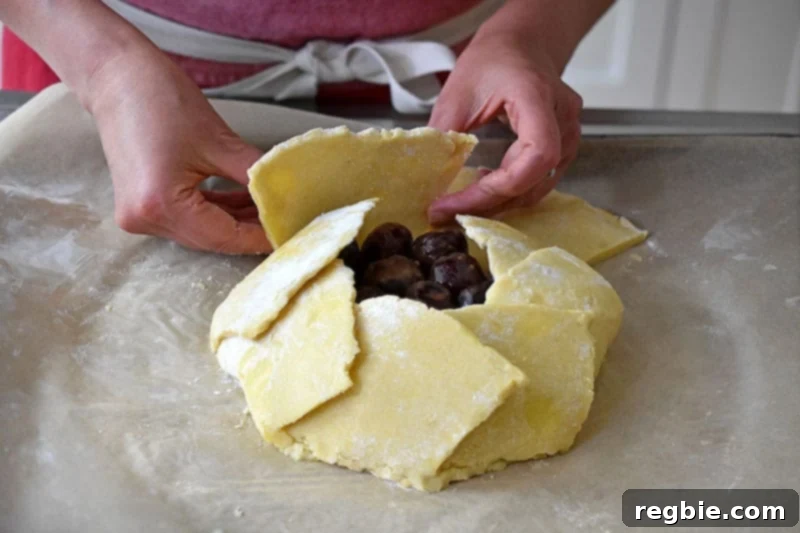
Carefully lift and fold each dough segment flap up and over the cherries, working your way around the circle. The goal is to partially enclose the filling, leaving the vibrant cherries in the very center of the galette exposed.
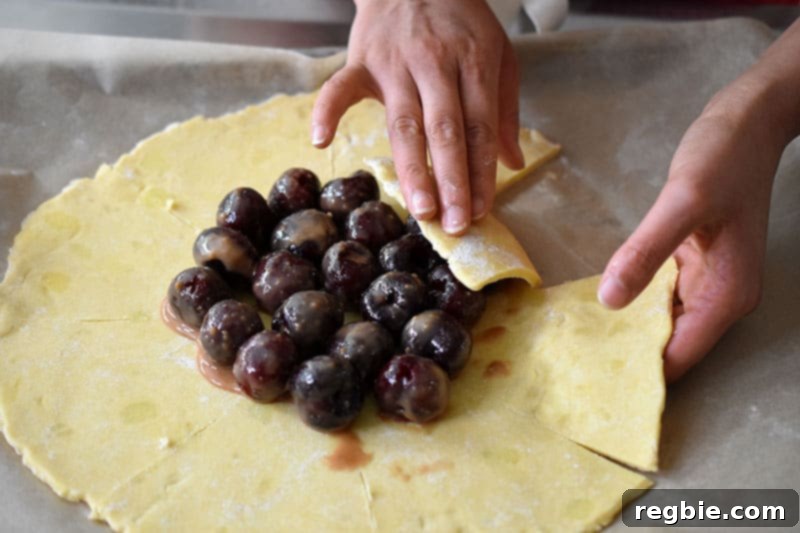
If any edges or other parts of the dough crack during this process, simply dab a tiny amount of water on the crack and gently press to seal it. Remember our earlier tip: this is exactly what “rustic” looks like, so don’t strive for perfection! Embrace the charming imperfections that make each homemade galette unique.
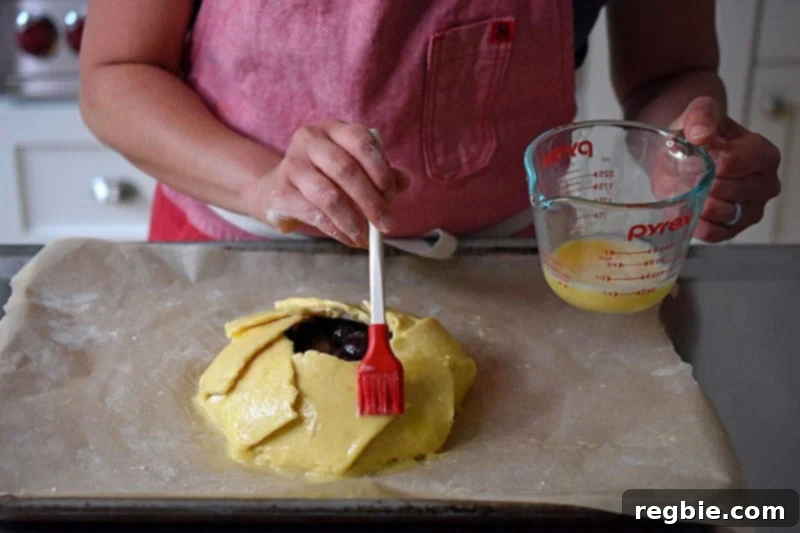
In a small bowl, whisk the remaining large egg to create an egg wash. Use a pastry brush to lightly brush this egg wash over the top of the folded-over crust. This step contributes to a beautiful golden-brown, glossy finish on your baked galette.
Bake the Cherry Galette
Carefully transfer the baking sheet with your assembled galette into the preheated 400°F (200°C) oven. Bake for 30 to 35 minutes, or until the crust achieves a beautiful golden-brown color and the cherry filling is visibly bubbly and thickened.
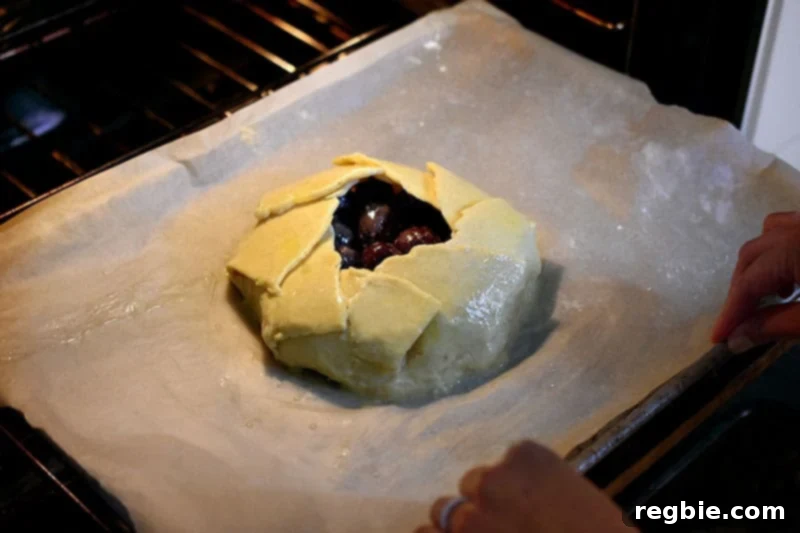
To ensure even baking and browning, rotate the galette halfway through the baking time. This prevents one side from cooking faster than the other, resulting in a uniformly gorgeous crust.
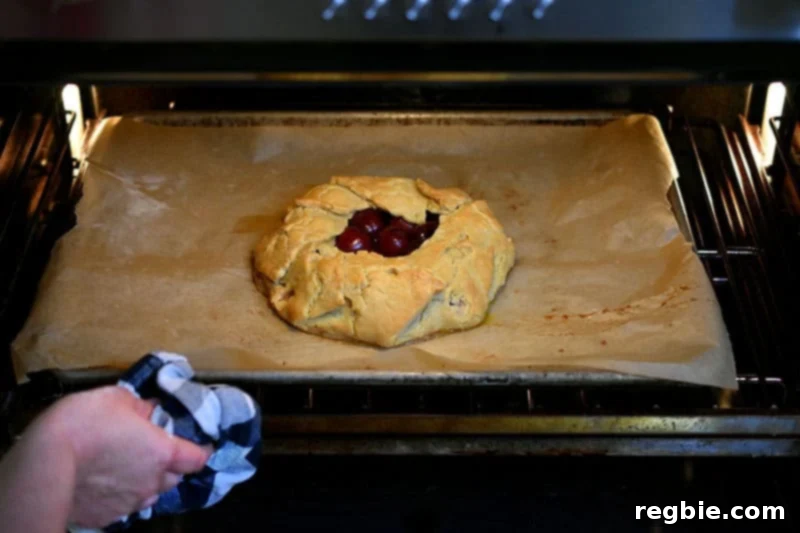
Once baked to perfection, carefully remove the galette from the oven and slide the parchment paper (with the galette still on it) onto a wire rack to cool. Allowing it to cool on a rack prevents the bottom crust from becoming soggy.
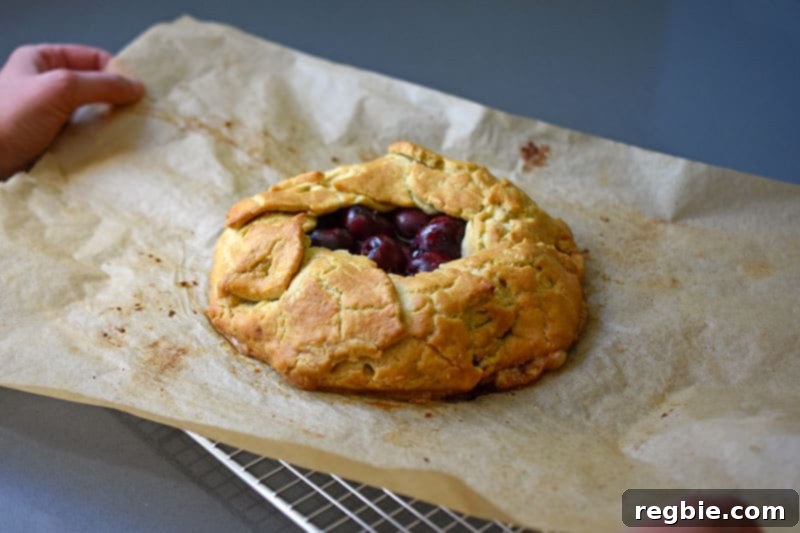
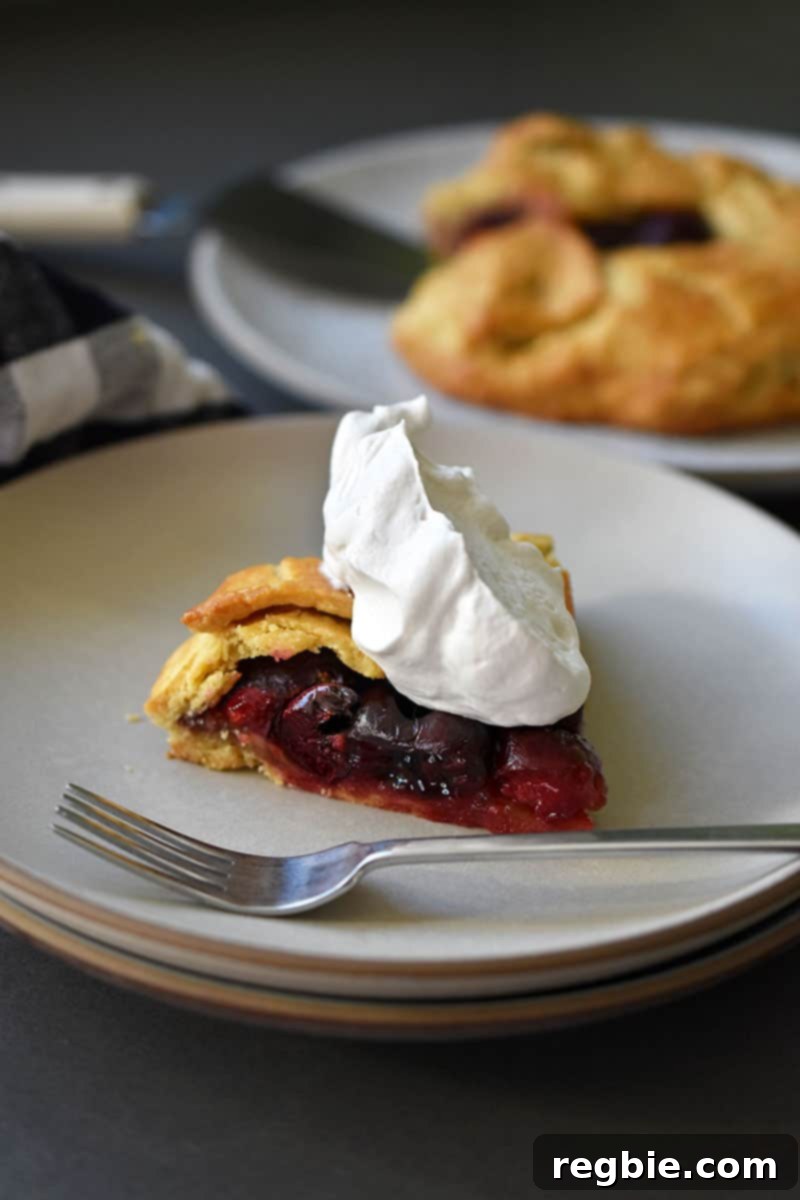
When sufficiently cooled (warm or room temperature is ideal), slice up your incredible paleo cherry galette. For an extra touch of indulgence, consider topping each slice with a dollop of whipped coconut cream or a scoop of dairy-free vanilla ice cream. Now, it’s time to dig in and savor this delicious homemade dessert!
Looking for Other Paleo Baked Goods? Here Are Some My Faves:
- Matcha Mug Cake
- Easy Chocolate Lava Cake
- Pumpkin Bars
- Berry Snack Cake
- Fresh Peach Cake
- Easy Cinnamon Rolls in A Muffin Pan
- The World’s Easiest Cookies
Looking for more recipe ideas? Head on over to my Recipe Index. You’ll also find exclusive recipes in my cookbooks: Nom Nom Paleo: Food for Humans (Andrews McMeel Publishing 2013), Ready or Not! (Andrews McMeel Publishing 2017), and Nom Nom Paleo: Let’s Go! (Andrews McMeel Publishing 2022).
Cherry Galette (Paleo, Gluten Free, Nut Free) Recipe
Prep Time: 15 mins
Cook Time: 45 mins
Dough Chilling Time: 30 mins
Total Time: 1 hour 30 mins (approx.)
Servings: 6
Author: Michelle Tam
This cherry galette, a delightful free-form cherry pie, features a buttery and crisp crust paired with a perfectly balanced sweet and tart filling. It’s a fantastic fruit dessert that’s completely Paleo, gluten-free, and nut-free – ideal for enjoying during cherry season!
Ingredients
Dough
- 1 cup cassava flour (plus more as needed for rolling the dough)
- ¼ cup tapioca starch (or arrowroot powder)
- 1½ teaspoons maple sugar (or coconut sugar)
- ¼ teaspoon Diamond Crystal kosher salt
- 2 large eggs (divided: 1 for dough, 1 for egg wash)
- ½ cup ghee, chilled and coarsely chopped (palm shortening or coconut oil will also work)
- ¼ cup ice water
Filling
- ½ pound sweet cherries, pitted
- 1½ teaspoons lemon juice
- ¼ cup maple sugar (or coconut sugar)
- 1 tablespoon tapioca starch (or arrowroot powder; the filling will have a looser gel with arrowroot)
- ⅛ teaspoon Diamond Crystal kosher salt
Instructions
Make The Dough!
- Add the cassava flour, tapioca starch, sugar, salt, one egg, and chilled ghee to the work bowl of a food processor. Pulse until the dry ingredients resemble coarse crumbs with no lumps bigger than a pea. (If you don’t have a food processor, whisk dry ingredients, then add egg and cut in ghee with a pastry cutter or forks.)
- Transfer the contents from the food processor to a large mixing bowl. Drizzle in the cold water gradually, folding it in with a rubber spatula until a non-sticky dough forms.
- Smush the dough into a flat puck. Cover the bowl and refrigerate for about 30 minutes to chill the dough. While the dough chills, preheat your oven to 400°F (200°C) with the rack in the middle.
- Place a large piece of parchment paper on your work surface and sprinkle it generously with cassava flour. Place the chilled dough on top and sprinkle additional cassava flour over it.
- Roll the dough into a uniform circle, approximately ¼-inch thick and 12-inches in diameter. If the dough cracks as you roll it out, simply smush it back together and add a little water if it feels dry.
- Transfer the parchment paper and the rolled dough onto a rimmed baking sheet. If the dough feels too pliable, briefly pop it back into the fridge.
Make The Filling!
- In a large bowl, toss together the pitted cherries, lemon juice, sugar, tapioca starch, and salt. Mix until all ingredients are well combined and the cherries are coated.
Assemble the Galette!
- Arrange the cherry filling in a single layer in the center of the dough, leaving a 2-inch border around the edge.
- Using a paring knife, cut eight evenly spaced slits from the edge of the dough inward towards the cherries.
- Carefully fold each dough segment flap up and over the cherries, leaving the fruit in the center of the galette exposed.
- If the edges or other parts of the dough crack, dab a little water on top to help seal them up. Remind yourself: THIS IS WHAT RUSTIC LOOKS LIKE!
- Whisk the remaining egg in a small bowl and brush this egg wash evenly over the top of the crust.
- Place the galette in the preheated oven and bake for 30 to 35 minutes, or until the crust is golden brown and the filling is bubbly. Rotate the galette at the halfway point to ensure even baking.
- Transfer the finished galette onto a wire rack to cool completely.
- Slice it up. If desired, serve with a dollop of whipped coconut cream. Enjoy!
Notes
- No food processor? Whisk the dry ingredients together first in a large bowl. Then, add the egg and cut in the chilled ghee with a pastry cutter or two forks until coarse crumbs form. Continue with step 2 of the instructions.
- For maximum accuracy, especially with gluten-free baking, it is recommended to measure all dry ingredients using a kitchen scale.
Nutrition
Calories: 305 kcal
Carbohydrates: 38 g
Protein: 3 g
Fat: 16 g
Fiber: 1 g
Sugar: 15 g
Nutrition information is an approximation and may vary based on specific ingredient brands and preparation methods.
Like this recipe? Leave a comment below and share your thoughts!