
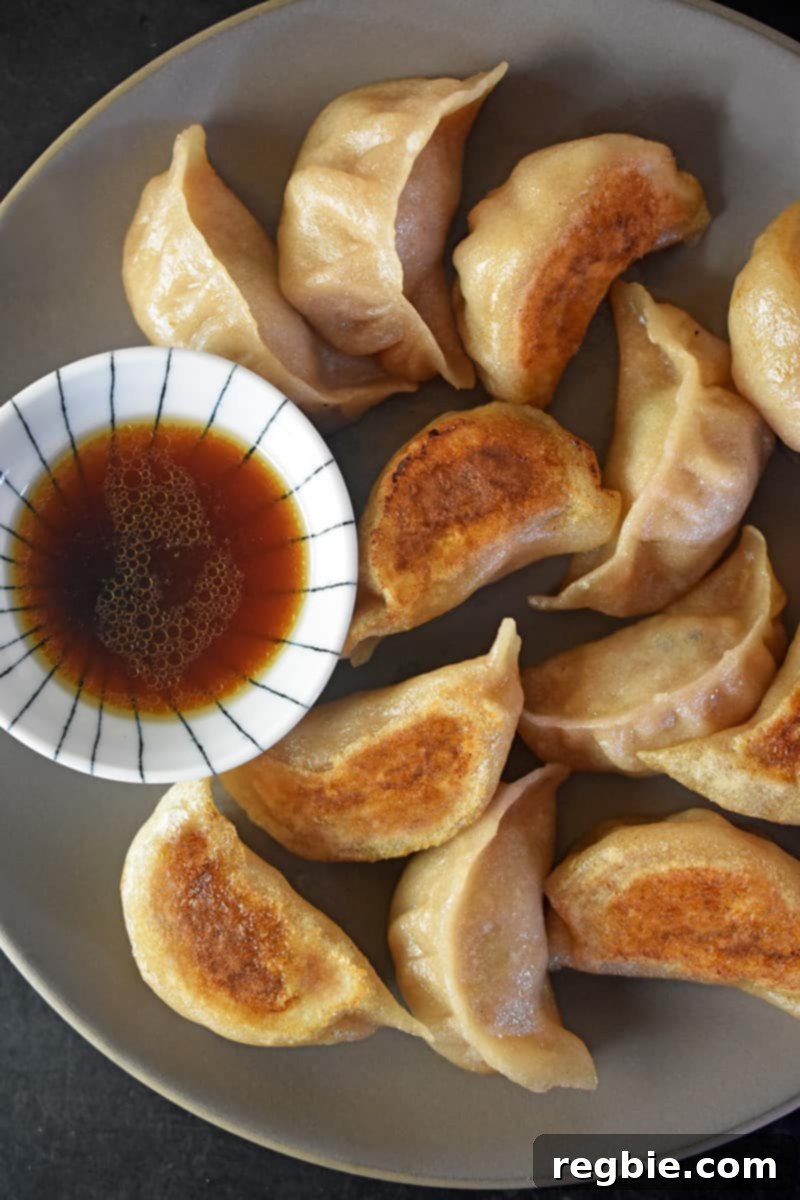
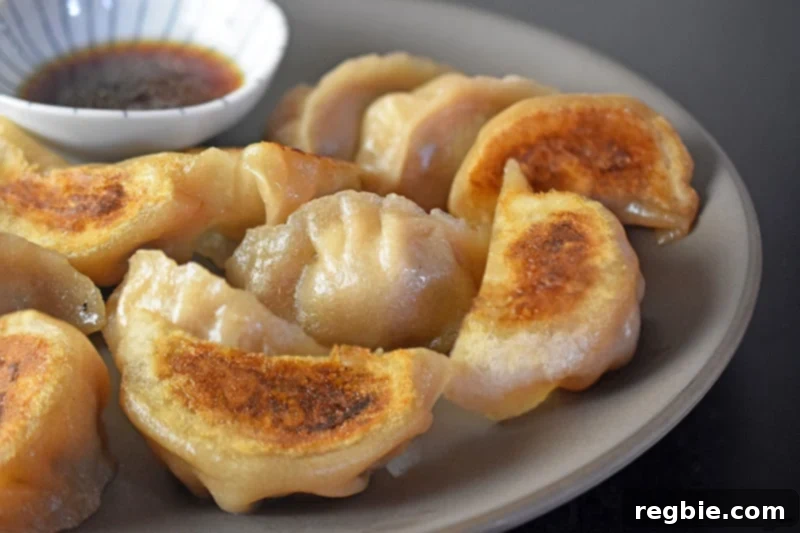
Craving the savory delight of perfectly pan-fried dumplings? Get ready to create the most incredible **homemade gluten-free potstickers** right in your own kitchen! These exceptional dumplings are not only paleo but also completely grain-free, nut-free, dairy-free, and egg-free. Despite these dietary considerations, they deliver an authentic, mouthwatering flavor that will transport you back to your favorite Chinese restaurant. You’ll be amazed at how these delicious potstickers can impress even your most dedicated dumpling-loving, non-paleo friends! (Just a heads-up: these likely don’t qualify for Whole30, falling under “The Pancake Rule”.)
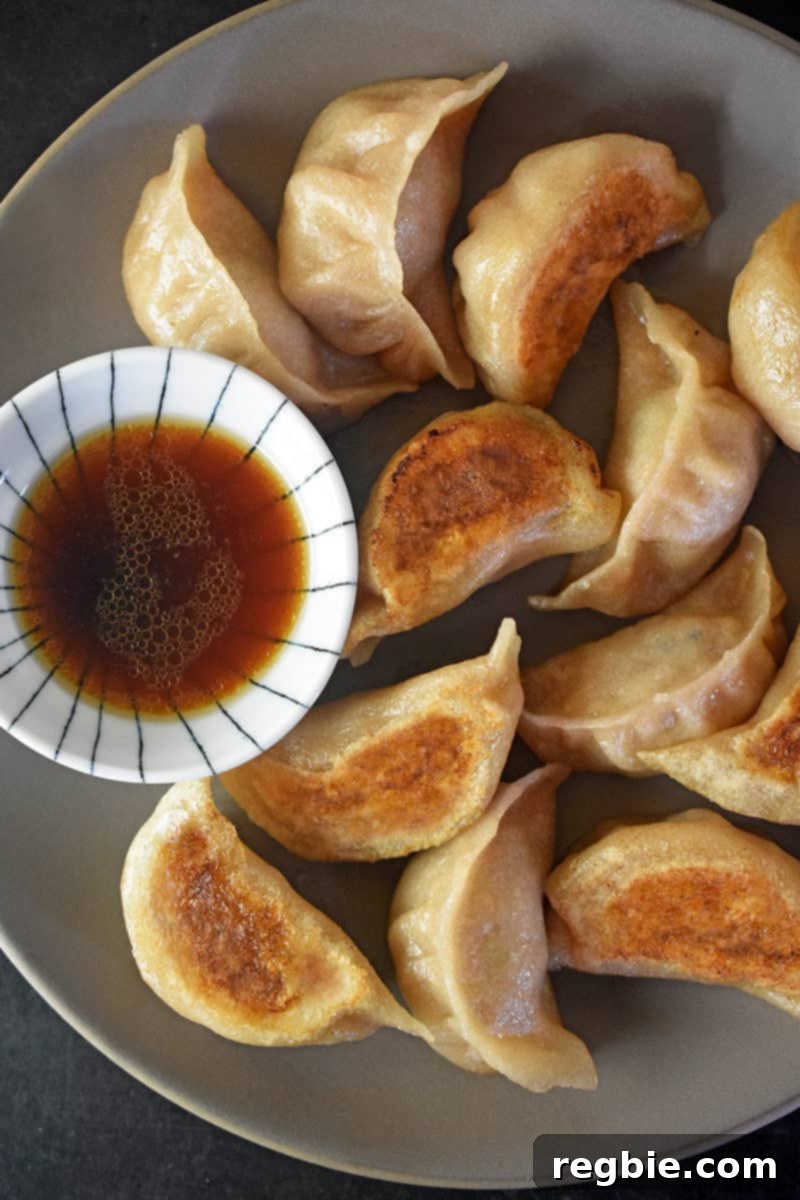
Table of Contents
- The Ultimate Paleo Potstickers: Worth Every Effort!
- What’s the Best Strategy for Making These Potstickers?
- Day One: Preparing the Flavorful Filling
- Day Two: Crafting Wrappers, Forming Dumplings, and Cooking
- (Optional) Day Three: Savoring Your Delicious Dumplings
- Can I Use a Different Meat for the Potsticker Filling?
- Customizing the Vegetables in Your Potsticker Filling
- Alternative Flours for Gluten-Free Potsticker Wrappers?
- Making These Potstickers Keto-Friendly or Low Carb
- Is a Tortilla Press Essential for Potsticker Wrappers?
- My Paleo Potstickers Don’t Look Perfect – Is That OK?
- Can You Freeze These Homemade Potstickers?
- Key Ingredients for Authentic Paleo Potstickers
- For the Irresistible Potsticker Filling:
- For the Perfect Gluten-Free Dumpling Wrapper:
- For Cooking Your Delicious Dumplings:
- For the Zesty Dipping Sauce:
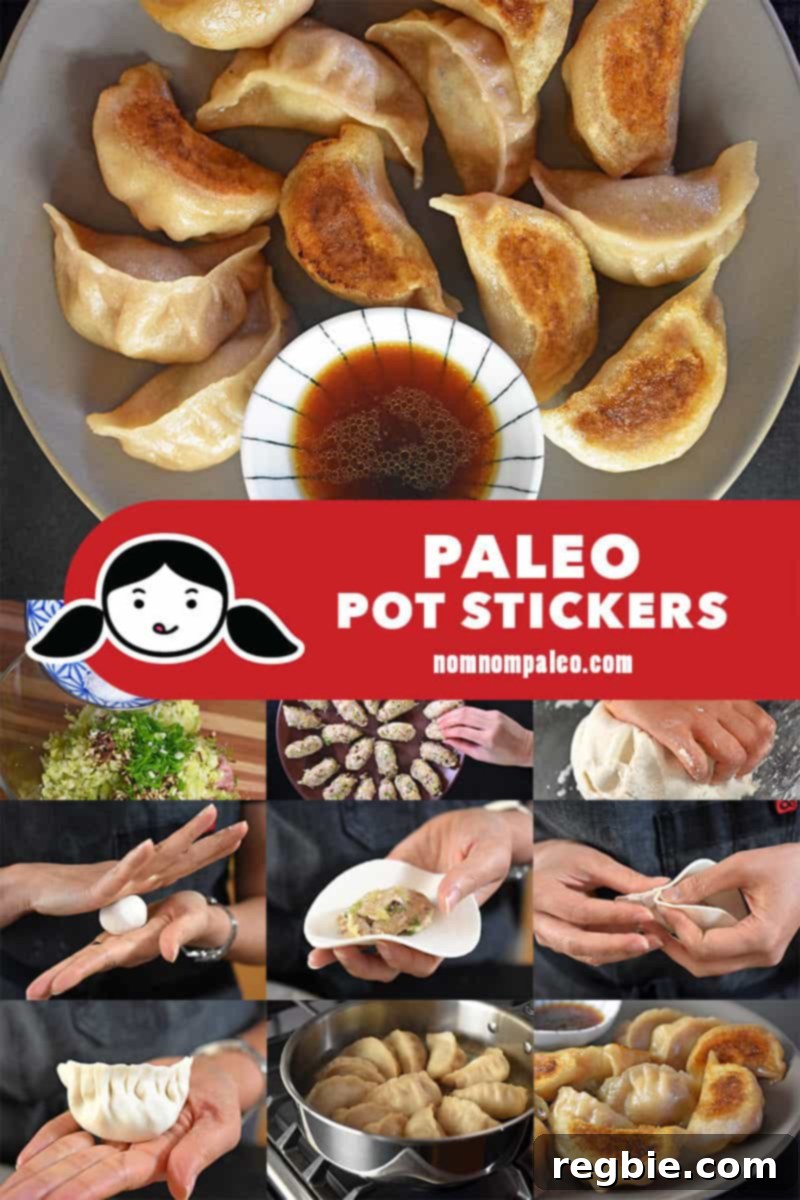
- Step-by-Step Guide: How to Make Paleo Dumplings
- More Paleo Asian Appetizer Recipes
- Printer-Friendly Recipe Card Overview
- Authentic Gluten-free Potstickers (Paleo, Nut-Free, Grain-free, Soy-free) Recipe
The Ultimate Paleo Potstickers: Worth Every Effort!
Let’s be upfront: these homemade gluten-free potstickers are not a quick weeknight meal. While I often champion shortcuts to culinary bliss (like my Ollie’s Cracklin’ Chicken), some gastronomic journeys demand more dedication. This recipe for Paleo Potstickers requires a bit more time and hands-on effort than many of my other creations, but trust me, the reward is utterly magnificent. These pan-fried Chinese dumplings are a labor of love that is undoubtedly worth every minute spent. And as always, I’m here to guide you through each step with clear instructions and helpful photos!
Homemade dumplings are more than just food; they are a profound expression of love, especially within Asian cultures. If you’ve ever watched the Pixar short film Bao or seen the hit movie Crazy Rich Asians, you’ll understand how dumplings beautifully symbolize the unspoken affection and warmth Asian parents often show their children. Making dumplings is a cherished tradition, passed down through generations. I have fond memories of sitting at our kitchen table, meticulously folding dumplings with my mom and grandma, and then eagerly devouring them straight from the frying pan. Who could possibly resist these delicate, meat-filled pockets of dough, sizzled to a perfect golden crisp and served with a tangy, vinegary dipping sauce?
For a decade after adopting a paleo lifestyle, I hesitated to create a grain-free version of my favorite childhood comfort food. Despite consistent encouragement from my husband over the years, I truly doubted I could replicate the magic of my beloved potstickers. That changed when a devoted reader reached out, sharing her success in making paleo-friendly potstickers using the dough from my Paleo Scallion Pancake recipe for wrappers! This breakthrough finally motivated me. I plunged into extensive experimentation with Paleo Potsticker recipes, and I am absolutely thrilled to announce that I can once again enjoy authentic homemade potstickers – and now, so can you!
What’s the Best Strategy for Making These Potstickers?
As mentioned, this recipe isn’t the simplest, and attempting it all in one go might feel overwhelming. To make the process more enjoyable and manageable, I highly recommend breaking it down into a two or even three-day plan:
Day One: Preparing the Flavorful Filling
The first day is dedicated to the filling. Soaking dried shiitake mushrooms and salting/draining Napa cabbage are crucial steps that require time. Preparing the filling a day or two in advance allows these flavors to meld beautifully and ensures your vegetables are perfectly tender and not watery. Store the prepared filling in an airtight container in the refrigerator for up to two days.
Day Two: Crafting Wrappers, Forming Dumplings, and Cooking
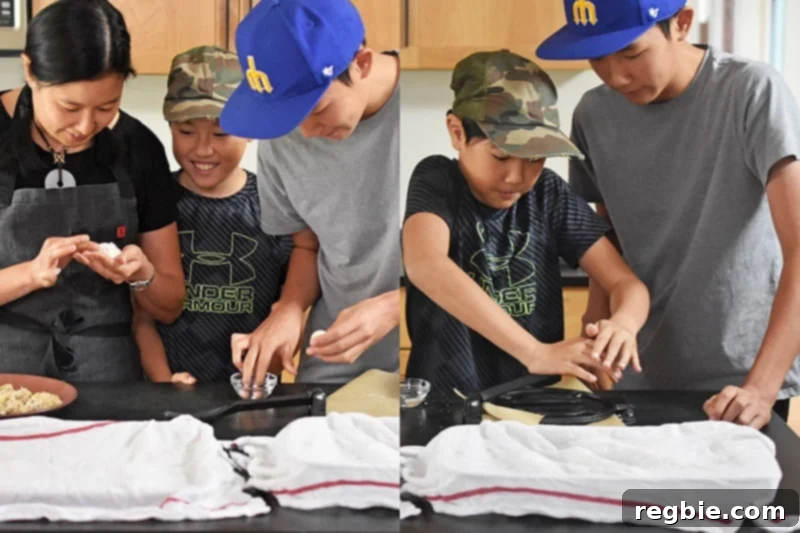
This is your main event, so clear your schedule for a weekend or holiday! It’s important not to make the dough too far in advance, as it tends to firm up considerably in the fridge, making it difficult to work with. For a smoother and faster process, enlist the help of friends and family. Crafting the wrappers and assembling the potstickers with extra hands makes for a fun, collaborative cooking experience. Plus, they can help you enjoy the delicious results right after they’re fried!
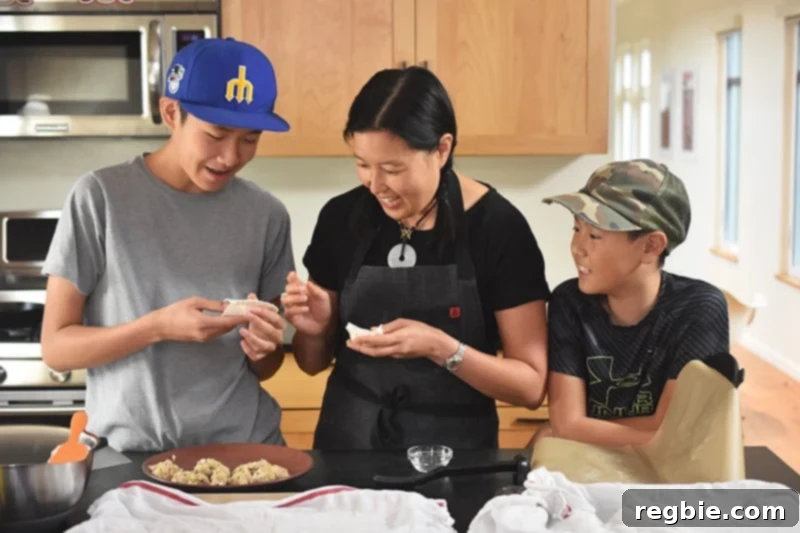
Once you’ve pan-fried these delightful potstickers, your helpers will be more than happy to assist in devouring them!
(Optional) Day Three: Savoring Your Delicious Dumplings
If you prefer not to cook all the dumplings on the same day you wrap them, you have the option to save some for later. Uncooked potstickers can be frozen for up to two months or refrigerated for up to two days. When you’re ready, simply steam-fry them following the recipe instructions for a fresh and satisfying meal.
Can I Use a Different Meat for the Potsticker Filling?
Absolutely! While ground pork is the traditional choice for Chinese potstickers, this recipe is incredibly versatile. I’ve successfully used ground chicken thighs, dark turkey meat, and ground beef, all yielding fantastic results. The key is to avoid excessively lean ground meat. A bit of fat contributes significantly to a juicier, more flavorful filling, ensuring your potstickers are rich and satisfying.
Customizing the Vegetables in Your Potsticker Filling
Dried shiitake mushrooms offer an unparalleled depth of umami flavor, making them ideal for this recipe. However, if fresh shiitakes are more accessible, they make a fine substitute. If you’re not a mushroom fan, feel free to omit them entirely. If Napa cabbage isn’t available at your local grocery store, bok choy is an excellent alternative. I’ve also had great success using finely diced kale leaves and regular green cabbage. Regardless of your choice of greens, do not skip the crucial step of salting and draining them. This process removes excess water, preventing a soggy, mushy filling and ensuring your potstickers have that perfect texture.
Alternative Flours for Gluten-Free Potsticker Wrappers?
Developing this specific gluten-free flour blend—using cassava and arrowroot without rice flour, corn starch, potato starch, or xanthan gum—was a meticulous process. Therefore, I cannot guarantee the outcome if you substitute other flours for the cassava and/or arrowroot in this recipe. Alternative flours can be quite expensive, and I would hate for you to be disappointed with the results. However, if you do experiment and discover a successful substitute, please share your findings in the comments below! Your valuable input could benefit other home cooks on their paleo journey.
Making These Potstickers Keto-Friendly or Low Carb
If you’re looking to adapt this recipe for a keto-friendly or low-carb diet, the easiest approach is to simply fry up the delicious filling mixture as meatballs! Alternatively, you can try my super quick and incredibly flavorful Potsticker Stir-Fry, which offers all the great flavors without the carb-heavy wrapper.
Is a Tortilla Press Essential for Potsticker Wrappers?
While not strictly mandatory, a tortilla press significantly simplifies and speeds up the process of making uniform potsticker wrappers, making it far less tedious. If you don’t own one, you can certainly use a heavy-bottomed pan or a rolling pin to flatten the dough balls. However, I highly recommend investing in a tortilla press. They are quite affordable and incredibly versatile. Once you have one, you can use it to effortlessly prepare other delicious recipes like my Paleo Scallion Pancakes and Fried Green Plantains (a.k.a. Patacones or Tostones)!
My Paleo Potstickers Don’t Look Perfect – Is That OK?
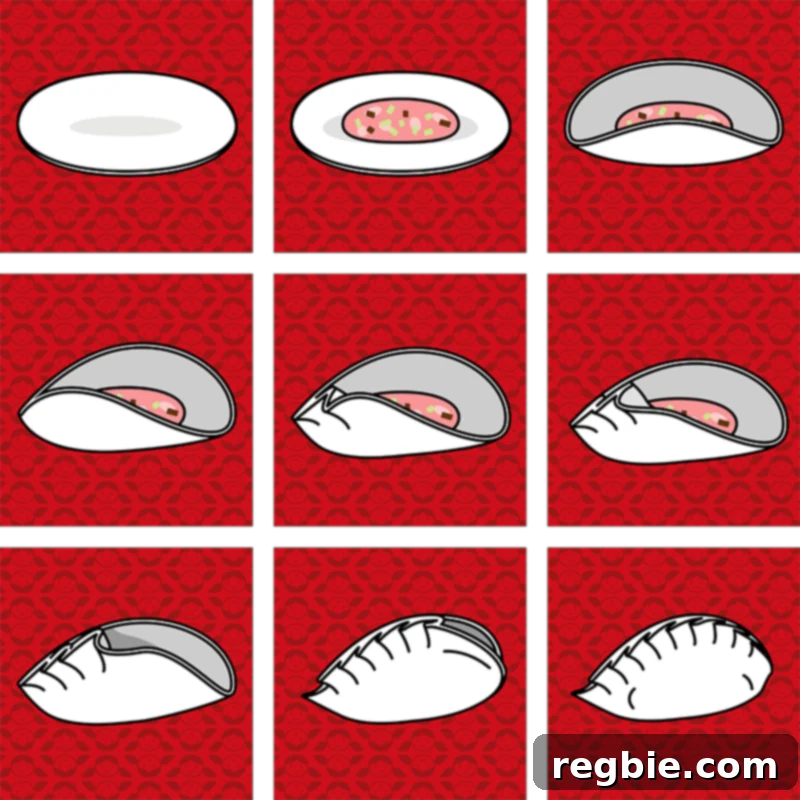
Absolutely, don’t worry about it at all! Crafting beautiful potstickers takes practice, and your first batch might not look like they belong in a magazine. The most important thing is the taste! Besides, wouldn’t you rather enjoy some delicious, albeit “ugly,” potstickers than none at all? If you’re keen on improving your folding technique, this video guide offers excellent tips on how to fold potstickers correctly. Additionally, here’s a helpful graphic that Henry created to illustrate the folding process:
Can You Freeze These Homemade Potstickers?
Yes, and I highly recommend it! When you’re putting in the effort to make a batch of these fantastic potstickers, it only makes sense to prepare extra for future enjoyment. Freezing uncooked potstickers is incredibly convenient. They cook beautifully directly from the freezer: simply steam-fry them using the same method as freshly wrapped dumplings, but extend the steam-frying time from 5 minutes to 7 minutes. This means you can always have a stash of delicious, healthy, homemade paleo potstickers ready for a quick meal or snack!
Key Ingredients for Authentic Paleo Potstickers
For the irresistible potsticker filling:
- Dried shiitake mushrooms: Essential for a deep umami flavor.
- Small Napa cabbage: Provides a delicate crunch and traditional sweetness.
- Diamond Crystal kosher salt: Crucial for seasoning and drawing out moisture from the cabbage (use half the amount if using Morton’s kosher salt or a fine grain salt).
- Ground pork: The traditional choice, offering rich flavor and juiciness.
- Chicken broth: Adds moisture and depth to the filling.
- Minced scallions (green onions): For a fresh, aromatic kick.
- Minced fresh garlic: A staple for savory Asian dishes.
- Ground ginger: Adds a warm, fragrant spice.
- Ground white pepper: Offers a subtle heat and classic Chinese flavor.
- Coconut aminos: Our soy-free alternative to tamari or soy sauce, maintaining a delicious savory profile.
- Toasted sesame oil: Imparts a wonderful nutty aroma and flavor.
For the perfect gluten-free dumpling wrapper:
- Cassava flour: I recommend Otto’s cassava flour for the best wrapper texture.
- Arrowroot powder: Helps achieve the ideal elasticity and chewiness.
- Diamond Crystal brand kosher salt: For seasoning the dough.
- Boiling water: Key to developing the dough’s texture.
For cooking your delicious dumplings:
- Avocado oil: Ideal for pan-frying due to its high smoke point.
For the zesty dipping sauce:
- Rice vinegar: Provides a delightful tang.
- Coconut aminos: For a savory, soy-free base.
- Toasted sesame oil: Adds depth and aroma.
- Paleo Sriracha or crushed red pepper (optional): For a customizable spicy kick.
Step-by-Step Guide: How to Make Paleo Dumplings
Let’s dive into making these incredible paleo potstickers. Remember, preparation is key for a smooth cooking experience.
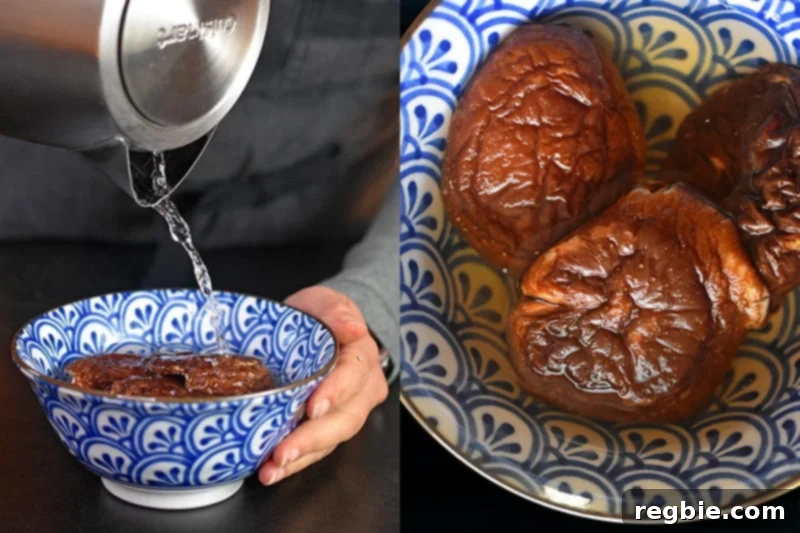
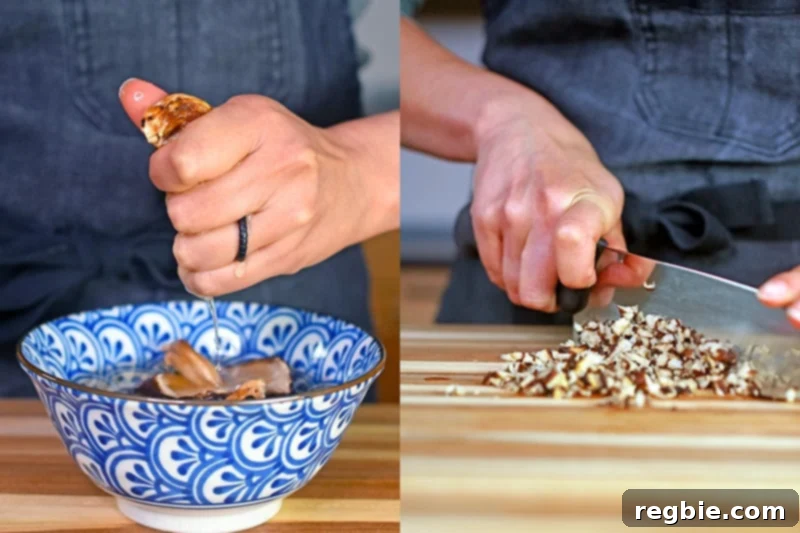
First, begin by preparing the filling. Place the dried shiitake mushrooms in a bowl and cover them with water. Allow them to soak for a minimum of 30 minutes, or until they are completely softened. For convenience, you can also soak them in the refrigerator for up to 8 hours, preparing them the night before.
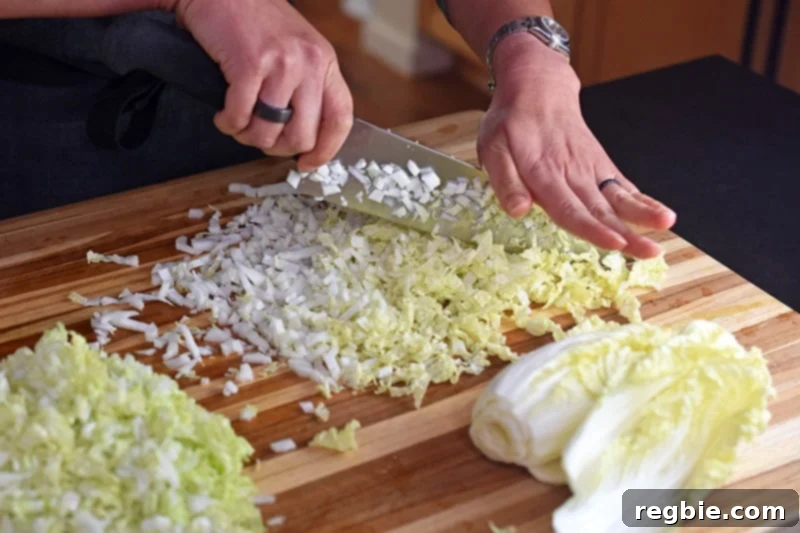
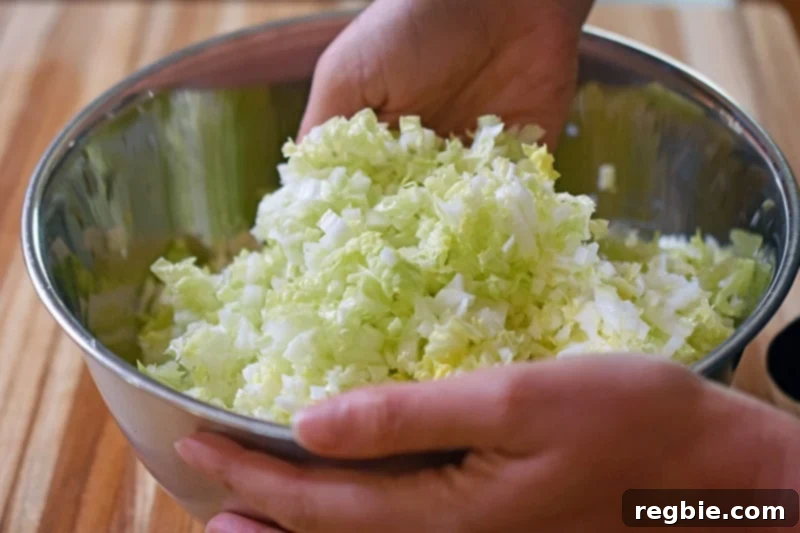
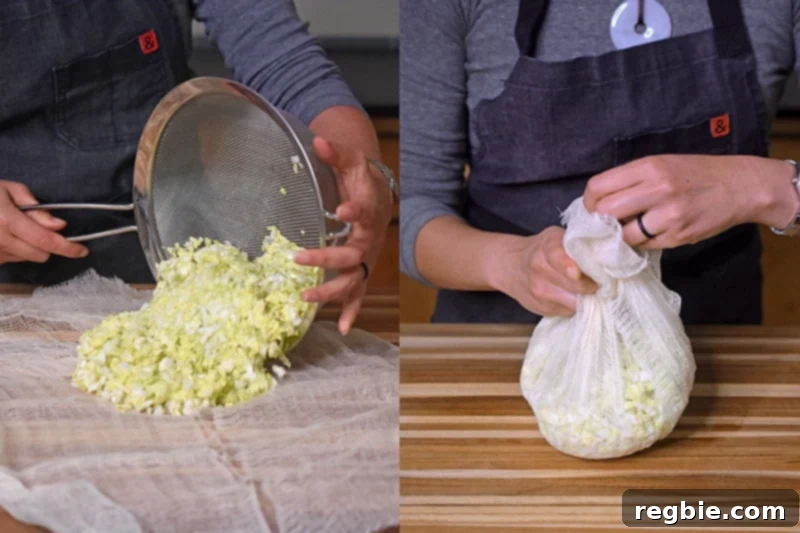
While the mushrooms are soaking, finely chop the Napa cabbage. A food processor can make this step quicker, but hand chopping works just as well if you prefer. Combine the finely chopped cabbage with 2 teaspoons of Diamond Crystal kosher salt in a large bowl and toss thoroughly. (Remember to use only half the amount of salt if you’re using Morton’s kosher salt or any fine-grain salt.)
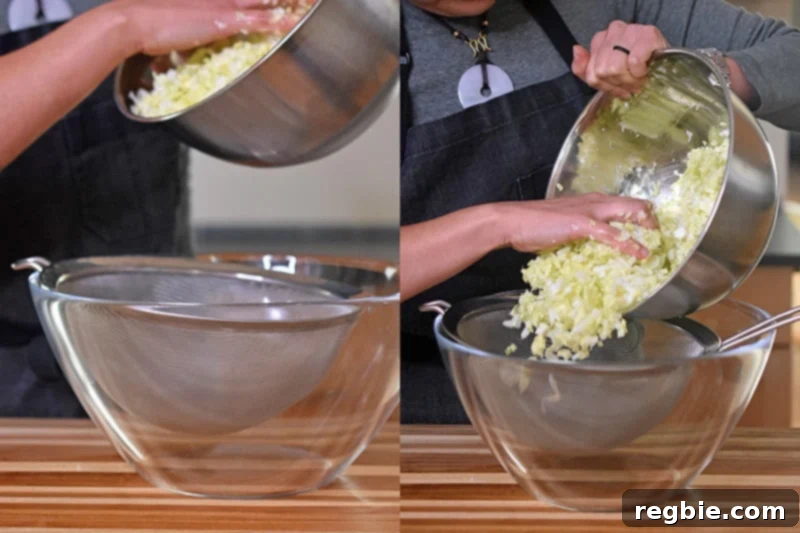
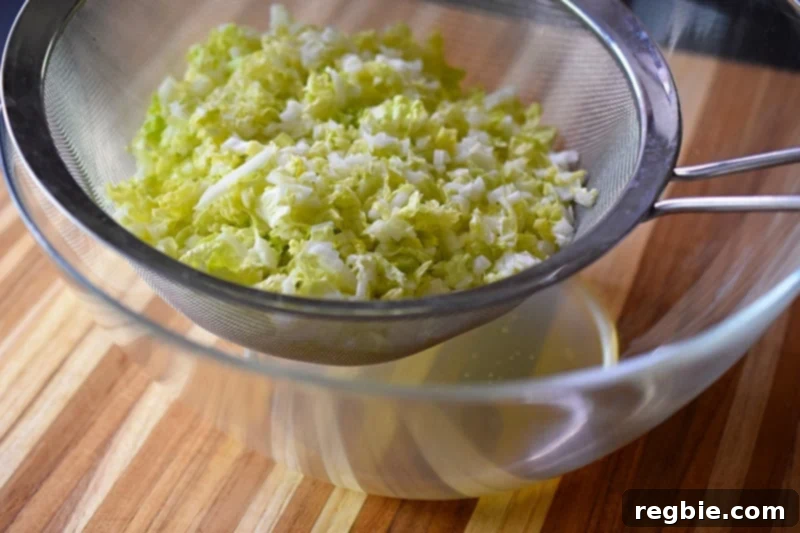
Transfer the salted cabbage to a fine mesh strainer or colander and place it over a bowl to catch the liquid. Allow it to stand at room temperature for at least 30 minutes, or in the refrigerator for up to 8 hours. This crucial step helps draw out excess moisture, ensuring your filling isn’t watery.
When you’re ready to proceed with the filling, retrieve the soaked shiitake mushrooms. Squeeze out as much excess liquid as possible, then remove and discard their tough stems. Finely dice the mushroom caps.
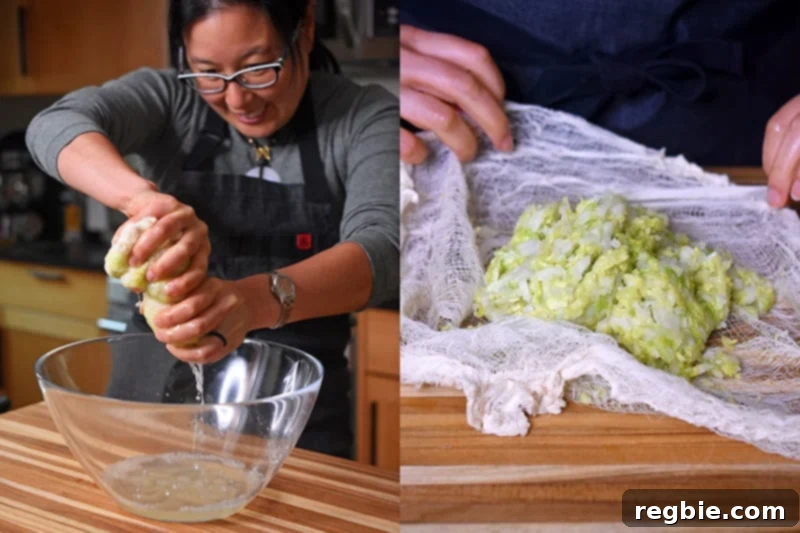
Next, take the salted cabbage and transfer it onto a large piece of cheesecloth or a clean dish towel. Gather the edges of the cloth to form a sack and firmly squeeze and twist the cabbage bundle to wring out as much liquid as you possibly can. You should be left with approximately 1 cup of well-drained cabbage.
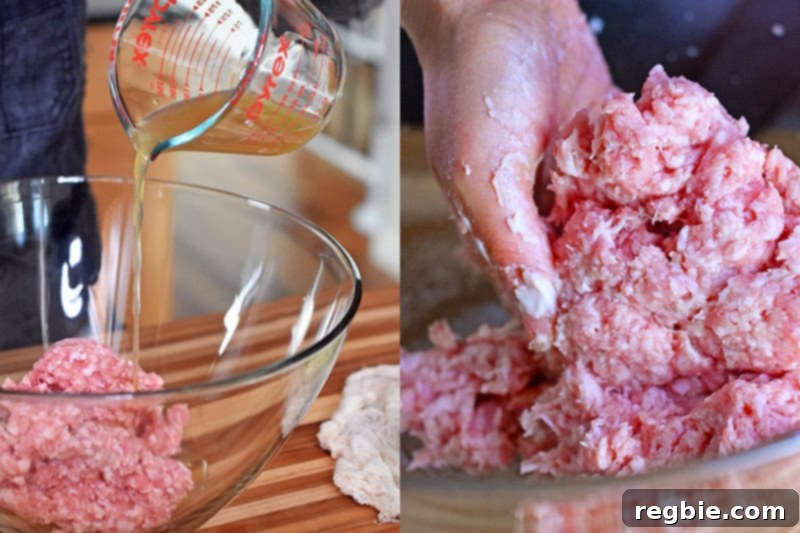
In a large mixing bowl, combine the ground pork with the chicken broth. Use your hands to thoroughly mix and knead the ingredients until the broth is completely incorporated into the meat, creating a cohesive base for your filling.
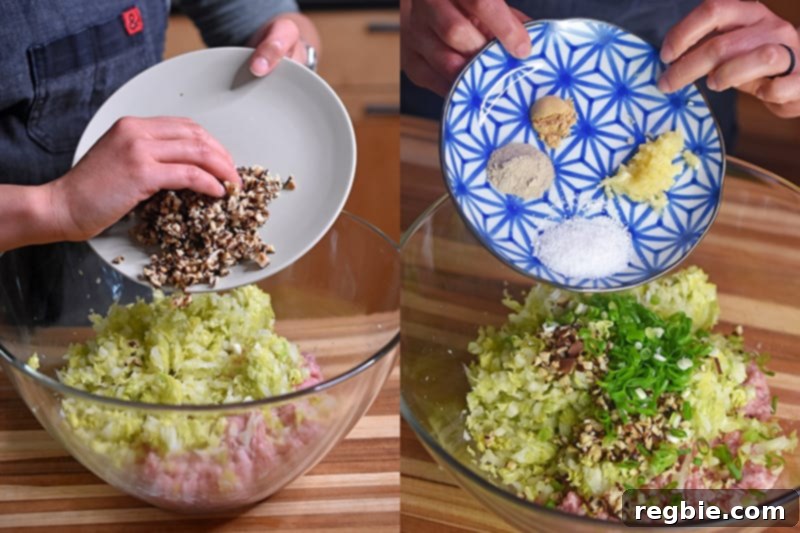
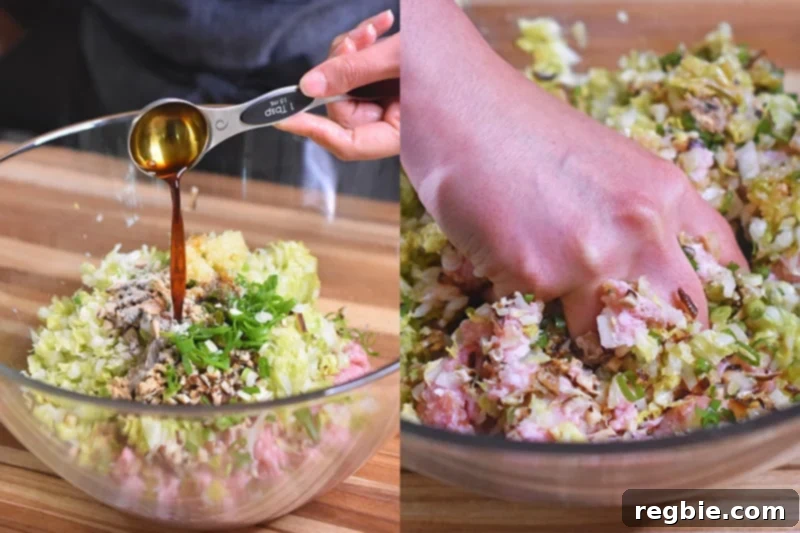
To the pork and broth mixture, add the drained cabbage, diced mushrooms, minced scallions, fresh garlic, ground ginger, ground white pepper, and the remaining teaspoon of Diamond Crystal kosher salt. Incorporate the coconut aminos and toasted sesame oil.
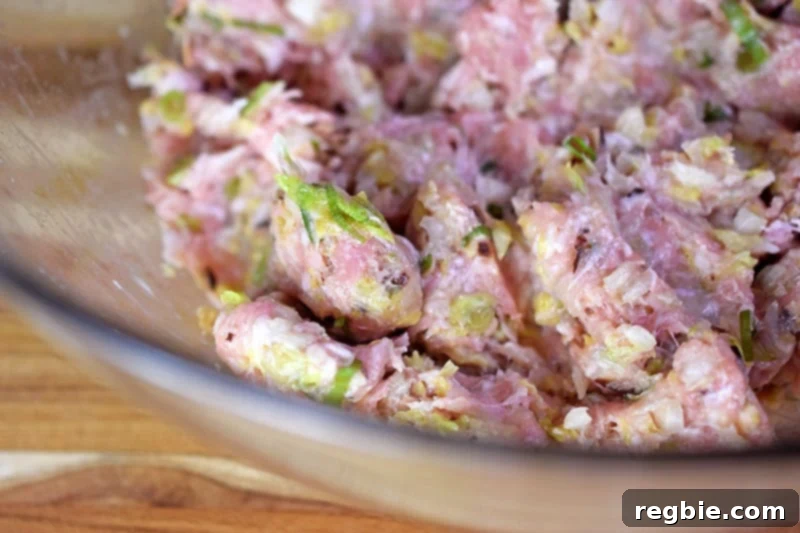
Continue mixing with your hands, kneading the filling until all ingredients are thoroughly combined and the mixture becomes notably tacky and sticky. This texture indicates the filling is ready to hold its shape within the wrappers. To check the seasoning, fry a small patty of the mixture in a pan and taste. Adjust with more salt if needed. Once perfected, the filling can be stored in a sealed container in the fridge for up to two days, making this an ideal make-ahead step.
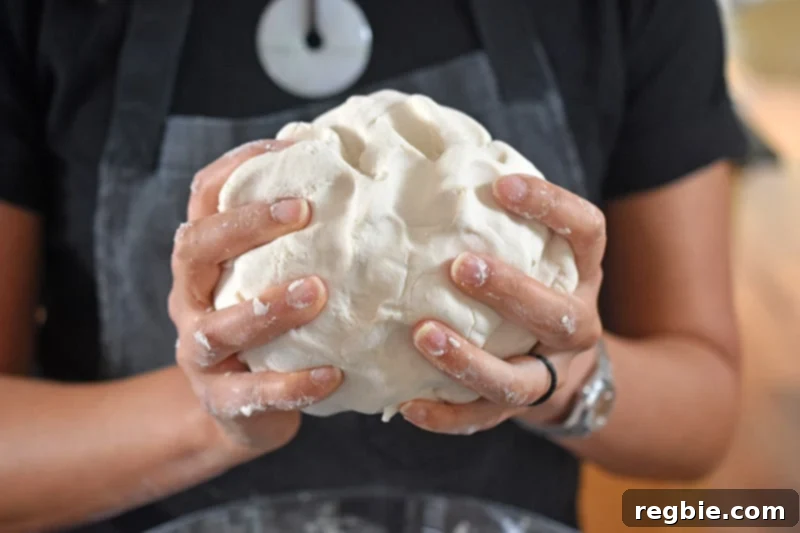
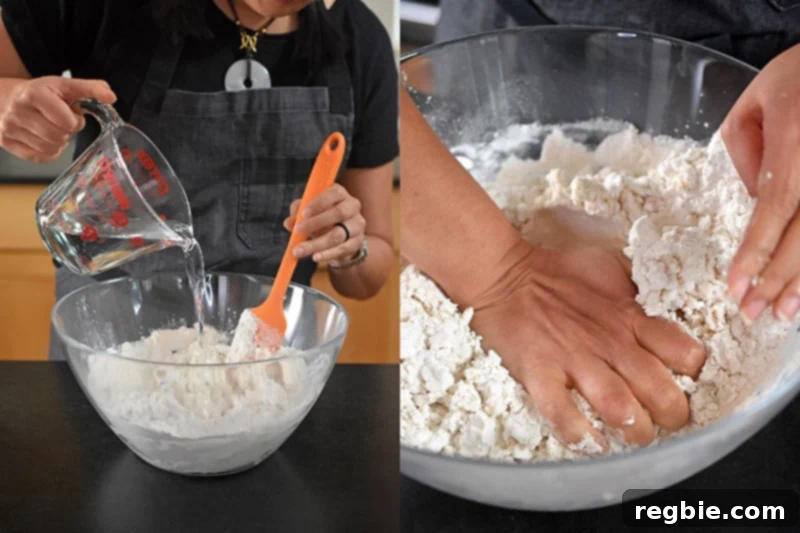
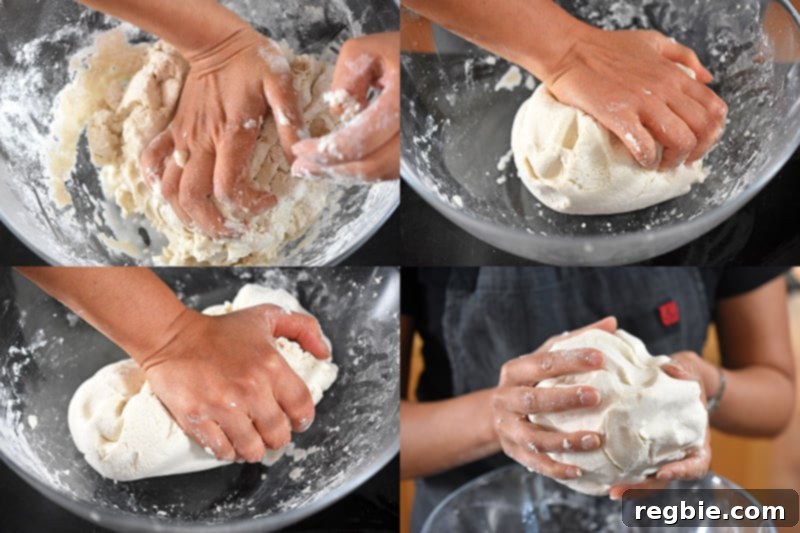
Now, let’s prepare the dough for the wrappers. Measure the cassava flour, arrowroot powder, and Diamond Crystal kosher salt, placing them all into a large mixing bowl. Carefully pour in approximately 2 cups of boiling water and stir until combined. Once the mixture has cooled enough to handle comfortably, use your hands to begin kneading the dough.
Continue to gradually add small amounts of boiling water while kneading the dough until it forms a springy, non-sticky ball. If the dough feels overly dry, add a tiny bit more water; however, be cautious not to make it too wet or soft, as this will make it difficult to work with. If it becomes too sticky, knead in a little more cassava flour. When in doubt, it’s generally better for the dough to be slightly stickier than too dry.
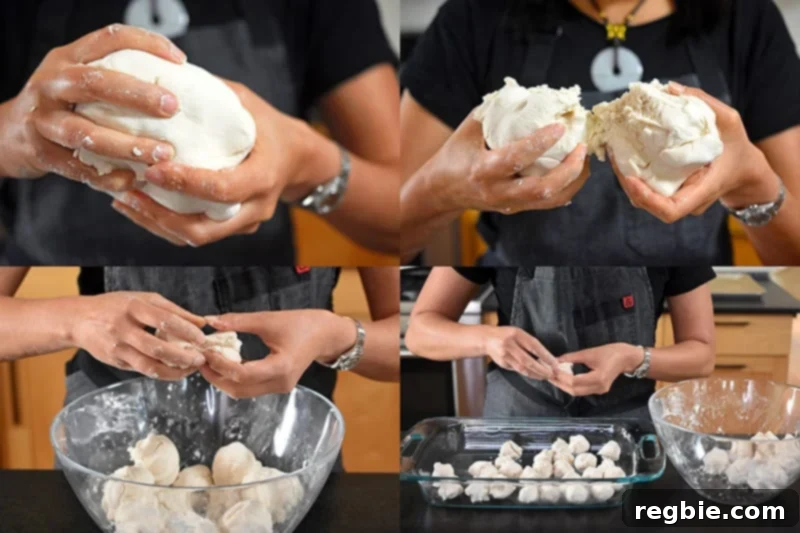
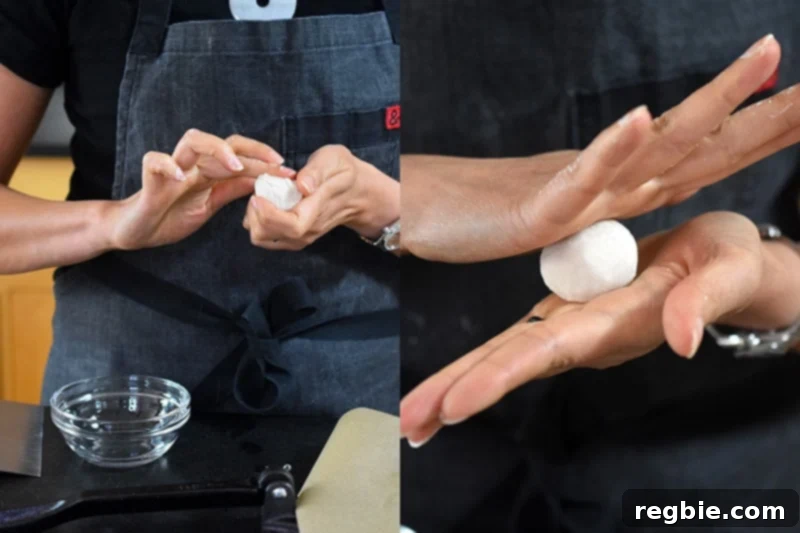
Once your dough is perfectly kneaded, divide it into thirds. Then, divide each of those three pieces in half, giving you 6 dough balls. Proceed to divide each of these 6 dough balls in half, and then in half two more times. If you’ve followed these divisions correctly, you should end up with 48 equal-sized portions of dough (3 balls → 6 balls → 12 balls → 24 balls → 48 balls).
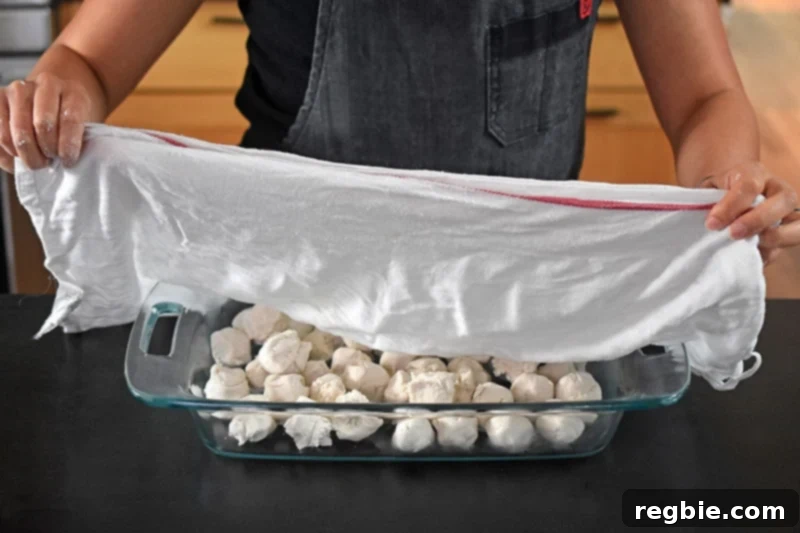
Cover the small dough balls with a damp kitchen towel. This is an important step to prevent them from drying out while you work on forming the wrappers and potstickers.
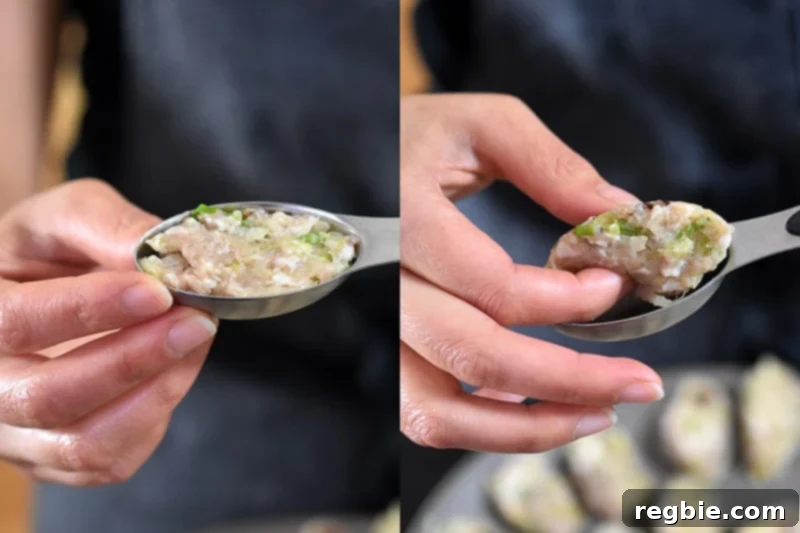
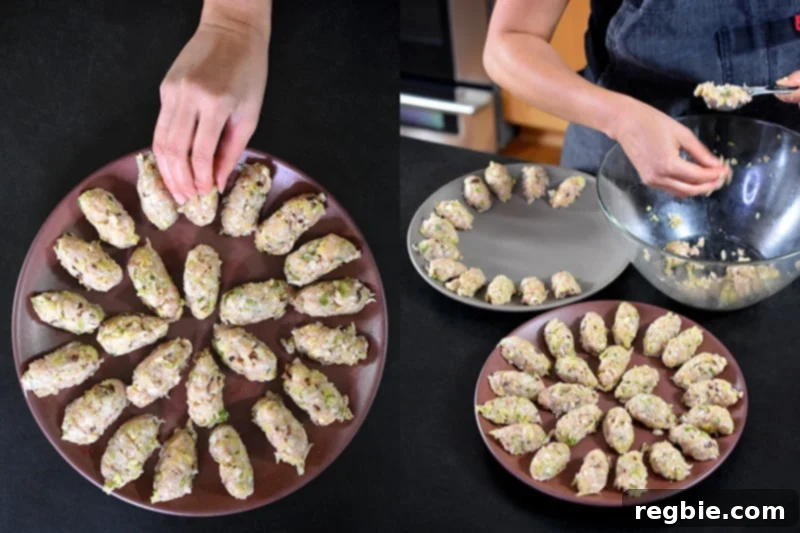
Now, it’s time for the fun part: assembling the wrappers and potstickers! This is where extra hands truly make a difference. Assign someone to portion out the filling; this seemingly small step ensures you have exactly enough filling for all your wrappers, avoiding any last-minute adjustments. Scoop out a scant tablespoon of filling and shape it into a neat oval on a plate. Repeat this process until you have 48 evenly sized, oval-shaped Paleo Pot Sticker fillings.
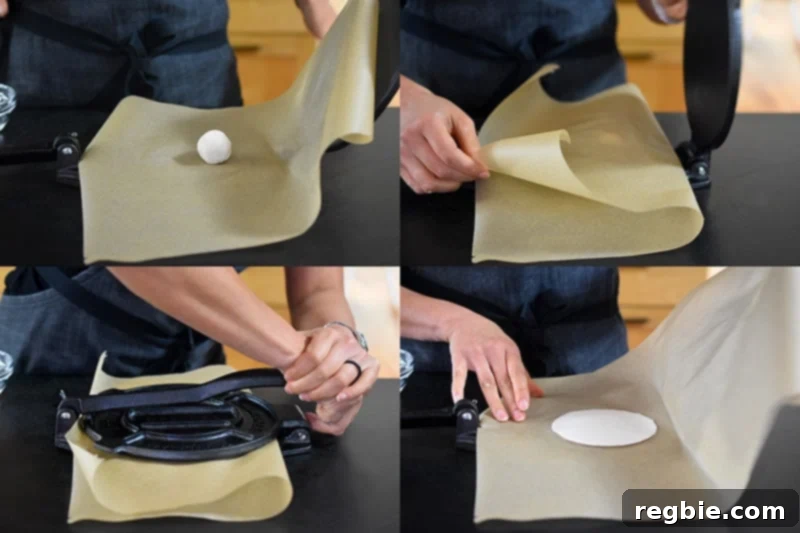
Next, let’s create those perfect wrappers! Gather your tortilla press, some parchment paper, a rimmed baking sheet, a damp kitchen towel, and a small bowl of water. Take one of your dough balls; if it feels a bit dry, dab it with a little water before rolling it into a smooth, round ball with your hands.
Place the dough ball on the tortilla press, sandwiched between two pieces of parchment paper. Firmly press down to flatten it into a thin wrapper, approximately 3½ inches in diameter. The thinness is key for a delicate potsticker.
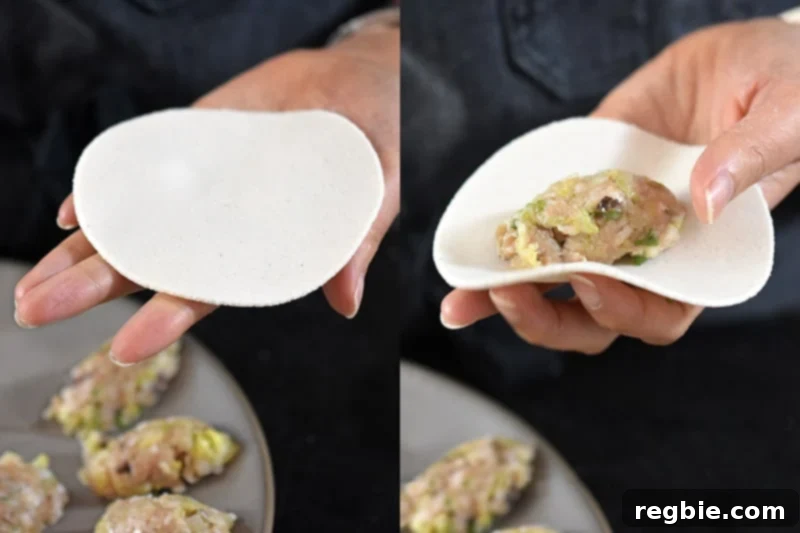
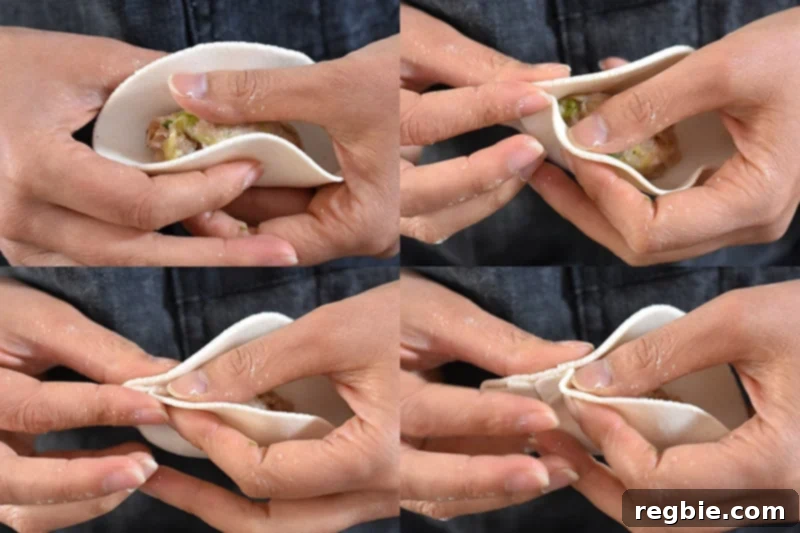
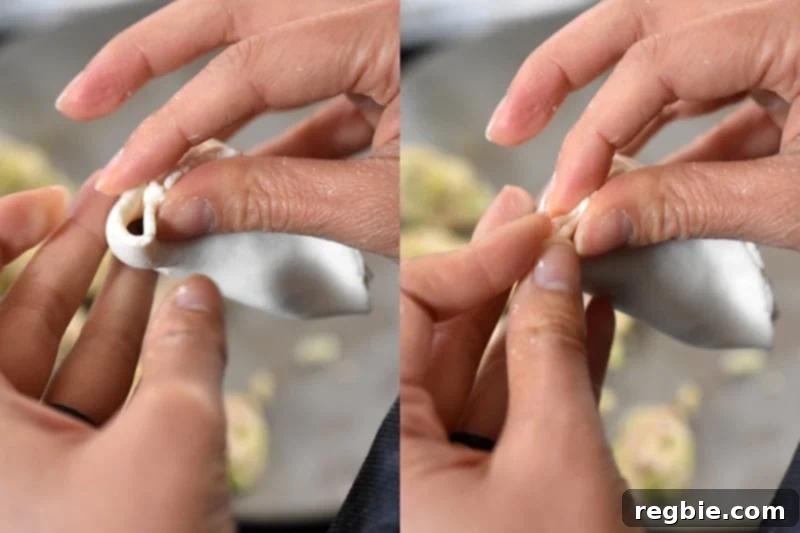
Carefully place one of the pre-scooped oval-shaped fillings into the center of a wrapper. Ensure your fingers are clean, as this will make the folding process much easier. Fold up the sides of the wrapper around the filling, creating a taco-like shape. Use your thumb to hold the filling in place, and with your other hand, begin crimping one side of the potsticker wrapper as you seal the top edge.
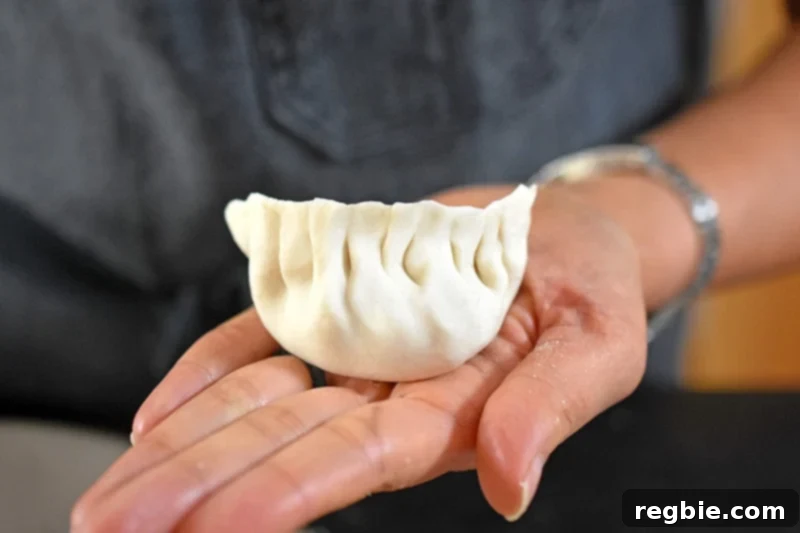
Continue pleating only one side of the wrapper and securely sealing the top edge of the potsticker until you reach the other end. If the edges feel dry, dab a little water on them to ensure a tight seal. The finished potsticker should have a flat bottom, perfect for pan-frying, and form a crescent shape with beautiful pleats along the outside edge.
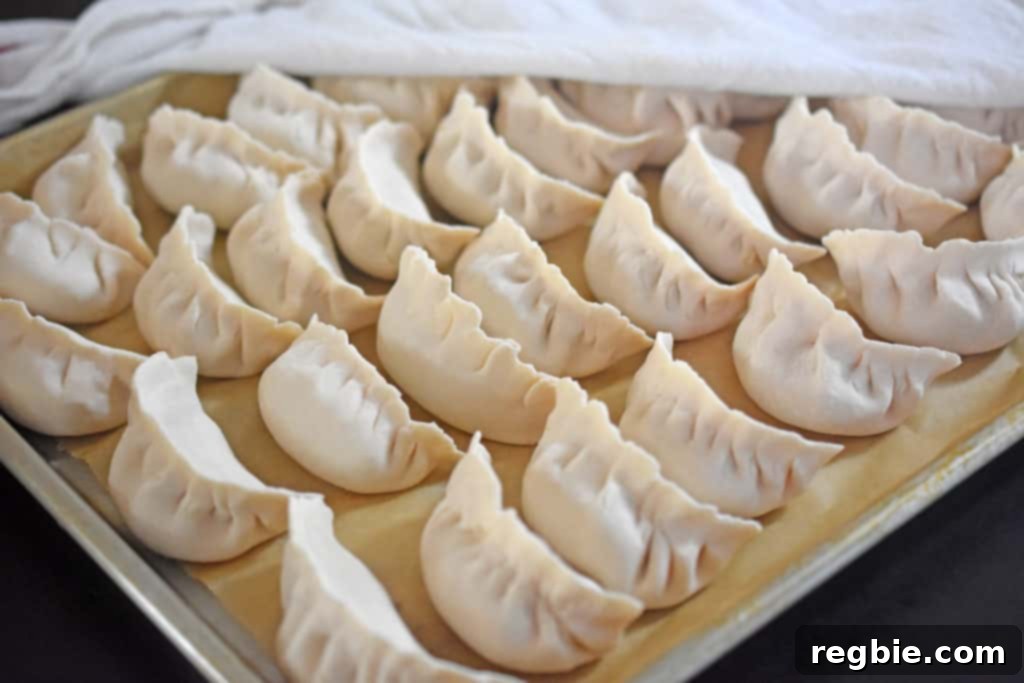
Place the completed potstickers on a parchment-lined rimmed baking sheet. Cover them with a damp kitchen towel to prevent them from drying out while you continue the assembly process. Keep making wrappers and wrapping potstickers until you’ve used all your dough and filling. You should yield a total of 48 delicious Paleo Potstickers!
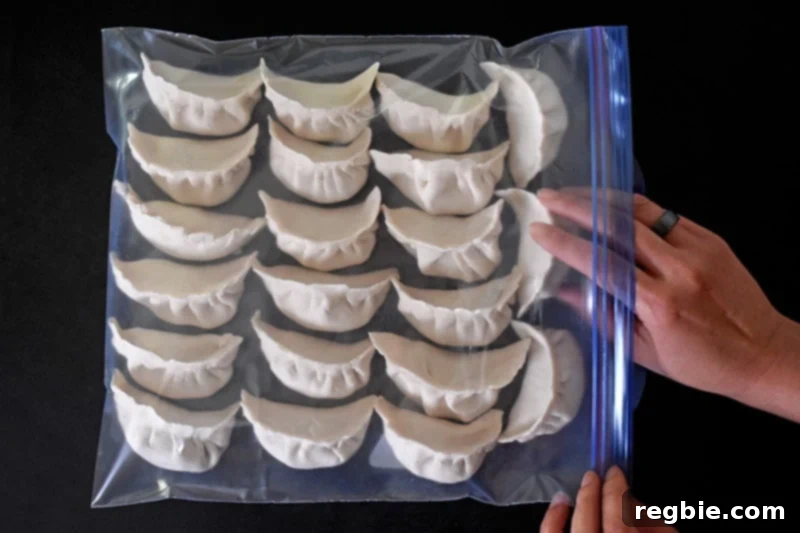
At this stage, you have two options: you can either freeze the potstickers for later or cook them immediately. I personally prefer to freeze mine in a single layer in a food-safe freezer bag, ensuring they don’t stick together. Frozen dumplings can be stored for up to 2 months and cooked directly from the freezer when you’re ready to enjoy them. It’s a fantastic way to always have a quick, healthy meal on hand!
Time to fry up those incredible potstickers! Heat a 10-inch heavy-bottomed skillet over medium-high heat. Once the pan is hot, swirl in about a tablespoon of avocado oil or your preferred high-temperature cooking fat. Arrange as many potstickers as will comfortably fit in a single layer in the pan, ensuring they don’t overcrowd.
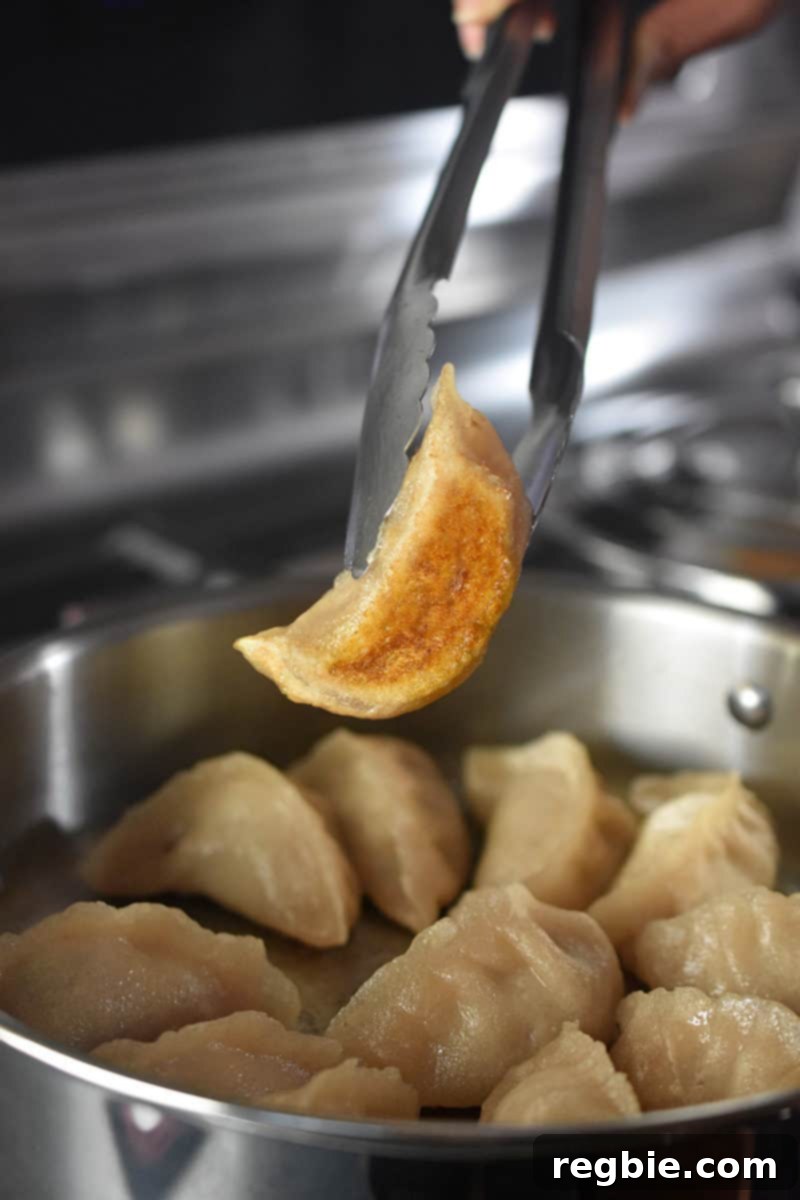
Fry the potstickers for about 2 minutes, or until their bottoms turn a beautiful golden-brown and become wonderfully crispy.
Carefully pour about ½ cup of boiling water into the skillet. Immediately cover the pan with a tight-fitting lid. Reduce the heat to medium and allow the Paleo Potstickers to steam-fry for 5 minutes. If you’re cooking them directly from frozen, extend the steam-frying time to 7 minutes.
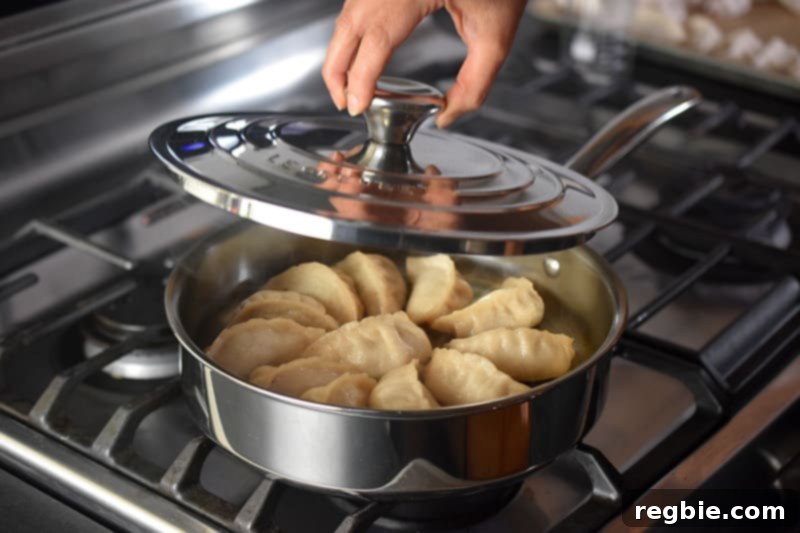
Once the steaming time is complete, remove the lid. Continue cooking for another minute or two, uncovered, to allow any remaining liquid to evaporate and to re-crisp the bottoms of the potstickers to a perfect golden-brown.
Carefully transfer the finished, hot potstickers to a serving platter. Repeat the cooking process with the remaining batches until all your delicious dumplings are ready. It’s best to enjoy these potstickers immediately, as they truly taste best when hot and fresh!
Remember, the more people helping, the faster it will be, especially during the wrapping stage!
Continue making wrappers and wrapping pot stickers until you’re finished. You should end up with 48 Paleo Pot Stickers!
At this point, you can either freeze the pot stickers or fry them up. I freeze mine in a food-safe freezer bag, making sure they’re in a single layer. You can keep the dumplings in the freezer for up to 2 months, and then fry them directly from the freezer when you’re ready to eat! Win-win!
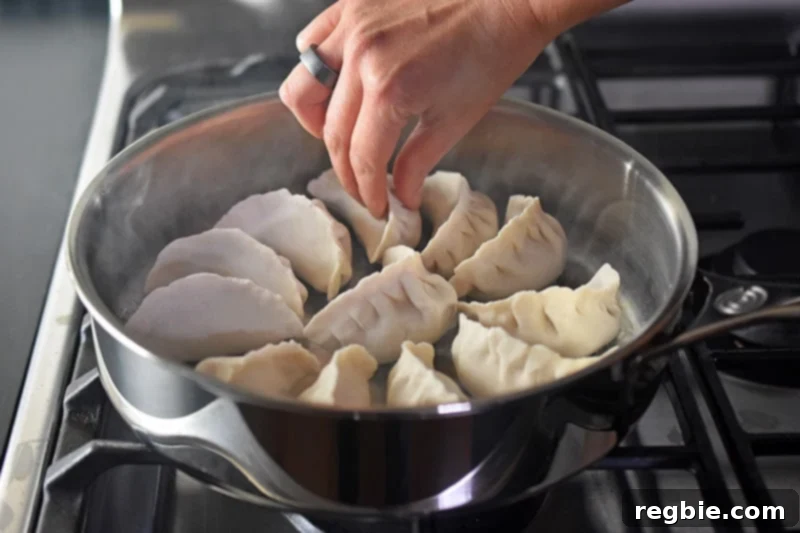
Now, it’s time to fry up the pot stickers. Heat a 10-inch heavy-bottomed skillet over medium-high heat. When the pan is hot, swirl in a tablespoon of avocado oil or your favorite high temperature cooking fat. Place as many pot stickers into the pan that’ll fit in a single layer.
Fry the pot stickers until the bottoms are golden-brown, about 2 minutes.
Carefully pour in a ½ cup of boiling water, and cover the skillet with a tight-fitting lid. Turn the heat down to medium and steam-fry the Paleo Pot Stickers for 5 minutes (7 minutes if cooking from frozen).
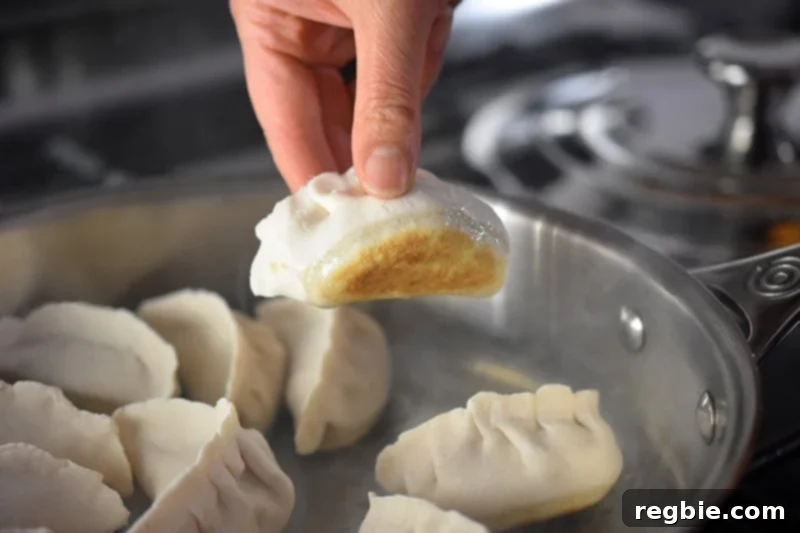
When the timer goes off, remove the lid and continue cooking a minute or two to evaporate any remaining liquid and to re-crisp the bottom of the potstickers.
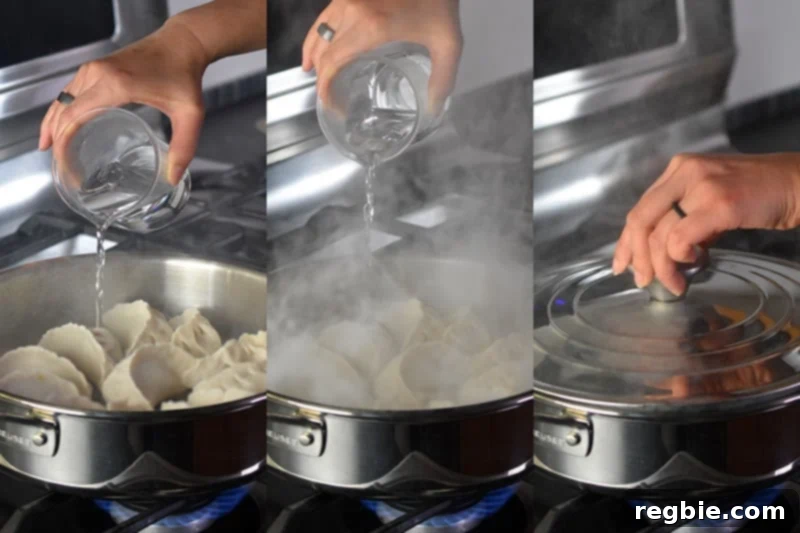
Carefully transfer the finished potstickers to a platter and repeat the process until you’re finished. Tell your family to eat the pot stickers as soon as they’re done because these dumplings taste best hot!
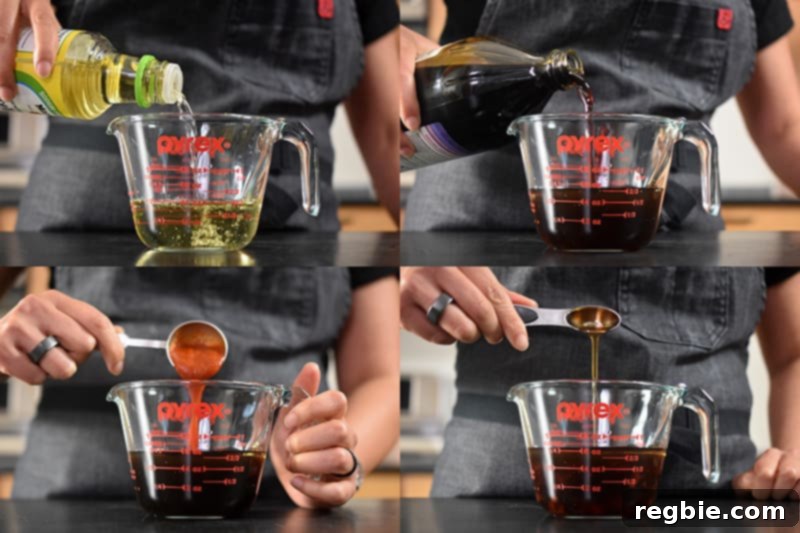
These Paleo Potstickers taste great plain, but I love dipping them in a zesty and spicy sauce. To make a simple paleo dipping sauce, just combine rice vinegar, coconut aminos, and toasted sesame oil in a measuring cup. For an extra kick, stir in some Paleo Sriracha or crushed red pepper flakes.
If you happen to have All-Purpose Stir-Fry Sauce in your fridge, it also makes a fantastic dipping sauce!
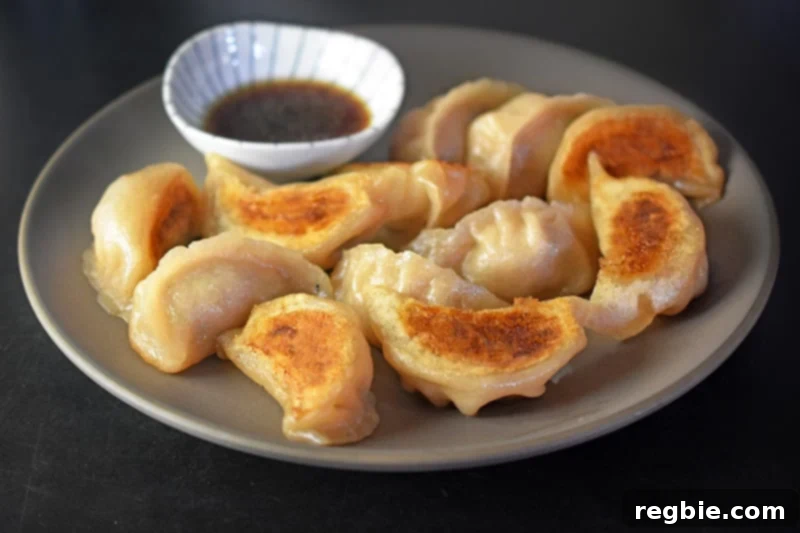
Serve your exquisite Paleo Potstickers with your preferred dipping sauce and enjoy every bite. Only fry the amount of potstickers you plan to eat immediately, and freeze the rest. You’ll be glad to have a stash in your freezer for whenever that craving for authentic Chinese dumplings strikes!
Seriously, who could possibly resist a plate of juicy, perfectly pan-fried Paleo Potstickers?
More Paleo Asian Appetizer Recipes
If you’ve enjoyed these potstickers, be sure to explore more of our delicious paleo Asian-inspired appetizer recipes:
- Shrimp Toast
- Shrimp Stuffed Mushrooms
- Wonton Meatballs
- Paleo Potstickers
- Scallion Pancakes
- Chinese Chicken Wings
- Taiwanese Popcorn Chicken
Looking for even more incredible recipe ideas? Head on over to my Recipe Index for a vast collection. You’ll also discover exclusive recipes and culinary inspiration in my cookbooks: Nom Nom Paleo: Food for Humans (Andrews McMeel Publishing 2013), Ready or Not! (Andrews McMeel Publishing 2017), and Nom Nom Paleo: Let’s Go! (Andrews McMeel Publishing 2022).
PRINTER-FRIENDLY RECIPE CARD OVERVIEW
Authentic Gluten-free Potstickers (Paleo, Nut-Free, Grain-free, Soy-free)

Ingredients
Potsticker Filling
- 3 large dried shiitake mushrooms
- 1 pound Napa cabbage a small head
- 1 tablespoon Diamond Crystal kosher salt use half the amount if using Morton’s kosher salt or a fine grain salt, divided
- 1 pound ground pork
- ¼ cup chicken broth
- ½ cup minced scallions
- 1 tablespoon minced fresh garlic
- ½ teaspoon ground ginger
- ½ teaspoon ground white pepper
- 1 tablespoon coconut aminos
- 1 teaspoon toasted sesame oil
Wrapper Dough
- 3 cups cassava flour 3 cups = 384 grams
- ¾ cup arrowroot powder ¾ cup = 96 grams
- 1½ teaspoons Diamond Crystal kosher salt
- 2¼ cups boiling water
Cooking The Dumplings
- ¼ cup avocado oil divided
Dipping Sauce
- ½ cup rice vinegar
- ¼ cup coconut aminos
- 1 teaspoon toasted sesame oil
- 2 teaspoons Paleo Sriracha optional
Instructions
-
Start by making the filling. Soak the shiitake mushrooms in a bowl with water for at least 30 minutes or until completely softened. You can also soak the mushrooms for up to 8 hours in the fridge.
-
While the mushrooms are soaking, finely chop the Napa cabbage. (Yes, you can pulse it in a food processor if you don’t mind dirtying an appliance.) Combine the finely chopped cabbage and 2 teaspoons of Diamond Crystal kosher salt in a large bowl and toss well. (Only use half the amount of salt if using Morton’s kosher salt or a fine grain salt). Transfer the salted cabbage to a fine mesh strainer or colander and set it over a bowl. Let it stand at room temperature for at least 30 minutes or in the fridge for up to 8 hours.
-
When you’re ready to make the filling, grab the soaked shiitake mushrooms and squeeze out the excess liquid. Remove and discard the tough stems and finely dice the caps.
-
Dump the salted cabbage onto a large piece of cheese cloth or clean dish towel. Gather up the edges and squeeze and twist the cabbage bundle to wring out as much liquid as possible. You should end up with about 1 cup of cabbage.
-
In a large bowl, use your hands to mix the ground pork with the chicken broth until the liquid is incorporated into the meat.
-
Combine the pork/broth with the drained cabbage, mushrooms, scallions, minced garlic, ground ginger, ground white pepper, the remaining teaspoon of Diamond Crystal kosher salt, coconut aminos, and sesame oil. Use your hands to knead the filling until everything is well-mixed and the mixture starts to feel tacky and sticky.
-
To check the seasoning, fry up a tiny patty of the meat mixture in a pan and taste it. Add more salt if needed. At this point, you can store the filling in a sealed container in the fridge for up to two days.
-
When you’re ready to make the wrapper dough, measure out the cassava flour, arrowroot powder, and Diamond Crystal kosher salt and place them all in a large mixing bowl. Pour in about 2 cups of boiling water and stir it in. Once the water cools down enough to touch, use your hands to knead the dough.
-
Continue adding a little boiling water at a time and knead it until you form a springy, not-sticky dough. If it seems extra dry, add a touch more water, but watch out—you don’t want a wet, soft dough, or you’ll have trouble working with it. If it gets too wet, knead in a bit more cassava flour.
-
Divide the dough in thirds, and then divide each piece in half to get 6 dough balls. Next, divide each of the 6 dough balls in half, then in half two more times. If you followed my instructions correctly, you should end up with 48 equal-sized portions. (Split the dough ball into 3 balls → 6 balls → 12 balls → 24 balls → 48 balls)
-
Cover the dough balls with a damp kitchen towel to keep them from drying out.
-
Now, it’s time to grab your friends and family to help assemble the wrappers and pot stickers! Assign someone to portion out the fillings—this step may seem unnecessary, but it’ll ensure that you have exactly enough filling for the wrappers. Scoop out a scant tablespoon of filling and place the oval-shaped filling on a plate. Repeat until you have 48 equal oval-shaped Paleo Pot Sticker fillings.
-
Next, let’s make the wrappers! Grab a tortilla press, some parchment paper, a rimmed baking sheet, a damp kitchen towel, and a small bowl of water. Take one of the dough balls and dab it with a little water if it feels dry. Then, use your hands to roll it into a round ball.
-
Place the dough ball on the tortilla press in between pieces of parchment paper, and smush it flat. The wrapper should be very thin and about 3½-inches in diameter.
-
Put the pre-scooped filling into the middle of the wrapper. Make sure your fingers are clean or it’ll be hard to fold properly. Fold up the sides of the wrapper around the filling like a taco. Use your thumb to keep the filling in place and use your other hand to crimp one side of the pot sticker as you seal the top. Continue pleating only one side of the wrapper and sealing the top of the pot sticker until you reach the other side. Use your fingers to securely seal the top of the pot sticker, dabbing on a little water if the edges feel dry. The finished pot sticker should have a flat bottom and form a crescent with the pleats on the outside.
-
Place the pot stickers on a parchment lined rimmed baking sheet and cover them with a damp kitchen towel to keep them from drying out. Continue making wrappers and wrapping pot stickers until you are finished. You should end up with 48 Paleo Pot Stickers!
-
At this point, you can either freeze the pot stickers or fry them up. I freeze mine in a food-safe freezer bag, making sure they’re in a single layer. You can keep the dumplings in the freezer for up to 2 months, and then fry them directly from the freezer when you’re ready to eat.
-
Now it’s time to fry up the pot stickers! Heat a 10-inch heavy-bottomed skillet over medium-high heat. When the pan is hot, swirl in a tablespoon of avocado oil or your favorite high temperature cooking fat. Place as many pot stickers into the pan that’ll fit in a single layer.
-
Fry the pot stickers until the bottoms are golden-brown, about 2 minutes.
-
Carefully pour in a ½ cup of boiling water, and cover the skillet with a tight-fitting lid. Turn the heat down to medium and steam-fry the Paleo Pot Stickers for 5 minutes (7 minutes if cooking from frozen).
-
When the timer goes off, remove the lid and continue cooking a minute or two to evaporate any remaining liquid and to re-crisp the bottom of the pot stickers.
-
Carefully transfer the finished pot stickers to a platter and repeat the process until you’re finished. Tell your family to eat the pot stickers as soon as they’re done because they taste best hot!
-
Time to make the dipping sauce! Simply mix together rice vinegar, coconut aminos, and toasted sesame oil in a measuring cup. Want it spicy? Stir in some Paleo Sriracha or crushed red pepper flakes.
Notes
- Always read the FAQs and all recipe steps thoroughly before you begin cooking.
- While you can complete these potstickers in about 3.5 hours, for a more relaxed and enjoyable experience, I recommend spreading the process over 2 days.
- For precise measurements, especially with flours, using a kitchen scale is highly recommended.
- Don’t hesitate to involve friends and family in the preparation; it makes the process quicker and more fun!
- These Paleo Potstickers freeze exceptionally well, so consider making a larger batch than you think you’ll eat to stock up for later.
Nutrition
Nutrition information is automatically calculated, so should only be used as an approximation.