
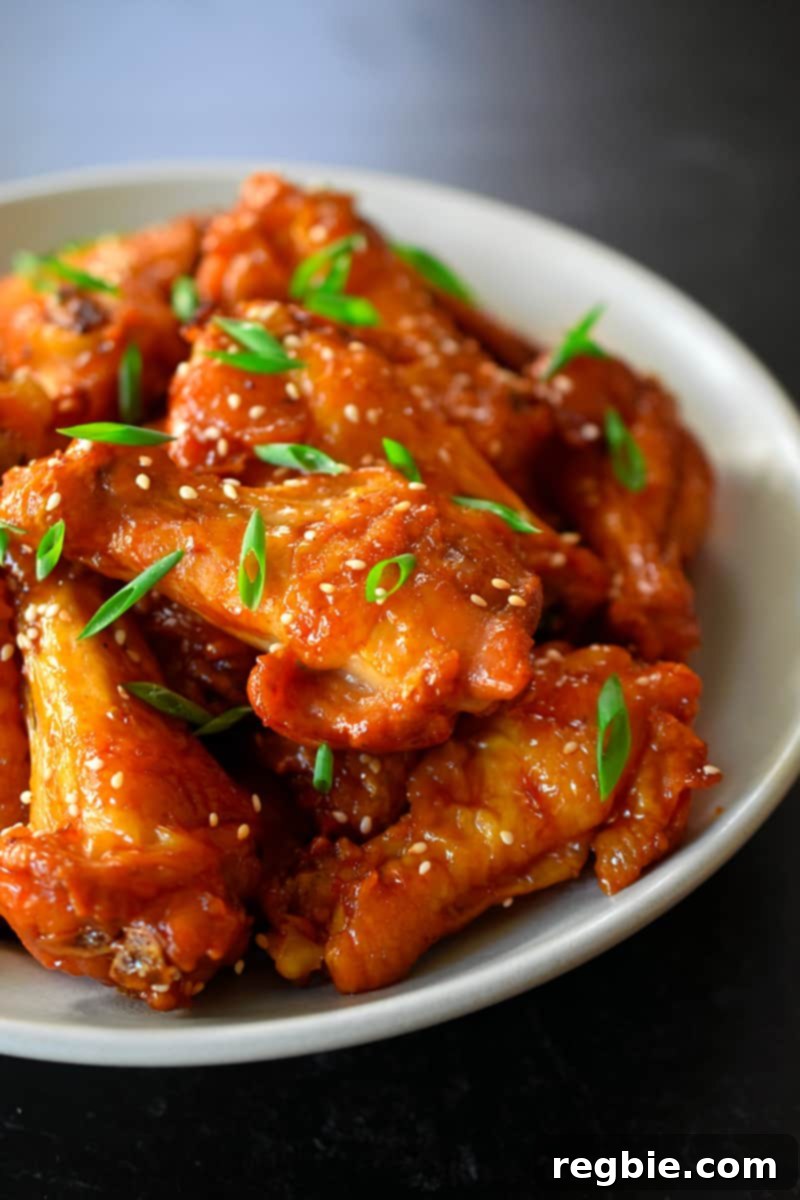
Get ready to elevate your snack game with these truly irresistible Paleo Sticky Asian Chicken Wings! Imagine perfectly crispy skin coated in a luscious, sweet, and spicy sauce that will have everyone licking their fingers. Whether you’re hosting a game day party, planning a family feast, or simply craving a healthy, flavor-packed meal, these wings are an absolute showstopper. What’s more, this recipe is entirely gluten-free and easily adaptable to be Whole30-compatible, ensuring everyone can enjoy this delicious treat without compromise. Discover the simple secrets to achieving restaurant-quality wings right in your own kitchen, using either your oven or air fryer.
Table of Contents
- The Ultimate Secret to Crispy Chicken Wings: Baking Powder!
- Crafting Your Own Paleo and Grain-Free Baking Powder
- Maximize Crispiness with a Wire Rack for Baking
- How to Make Whole30-Compatible Sticky Asian Chicken Wings Sauce
- Air Fryer Magic for Crispy Wings: A Convenient Alternative
- Essential Ingredients for Perfect Asian Chicken Wings
- For the Crispy Chicken Wings
- For the Irresistible Sticky Sauce
- For the Fresh Garnish
- Step-by-Step Guide to Making Perfect Asian Chicken Wings
- Storing and Reheating Leftover Paleo Sticky Asian Chicken Wings
- More Paleo & Game Day Chicken Wing Recipes
- PRINTER-FRIENDLY RECIPE CARD (Full Details)
The Ultimate Secret to Crispy Chicken Wings: Baking Powder!
Achieving truly crispy chicken wings without deep frying might seem like a culinary myth, but it’s a simple technique that has revolutionized home cooking. The secret lies in one common pantry ingredient: baking powder. Forget messy deep fryers; with just a sprinkle of this unassuming powder, your oven or air fryer can produce wings with a skin so crackly and golden, you’d swear they were fried. This method offers a healthier alternative without compromising on that satisfying crunch.
Before tossing your wings with baking powder, ensure they are as dry as possible. Patting them thoroughly with paper towels removes surface moisture, which is crucial for crispiness. Excess moisture creates steam, which hinders the browning and crisping process. Once dried, a strategic combination of baking powder and salt is applied. But how exactly does baking powder work its magic to deliver such impressive results?
As brilliantly explained by the culinary experts at Cook’s Illustrated, the process involves a bit of fascinating food science:
“Baking powder is composed of an acid and an alkali and acts like a salt: The salt helps draw moisture to the surface of the poultry skin, where it can evaporate. (Adding table salt to the baking powder, which we do in this recipe, enhances this effect.) The acid helps break down proteins within the skin, and the alkali accelerates the browning process, meaning that the skin can crisp more quickly.”
This ingenious chemical reaction creates a higher pH on the chicken skin, which in turn facilitates a beautiful Maillard reaction – the complex process responsible for that desirable golden-brown color, rich aroma, and complex savory flavors. The precise combination of moisture extraction, protein breakdown, and accelerated browning ensures your wings achieve maximum crunch and flavor without the need for excessive oil, making them a healthier and equally delicious option.
Crafting Your Own Paleo and Grain-Free Baking Powder
For those committed to a Paleo lifestyle or embarking on a Whole30 program, navigating ingredients can sometimes be a challenge. Store-bought baking powder often contains cornstarch as a filler or anti-caking agent, which is a grain and thus not compliant with these dietary approaches. This can be frustrating when you’re striving for crispy baked goods or, in our case, deliciously crunchy chicken wings. The excellent news is that you don’t have to sacrifice crispiness for compliance; you can easily create a homemade, grain-free baking powder right in your kitchen with just a few common staple ingredients.
Making your own Paleo-friendly baking powder is not only simple but also gives you complete control over what goes into your food. This ensures purity and adherence to your specific dietary needs. The magic ratio for this essential grain-free leavening agent and crisping aid is remarkably straightforward:
- 2 parts cream of tartar: This provides the crucial acidic component necessary for the chemical reaction.
- 1 part baking soda: This is the alkaline agent that reacts with the acid to produce the desired effects.
- 1 part arrowroot starch or tapioca starch: These grain-free starches act as the “cornstarch” replacement, preventing the active ingredients from clumping together and reacting prematurely when stored. They also help distribute the mixture evenly on the chicken skin.
To prepare a batch, simply measure out your ingredients according to the ratio (e.g., 2 tablespoons cream of tartar, 1 tablespoon baking soda, 1 tablespoon arrowroot starch) and whisk them together thoroughly until well combined. Store this homemade blend in an airtight container in a cool, dry place. This ensures your wings remain perfectly compliant with your dietary goals while still achieving that coveted, satisfying crispiness every time.
Maximize Crispiness with a Wire Rack for Baking
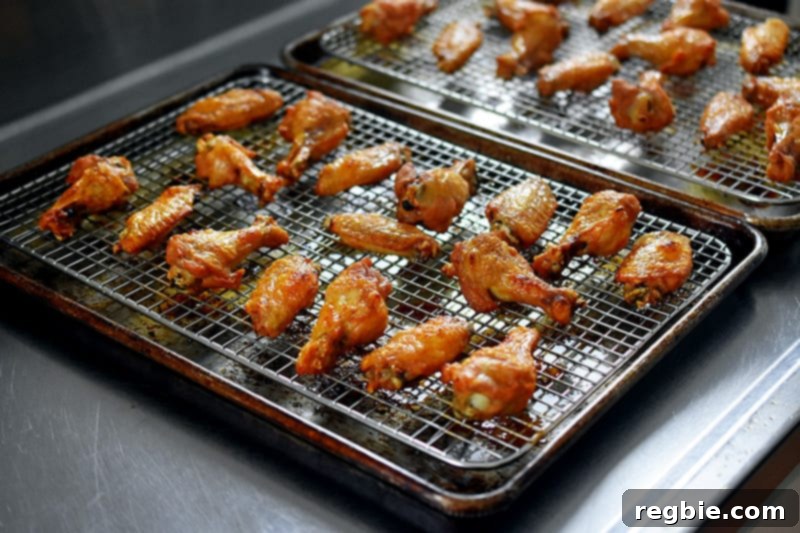
Beyond the transformative baking powder trick, another indispensable method for achieving superior crispiness in oven-baked chicken wings is to cook them on a stainless steel wire rack placed over a sturdy, rimmed baking sheet. This technique is a long-time favorite among seasoned home cooks and culinary enthusiasts alike, and for very good reason: it promotes optimal air circulation around every single wing, making a dramatic difference in texture.
When chicken wings sit directly on a flat baking sheet, moisture released during cooking can accumulate underneath, essentially steaming that side of the wing and preventing it from crisping properly. The wire rack elevates the wings, allowing hot air from the oven to circulate freely around all surfaces—top, bottom, and sides. This even exposure to heat ensures that the skin on all sides renders fat and crisps up beautifully and uniformly. It’s a true game-changer for achieving consistent texture and avoiding any soggy spots.
When arranging your wings on the rack, make sure not to crowd them. Give each wing a little space to breathe (at least half an inch on all sides), allowing the hot air to do its job effectively. Overcrowding can lead to steaming, even on a wire rack, so it’s always better to use two baking sheets if needed. After enjoying your perfectly crispy wings, a simple but helpful tip for easier cleanup is to soak the wire racks in hot, soapy water immediately after use. This will help loosen any baked-on residue, making scrubbing a much quicker and more enjoyable task.
How to Make Whole30-Compatible Sticky Asian Chicken Wings Sauce
The hallmark of truly amazing Asian chicken wings is a vibrant, sweet, and savory sticky sauce. Creating one that adheres to strict Paleo and Whole30 guidelines requires a bit of thoughtful ingredient selection, but the results are absolutely worth it. While traditional Asian sauces often call for soy sauce and refined sugars, our compliant version utilizes healthier, cleaner alternatives without sacrificing an ounce of that coveted umami and sticky sweetness.
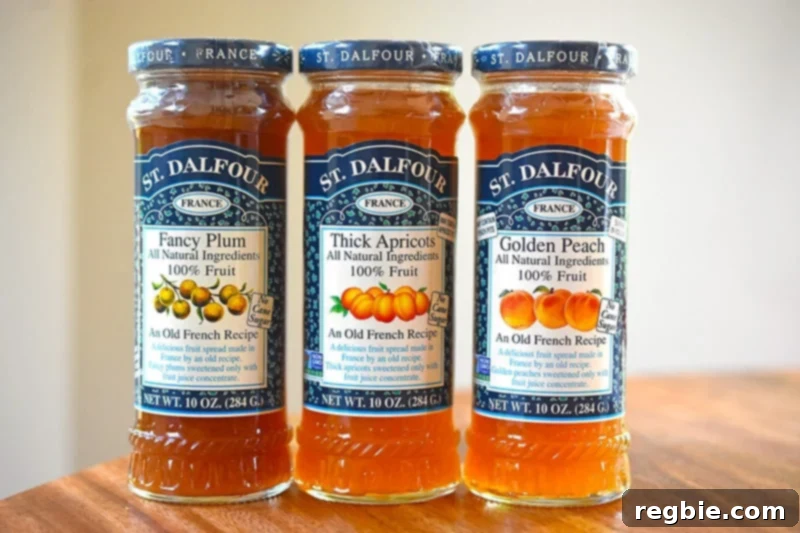
For the essential sweetness, honey is typically used in our hot and sweet sauce when following a general Paleo diet. However, if you are strictly adhering to a Whole30 program, honey (along with all other added sugars) is not allowed. A fantastic, compliant substitute that delivers a similar flavor profile and sticky texture is 100% fruit juice-sweetened jam. My personal go-to, and one I highly recommend, is St. Dalfour brand. While this is not a sponsored endorsement, I consistently find their plum, apricot, or peach spreads to be ideal. These jams contain only fruit and fruit juice, making them perfectly Whole30-compliant and providing a rich, natural sweetness that beautifully complements the savory and spicy elements of the sauce.
Another crucial component for that signature Asian flavor profile is a good dose of heat. While conventional sriracha often contains added sugar, sulfites, and other non-compliant ingredients, a Whole30-compatible version is essential for this recipe. Fortunately, the market now offers several excellent Whole30-compliant sriracha brands, or you can even take matters into your own hands and make your own with my trusted Whole30 Sriracha recipe. If sriracha isn’t readily available or you simply prefer a different kind of spicy kick, Tabasco sauce also makes for a perfectly acceptable and compliant substitute, adding a straightforward, clean heat without any hidden sugars or questionable ingredients. These carefully selected components ensure your sauce is both delicious and adheres perfectly to your dietary choices.
Air Fryer Magic for Crispy Wings: A Convenient Alternative
For those who love the convenience and efficiency of modern kitchen appliances, the air fryer is an absolute game-changer for making these sticky Asian chicken wings. Yes, my friends, you can absolutely achieve fantastically crispy results in your air fryer, often with even less oil and quicker cooking times than a conventional oven. This method is perfect for smaller batches, quick weeknight meals, or when you’re short on time but still crave that perfect crunch without heating up your entire kitchen.
To cook your Paleo sticky Asian chicken wings in an air fryer, begin by preparing them with the baking powder and salt mixture as described for oven baking. This initial step is critical regardless of your cooking method. Once coated, arrange the wings in a single layer within your air fryer basket. It’s paramount not to overcrowd the basket, as this can severely impede hot air circulation, leading to uneven cooking, steaming, and ultimately, less crispiness. If necessary, cook the wings in multiple batches to ensure each piece has enough space to crisp up properly.
Set your air fryer to a temperature of 400°F (200°C). Cook the wings for a total of 18 to 20 minutes. Remember to pause halfway through the cooking process (around 9-10 minutes) to flip the wings over. This ensures even browning and crisping on all sides, mimicking the rotation needed in a conventional oven. The exact cooking time may vary slightly depending on the size of your wings (smaller wings cook faster) and the specific model and wattage of your air fryer. Always keep an eye on them towards the end to prevent overcooking. Once they are beautifully golden and perfectly crispy, they’re ready to be tossed in the delicious sticky Asian sauce, delivering all the flavor and crunch you desire in record time.
Essential Ingredients for Perfect Asian Chicken Wings
Crafting these delectable Paleo Sticky Asian Chicken Wings requires a thoughtful selection of high-quality ingredients, ensuring both incredible flavor and strict adherence to dietary guidelines. Here’s a detailed breakdown of what you’ll need, along with tips for each component:
For the Crispy Chicken Wings
- Chicken wings: You’ll need approximately 4 pounds of chicken wings. For optimal handling and even cooking, it’s best if they are already cut into drumettes and flats. If you buy whole wings, you can easily separate them yourself by finding the joints.
- Cream of tartar: This is a crucial acidic component for our homemade grain-free baking powder. It works by reacting with baking soda to create the necessary crisping action on the chicken skin.
- Baking soda: The alkaline counterpart to cream of tartar. Together, these two create a powerful leavening and browning agent without any grains.
- Arrowroot starch or tapioca starch: These natural, grain-free starches replace cornstarch in our homemade baking powder. They help keep the mixture dry, prevent clumping, and contribute to the wings’ outer crust. Both are excellent choices.
- Diamond Crystal kosher salt: Preferred for its flakey texture, which adheres well to the chicken skin, and its ability to effectively draw out moisture. If using a finer salt like table salt or a different brand of kosher salt, you may need to adjust the quantity slightly as saltiness can vary significantly.
For the Irresistible Sticky Sauce
- Coconut aminos: This fantastic soy-free and gluten-free alternative is the backbone of our Asian sauce. It provides a similar savory, umami depth to traditional soy sauce, making it perfectly compliant for Paleo and Whole30 diets. Look for brands without added sugar.
- Honey or fruit-sweetened jam: For a Paleo-friendly sauce, honey provides the perfect natural sweetness. If strictly following a Whole30 protocol, substitute with 3 tablespoons of 100% fruit juice-sweetened jam (peach, plum, or apricot varieties work wonderfully, like St. Dalfour). Ensure there are absolutely no added sugars or artificial sweeteners.
- Sriracha: This gives the sauce its characteristic sweet heat and vibrant red hue. It’s important to use a specifically labeled Whole30-compatible sriracha if adhering to the program, as many brands contain sugar. Alternatively, Tabasco sauce is a simple and compliant substitute for a straightforward spicy kick.
- Garlic cloves: Freshly minced garlic is indispensable for the aromatic base and robust, pungent flavor of an authentic Asian sauce. Do not use garlic powder if you can help it; fresh is always best here.
- Arrowroot starch or tapioca starch (optional): If you desire a thicker, glossier sauce that clings even more beautifully to the wings, a small amount of either starch mixed with an equal part water (to create a slurry) can be used. This helps bind and thicken the sauce without adding any grains.
For the Fresh Garnish
- Toasted sesame seeds: These tiny seeds add a delightful nutty flavor, a subtle crunch, and an appealing visual finish, enhancing the authentic Asian experience. Toast them lightly in a dry pan for maximum flavor.
- Sliced green onions (scallions): Provides a fresh, slightly pungent, and oniony contrast to the rich, sticky sauce. They also add a pop of vibrant green color, making the dish even more appealing. Slice them thinly on the bias for an elegant presentation.
Gathering these high-quality, carefully selected ingredients will set you up for success, ensuring your homemade sticky Asian chicken wings are both incredibly delicious and perfectly aligned with your healthy eating goals. Each component plays a vital role in creating a balanced, flavorful, and compliant dish.
Step-by-Step Guide to Making Perfect Asian Chicken Wings
Follow these detailed steps to create a batch of incredibly crispy, sticky, and flavorful Paleo Asian chicken wings that are sure to impress even the most discerning palates. Precision at each stage will guarantee mouth-watering results!
1. Prepare Your Oven for Optimal Baking:
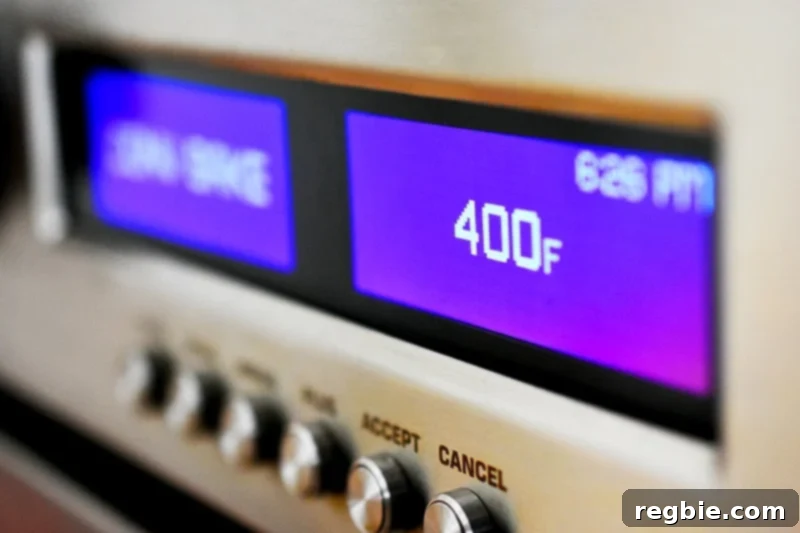
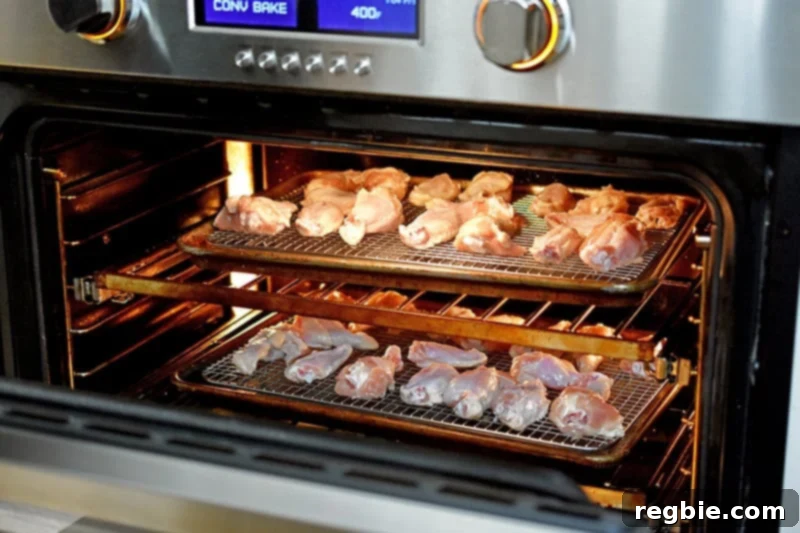
Begin by preheating your oven. If your oven has a convection setting, set it to 400°F (200°C); this mode circulates hot air for faster, more even cooking and superior crispiness. If you’re using a standard bake mode, set it to 425°F (218°C). Position one oven rack in the upper middle and another in the lower middle position. This setup is ideal for baking two trays of wings simultaneously, ensuring consistent results for a larger batch.
2. Whip Up Your Grain-Free Baking Powder:
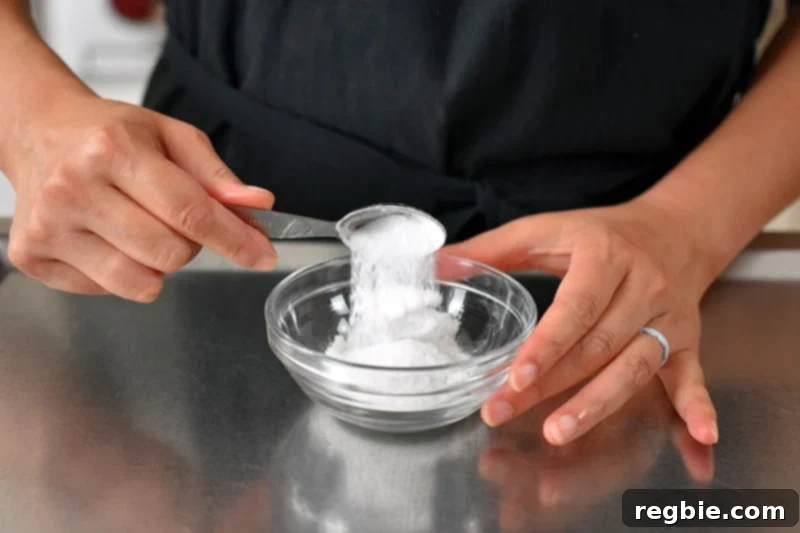
In a small, clean bowl, combine the cream of tartar, Diamond Crystal kosher salt, baking soda, and arrowroot starch (or tapioca starch). Whisk these ingredients together thoroughly until they are uniformly mixed. This mixture creates your homemade, grain-free, and Paleo-compliant baking powder blend, which is the magic component responsible for achieving that coveted ultra-crispy chicken skin.
3. Prepare and Coat the Chicken Wings:
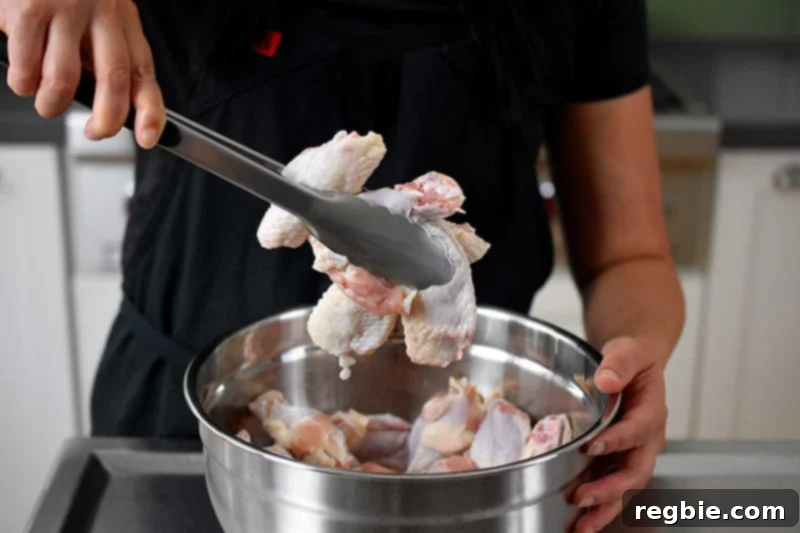
Take your chicken wings and pat them exceptionally dry with paper towels. This step is critically important: removing as much surface moisture as possible is absolutely crucial for achieving maximum crispiness. Place the thoroughly dried wings in a large mixing bowl. Pour your freshly prepared grain-free baking powder mixture over the wings and toss them diligently with a pair of tongs until each wing piece is evenly and completely coated. Ensure there are no dry spots, as uniform coating leads to uniform, irresistible crispiness.
4. Arrange Wings for Optimal Baking:
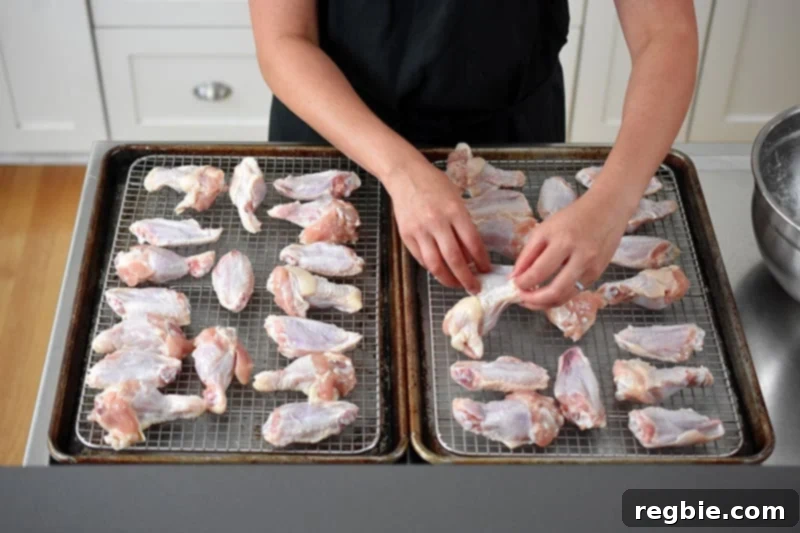
Lightly grease two stainless steel wire racks and set them into two separate rimmed baking sheets. Arrange the coated chicken wings in a single layer on the prepared wire racks. This is vital: ensure that no wings are overlapping or touching each other. Giving each wing ample space (at least half an inch all around) prevents steaming and allows hot air to circulate freely around every surface, promoting superior and even crisping.
5. First Bake Cycle for Rendering:
Carefully place one baking sheet with wings on the upper middle oven rack and the other on the lower middle rack in your preheated oven. Bake for an initial 20 minutes. This first phase is essential for beginning the rendering of the chicken fat and initiating the crisping process on the skin, setting the stage for perfectly crunchy wings.
6. Flip and Rotate for Even Crisping:
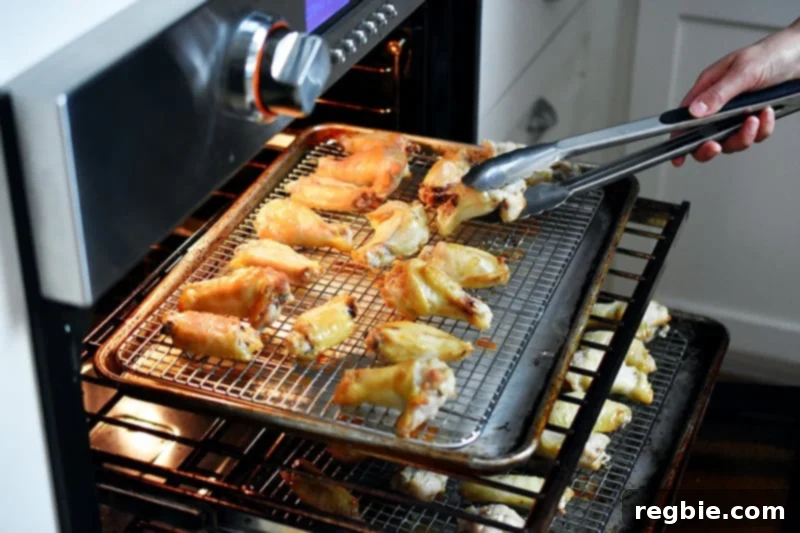
After the initial 20 minutes, carefully open the oven door. Using sturdy tongs, meticulously flip each chicken wing over to expose the other side to the direct heat. Additionally, swap the positions of the top and bottom baking sheets. This crucial step ensures both sides of the wings get equal exposure to heat and that all wings brown evenly, leading to uniform crispiness across the entire batch.
7. Second Bake Cycle Until Golden Perfection:
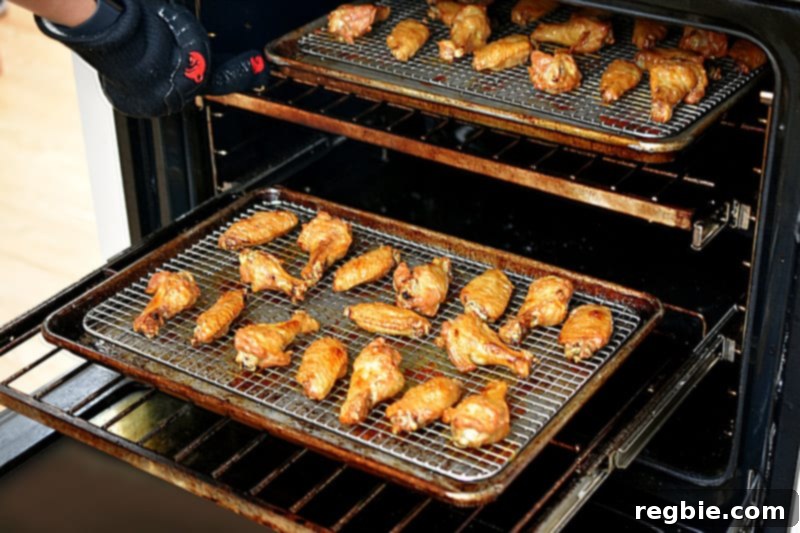
Continue baking for an additional 20 to 25 minutes, or until the chicken skin is incredibly crisp and beautifully golden brown. The wings should look deeply caramelized and feel firm to the touch. Keep a close watch during this final stage; you might need to rotate the pans one more time if you notice the wings on one rack browning significantly faster than the other. The ultimate goal is a consistent, deep golden crispiness on all pieces.
8. Prepare the Irresistible Sticky Sauce:
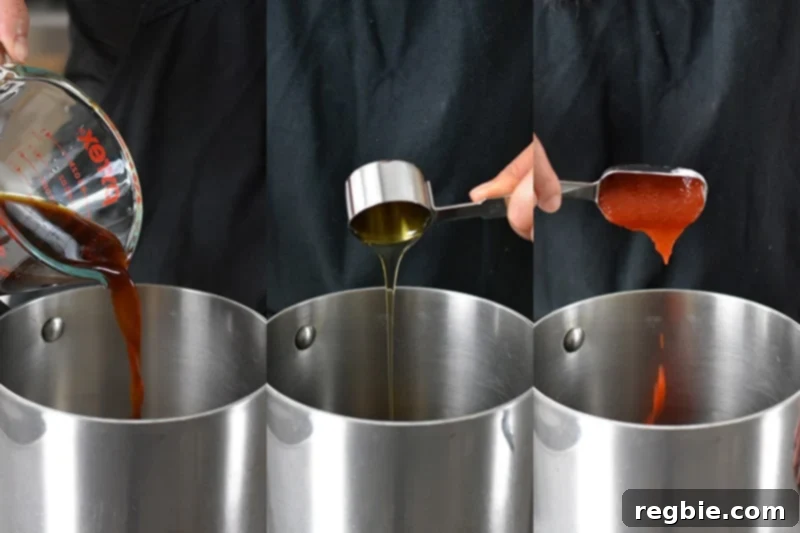
While your wings are baking to perfection, it’s time to prepare the mouth-watering Asian sauce. In a small saucepan, combine the coconut aminos, honey (or your chosen Whole30-compatible jam), sriracha (or Tabasco), and freshly minced garlic. Bring the mixture to a rolling boil over high heat, stirring continuously to ensure all ingredients are well combined and the honey or jam fully dissolves into the liquid.
9. Simmer to Perfection:
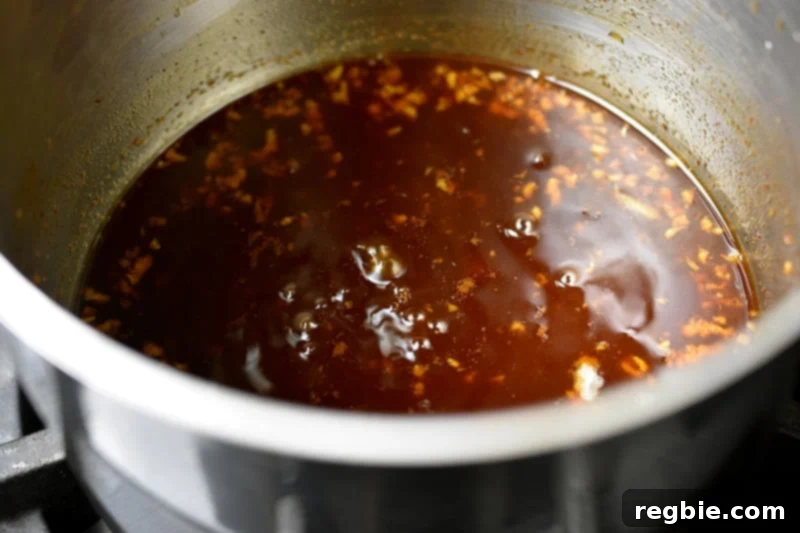
Once the sauce has reached a boil, immediately reduce the heat to a gentle simmer. Allow the sauce to cook, stirring occasionally, for 8 to 10 minutes. During this simmering period, the sauce will naturally thicken and reduce, concentrating its flavors and developing that desired luscious, sticky consistency. It should visibly coat the back of a spoon lightly, indicating it’s ready to cling beautifully to your crispy wings.
10. Optional: Thicken the Sauce with a Slurry:
If you prefer an even thicker, more intensely glazed sauce that has a luxurious sheen, you can prepare an arrowroot starch slurry. In a small bowl, whisk together one teaspoon of arrowroot starch (or tapioca starch) with an equal amount of cold water until smooth and lump-free. This creates a powerful, grain-free thickening agent that will dramatically improve the sauce’s texture.
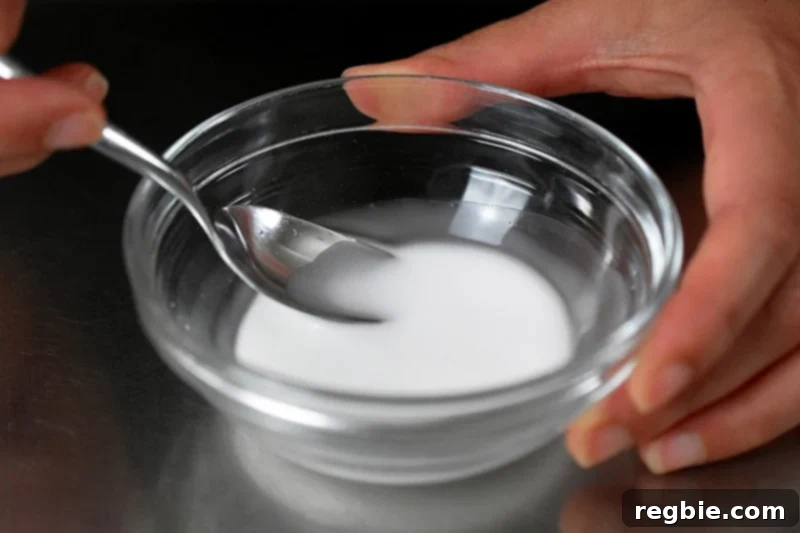
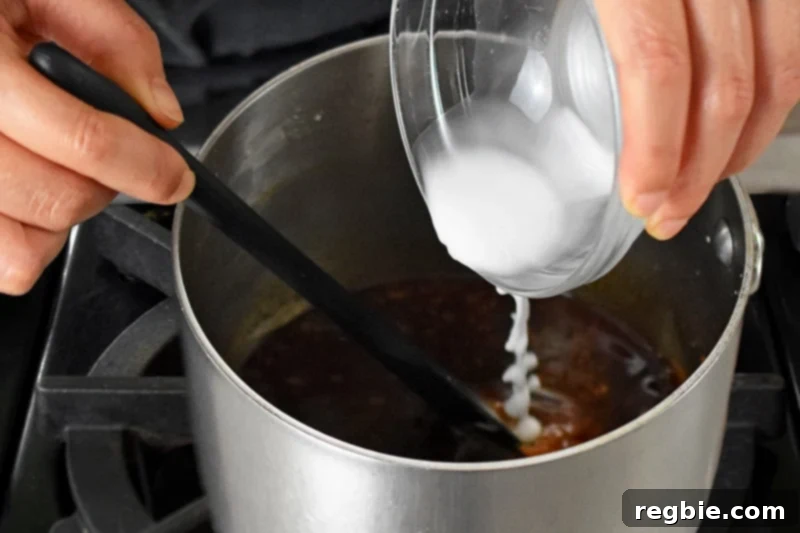
Gradually stir this slurry into the simmering sauce. Continue to stir gently for another minute or two until the sauce reaches your desired glossy, thick consistency. The sauce will thicken quite quickly, so watch it closely. Once thickened to your liking, immediately remove the saucepan from the heat to prevent it from becoming too thick or gummy.
11. Toss and Serve:
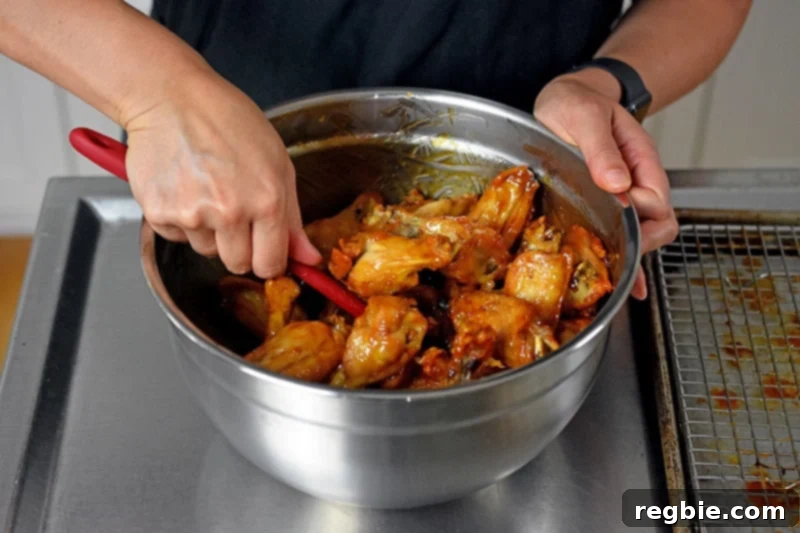
Transfer the warm, sticky sauce into a large mixing bowl. Add your freshly baked, piping hot, and crispy chicken wings directly into the bowl with the sauce. Use tongs or a sturdy spatula to gently but thoroughly toss the wings, ensuring every single piece is completely coated in the glorious, flavorful sauce. The heat from the wings will help the sauce adhere perfectly, creating that irresistible sticky glaze.
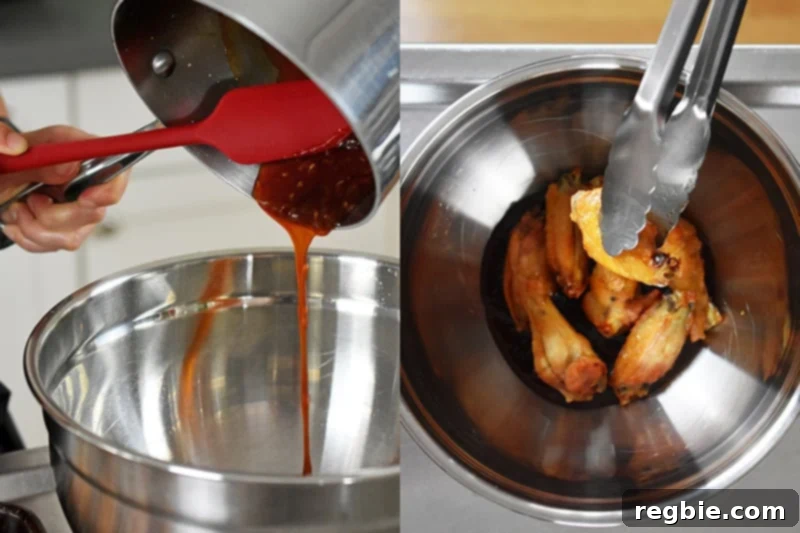
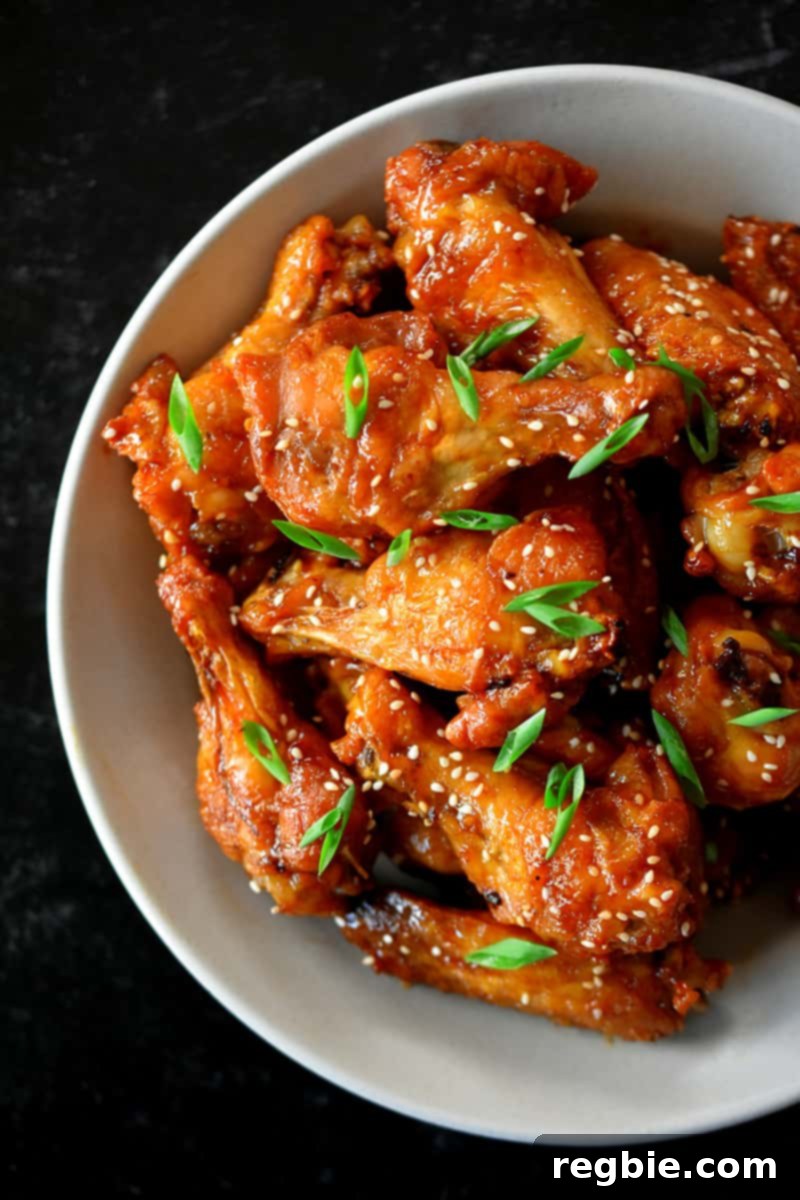
Finally, generously sprinkle the sauced wings with a healthy amount of toasted sesame seeds and thinly sliced green onions (scallions) for a burst of freshness, a subtle nutty crunch, and vibrant visual appeal. Serve these utterly irresistible sticky Asian chicken wings immediately and prepare for them to disappear in record time! They are best enjoyed hot and fresh.
Storing and Reheating Leftover Paleo Sticky Asian Chicken Wings
While it’s genuinely hard to imagine having any of these delicious sticky Asian chicken wings left over, especially with their irresistible flavor and texture, it can happen! Properly storing and reheating them ensures you can enjoy their fantastic taste for a few days to come. It’s important to note that while the flavor will remain exceptional, they may lose some of their initial crispiness upon reheating, but they’ll still be wonderfully satisfying.
Storage Instructions: To store any leftover wings, first allow them to cool completely to room temperature. This prevents condensation from forming inside the container, which can make the wings soggy. Once cool, transfer them to an airtight container and place them in the refrigerator. They will keep well and safely for up to 3-4 days. For longer storage, you can freeze cooked wings. Arrange them in a single layer on a baking sheet and freeze until solid. Once frozen, transfer them to a freezer-safe bag or container, separating layers with parchment paper if needed, and store for up to 2-3 months. Thaw frozen wings in the refrigerator overnight before reheating.
Reheating for Best Results: While reheating, the sauce might become a bit less intensely sticky, and the skin won’t be quite as profoundly crispy as when fresh out of the oven. However, the rich, sweet, and spicy flavors will remain wonderfully vibrant. For the best possible reheating results that aim to restore some crispiness, an oven or air fryer is highly recommended over a microwave, which tends to make them soft:
- In the Oven: Preheat your oven to 350°F (175°C). Spread the leftover wings in a single layer on a baking sheet, ideally on a wire rack to promote air circulation. Heat for 10-15 minutes, or until they are thoroughly warmed through. For a touch more crispness on the skin, you can increase the temperature to 400°F (200°C) for the last 5 minutes.
- In the Air Fryer: For smaller batches and quick reheating, place the wings in a single layer in your air fryer basket. Cook at 350°F (175°C) for 5-8 minutes, checking periodically and flipping halfway, until they are heated through and slightly re-crisped.
Even if the skin doesn’t regain its full initial crunch, the deep, satisfying flavors of the sticky Asian sauce will ensure these leftovers are a delightful and convenient meal or snack.
More Paleo & Game Day Chicken Wing Recipes
Can’t get enough of delicious, healthy chicken wings that fit your Paleo or Whole30 lifestyle? Here are more fantastic Game Day-friendly chicken wing recipes from the Nom Nom Paleo kitchen to add to your repertoire. Each one offers a unique flavor profile guaranteed to be a crowd-pleaser!
- Classic Chinese Chicken Wings: A timeless favorite with authentic flavors, perfect for any gathering.
- Mystical Magic Wings (Whole30 Day 30 Favorite!): A simple yet incredibly flavorful recipe that’s a perfect way to celebrate the end of your Whole30 journey.
- Zesty Chili Lime Chicken Wings: Bursting with bright, tangy, and spicy notes, these wings are a refreshing twist on traditional flavors.
- Juli Bauer’s Irresistible Sticky Sesame Teriyaki Wings: A fantastic collaboration recipe offering a rich, sweet, and savory sticky glaze.
Looking for even more incredible recipe ideas and culinary inspiration that fit a healthy, flavorful lifestyle? Head on over to my comprehensive Recipe Index. You’ll also find exclusive, crowd-pleasing recipes and detailed guides in my acclaimed cookbooks: Nom Nom Paleo: Food for Humans (Andrews McMeel Publishing 2013), Ready or Not! (Andrews McMeel Publishing 2017), and the latest Nom Nom Paleo: Let’s Go! (Andrews McMeel Publishing 2022). Happy cooking and healthy eating!
PRINTER-FRIENDLY RECIPE CARD (Full Details)
Sticky Asian Chicken Wings (Paleo, Whole30, Gluten Free) Recipe
10 minutes
45 minutes
55 minutes
8
Michelle Tam
Pin Recipe
Print Recipe
Ingredients (Yields 8 servings)
For the crispy wings
- 1 tablespoon cream of tartar
- 2 teaspoons Diamond Crystal kosher salt
- 1½ teaspoons baking soda
- 1½ teaspoons arrowroot starch or tapioca starch
- 4 pounds chicken wings cut into drumettes and flats
For the rich, sticky sauce
- ½ cup coconut aminos
- 2 tablespoons honey or 3 tablespoons peach, plum, or apricot jam sweetened only with fruit juice (for Whole30)
- 1 tablespoon Whole30 Sriracha or Tabasco sauce
- 3 garlic cloves minced
- 1 teaspoon arrowroot starch or tapioca starch (optional, for thicker sauce)
For the fresh garnish
- 2 tablespoons toasted sesame seeds
- 1 scallion thinly sliced on the bias
Instructions
-
1. Preheat Oven: Heat your oven to 400°F (200°C) on convection mode or 425°F (218°C) on standard mode. Place one oven rack in the upper middle position and another in the lower middle position. This setup is ideal for baking two trays of wings simultaneously.
-
2. Make Grain-Free Baking Powder: In a small bowl, thoroughly mix together the cream of tartar, kosher salt, baking soda, and arrowroot starch (or tapioca starch). This combination creates our special grain-free baking powder that will ensure maximum crispiness.
-
3. Prepare Wings: Pat the chicken wings extremely dry with paper towels to remove all surface moisture. Transfer the dry wings to a large bowl. Pour the homemade baking powder mixture over the wings and toss them vigorously with tongs until every wing piece is evenly coated. Dryness and even coating are crucial for crispy skin.
-
4. Arrange on Racks: Place two greased wire racks onto two rimmed baking sheets. Arrange the coated chicken wings in a single layer on these racks, ensuring there is ample space between each wing. Avoid crowding to allow hot air to circulate freely, which is vital for crispiness.
-
5. Initial Bake: Place one baking sheet on the upper middle rack and the other on the lower middle rack in the preheated oven. Bake for 20 minutes to start the rendering process and initial browning.
-
6. Flip & Rotate: After 20 minutes, carefully open the oven. Using tongs, flip each chicken wing over. Simultaneously, swap the top tray with the bottom one to ensure even cooking and browning across all wings.
-
7. Final Bake: Continue baking for an additional 20 to 25 minutes, or until the chicken skin is delightfully crisp and golden brown. Monitor closely; you might need to rotate the pans again if one set of wings is browning much faster than the other.
-
8. Prepare Sauce: While the wings are baking, combine coconut aminos, honey (or Whole30-compatible jam), sriracha, and minced garlic in a small saucepan. Bring the mixture to a boil over high heat, stirring continuously.
-
9. Simmer Sauce: Reduce the heat to a simmer and let the sauce cook for 8 to 10 minutes, stirring occasionally, until it has slightly thickened and reduced to a sticky consistency that coats the back of a spoon.
-
10. Thicken Sauce (Optional): For a thicker sauce, create a slurry by mixing one teaspoon of arrowroot starch with one teaspoon of cold water in a small bowl. Stir this slurry into the simmering sauce until it reaches your desired glossy, thick consistency. Immediately remove from heat.
-
11. Toss with Sauce: Transfer the finished sticky sauce to a large mixing bowl. Add the hot, crispy baked wings and toss gently but thoroughly until every wing is beautifully coated in the flavorful sauce.
-
12. Garnish and Serve: Garnish the sticky Asian chicken wings generously with toasted sesame seeds and thinly sliced scallions. Serve immediately and enjoy the ultimate finger-licking experience!
Recipe Video Overview
Watch this helpful video for a quick visual guide on how to prepare these delicious Paleo Sticky Asian Chicken Wings, ensuring you nail every step for perfect results!
Helpful Notes & Tips
Whole30 Version Adaptation for Full Compliance: To ensure these delicious wings are fully Whole30 compliant, please make the following specific substitutions for the sauce: instead of honey, use 3 tablespoons of 100% fruit juice-sweetened jam (peach, plum, or apricot jams from brands like St. Dalfour are excellent choices, confirming no added sugars). Additionally, be sure to use a specifically labeled Whole30-compatible sriracha, or simply opt for Tabasco sauce for the spicy element, as it is naturally compliant. All other ingredients in the recipe remain Whole30 compliant.
Nutrition Information (per serving)
Calories:
326kcal
|
Carbohydrates:
11g
|
Protein:
23g
|
Fat:
21g
|
Fiber:
1g
Nutrition information is automatically calculated and should be considered an approximation. Individual results may vary based on exact ingredients, brands, and preparation methods. It is recommended to verify nutrition facts with your own calculations if precise dietary information is required.
Enjoyed this recipe? Leave a comment below!