
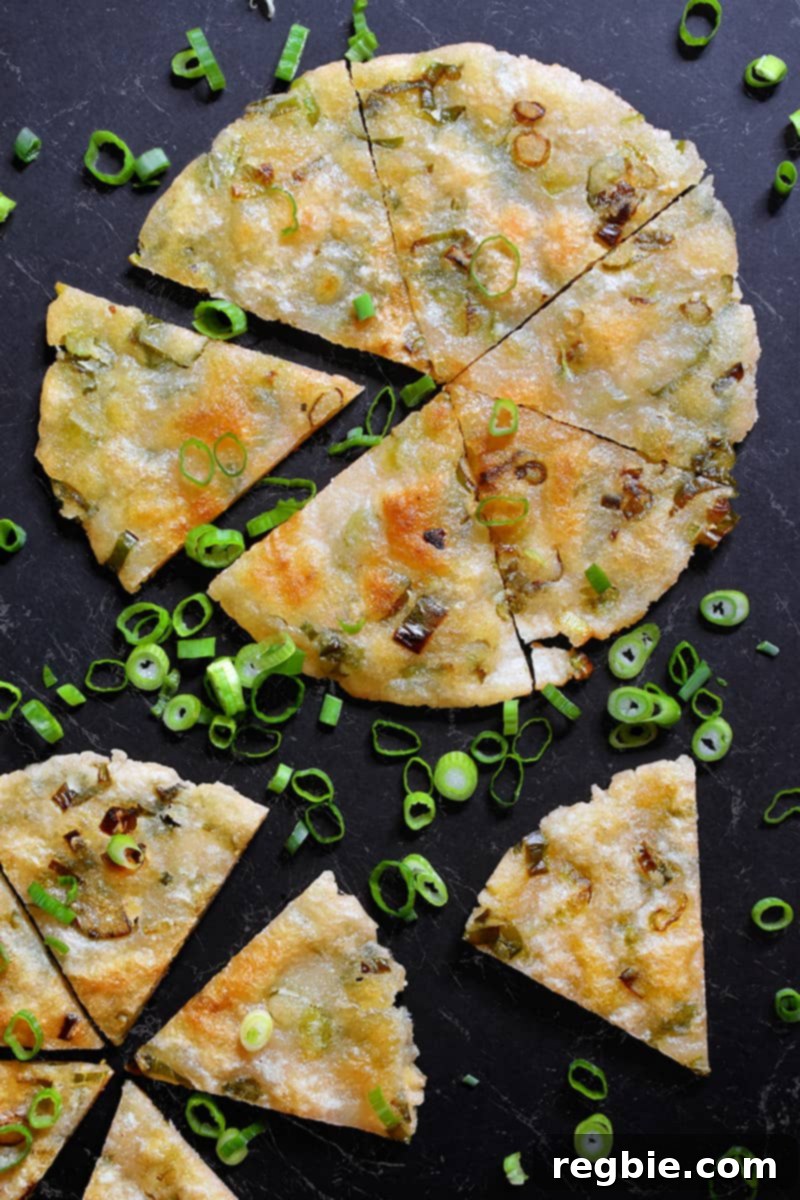
Imagine biting into a perfectly golden, crispy-on-the-outside, and delightfully chewy-on-the-inside pancake, bursting with savory scallion flavor. These Paleo Scallion Pancakes are so remarkably authentic, you’ll swear they came straight from your favorite Mandarin breakfast spot. The best part? Mine are meticulously crafted to be entirely vegan, grain-free, egg-free, nut-free, and fried exclusively in healthy fats! Prepare to redefine your breakfast and snack experience with these truly delicious flatbreads.
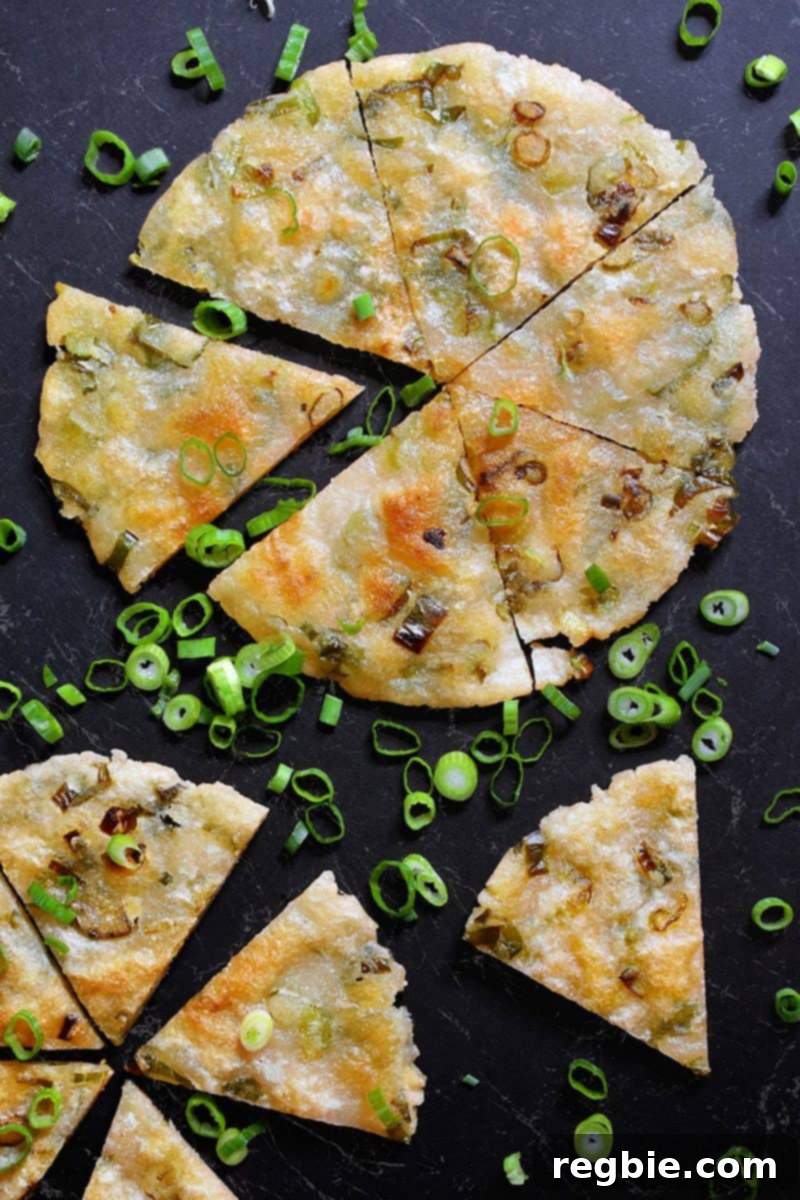
Table of Contents
- What are Chinese Scallion Pancakes?
- The Paleo, Gluten-Free, and Vegan Advantage
- Cassava Flour: The Secret to Success
- Essential Ingredients
- How to Make Gluten-Free and Paleo Scallion Pancakes
- Make-Ahead Tips & Storage
- Serving Suggestions & Perfect Pairings
- Troubleshooting Common Issues
- Paleo Scallion Pancakes Recipe
What Are Chinese Scallion Pancakes?
For those unfamiliar, Chinese Scallion Pancakes, also known as green onion pancakes or cong you bing (葱油饼), are a beloved savory flatbread from Chinese cuisine. Unlike the fluffy, sweet pancakes you might enjoy with maple syrup, these are unleavened, made from a simple dough, and are packed with aromatic minced scallions and a touch of sesame oil, then pan-fried to golden perfection. They boast an incredibly enticing texture profile: delightfully crispy and flaky on the exterior, giving way to a soft, chewy interior.
Scallion pancakes are a versatile dish, commonly served as a popular street food snack, an appetizer in restaurants, or a comforting breakfast item. Their unique taste and satisfying texture have garnered fans worldwide. The distinct layering and folding technique used in their preparation is what creates those characteristic internal swirls and the delightful contrast between the outer crispness and inner chewiness.
For a long time, the idea of creating a paleo version that truly captured the essence of the original felt like an insurmountable challenge. The traditional recipe relies heavily on wheat flour for its specific gluten structure, which contributes to its signature chewiness and elasticity. Replicating this without grains and other common allergens required considerable experimentation and a deep understanding of alternative flours.
The Paleo, Gluten-Free, and Vegan Advantage
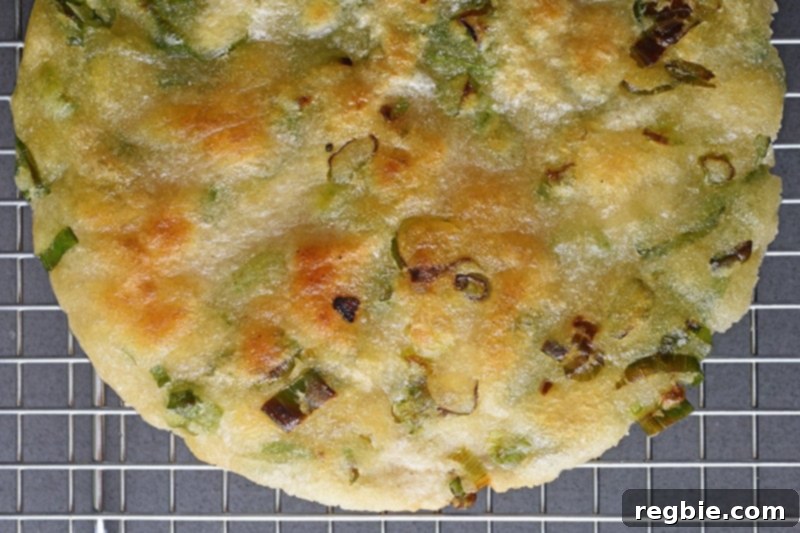
It took dedication, numerous attempts, and a generous amount of “elbow grease” in the kitchen, but the result is a paleo, gluten-free, and vegan rendition of scallion pancakes that truly stands shoulder-to-shoulder with the traditional version. This recipe isn’t just a delicious alternative; it’s a testament to how incredible allergen-friendly eating can be without sacrificing flavor or texture.
The journey to perfecting these pancakes was driven by a desire to enjoy a classic comfort food while adhering to specific dietary principles. For those navigating gluten sensitivities, a paleo lifestyle, or a vegan diet, finding satisfactory replacements for favorite dishes can be challenging. This recipe offers a solution that eliminates common allergens like gluten, dairy, eggs, and nuts, making it accessible to a wider audience.
Don’t just take my word for it! These paleo scallion pancakes received enthusiastic endorsements from both my discerning, often blunt, parents and my notoriously picky younger son, Ollie. Their seal of approval, particularly from my dad who offered specific serving advice, confirmed that these pancakes truly hit the mark. His feedback? Don’t be shy with the scallions, enjoy them piping hot to preserve that crucial crispy texture, and pair them with a mug of strong Chinese tea to aid digestion. Excellent advice, Pop!
Beyond taste, this recipe offers significant health benefits. By utilizing grain-free flours and healthy cooking fats, these pancakes support digestive well-being and provide a cleaner energy source compared to their traditional counterparts. They are a fantastic way to enjoy a savory treat without the common inflammatory ingredients often found in processed foods or conventional recipes.
Cassava Flour: The Secret to Success
A cornerstone of this recipe’s success is cassava flour. It’s crucial to understand that cassava flour is not the same as tapioca flour or starch, although both are derived from the cassava root. Cassava flour uses the whole root, finely ground, resulting in a flour that behaves remarkably like wheat flour in many applications, offering a substantial and elastic quality. Tapioca starch, on the other hand, is just the isolated starch, primarily used for thickening or adding chewiness.
Paired with arrowroot powder, which is a starch extracted from the roots of the arrowroot plant, these two flours create a magical combination. The cassava flour provides the structure and a wonderful chew, while the arrowroot powder contributes to the desirable crispy exterior. This synergy is vital for achieving the authentic texture profile of traditional scallion pancakes without gluten.
When working with grain-free flours like cassava, precision is paramount. Unlike wheat flour, which is more forgiving, the exact ratio of liquid to flour can drastically impact the dough’s consistency. For this reason, I strongly recommend using a kitchen scale to measure out your flours by weight. This ensures consistent results every time and removes the variability that can come with volume measurements.
A word of caution for those considering substitutions: paleo and gluten-free baking is a science, and swapping flours is often not a one-to-one exchange. I’ve specifically formulated this recipe to work with cassava flour and arrowroot powder for their unique properties. Substituting with other flours, such as almond flour or coconut flour, will likely alter the texture significantly, as they absorb liquids differently and lack the same binding capabilities. If you do successfully experiment with alternative flours or fats, please share your insights in the comments to benefit others!
Essential Ingredients
Crafting these delicious pancakes requires a handful of simple yet specific ingredients:
- Cassava flour: As mentioned, precise measurement is key. Use a kitchen scale for best results.
- Arrowroot powder: This complements the cassava flour, adding to the desired texture.
- Diamond Crystal brand kosher salt: For seasoning the dough and the scallion filling.
- Boiling water: Crucial for activating the starches in the flours and developing the dough’s elasticity.
- Toasted sesame oil: Adds an authentic, nutty aroma and flavor, both in the dough layers and for brushing.
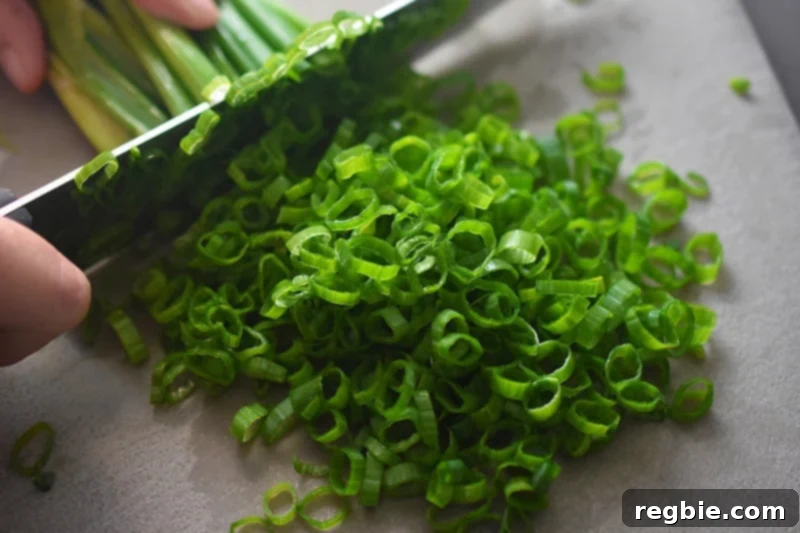
- Scallions / Green onions: The star of the show! Slice them as thinly as possible to ensure they distribute evenly and soften beautifully during cooking.
- Your favorite high-temperature cooking fat: For frying. Feel free to use ghee, avocado oil, or any other healthy fat suitable for high heat.
How to Make Gluten-Free and Paleo Scallion Pancakes
Follow these detailed steps to create your own batch of irresistible scallion pancakes:
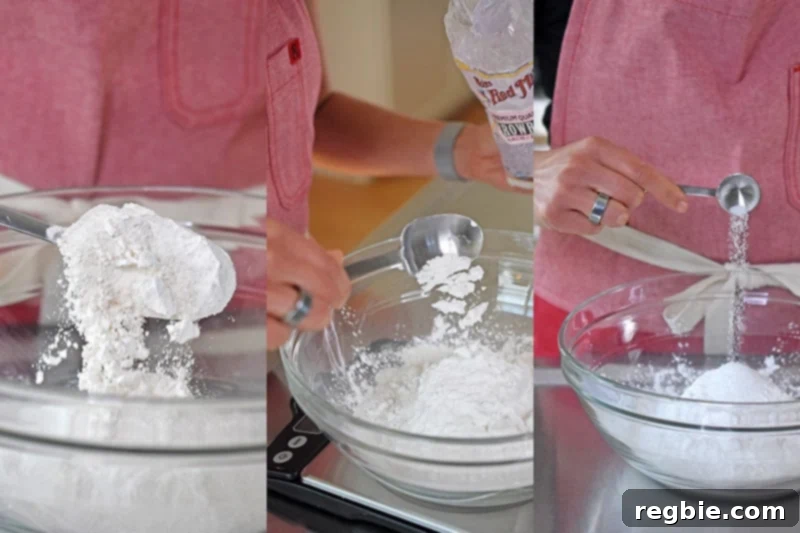
1. Prepare the Dry Ingredients
In a large mixing bowl, combine the cassava flour, arrowroot powder, and one teaspoon of Diamond Crystal brand kosher salt. Whisk these dry ingredients thoroughly to ensure they are well combined and evenly distributed. This step is important for consistent dough development.
2. Form the Dough
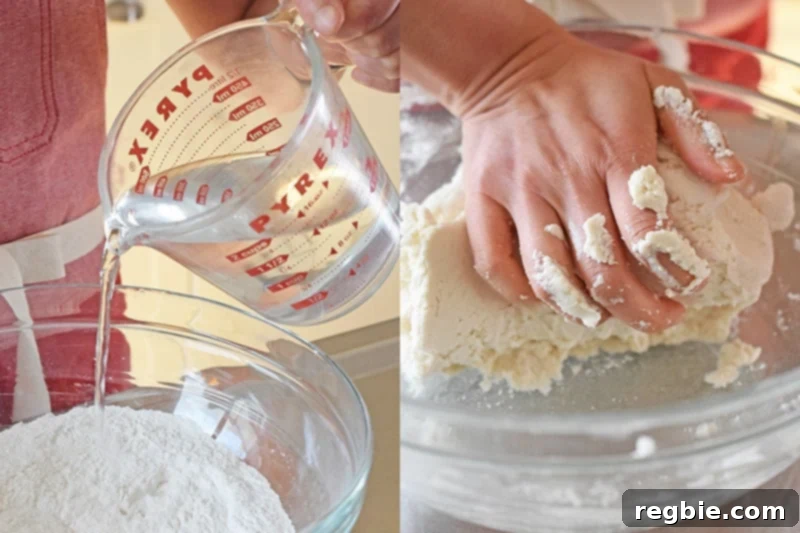
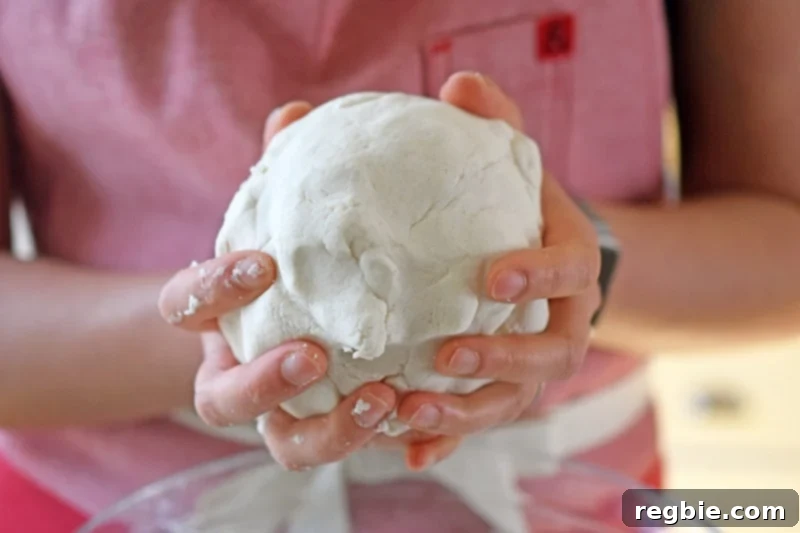
Carefully add about 1 cup of boiling water to the dry ingredients. Mix immediately with a sturdy spoon or, if you’re brave and your hands can handle the heat, knead by hand. Gradually add the remaining boiling water, a tablespoon at a time, while continuing to knead. The goal is to form a springy, non-sticky dough. If the dough feels too dry, add a tiny splash more water. Be cautious not to add too much, as a wet, soft dough will be difficult to work with. If it does become too sticky, knead in a small amount of additional cassava flour until the desired consistency is reached.
3. Portion and Roll the Dough
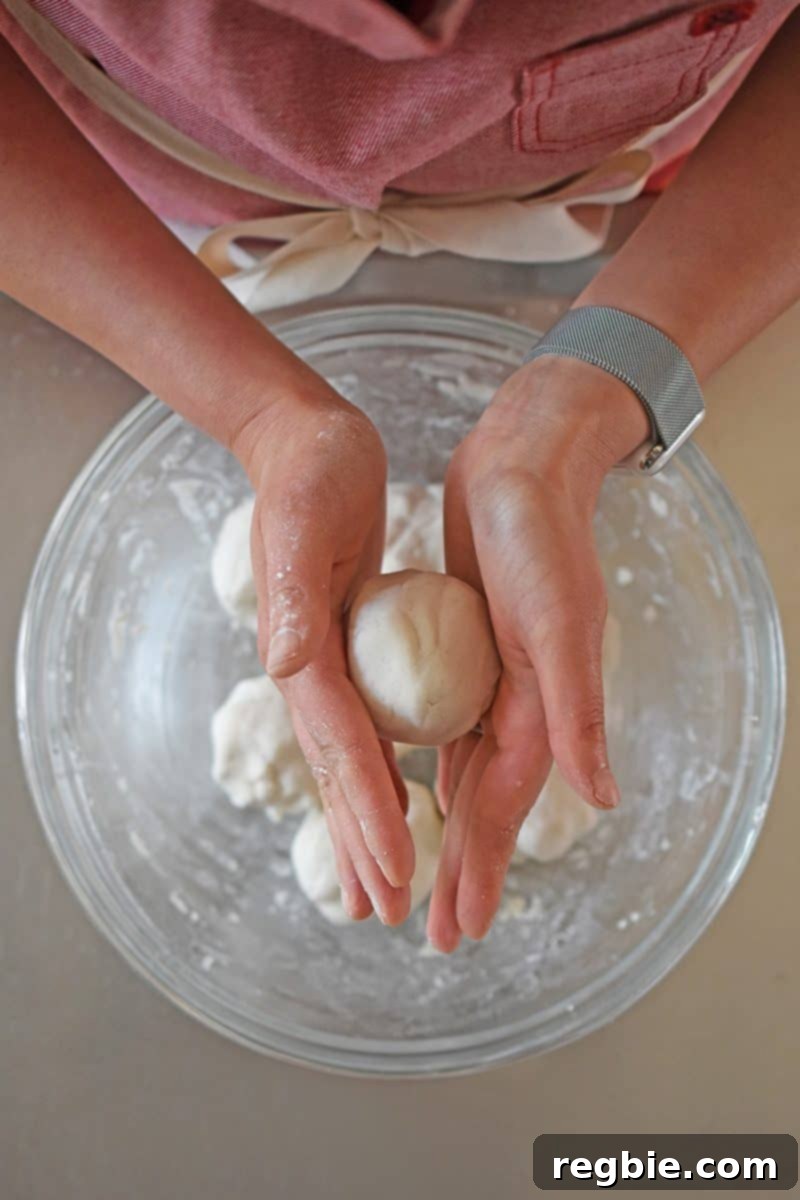
Divide the dough into two equal halves. Then, divide each half in half again, and repeat one more time. This process should yield 8 equal-sized portions of dough. Roll each portion into a smooth ball with your hands. It’s important to keep the remaining dough balls covered with a silicone lid or a damp kitchen towel to prevent them from drying out while you work.
4. Flatten and Layer the Dough
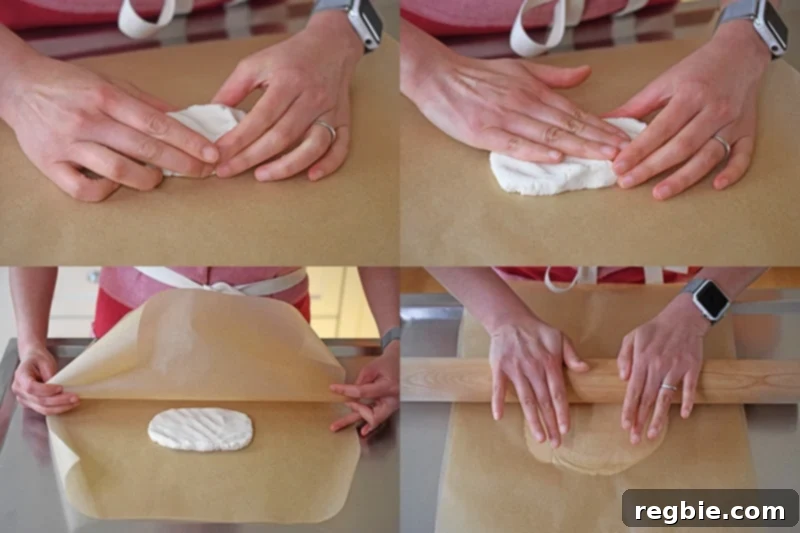
Take one dough ball and gently flatten it with your fingers. Place this flattened dough between two pieces of parchment paper. Using a rolling pin, roll the dough out until it is very thin, approximately ⅛-inch thick. This thinness is crucial for achieving the desired crispiness.
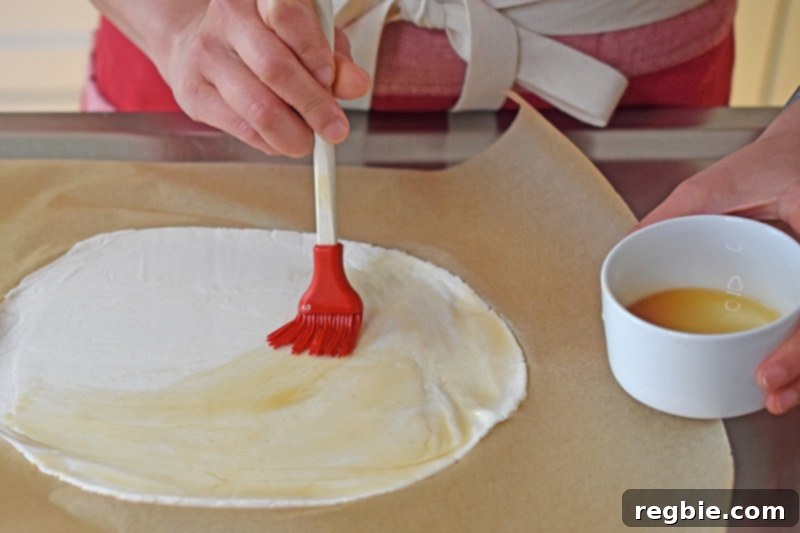
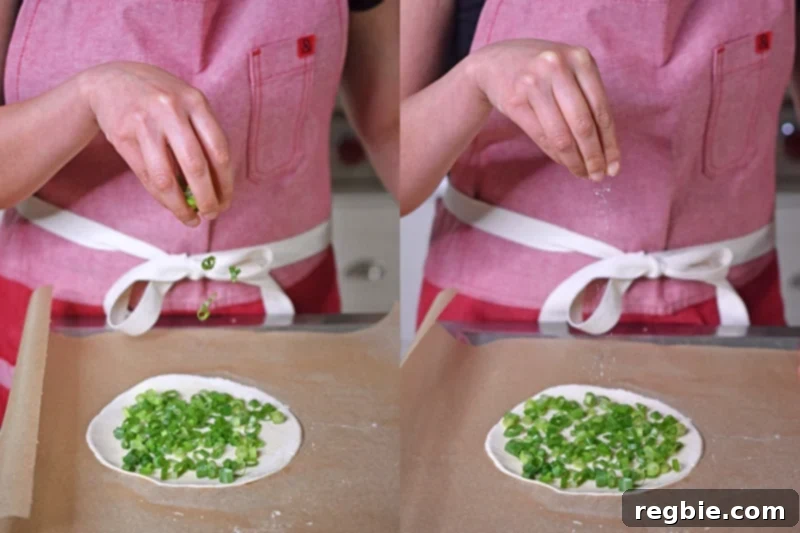
Brush a thin, even layer of toasted sesame oil over the entire surface of the flattened dough. This not only adds flavor but also helps create distinct layers during the folding process. Then, evenly spread about ¼ cup of the thinly minced scallions over the dough in a single layer. Finish by sprinkling a pinch of salt over the scallions to enhance their flavor.
5. Roll and Coil for Layers
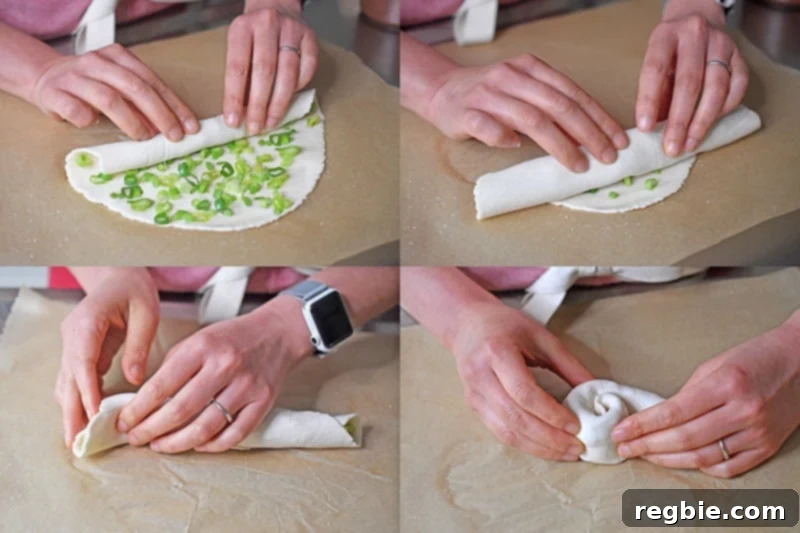
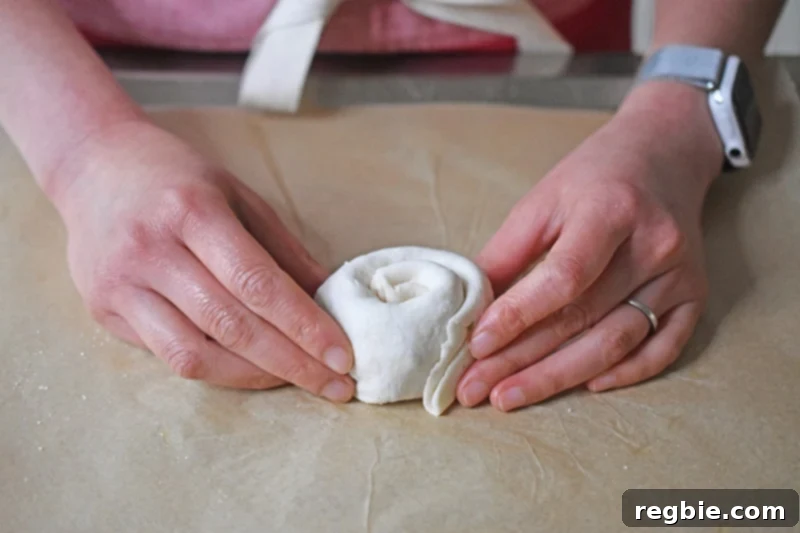
Carefully roll the dough up tightly, starting from one end, until it resembles a scallion cigar. This initial roll creates the first set of layers. Next, take one end of the “cigar” and tuck it in, then coil the entire cigar around itself to form a spiral, similar to a pinwheel or a cinnamon bun. This ingenious technique is what gives scallion pancakes their characteristic flaky, layered texture once cooked.
6. Final Flattening and Shaping
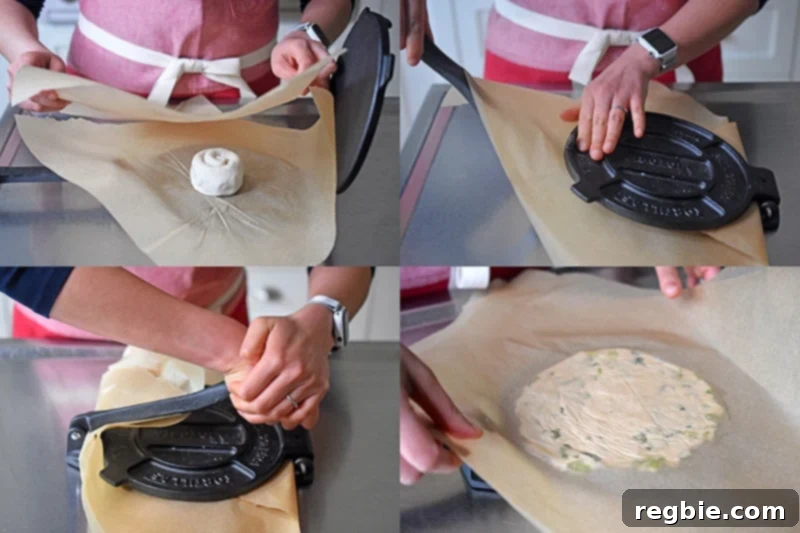
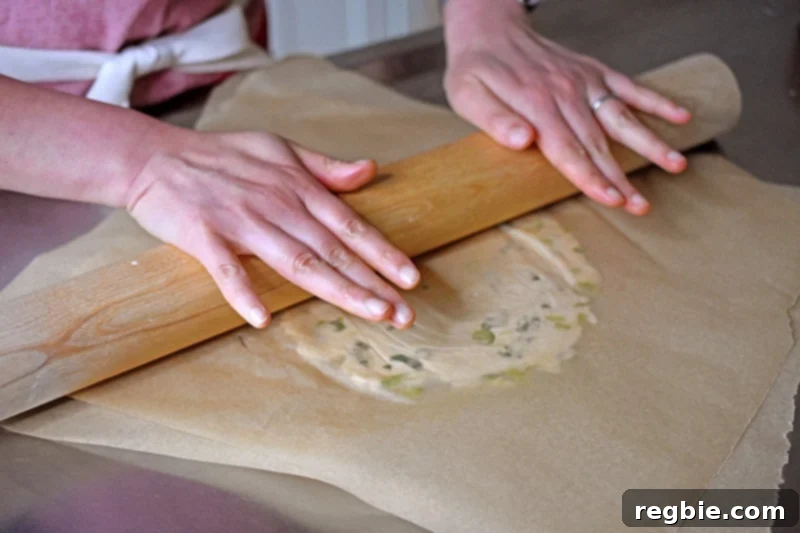
Place the “cinnamon bun” shaped dough between two fresh pieces of parchment paper. You have two options for flattening: either use a tortilla press, which helps achieve a nice, uniform circular shape, or roll it out by hand with a rolling dowel. I often use both methods: I initially press it with a tortilla press, then roll it out even thinner by hand with a dowel. This ensures an extra-crispy pancake, which is how I prefer them. Repeat this process with the remaining dough balls, rolling out as many pancakes as you plan to serve immediately.
7. Frying the Pancakes
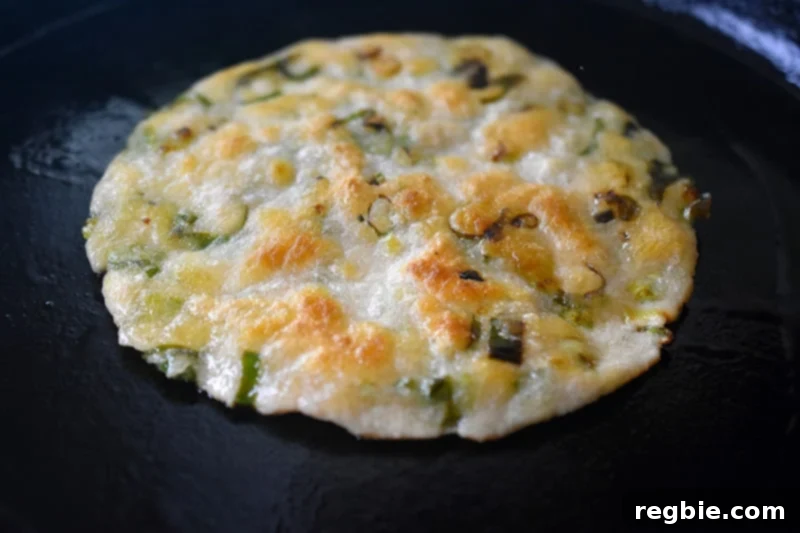
Place a large skillet (cast iron works wonderfully) over medium heat. Once the pan is hot, add enough cooking fat to generously coat the bottom. Carefully transfer one flattened pancake to the hot pan. Cook for approximately 5 minutes on the first side, or until it achieves a beautiful golden-brown color and appears crispy. Just before you’re ready to flip the pancake, brush a little more hot oil onto the uncooked side. This ensures both sides absorb enough fat for ultimate crispiness.
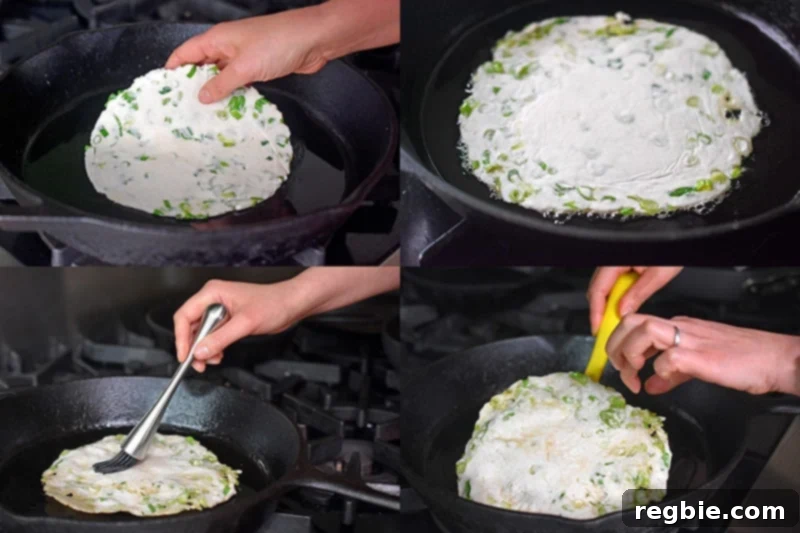
Flip the pancake and fry the second side for about 3 minutes, or until it is also deeply browned and wonderfully crispy. The exact cooking time may vary slightly depending on your pan and the thickness of your pancakes, so watch for that beautiful golden hue.
8. Cool and Serve
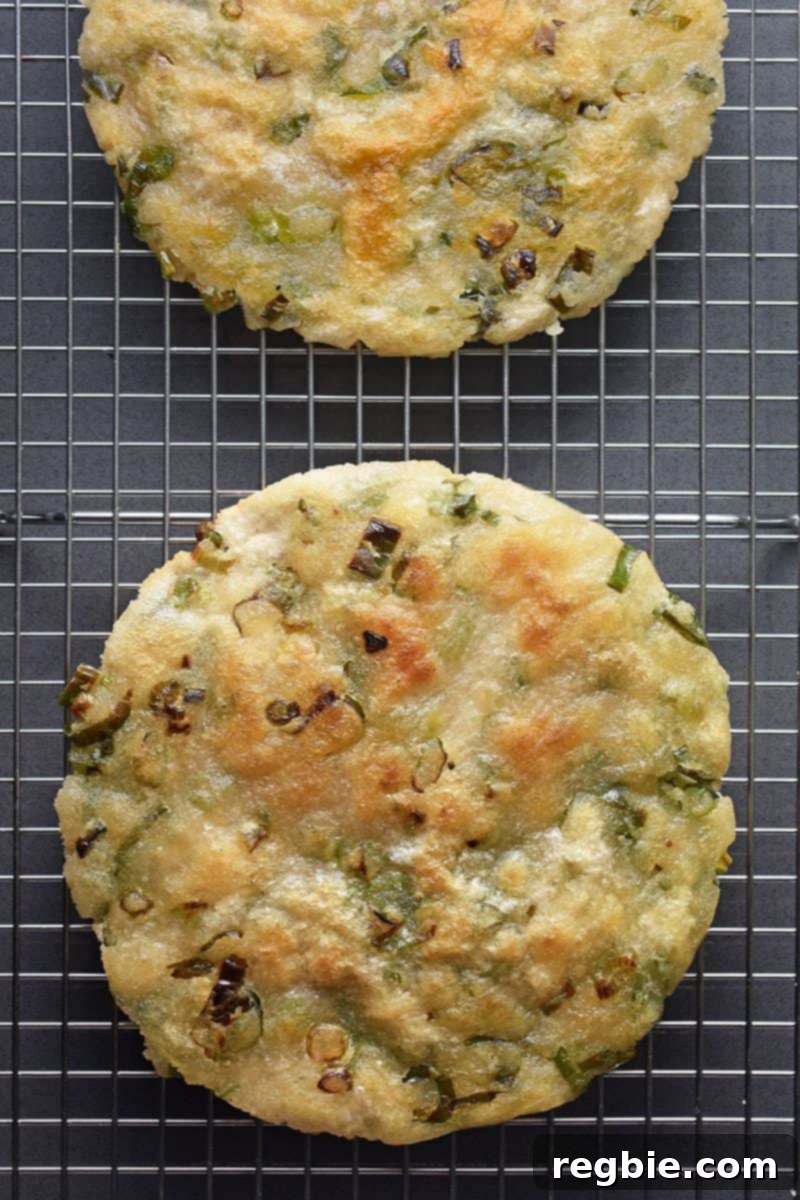
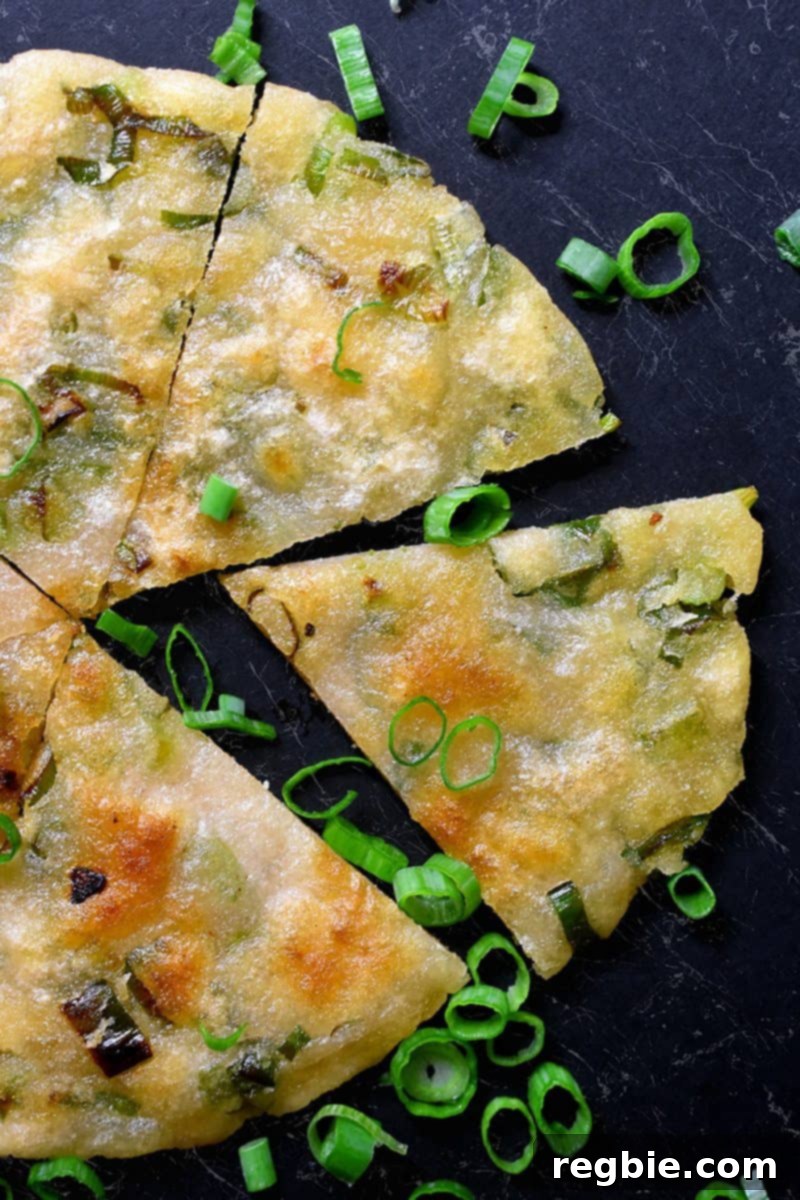
Once cooked, transfer the crispy pancake to a wire rack to cool slightly while you continue frying the remaining cakes. This prevents the bottom from getting soggy. Do not wait too long before cutting and eating! As my father wisely advised, these pancakes are best enjoyed while they are still piping hot, when their texture is at its peak. Serve them immediately, perhaps alongside some strong hot tea, for an authentic and satisfying experience.
Make-Ahead Tips & Storage
Planning ahead can make enjoying these delicious pancakes even easier. If you wish to prepare the dough in advance, you can form the “cinnamon bun” spirals and store them for later use. Wrap each coiled dough portion individually in plastic wrap or parchment paper, then place them in a freezer-safe bag. They can be stored in the freezer for up to 4 months, making them perfect for a quick breakfast or snack whenever a craving strikes.
When you’re ready to cook, simply thaw the frozen “buns” in the refrigerator overnight. It’s important to roll them out just before frying, as the uncooked pancakes can be quite delicate after thawing. Rolling them fresh ensures the best shape and texture. You can also store the un-fried, flattened pancakes between layers of parchment paper in the fridge for up to 24 hours.
Looking for more recipe ideas? Head on over to my Recipe Index. You’ll also find exclusive recipes in my cookbooks, Nom Nom Paleo: Food for Humans (Andrews McMeel Publishing 2013), Ready or Not! (Andrews McMeel Publishing 2017), and Nom Nom Paleo: Let’s Go! (Andrews McMeel Publishing 2022).
Serving Suggestions & Perfect Pairings
These Paleo Scallion Pancakes are incredibly versatile and can be enjoyed in various ways. Traditionally, they are served simply on their own with a cup of hot tea for breakfast. However, their savory flavor makes them an excellent accompaniment to many other dishes.
- Dipping Sauce: Enhance the experience with a simple dipping sauce. A common choice is a mix of soy-free tamari (for a gluten-free and soy-free option), rice vinegar, a touch of fresh grated ginger, and a pinch of maple syrup or coconut sugar for balance. A dash of chili oil can add a welcome kick.
- Main Dish Accompaniment: Serve them as a side with your favorite Asian-inspired meals, such as stir-fries, curries, or even grilled meats and vegetables.
- Breakfast or Brunch: Alongside other paleo or vegan breakfast items like scrambled tofu, avocado slices, or a fresh fruit salad, these pancakes can create a hearty and satisfying meal.
- Snack: They are perfect on their own as a savory snack any time of day.
Remember, the key is to serve them warm to fully appreciate their crispy texture!
Troubleshooting Common Issues
Even with a well-tested recipe, cooking can sometimes present challenges. Here are a few common issues you might encounter and how to fix them:
- Dough is Too Sticky: If your dough is overly sticky and hard to handle, it likely has too much water. Knead in a small amount of additional cassava flour, a tablespoon at a time, until it reaches a manageable, non-sticky consistency.
- Dough is Too Dry or Crumbly: Conversely, if your dough is dry and prone to cracking, it needs more moisture. Add a tiny bit of boiling water, half a teaspoon at a time, and knead well until it becomes springy and cohesive.
- Pancakes Aren’t Crispy Enough: Several factors contribute to crispiness. Ensure your cooking fat is hot enough (medium heat), you’re using enough fat to coat the pan, and most importantly, roll your dough out as thinly as possible (⅛-inch is ideal). Thicker pancakes will be chewier, while thinner ones will crisp up beautifully.
- Lack of Flavor: If your pancakes taste bland, you might be skimping on the scallions or salt. Don’t hesitate to be generous with the minced scallions, and ensure you’re sprinkling salt both in the dough and over the scallion layer before rolling. The toasted sesame oil also adds a significant depth of flavor.
Paleo Scallion Pancakes Recipe
Here’s the full, printable recipe for your convenience:
Prep Time: 10 minutes
Cook Time: 1 hour 20 minutes
Total Time: 1 hour 30 minutes
Servings: 8 pancakes
Author: Michelle Tam
These paleo scallion pancakes are pretty much indistinguishable from the ones I used to order at my favorite Mandarin breakfast joints—only mine are vegan, grain-free, egg-free, nut-free, and fried in good fats! These crispy-on-the-outside, chewy-on-the-inside flatbreads filled with minced scallions are delicious!
Ingredients
- 2 cup cassava flour
- ½ cup arrowroot powder
- Diamond Crystal kosher salt
- 1½ cups boiling water
- 2 tablespoons toasted sesame oil
- 2 cups thinly sliced scallions
- Ghee, avocado oil, or your favorite high-temperature cooking fat for frying
Instructions
- Measure out the cassava flour, arrowroot powder, and 1 teaspoon of Diamond Crystal brand kosher salt into a large bowl. Whisk well to combine.
- Add about 1 cup of the boiling water and mix well with a spoon (or your hands if your nerve endings are gone like mine). Slowly add the rest of the boiling water and knead well until you form a springy, not-sticky dough. If it seems extra dry, add a touch more water, but watch out—you don’t want a wet, soft dough, or you’ll have trouble working with it. If it gets too wet, knead in a bit more cassava flour.
- Divide the dough in half, and then in half again. Next, divide the dough in half one more time. If you followed my instructions correctly, you should end up with 8 equal-sized portions. Roll ’em into balls with your hands.
- Grab one dough ball, making sure to keep the rest of the balls covered. (I just pop a silicone lid or damp kitchen towel over the bowl.) Smush down the piece of dough with your fingers, and then flatten it between two pieces of parchment paper. Use a rolling pin to flatten it until it’s very thin—about ⅛-inch.
- Brush on a thin layer of toasted sesame oil. Add ¼ cup of the minced scallions in a single layer to the flattened dough. Sprinkle on some salt as well.
- Carefully roll the dough up into it looks like a scallion cigar. Then, take one end and tuck it in. Coil the cigar around until you end up with something that kinda looks like a pinwheel or a cinnamon bun.
- Place the “cinnamon bun” between two pieces of parchment paper, and either flatten it into a thin circular pancake with a tortilla press (which helps give your pancake a nice circular shape) or roll it out by hand with a rolling dowel. I usually do both: I smush mine with a tortilla press and then roll it out even thinner with a rolling dowel ’cause I like my scallion pancakes extra crispy. Repeat with the remaining dough balls and roll out as many as you feel like serving.
- Place a large skillet over medium heat. Once the pan is hot, add enough fat so it covers the bottom of the pan. Carefully transfer a pancake to the pan and cook for 5 minutes on one side (or until nicely browned).
- Right before you’re ready to flip it, brush on some hot oil on the un-fried side. Then, fry on the other side for about 3 minutes or until crispy and browned.
- Transfer the cooked pancake to a wire rack to cool a bit while you fry up more cakes.
- Don’t wait too long before cutting and eating. As my pop said, serve these pancakes while they’re warm, and with some strong hot tea!
Video
A video tutorial for making Paleo Scallion Pancakes is typically available here, demonstrating each step visually for optimal results. While the embedded player cannot be shown in this text, visual guides are highly recommended for complex dough work.
Notes
If you want to make the dough ahead of time, you can form the “cinnamon buns” and wrap those up individually (with plastic wrap or parchment paper) and store them in a freezer bag for up to 4 months. Thaw the “buns” in the fridge overnight and roll them out before frying. The frozen uncooked pancakes are pretty delicate, so it is best to roll them out right before you fry them.
Nutrition
Nutrition information is automatically calculated, so should only be used as an approximation.
- Calories: 222kcal
- Carbohydrates: 33g
- Protein: 1g
- Fat: 9g
- Fiber: 2g
- Sugar: 1g
Like this? Leave a comment below!